Quick Mode Process Description
This section describes how to use the Quick Mode method to extract data from an on-premises data source and then load the data directly to an on-premises database file using the EPM Integration Agent. The EPM Integration Agent executes a query against an on-premises relational database and then loads the data to a data export file.
To use the quick mode method:
-
Create the SQL Query:
-
From the Data Integration home page, and then from the Actions menu, then from the Setup actions drop-down, select Query.
-
On the Query page, click
 .
.
-
From the Create Query page, and then in Query Name, specify the SQL query name.
The query name is used on the Options tab in Application Details to identify the data extract query when registering the SQL data source for the integration.
-
Create the query definition and save the SQL query.
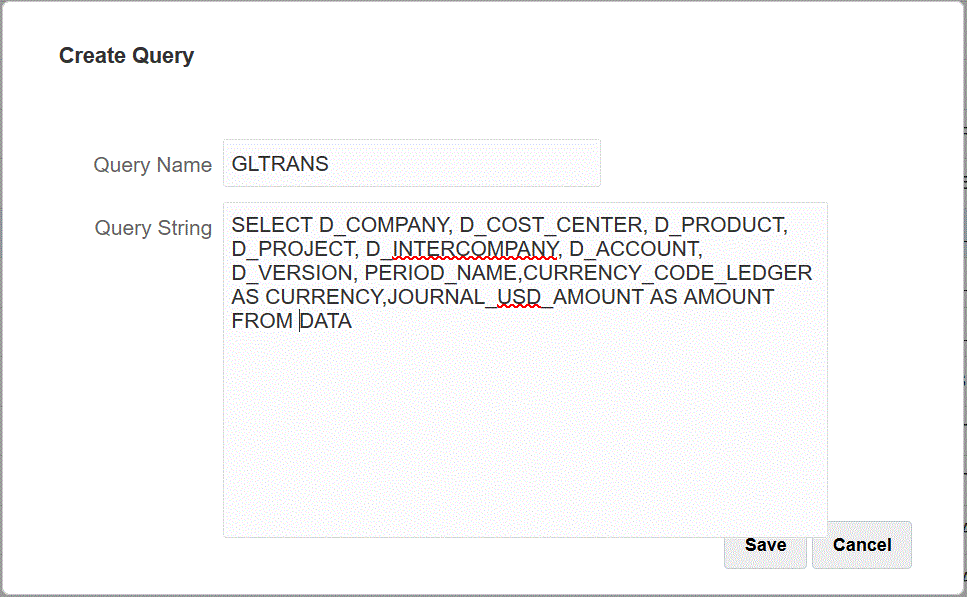
For more information, see Creating an SQL Query .
-
-
Create the on-premises database file:
-
Create a file that contains one header row from the on-premises database.
The header row must exactly match the dimension name in the target dimension. You can use an alias for a column name in the SQL query to the dimension name.
-
Save the file as a CSV format file with a header row.

-
Load the file using the file browser when registering the on-premises database application.
-
-
Register the on-premises database file application:
-
From the Data Integration home page, and then from the Actions menu, then from the Setup actions drop-down, select Applications.
-
On the Applications page, click
 .
.
-
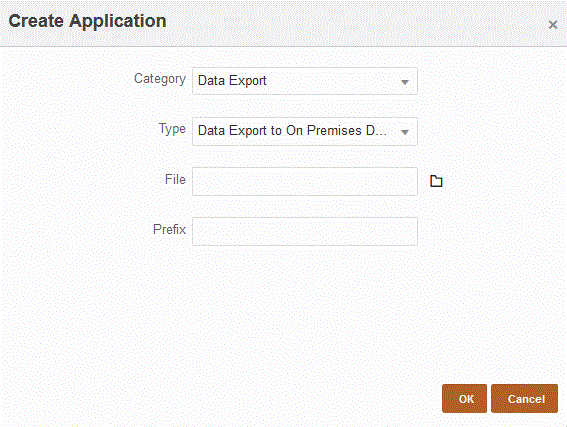
From Create Application, then Category, select Data Export.
-
From Type, select Data Export to On Premises Database.
-
From File, select the file that you created in step 2.
Click
 to browse for the file on the File Browser page.
-
Optional: In Prefix, specify a prefix to make the application name unique.
The prefix is concatenated with the file name to form a unique application name. For example, if you want to name an application with the same name as an existing one, you can assign your initials as the prefix.
-
Click OK.
-
-
Define the application details for the on-premises database file application:
- On the Application page, select the on-premises database application and then from the Actions menu, select Application Details tab.
-
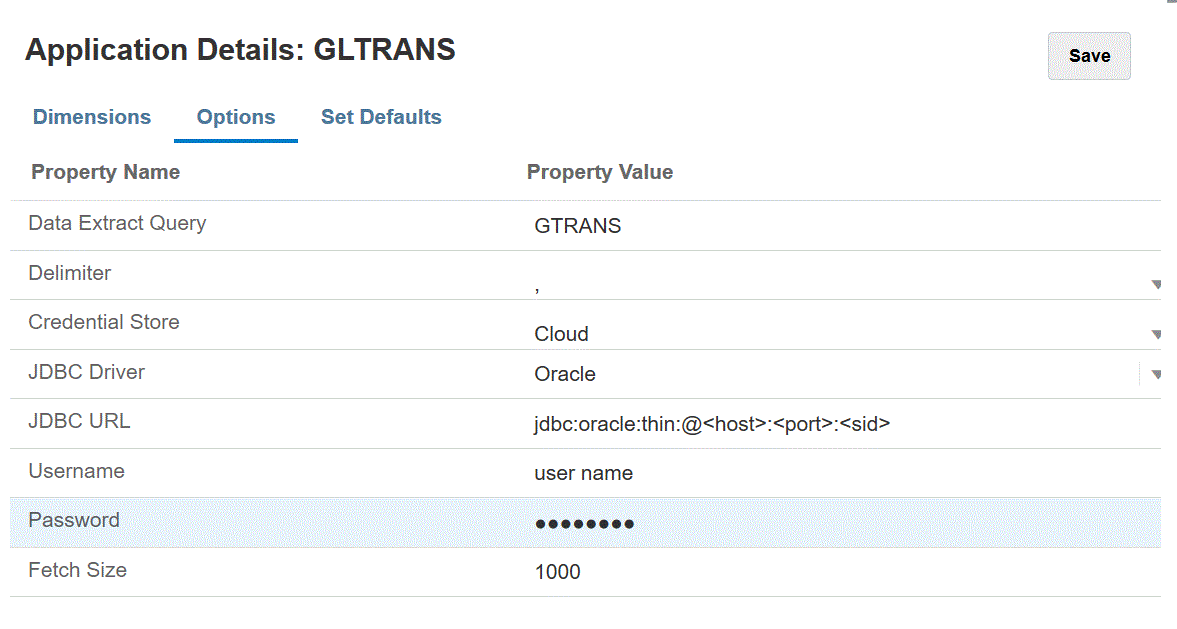
Select the Options tab.
-
In Data Extract Query, specify the name of the SQL query to run against the file.
-
In Delimiter, select the type of delimiter used in the file:
-
Comma (,)
-
Exclamation (!)
-
Semicolon (;)
-
Colon (:)
-
Vertical bar (|)
-
-
In Credential Store, specify the type of credential store used by the EPM Integration Agent.
Available types of credential stores include the following:
- Cloud
- File
For the Cloud credential store type, store the username/password/connect string in the application.
For the File credential store type, create a file in the on-premises environment to store the JDBC URL, user name, and password. The file name must be named
appname.credand stored in theconfigdirectory.The file must contain the following lines:
driver=oracle.jdbc.driver.OracleDriver
jdbcurl=jdbc:oracle:thin:@host:port/service
username=apps
password=w+Sz+WjKpL8[
Note:
The password used for both credential store types must be encrypted.
When the type is a "Cloud" store, type the password in the user interface in the usual way. The system encrypts and stores the password.
When the type is a "File" store, you must encrypt the password using the
encryptpasswordutility and store the password in the file. For more information about encrypting your password, see Encrypting the Cloud EPM User Password. -
In JDBC URL, specify the JDBC driver URL connection string.
The JDBC Driver URL connection string enables you to connect to a relational database using Java.
For an Oracle Thin JDBC driver, the JDBC driver URL includes the following:
jdbc:oracle:thin:@host:port:sidjdbc:oracle:thin:@host:port/serviceFor a MS SQL Server, the JDBC driver URL includes:
jdbc:sqlserver://server:port;DatabaseName=dbname -
In Username, specify the on-premises database user name.
-
In Password, specify the on-premises database password.
-
In Fetch Size, specify the number of rows fetched (that the driver processes) with each database round trip for a query.
-
Click Save.
-
Create the integration job between the on-premises data source and Oracle Fusion Cloud Enterprise Performance Management:
-
From the Data Integration home page, click
 (Add icon).
-
On the Create Integration page, and then in Name and Description, enter a name and description for the integration job.
-
In Location, enter a new location name, or pick an existing location to specify where to load data.
-
Tap the Quick Mode slider on.
When you associate an integration job with the Quick Mode method and then save the job, you cannot reverse the Quick Mode association. However; the integration job can be deleted.
-
Click
 (Select a Source).
-
From the Select a Source drop-down (
 ), select the on-premises database data source
application.
-
From the Select a Target drop-down (
 ), select the on-premises data export file application.
-
Click Save and Continue.
-
-
Map the dimensions between the on-premises database data source and the on-premises database file application:
-
On the Mapping Dimensions page, from Type, select the type of data load method.
Available options:
-
Delimited - Numeric data: supports numeric data types only.
-
Delimited - All data types supports the following data types to Planning:
-
numbers
-
text
-
Smartlists
-
Data
-
-
-
In the mappings grid, map the source columns in the on-premises data source application to the dimensions in the Cloud EPM application by completing the following:
-
In Select Source Dimension, select the name of the source dimension to map to the dimension.
-
Optional: Add a target expression for each of the Cloud EPM dimensions.
For information on using target expressions, see Using Target Expressions.
Note:
You cannot use a SQL target expression type with the Quick Mode method.
Source expression types are not available with the Quick Mode method.
-
- Click Save and Continue.
-
- From the Data Integration home page, click
 to the right of the direct integration, and then select
Options
 -
Click the Options tab.
-
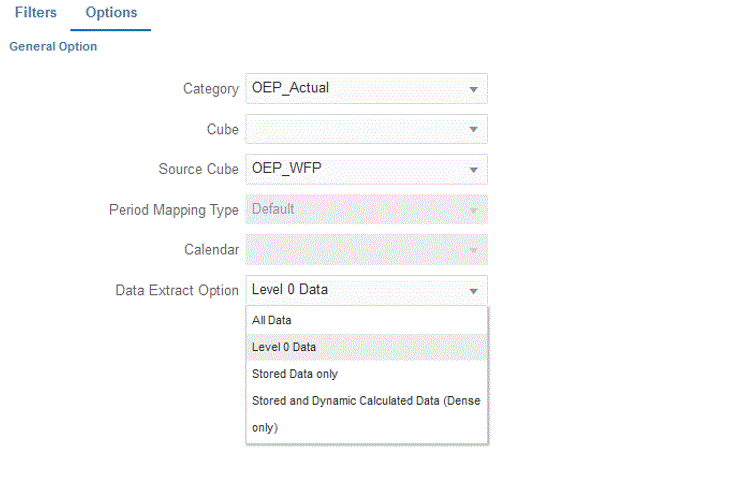
In Category, specify an explicit source filter for Scenario dimension.
The Category is a required component of POV for processing so a category must be specified when defining the integration. The category is not used to determine the scenario for Quick Mode processing.
-
In Data Extract Option, select the method for extracting data:
Available options:
-
All Data—Extracts stored values and dynamically calculated values for both the Dense and Spare dimensions.
The All Data data extract option uses the MDX Query Export method to extract data.
-
Stored and Dynamic Calculated Data—Extracts for stored members and dynamic calculated members for the Dense dimension only and not Spare dimensions. The Stored and Dynamic Calculated Data option uses the DATAEXPORT command method to extract data.
-
Stored Data Only—Extracts stored data only. Dynamically calculated values are excluded in this type of extract. The Stored Data Only option uses the DATAEXPORT command method to extract data.
-
Level 0 Data—Extracts entire members at the bottom of dimension (raw data stored in a database) anatad enables you to apply filters and select columns to include in the output file. This extract option also enables you to export non-numeric data. The Level 0 Data option uses the MAXL Export method to extract data. This method can be used only by the Service Administrator. The application is read only when the extract step is executing.
If you select the Quick Mode method, the following target options are not available:
- Export Attribute Columns
- Accumulate Data
- Sort Data
- Pivot Dimension
-
-
Click Save.
-
Run the Integration:
-
From the Data Integration home page, select the integration job associated with the Quick Mode load and then click
 .
.
-
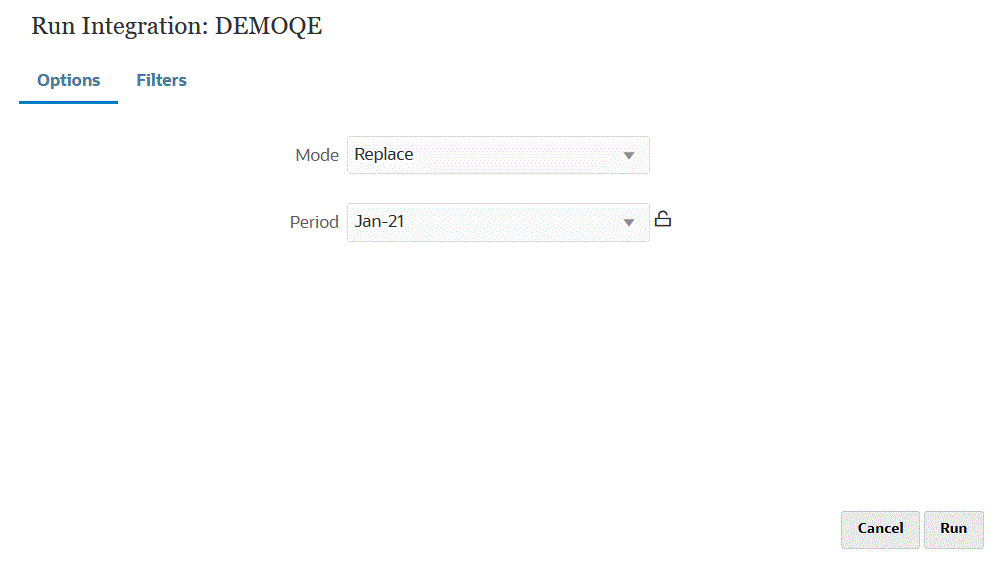
From the Run Integration page, the default value for the Mode is Replace.
When running the Quick Mode load, valid export modes are:
- For Planning—Replace, Merge, and Accumulate
- For Financial Consolidation and Close—Replace, Merge, Accumulate
If using Quick Mode in Merge mode, and there are any errors during the load, the load fails and nothing is loaded. If using Replace mode, valid data will is loaded, and invalid data is not loaded. Replace mode results in a partial load of valid data.
Replace is the default mode.
-
If no period was selection on the Options page, then from the Period drop-down, select the single period from the source file from which to load data.
If you map a period dimension and specify a target expression for period on the Map Dimension page for the integration, then the Period drop-down is not available for selection because the period is derived from the mapping.
-
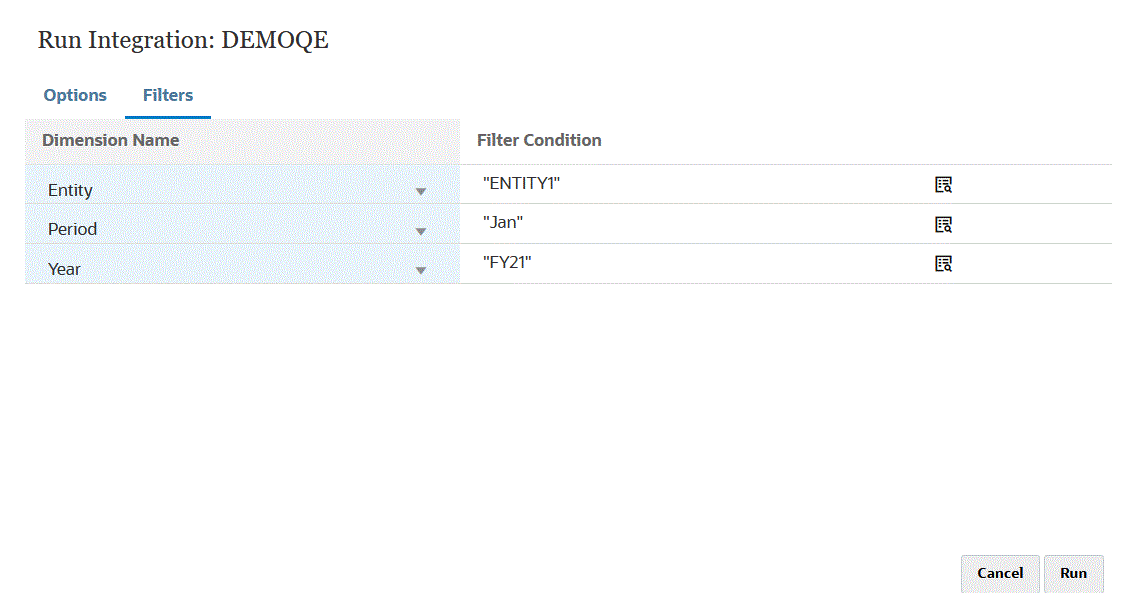
If filters have been defined for the integration, click the Filters tab and make any changes as desired.
-
Click Run.
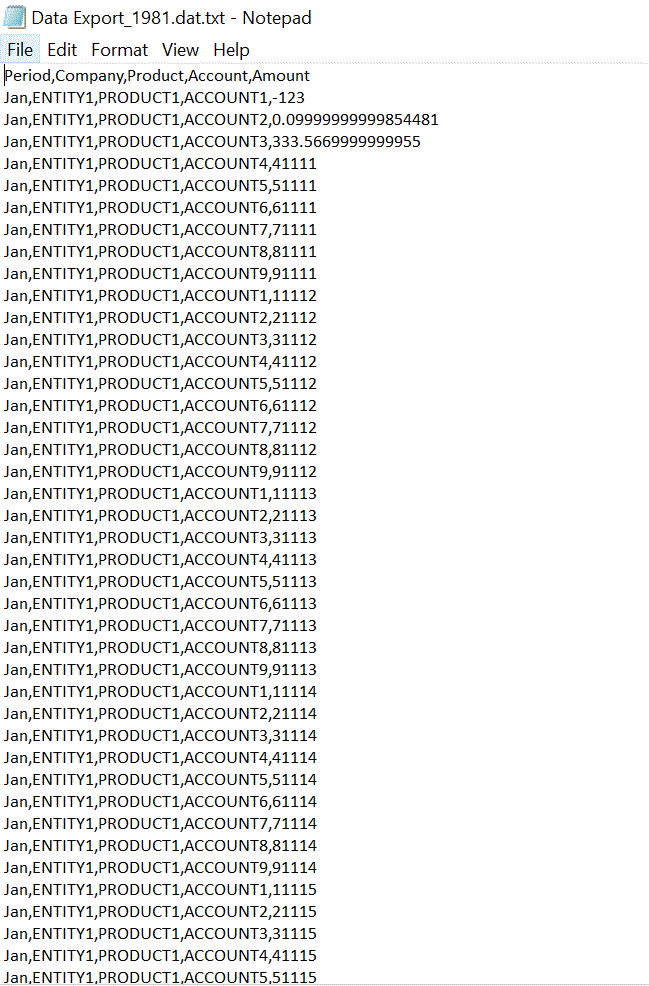
The following example shows the result of the data export filtered by entity and period.
-