Loading Metadata Process Description
-
Generate a metadata load file for each dimension to be loaded.
A metadata load is only available to applications built on the Planning platform only.
For information on how to construct a metadata load file, see Metadata Load File Considerations.
-
In Application, register a target application for the class of dimension or dimension type.
Data Integration creates six-dimensions applications automatically: Account, Entity, Custom, Scenario, Version, and Smartlist.

For more information on adding a dimension class or type as a target application, see Registering a Target Application for the Class of Dimension or Dimension Type.
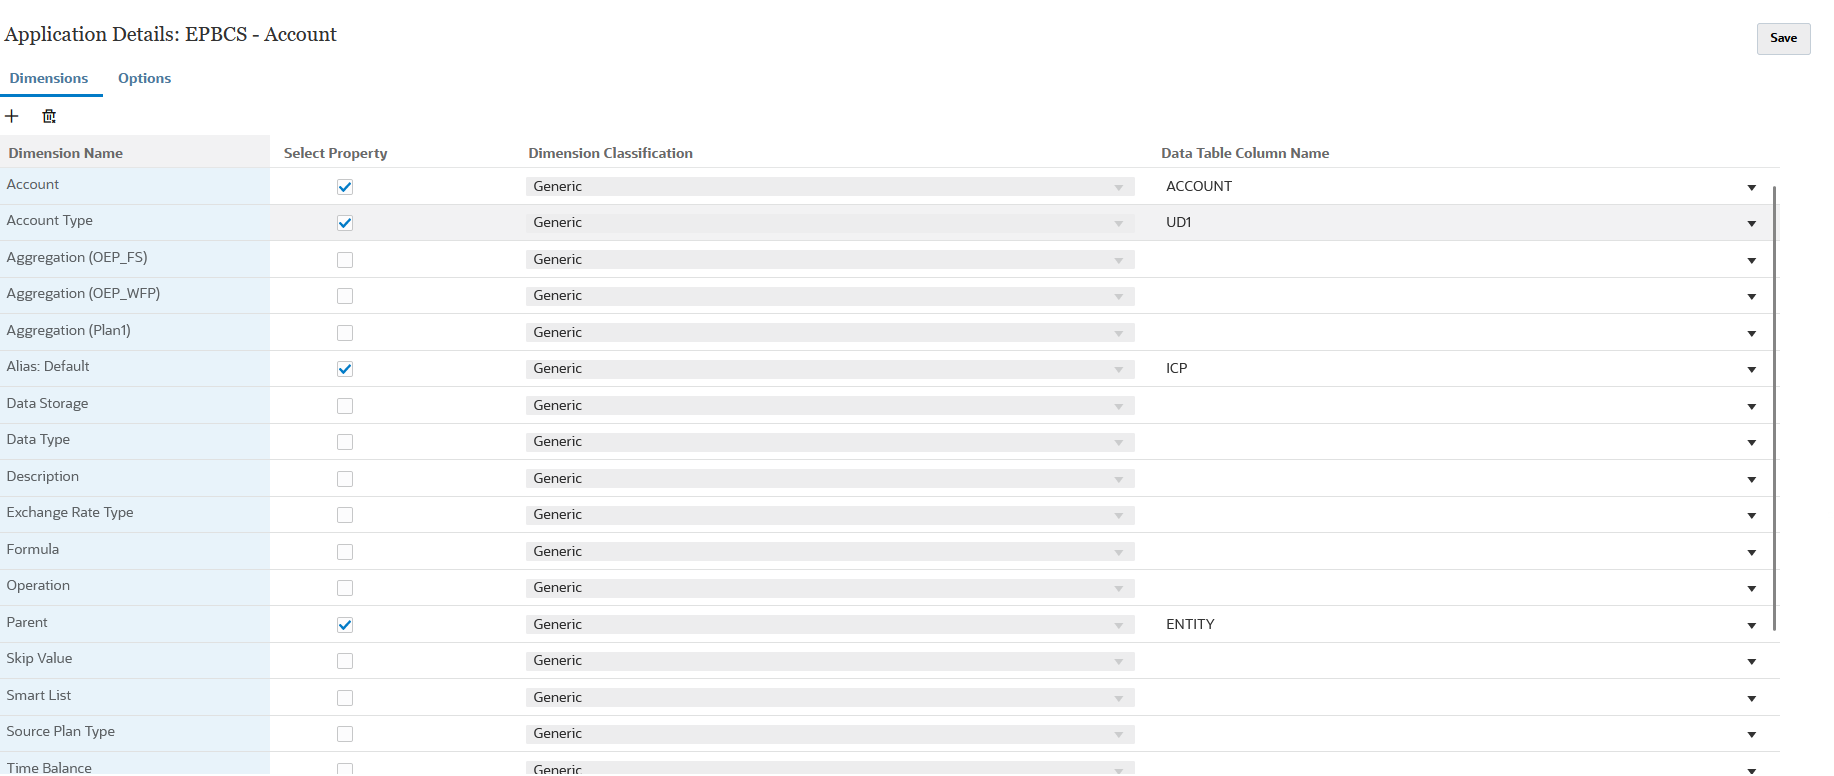
- In Application Details, the system creates a record for each dimension
property. Only the member name and parent are required fields.

To enable additional properties, add a row to the dimension metadata application. The name of the row is the property or attribute name used in the Planning application.
- Optional: To add a custom dimension (one designated as Generic in the Planning application), in the target application, select the property name and enable the Select Property field, and then map it to a Data Table Column Name value. Next create a separate import format for each generic dimension. Then, in the dimension's data rule, specify the dimension name (for example, Product, Movement) in the Dimension name of the data rule's target options.
-
In Create Integration, create an integration between the metadata file and the target application.

For more information, see Creating File-Based Integrations.
-
In Map Dimensions, map the data from the metadata load file to the properties of the dimensions in the Oracle Fusion Cloud Enterprise Performance Management application.
This allows users to import dimension members from any file format. (The file must be "delimited - all data type" file type.)
Properties are added as "dimensions" of a dimension application. For example, the Two Pass Calculation property of Entity is added as a dimension and the flat file adds the "yes" or "no" property on the load.

Note:
Checked dimensions in the dimension "application" are the ones loaded. If you do not map them, the load will fail. There is no default if a mapping is missing. To avoid loading a "field" such as alias, uncheck the check box in the target application. To supply a single value for all loaded rows, specify the value in the Expression field and map *to* for that dimension.For more information, see Creating the Dimension Maps.
-
On the Run Integration page, from Export Mode, select Merge and then select all other required parameters.
You can execute the integration or one or more periods. You then verify that the data was imported and transformed correctly, and then export the data to the target application.
-
You can also to import and export metadata using the Pipeline. For more information, see Using an Import Metadata Job Type and Using an Export Metadata Job Type.