Working with Dimensions and Members
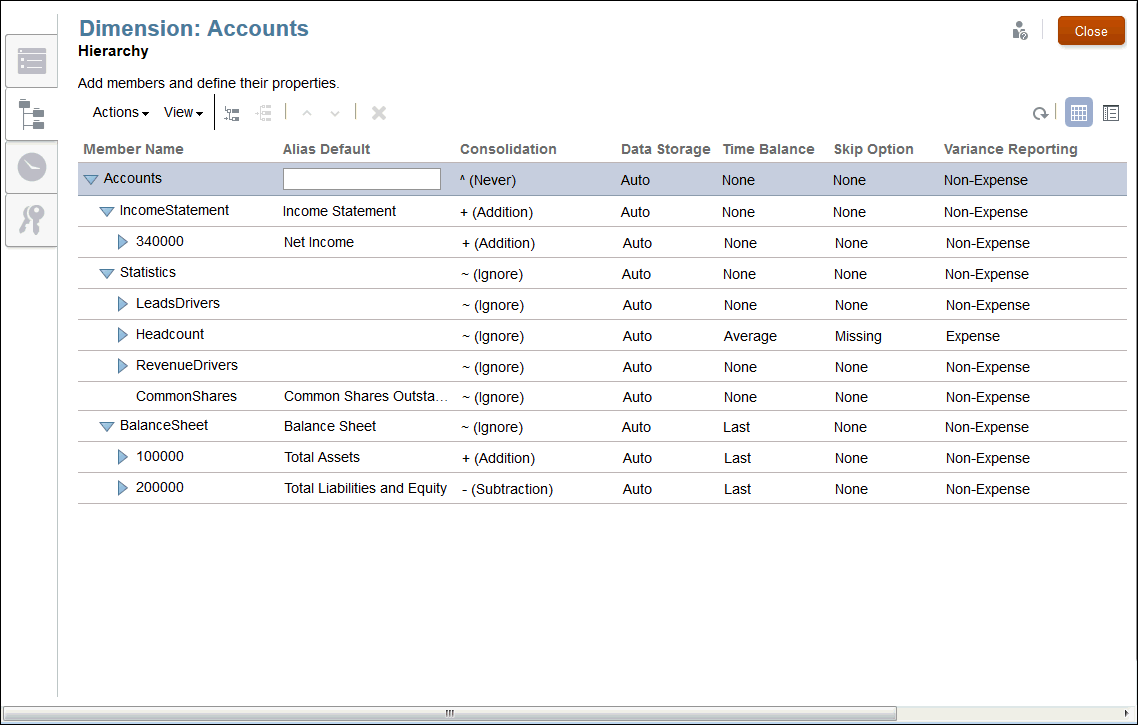
Dimension members exist in a parent-child relationship, and you may have multiple levels or generations of child members for a single dimension. The dimensions and members are represented in a hierarchical format, with child members aggregating up into the parent member.
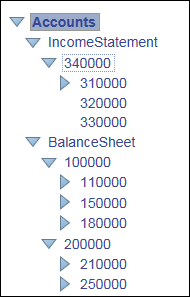
You can add members as children or siblings on the Dimension Hierarchy:
-
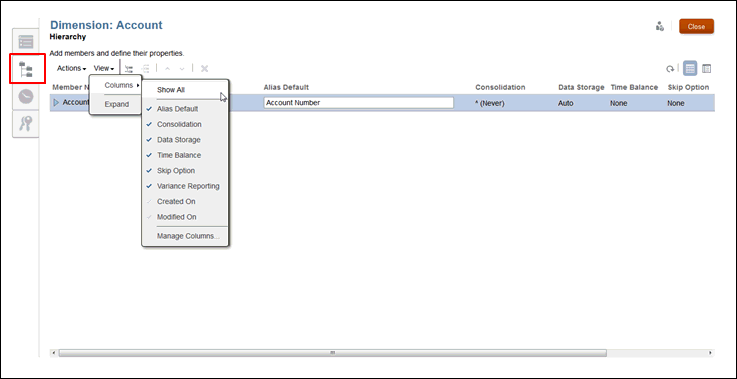
Child—A child member has a parent member above it. In the example above, Account 34000 is a child of IncomeStatement.
-
Sibling—A sibling member is a child member that is added at the same level or generation as another child member and has the same immediate parent. In the example above, Income Statement and BalanceSheet are sibling members under the Account parent.
You can work with members as outlined below:
-
To add members, see Working with Dimensions and Members.
-
To modify members, edit the details for the member in the appropriate column on the Dimension Hierarchy.
-
To delete members, under Actions, select Delete, or click Delete
 . A confirmation message is displayed, and you click OK to confirm the deletion.
Caution:
When all changes to the dimensions have been completed, the changes must be deployed to the selected model. See "Deploying Models and Dimensions" in Creating a Custom Application.
Dimension Members
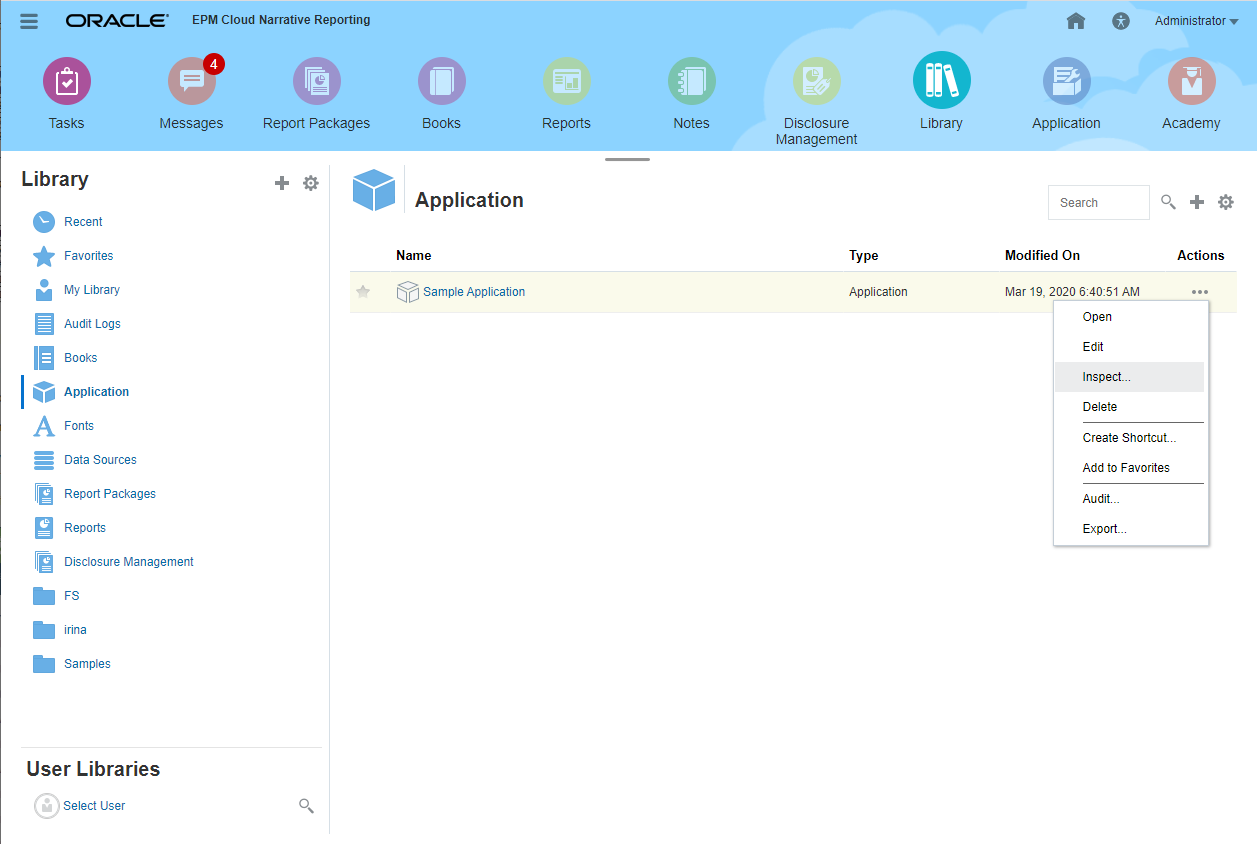
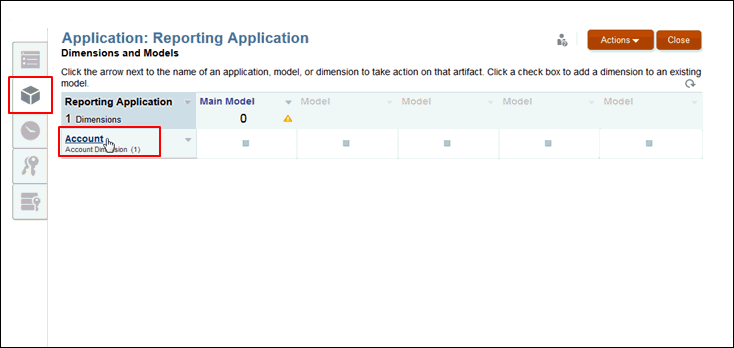
After you create dimensions on the Application Dimensions and Models tab, as outlined in Creating a Custom Application, you add the dimension members from the Hierarchy tab. The dimension members represent sets of related points of data under a dimension. For example, in your Account dimension, members might represent account numbers.
You must create at least one member for each dimension to store data. At a minimum, you must create both a Time and Account dimension for a model. Each dimension type is allowed a maximum number of members, as outlined in the following table:
Table 5-1 Maximum Number of Members
| Dimension Type | Maximum Number of Members |
|---|---|
| Account (Required Dimension) | 5,000 |
| Currency | 100 |
| Entity | 25,000 |
| Generic | 50,000 |
| Scenario | 30 |
| Year | 20 |
| Time (Required Dimension) | 73 — The time period limit of 73 allows for the following:
|
Table and Detailed Views
The Dimension Editor offers two views to display the hierarchy for all members in a dimension. You may view, add, edit, and delete members and their associated properties for the selected dimension using either view, which you can toggle.
- Table View
-
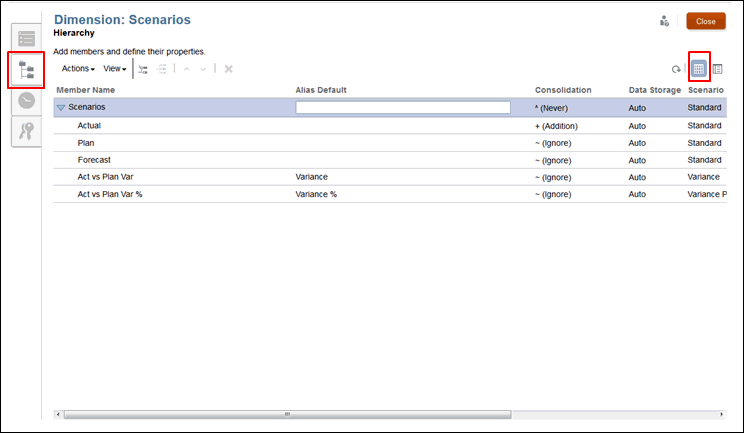
From the Dimension Hierarchy screen, select the Table View icon
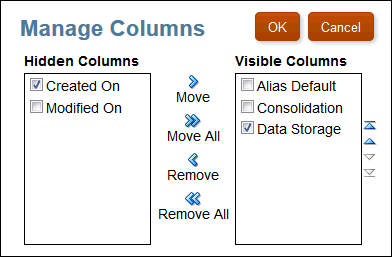
 to view the hierarchy as a table. Click the Member Name or associated field to activate data entry. You can rearrange the property columns by dragging the column titles.
Note:
To view additional Alias tables from this view, you must switch to the Detailed View.
- Detailed View
-
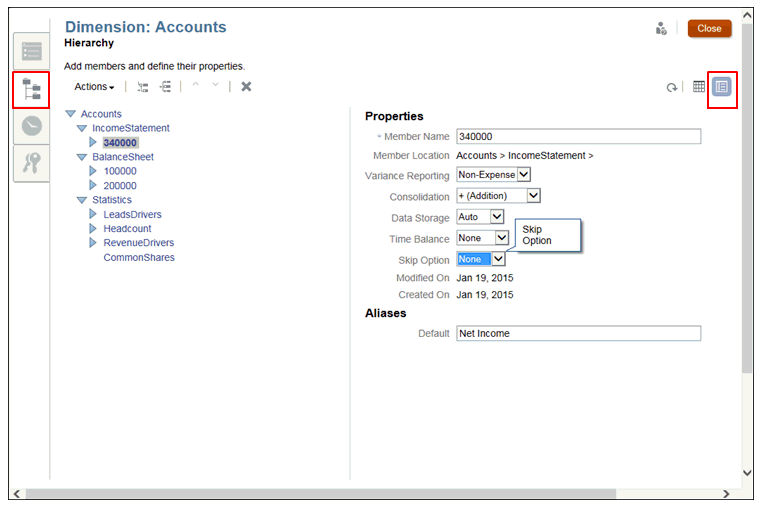
From the Dimension Hierarchy screen, select the Detailed View icon
 to view the property details for the selected member as a list. Click the Member Name to activate the data entry fields.
Note:
You cannot rearrange property columns on the Detailed View. You must perform that task on the Table View.
Dimension Properties Table
For each dimension member, you must set the associated properties that govern how the member performs, such as how child members are aggregated to parents, how member data is stored, how to assign an alias name to simplify identification of members, and so on.
The member properties are assigned from the dimension Hierarchy tab. The standard properties apply to all dimension types; however, the Account and Scenario dimensions require some additional properties. See the appropriate properties for each dimension type, as outlined on the Dimension Properties tables below:
Dimension Properties for All Dimensions
Table 5-2 Dimension Properties for All Dimensions
| Properties for All Dimensions | Description |
|---|---|
| Member Name | Enter the unique member name. |
| Alias | Optional: Enter an alias name for the member to enhance the readability of the hierarchy.
|
| Consolidation | Assign member consolidation properties to each member to determinehow child members are aggregated to their parents. Available consolidation options:
|
| Data Storage | Set to determine how data values are stored for a dimension:
|
| Created On | Displays the date on which the member property was created. |
| Modified On | Displays the date on which the member or property was modified. |
Dimension Properties for Scenario Dimension
Table 5-3 Dimension Properties for Scenario Dimension
| Scenario Dimension Properties | Description |
|---|---|
| Scenario Type |
|
| Variance Member1 | Select the first Standard scenario member that you want to compare to Variance Member 2. |
| Variance Member2 | Select the second Standard scenario member that you want to compare to Variance Member 1. |
Dimension Properties for Account Dimension
Table 5-4 Dimension Properties for Account Dimensions
| Account Dimension Properties | Description |
|---|---|
| Time Balance | Select a time balance method to determine the calculation method of parent members in the Time dimension. See Working with Dimensions and Members below this table.
|
| Skip Option | If you set a time balance as first, last, or average, then you must set a skip property to control what happens when the application encounters a missing value or a value of 0. See Working with Dimensions and Members below this table. |
| Skip Option (continued) | Skip Option for First and Last Time Balance only, select one of the following options:
|
| Skip Option (continued) | Skip Option for Average Time Balance, if #MISSING data is encountered when calculating an average, it divides by the number of members with actual values, rather than the total number of members. Therefore, setting the skip property to none or #MISSING does not affect the calculation. |
| Variance Reporting | Variance Reporting—Determines how the account is being tagged for Scenario variance reporting:
|
Figure 5-1 Time Balance Example

Figure 5-2 Skip Options Example

Adding Dimension Members
Add the dimension members and specify the properties from the Hierarchy editor. You can also modify or remove members.
To add members to a dimension:
