Call a Decision Service From a Visual Builder Application
Intelligent Advisor decision services (as OpenAPI-based REST web services) can be called from applications developed using Oracle Visual Builder.
To do this:
-
Ensure that the Prerequisites for Calling a Decision Service From a Visual Builder Application have been met.
- In Visual Builder, open your application.
- Add a new service connection that is defined by specification. To do this, follow the steps in Create a Service Connection from a Service Specification and in the Service Specification step of the Create Service Connection wizard, provide the following:
Service Name: Enter a name for your connection
API Type: Select OpenAPI / Swagger
Service Specification: Select Web address and enter the OpenAPI (Swagger) specification URL. This URL is provided on the deployment endpoints display page in Intelligent Advisor Hub. For more information, see Decision Service Endpoints for REST Assessments.
Metadata Retrieval Option: Select Copy full OpenAPI to the application. This will copy the complete service metadata during development and statically store it in your application's sources.
Security: Leave Allow anonymous access to the service connection infrastructure unselected
Authentication:
Select OAuth 2.0 Client Credentials
Client ID: Enter the username of the API client in Intelligent Advisor Hub
Secret: Enter the password of the API client in Intelligent Advisor Hub
Scope: Leave blank
Token URL: Enter the OAuth 2.0 authentication endpoint. This URL is provided on the deployment endpoints display page in Intelligent Advisor Hub. For more information, see Decision Service Endpoints for REST Assessments.
Connection Type: Select Dynamic, the service supports CORS
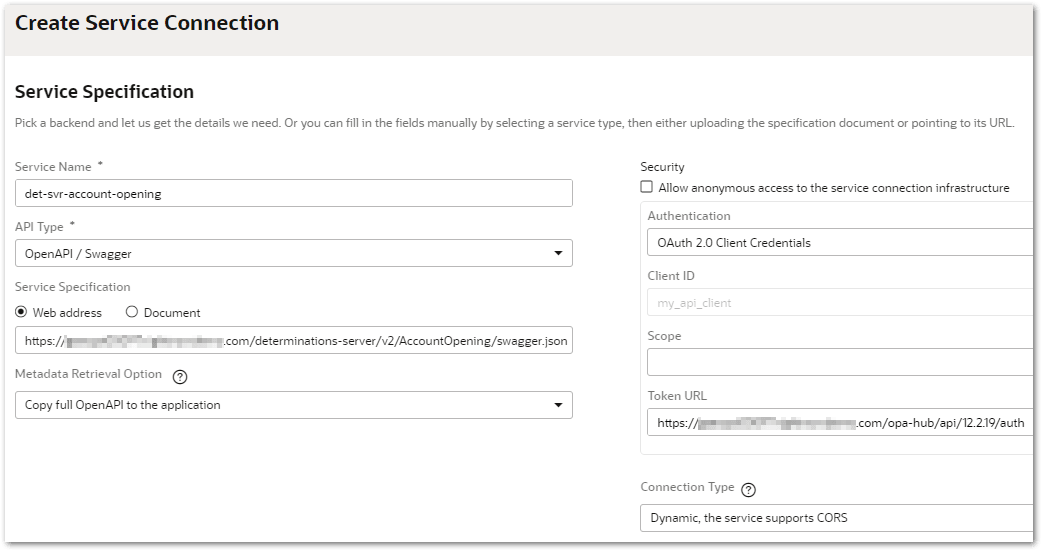
Click Create.
-
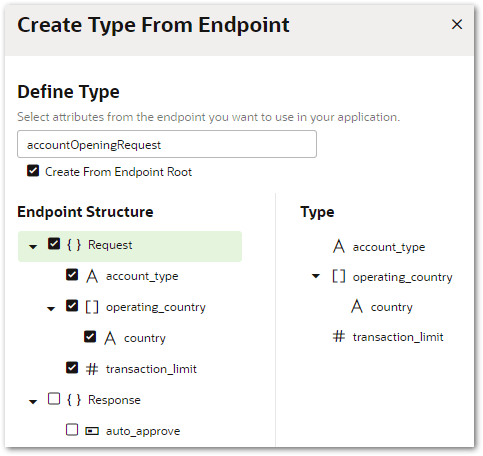
Create a type based on the request structure from the service connection endpoint. To do this, follow the steps in Create a Type From an Endpoint and in the Create Type From Endpoint wizard:
-
Under Services:
-
Select the service you created in step 3.
-
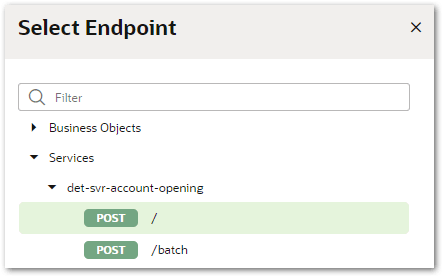
Select the POST / endpoint.

Note that if you need to run multiple assessments simultaneously from the Visual Builder application you would select the POST / batch endpoint instead. -
Click Next.
-
-
On the Define Type page:
-
Enter a name for the type.
-
Ensure that Create From Endpoint Root is selected.
-
Under Endpoint Structure, select the entire Request structure.
-
Click Finish.
-
-
-
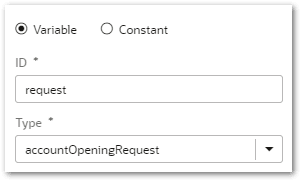
Create a variable with this type. To do this, follow the steps in Create Variables and in the + Variable drop-down:
-
In the ID field, enter a name for the variable (for example, request).
-
In the Type drop-down, select the type you created in step 4.
-
Click Create. Action chains can then be used to set the variable’s properties in response to the user entering data via the application’s user interface. The variable can subsequently (see step 6) be used as the request body for a Call REST action which calls the service connection.
-
-
Add the call REST endpoint action to the action chain. To do this, follow the steps in Add a Call REST Action and:
-
In the Select Endpoint window, select the POST / endpoint for the service you created in step 3.
-
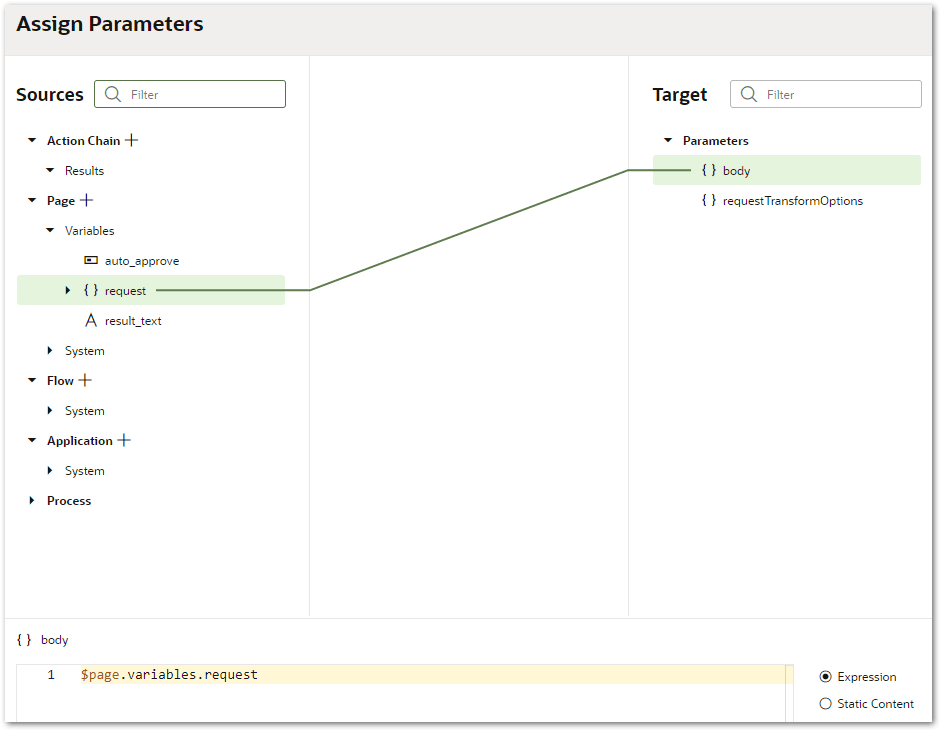
In the Assign Parameters window for the Call REST action, map the variable created in step 5 onto the body of the REST request.
-
-
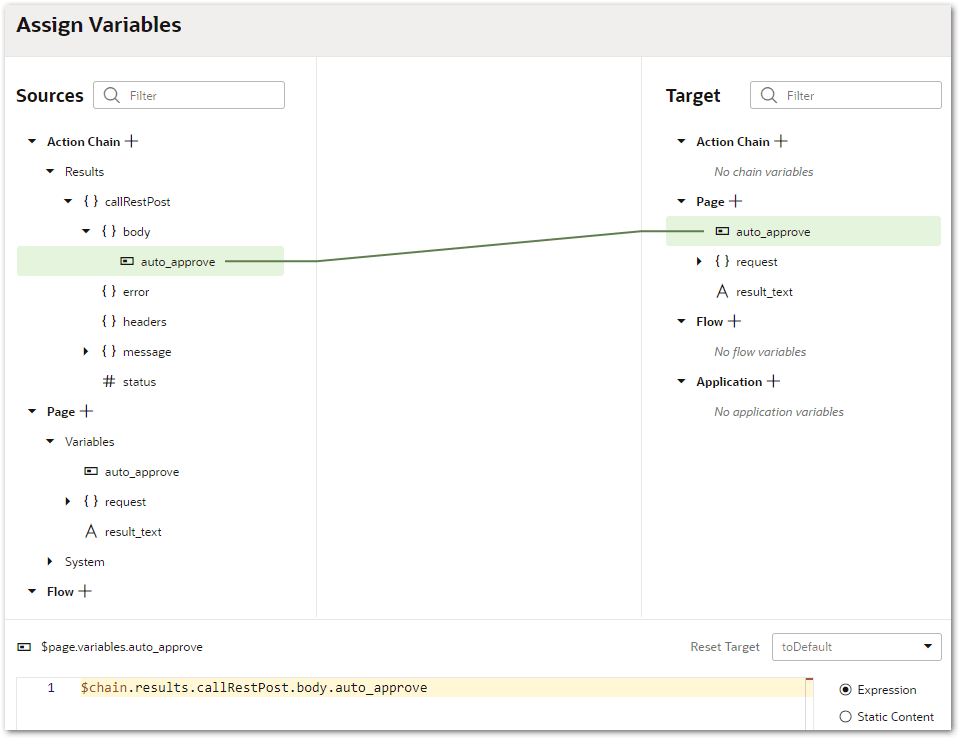
Add the response to the request and use it in another action under success for the Call REST action. For example, you could assign it to a variable. For more information, see Add an Assign Variables Action.
If you have configured the user interface using the Page Designer, you can now test that the Visual Builder application calls the Intelligent Advisor decision service. You can do this by clicking the Run button on the Visual Builder toolbar. The application should open in a new browser window with the decision service being called and responding as expected on the appropriate page in the flow.
Tip: You can try this out for yourself using the files provided in Example: A Visual Builder Application Calling a Decision Service.