- Using Oracle Internet of Things Asset Monitoring Cloud Service
- Work with Your Assets
- Create and Manage Assets
- Use Direct Data Ingestion for Your Sensor Attributes
- Demonstration: Create, Upload, and Verify a Root Certificate
Demonstration: Create, Upload, and Verify a Root Certificate
We download and use the gencert.sh utility to generate a self-signed root certificate. We next upload the root certificate to the IoT server, and verify it.
- In your IoT application, navigate to Menu
 > Settings > Security > Certificates.
 - Select Download Certificate Generation Tool from the menu on the Certificates page.

Save the
gencert.shscript file on your hard disk. - Run the gencert.sh utility to generate the root certificate.
You can use the help option to look at the various options:
gencert.sh help.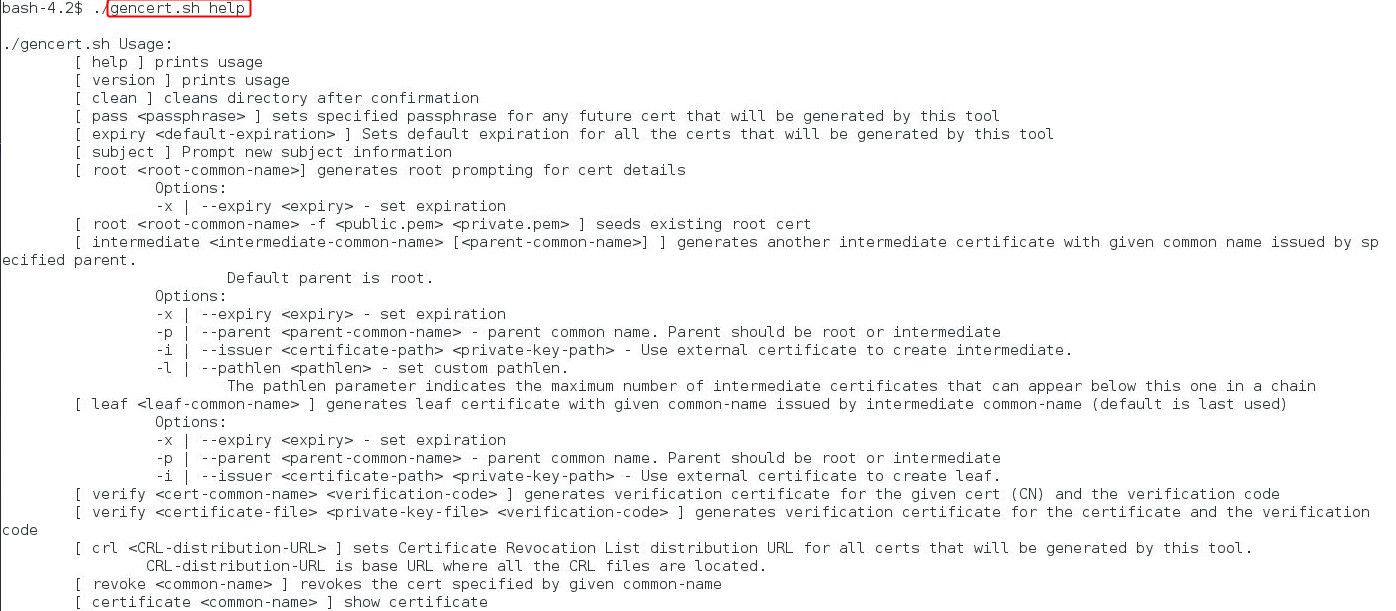
We use visioncorp as the root common name for our root certificate.
Issue the following command:
gencert.sh root visioncorp. We use the default options for other parameters, such as Country and State. Press Enter when the command prompts for these options, so as to accept the default option.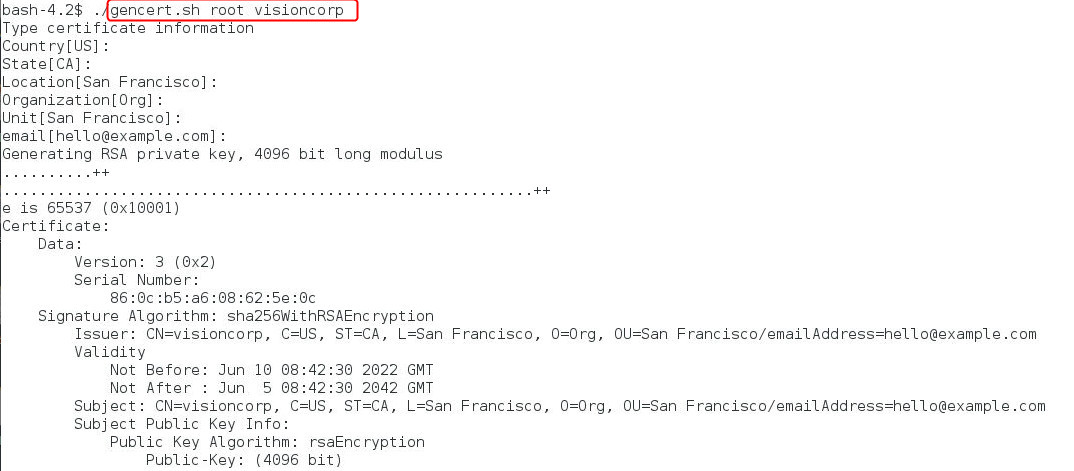
The tool generates files, such as the root certificate file (
visioncorp-cert.pem) and the private key (visioncorp-key.pem) in thecerts\visioncorpdirectory.
- On the Certificates page, use the Upload Certificate menu option to upload the root certificate.
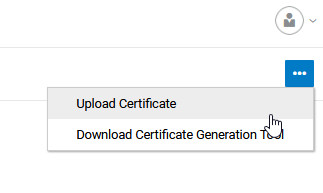
We provide a root certificate name and description, and upload the
visioncorp-cert.pemfile.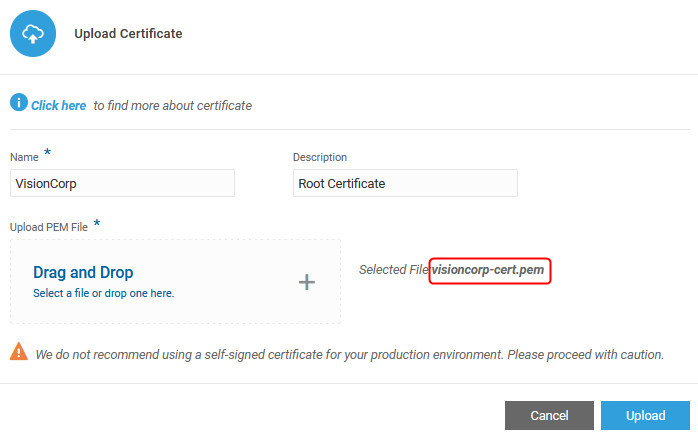
Note:
In your production environment, you would normally use a certificate issued by your CA, as opposed to a self-signed certificate. - Use the Verify Root Certificate option to verify the root certificate.
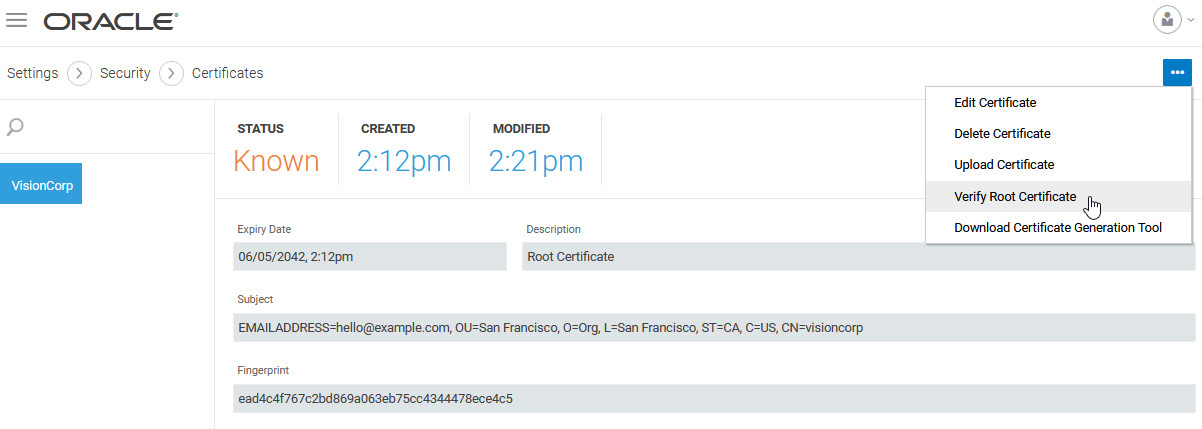
The server generates a verification code challenge that we need to sign with the private key to verify the certificate. Click Copy to Clipboard to copy the verification code. We'd next use it in the
gencert.shutility to generate the verification certificate.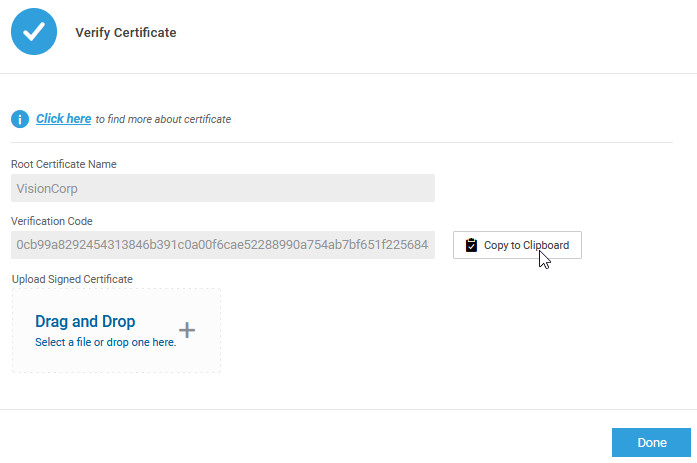
- Use the
gencert.shcommand to generate the verification certificate by signing the verification code with the private key associated with the root certificate.gencert.sh verify cert-common-name verification-codegenerates the verification certificate for the given certificate common name (CN) and verification code.We use the copied verification code in the following command:

The
gencert.shtool adds thevisioncorp-verification-cert.pemfile to thecerts\visioncorpdirectory. - Upload the signed certificate (
visioncorp-verification-cert.pem) in the Verify Certificate dialog and confirm successful verification.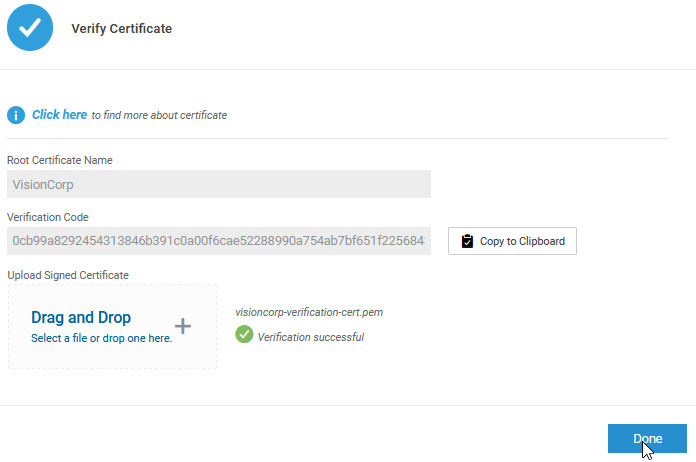
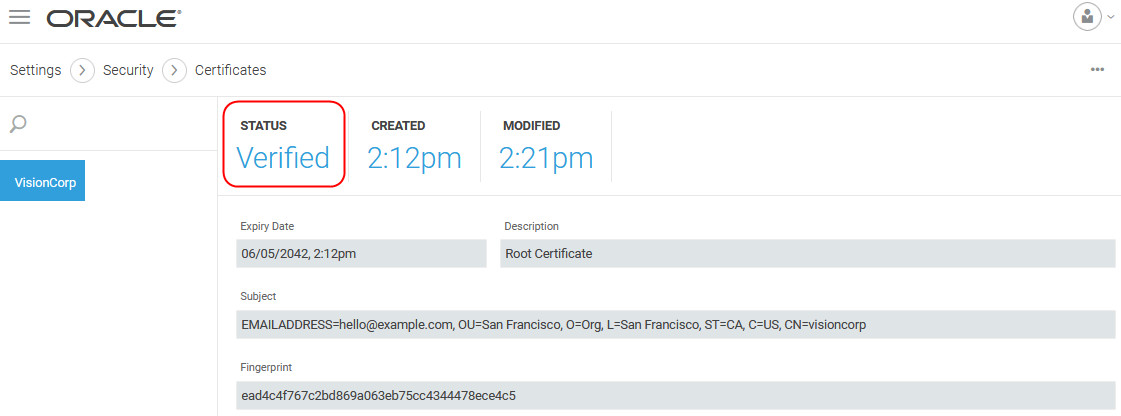
Notice that the status of the root certificate changes from Known to Verified.
