Using the Redwood Email Source Editor
Important: To access the content editors in the Redwood experience, please log in to My Oracle Support and create a service request. After you have been granted access, turn on the Redwood experience.
The Redwood Source Editor in Eloqua is designed for users who want the flexibility of working with HTML while also taking advantage of visual editing tools.
Important: We encourage you to use this editor to build and test your HTML content, but continue to use the Classic editor for emails you plan on launching in a campaign. For more details, guidelines, and best practices, check out our latest post on Customer Connect.
Learn about the editor:
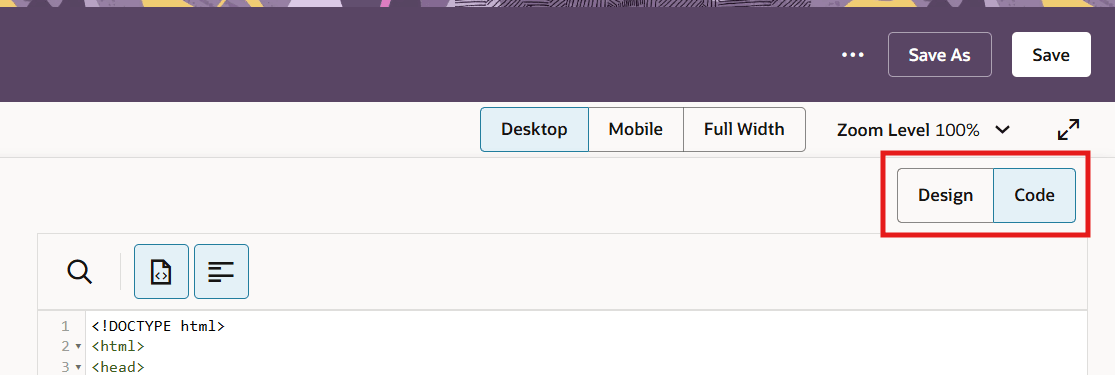
Switching between design and code view
You can easily toggle between visual editing and direct HTML editing:
-
Design view: A drag-and-drop workspace for visual editing.
-
Code view: Direct HTML editing with live updates.
Add components like Shared Content, Dynamic Content, Signature Layouts, or Cloud Content from the left-side panel.
Switch views at any time using the Design and Code tabs at the top right. Everything stays in sync between both views.
Locking and unlocking the Design view
To help preserve HTML integrity, use the Visual Editor toggle to lock or unlock the Design view.
-
When the Design view is locked, it is read-only.
-
You can continue to edit HTML safely in Code view while the Design view is locked.
-
When you unlock the Design view, visual editing is enabled after confirmation.
-
Changes made in Design view may update the underlying HTML.
-
After you edit HTML in Code view, the editor may automatically re-lock the Design view to prevent unintended changes.
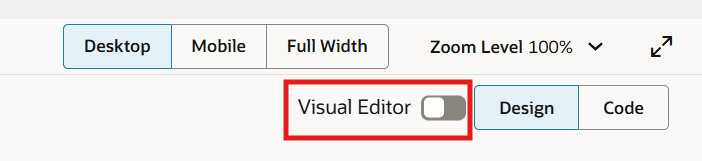
Note: Keep the Design view locked when precise control over HTML is required. Unlock it only when you need to make visual changes.
Code view toolbar
| Icon | Description |
|---|---|

|
Search |

|
Auto-close tags |

|
Line wrap |

|
Automatically formats and organizes your HTML to improve readability and consistency. |
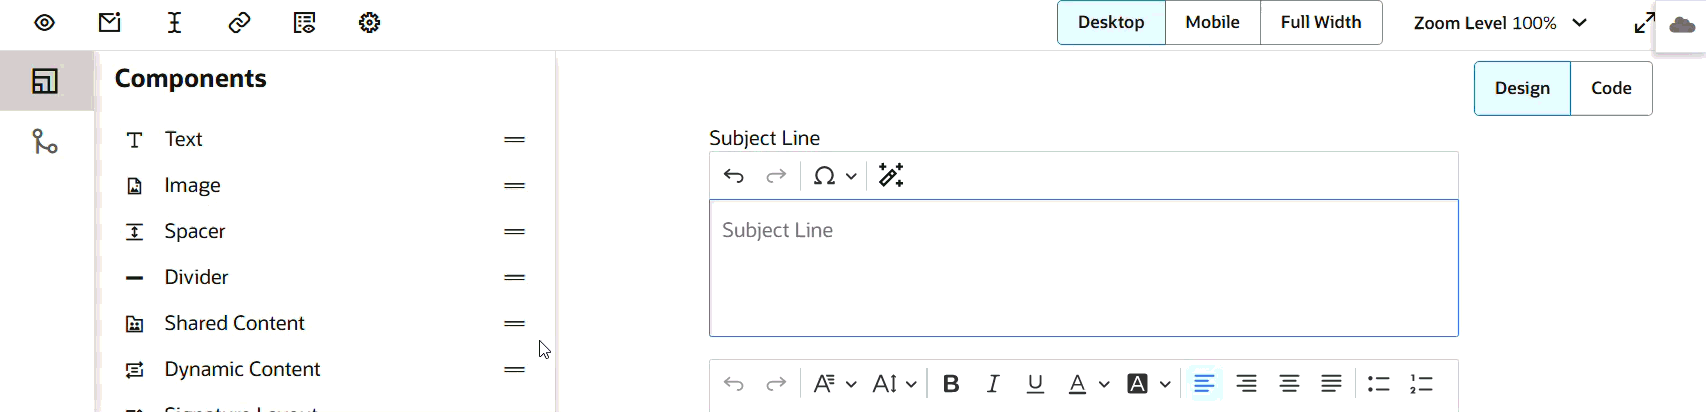
Subject line
To generate subject lines using AI:
Click
 ,
this will open the AI content writer or the AI chat, depending on what's enabled for your site.
Learn more about subject line generation
.
,
this will open the AI content writer or the AI chat, depending on what's enabled for your site.
Learn more about subject line generation
.
AI content writer

AI chat
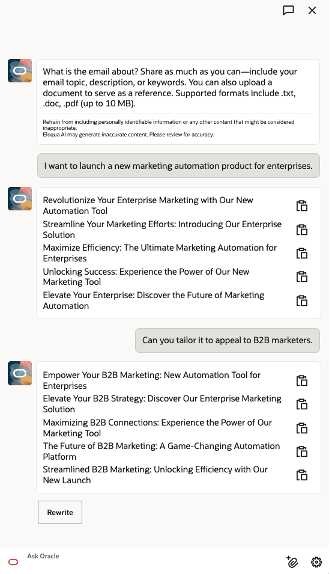
The chat supports conversational interactions to tailor subject lines. You can optionally upload a reference document, and the AI will use it to provide context-aware responses.
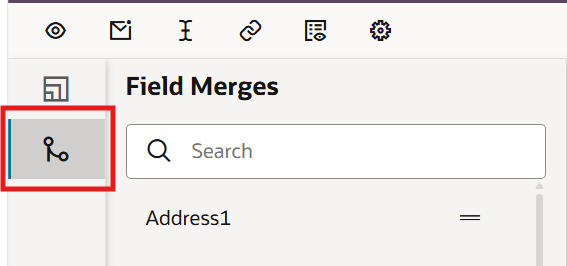
To add field merges: Drag the field merge from the left pane.
To add dynamic content: Drag the dynamic content from the left pane. Then click the token that was dropped and choose your dynamic content.
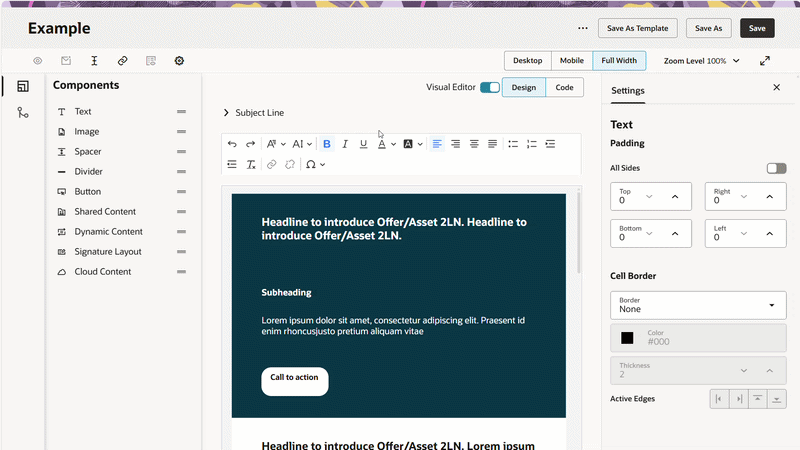
Adding and arranging content (design view)
The Design view allows you to visually build your email by adding and arranging components. The editor generates the corresponding HTML automatically as you make changes.
To use Design view, the Visual Editor must be enabled. When the Design view is locked, you cannot add or rearrange content.
Note: The Design view helps you build HTML structure, but it does not enforce layout or responsiveness. You are responsible for ensuring your email renders correctly across devices and email clients.
To add content: Drag or double-click any component from the panel and drop it into your email. You’ll see visual markers showing exactly where your component will appear. When you click into a component, you'll see the settings available.
To rearrange content: Click a component in your email and press Ctrl+X. Then place your cursor where you want the content to be moved to, and press Ctrl+V.
Design view: Editing and formatting
Text: Click to edit any text area or subject line. Use the familiar toolbar to change font, size, color, alignment, add lists, and create links—just like in a word processor. You can apply most of these formatting options from the toolbar or as you type using Keyboard shortcuts.
-
Apply basic text styles like bold, italics, and underline. Change the font color and background color.

-
Change different font families and control the font size.
-
Adjust text alignment, indentation, and bullets/numbered lists.

-
Use the link tool and its settings panel for URLs and special actions.

-
Remove formatting by clicking
 .
.
Button: Use the Button component to create calls to action that render consistently across email clients. Configure properties such as background color, alignment, width, border radius, padding, and link behavior in the Settings pane.

Images: To configure an image, you can use the code or design views. In the Settings pane in Design view, you can resize the image, set alignment, update alt text, and update padding and borders.
Other content: Use Spacers and Dividers to create structure, and drag in Shared Content or Dynamic Content blocks for reusable or personalized sections.
Keyboard shortcuts
| Insert a hard break (a new paragraph) | Enter | |
| Insert a soft break (a <br> element) | Shift+Enter | ⇧Enter |
| Copy selected content | Ctrl+C | ⌘C |
| Paste content | Ctrl+V | ⌘V |
| Undo | Ctrl+Z | ⌘Z |
| Redo | Ctrl+Y,Ctrl+Shift+Z | ⌘Y,⌘⇧Z |
| Bold text | Ctrl+B | ⌘B |
| Select all | Ctrl+A | ⌘A |
| Find in the document | Ctrl+F | ⌘F |
| Italic text | Ctrl+I | ⌘I |
| Strikethrough text | Ctrl+Shift+X | ⌘⇧X |
| Underline text | Ctrl+U | ⌘U |
| Move focus to the toolbar, navigate between toolbars | Alt + F10 | ⌥F10 |
| Navigate through the toolbar or menu bar | ↑, →, ↓, ← | ↑, →, ↓, ← |
| Execute the currently focused button. Executing buttons that interact with the editor content moves the focus back to the content. | Enter, Space | Enter, Space |
Protected template support
You can create protected templates in the Redwood experience. Learn more.
Using the Classic Email Source Editor