Legacy basic microsites
Warning: As part of best practices, Oracle Eloqua recommends that you always use either secure or authenticated microsites (both authenticated microsites and Authenticated Portals must have secure microsites) to encrypt data that is passed between a visitor’s browser and the web server. Basic microsites are not recommended and if actively being used should be considered for change to a secure microsite.
A microsite is a miniature website, often dedicated to a specific campaign, product, or keyword. The purpose is to give a visitor (whether channeled through your website, social media assets, emails, SMS, or other channels) precise information that they can use to better understand your products and services or to make a buying decision. Each landing page that you create in Oracle Eloqua must have an associated microsite.
When you create a new microsite, you need to configure a subdomain for your website and set up the microsite in Oracle Eloqua.
To create a subdomain on your website:
-
Click Settings
 .
. -
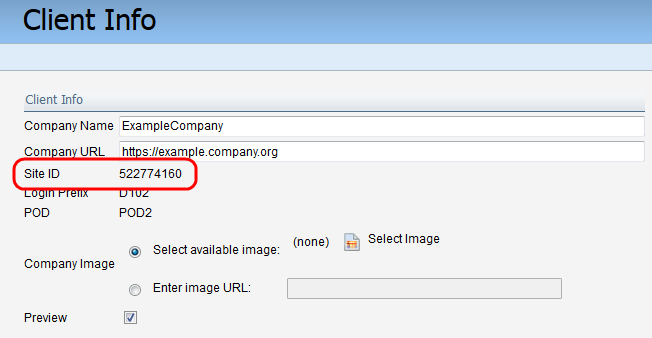
Click Company Defaults in the Display Preferences section, and determine your Oracle Eloqua site ID.
- Go to the site where you normally configure your website's domain settings and create a new subdomain for your microsite. Every subdomain can only link to a single microsite, but a microsite can link to multiple subdomains. If your company website is example.com, your subdomain could be welcome.example.com.
- Set the CNAME record to s[site id].hs.eloqua.com. For the example above, the CNAME record would point to s522774160.hs.eloqua.com.
Warning: Do not use the A record, as the public IP address may change.
Important: Because the IP record found within
s[site id].hs.eloqua.comcan change, it is highly recommended that you use the CNAME record.
After you finish, continue to setup your microsite below.
To register a new microsite in Oracle Eloqua:
-
Navigate to Assets
 > Website Setup, then click Microsites.
 -
Add your microsite:
-
In the classic UI, click Add, then click Microsite.
-
In the Redwood experience, click Add Microsite.
-
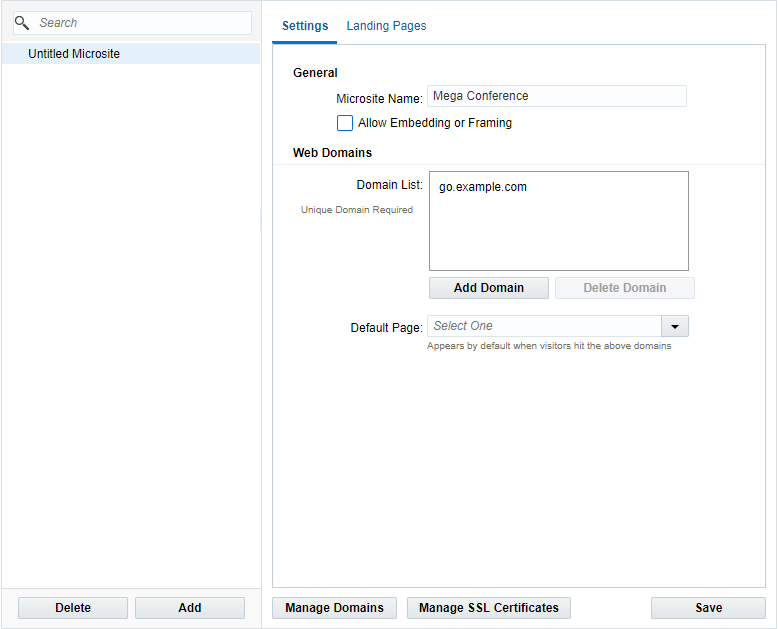
- Give the microsite a descriptive name. This is the name that marketers will use when associating landing pages to the microsite.
- To allow pages associated to this website to be embedded, select the Allow Embedding or Framing setting.
Warning: Only enable this setting if your pages must be embedded in a
<frame>,<iframe>or<object>. Learn more about the setting and the security risks it prevents. - Add the subdomains to the list. Do not include http:// or specific pages in the list.
Classic UI
Redwood experience

- Save your changes.
After you save your microsite, it can be associated to landing pages.
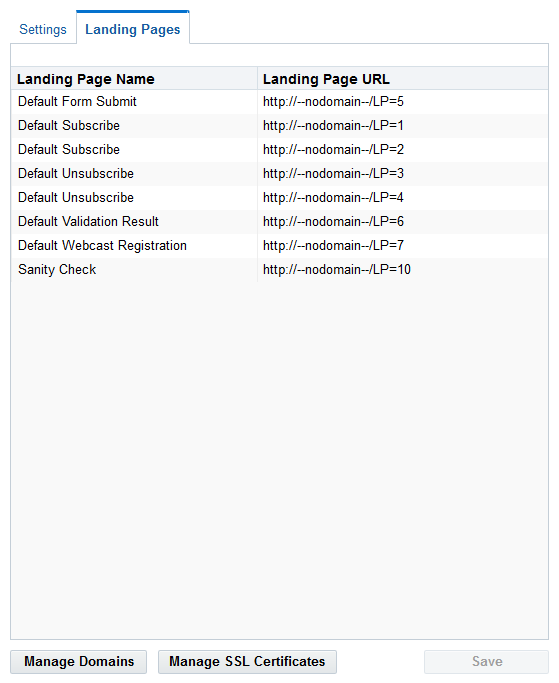
You can view the landing pages associated with a microsite using the Landing Pages tab.
Classic UI
Redwood experience
