Uploading multiple user accounts
You can use an upload wizard to create or update user accounts in a batch.
Note: When uploading multiple user accounts, ensure that each account has a unique user name. If another user account exists with the same user name (including deleted user profiles), then a notification appears at the end of the upload process indicating that the duplicate user profile was not created. If you want to reactivate a deleted user profile, you need to do it individually.
Before you begin:
- Create your upload file (.txt, .csv, .xls, .xlsx). The upload file should only contain the users you want to update or delete.
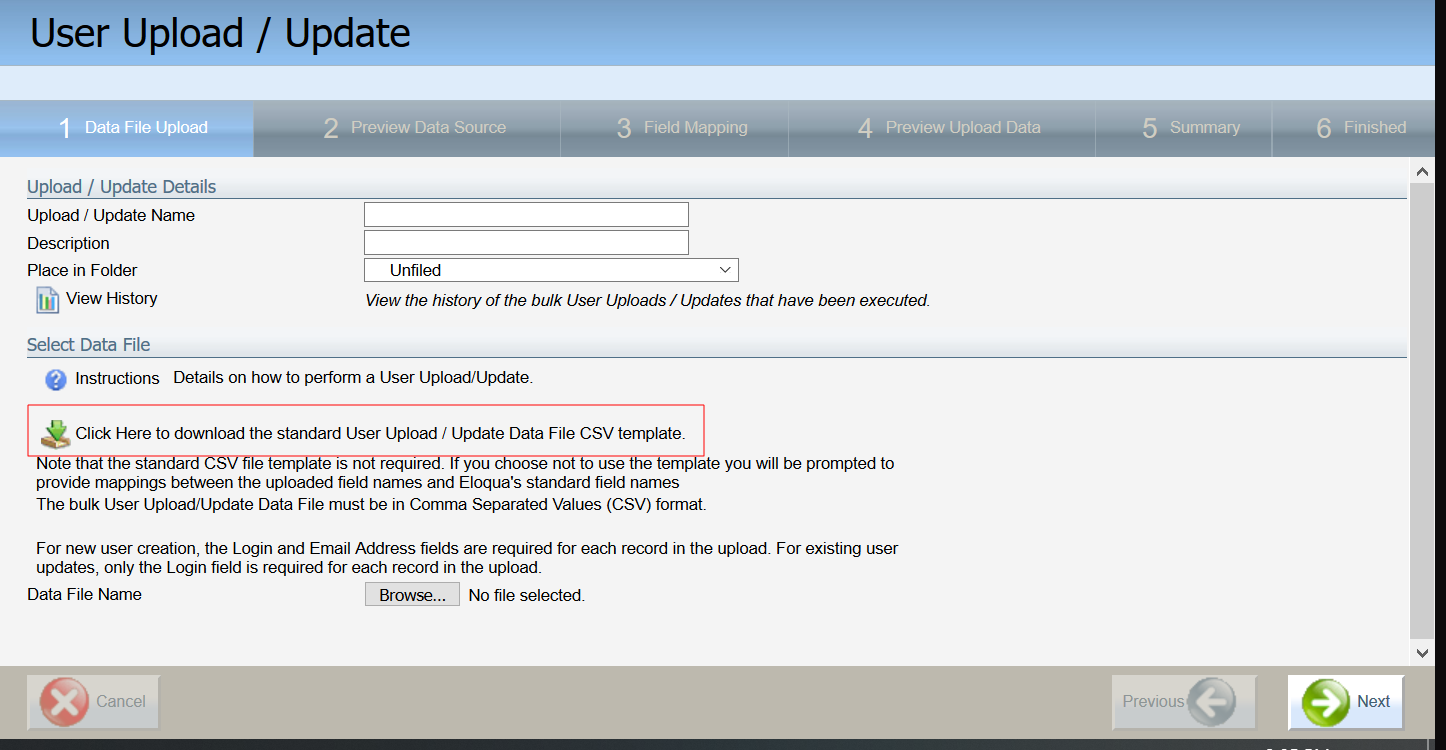
- Use the CSV template provided by Oracle Eloqua when uploading users in batch. This template is available from the UI when you start the upload process.
- If you are updating a group of users, you can download their current user account information to a CSV file. You can then update and upload this file with the new account information.
- Use the CSV template provided by Oracle Eloqua when uploading users in batch. This template is available from the UI when you start the upload process.
- Separate contact fields in a .csv or .txt file using a comma (,), pipe (|), or semi-colon (;).
- The first row of the file must be column headings. Oracle Eloqua will attempt to map the headings to existing contact fields.
- If you are adding or updating users, make sure that you can map the data in your upload file to user fields in Oracle Eloqua. Use similar naming conventions in your upload file to make this mapping easier.
- Make sure that users in your upload file have a unique identifier (such as an email address).
- Assign users to a security group by using the security group acronym. You can find the acronym when you open the security group. The acronym for the default security groups are:
- Basic Users - Marketing: MKGB
- Advanced Users - Marketing: MKGA
- Executive Users: EXEC
- Active Users - Sales: SALE
- Administrator: CADM
- When specifying the time zone for users, refer to list below for acceptable formats.
Note: If you do not specify a valid time zone, the time zone defaults to Eastern Time (GMT-05:00). Users can update their profile to change the timezone setting.
To upload multiple users:
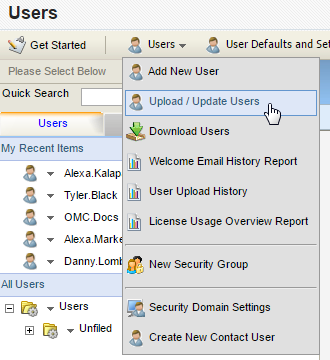
- Click Settings
 , then click Users in the Users and Security area.
 - Select Users > Upload / Update Users.
- Complete the information about the upload on Step 1 Data File Upload and click Next. You can download the sample CSV file on this step.
Note: The sample CSV file includes the native CRM User Name as well as fields for four CRM integrations: MS Dynamics User Id, CX Sales User Id, SFDC User Id, and Siebel On Demand User Id. The CRM integration user IDs take precedence over the native CRM User Name if a user has both.
If you do not see these integration fields in step 4, you can update the available fields with the latest CSV sample file.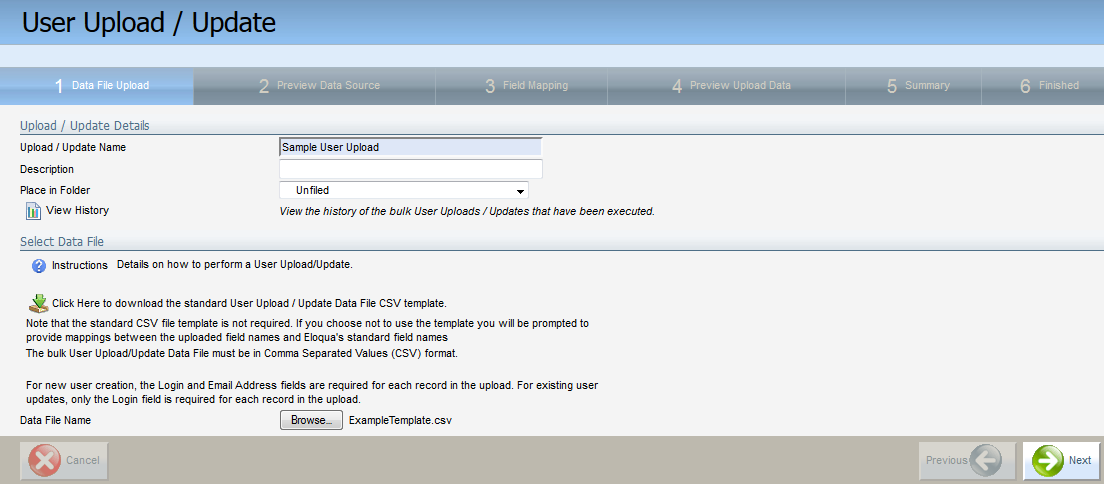
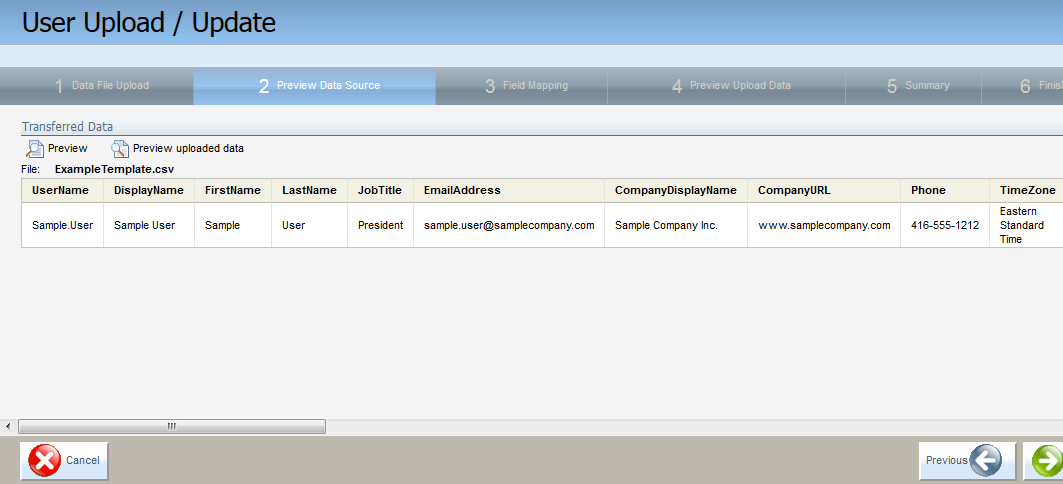
- Verify the contents of the file on the Step 2 Preview Data Source tab and click Next.
- Map the fields from the source file to applicable Oracle Eloqua fields in Step 3 Field Mapping and click Next.
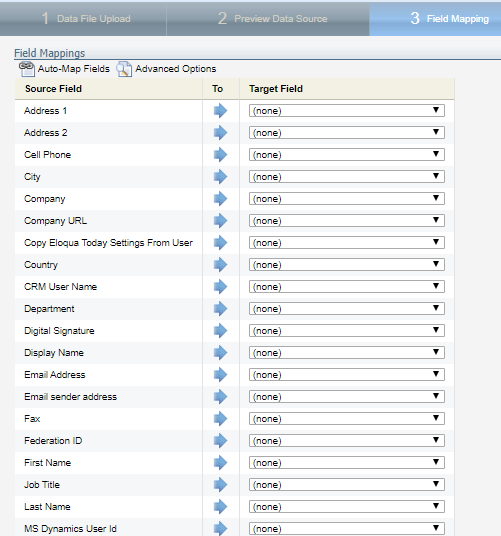
- For Oracle Eloqua to make the best possible matches, click Auto-Map Fields, then review the mappings for errors.
- To specify when to update user account fields, click Advanced Options. For example, update the field if it is blank or not blank.
- Verify the final upload and mapping in Step 4 Preview Upload Data and click Next.
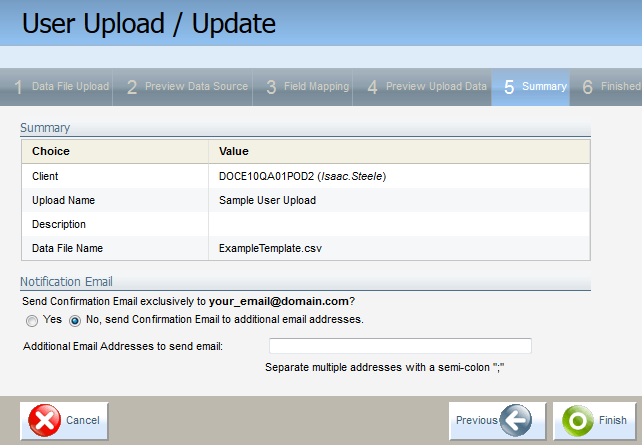
- Complete the final step of the wizard and click Finish.
If you want to download users in batch, click Users then select Download Users. You can choose to either export to Excel or print the list of users.
Time zone requirements
- Alaskan Standard Time
- Arab Standard Time
- Arabian Standard Time
- Arabic Standard Time
- Argentina Standard Time
- Armenian Standard Time
- Atlantic Standard Time
- AUS Eastern Standard Time
- Azerbaijan Standard Time
- Azores Standard Time
- Canada Central Standard Time
- Cape Verde Standard Time
- Caucasus Standard Time
- Central America Standard Time
- Central Asia Standard Time
- Central Brazilian Standard Time
- Central Europe Standard Time
- Central European Standard Time
- Central Pacific Standard Time
- Central Standard Time
- Central Standard Time
- China Standard Time
- Dateline Standard Time
- E. Africa Standard Time
- E. Australia Standard Time
- E. Europe Standard Time
- E. South America Standard Time
- Eastern Standard Time
- Egypt Standard Time
- Ekaterinburg Standard Time
- Fiji Standard Time
- FLE Standard Time
- Georgian Standard Time
- GMT Standard Time
- Greenland Standard Time
- Greenwich Standard Time
- GTB Standard Time
- Hawaiian Standard Time
- Israel Standard Time
- Jordan Standard Time
- Korea Standard Time
- Mexico Standard Time
- Mexico Standard Time 2
- Mid-Atlantic Standard Time
- Middle East Standard Time
- Montevideo Standard Time
- Morocco Standard Time
- Mountain Standard Time
- Mountain Standard Time
- N. Central Asia Standard Time
- Namibia Standard Time
- New Zealand Standard Time
- North Asia East Standard Time
- North Asia Standard Time
- Pacific SA Standard Time
- Pacific Standard Time
- Pacific Standard Time
- Pakistan Standard Time
- Romance Standard Time
- Russian Standard Time
- SA Eastern Standard Time
- SA Pacific Standard Time
- SA Western Standard Time
- Samoa Standard Time
- SE Asia Standard Time
- Singapore Standard Time
- South Africa Standard Time
- Taipei Standard Time
- Tasmania Standard Time
- Tokyo Standard Time
- Tonga Standard Time
- US Eastern Standard Time
- US Mountain Standard Time
- Vladivostok Standard Time
- W. Australia Standard Time
- W. Central Africa Standard Time
- W. Europe Standard Time
- West Asia Standard Time
- West Pacific Standard Time
- Yakutsk Standard Time