Creating a new visitor notification
Create visitor notifications to alert members of your sales and marketing team when a desired type of visitor frequents your website.
To create a new website visitor notification:
-
Click Settings
 .
. -
Click Notifications in the Display Preferences area.
Note: An administrator can access visitor notifications for all users through Users in the Users and Security area.
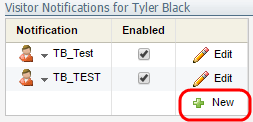
- Click + New. The New Visitor Email Notification window opens.
-
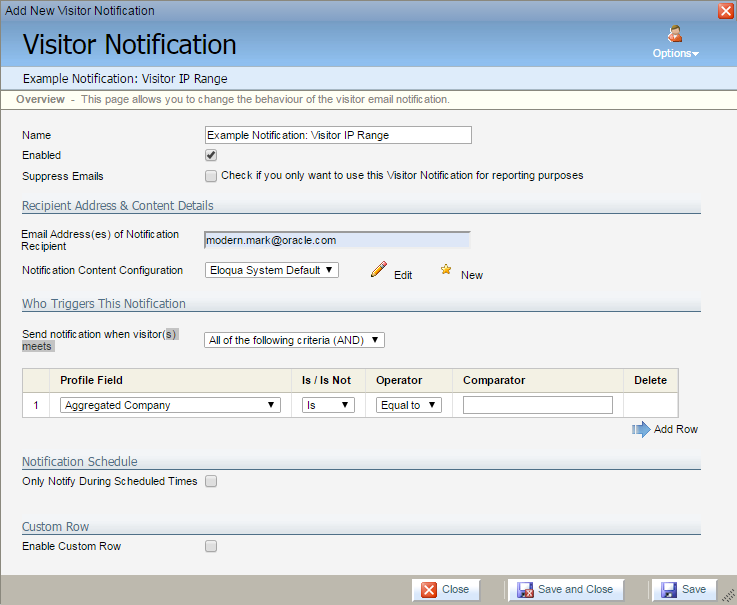
Type a name for the notification, then click Save and Continue.
The Add New Visitor Notification window then opens.
-
 Configure the Recipient Address & Content Details section
-
Type the email address for notification recipients in the Email Address(es) of Notification Recipient field. If you are using multiple email addresses, separate each with a comma.
-
Select the email configuration from the Notification Content Configuration drop-down. A configuration determines the contents of the email being sent.
You can view the configuration by clicking Edit or click New to create a new one. Oracle Eloqua provides a default configuration called Eloqua System Default.
Note: You can customize the email with additional information using the Custom Row settings described below.
-
-
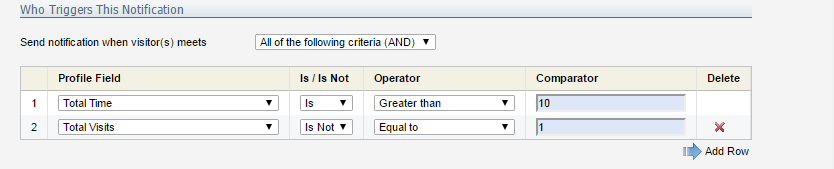
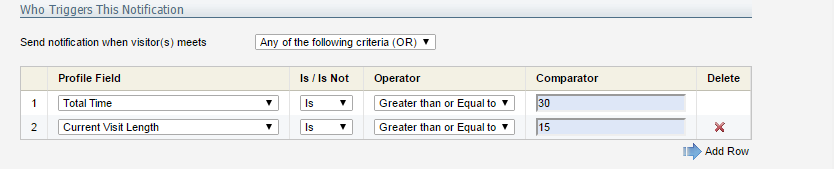
Define the criteria used to trigger the notification in the Who Triggers This Notification section. Add and remove rows using Add Row, or the red X.
Further definitions of criteria items
- Profile Field: The visitor profile field containing required information, as tracked by Oracle Eloqua.
- Is / Is Not: Determines if the profile field is a specified value, or is not.
- Operator: Determines if the selected field value must be equal to, greater or less than (or equal to), or between two specified values.
- Comparator: The specific value for the profile field. The comparator values will be dependent on the profile field and the operator.
Example:
A visitor triggers this notification when that visitor has visited your website more than once and the visit was longer than ten minutes. The visitor has to meet both criteria.
A visitor triggers this notification when that visitor has spent a total of at least thirty minutes on your website or at least fifteen minutes in the current visit. The visitor can meet one or both of the criteria.
-
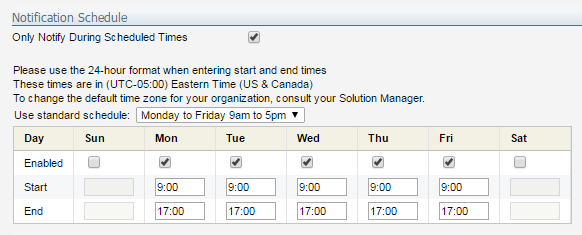
Select Only Notify During Scheduled Times to schedule when to send the notifications. Select a preset schedule, or input a custom one.
Note: If a schedule is not set, the notification email is sent when criteria is met.
- Select Enable Custom Row to insert an additional row of information to the notification email. This information is in addition to the information already included by the content configuration you specified earlier. The first blank field is a descriptive label displayed in the email. The second blank field determines the actual value Oracle Eloqua collects.

- To create a link to the Salesforce contact profile of the visitor, click Insert Salesforce Contact Link.
- To insert an additional contact field in the notification email, click Insert Email Field.
- Click Save and Close.
Tip: To capture visitor information in a report instead of sending email notifications select the Suppress Emails check box.
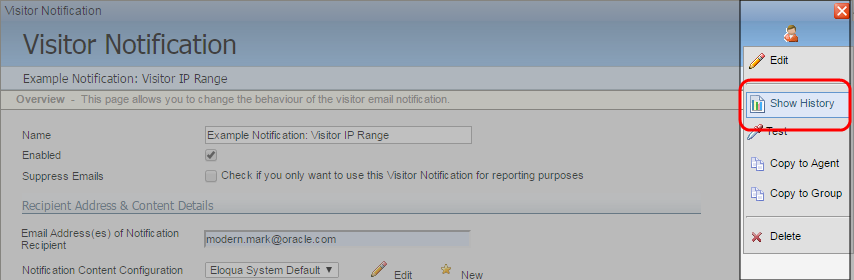
If selected, Oracle Eloqua does not send emails, but captures the visit information in a report. You can view the report by clicking Options in the upper-right corner, and then selecting Show History.