Creating messages
Use the message designer to create your email message. You can create a message from blank, upload one from a ZIP file, or start from an existing message or sample provided by us.
The message designer provides two editing experiences:
-
The Visual editor provides pre-built WYSIWGY components and layouts that you can add to your message by using the drag-and-drop method. Messages built in this editor are fully responsive and ready to be displayed on any device. If you need to refine the HTML code, simply move the message over to the Source editor.
-
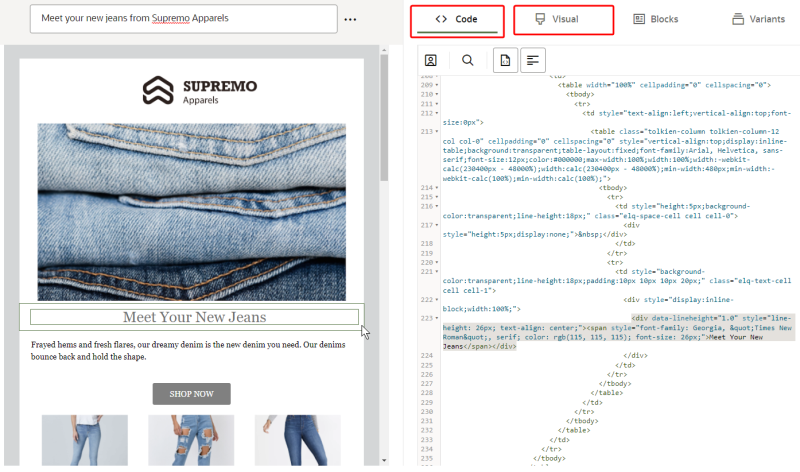
The Source editor provides a Code tab for users who have their own code, or are familiar with building out messages using custom HTML with side by side code and preview panes. Additionally, the Source editor offers a Visual tab to update parts of your message quickly with no coding required.
To create a message:
- Click
 from any page in Responsys Express.
 - Click Messages.
-
Click Create.
-
Enter a Name and Description for your message. For transactional messages, click the Is this a transactional message? toggle.
Important: Transactional Messaging is an add-on feature that must be ordered for your account. Please contact your account manager or Oracle sales.
Tip: Use transactional messages for information that you want to send when a contact performs a specific activity. Transactional messages are typically used for purchase confirmations, account notifications, shipping notifications, password reset notifications, and so on. They have no automatic suppression, no footers, and no automatic opt-out mechanism.
- Choose the method you want to create the message:
- Start from blank - With this option, you can choose which editing experience you want to use.
- Use samples - With this option, you can either copy an existing message, or start with a sample message template. You can choose between these options on the page that appears after clicking Continue.
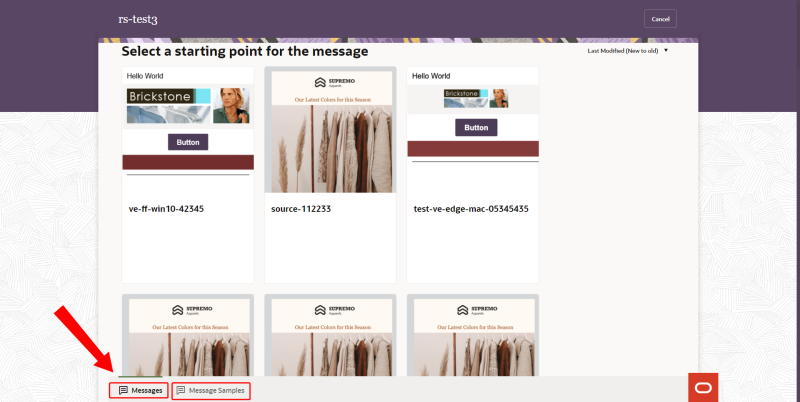
- Import ZIP- See Creating a message with a ZIP file before using this option.
Note: The editing experience will depend on the message you’ve chosen. You cannot move a message from the Source editor to the Visual editor, but you can move a Visual editor message to the Source editor so that you have full access to the HTML code. For more details, see how to move a message created with the visual editor to the HTML source code editor.
- Select which editor you would like to use to create your message content:
Visual editor – Use prebuilt components like text, images, and buttons. You can also customize the layout of your message, like adding one or more columns. Coding is not required to use the Visual editor. See Creating messages in the visual editor for more details.
- Source editor - Full HTML control with a live preview. The Code tab lets you work with the HTML code of the message, and the Visual tab offers a rich-text editing option that lets you customize your message without needing to know HTML code.
 Tips:
Tips:If you want to create your message by solely using a rich text editing option, it would be more practical to use the Visual editor rather than using the Source editor's Visual tab, as the Visual editor offers a wider variety of customization options which are essential to create attention-grabbing messages. See Creating messages in the visual editor for more details.
Personalize your content by adding attributes. Learn more about personalization.
- Click Continue.
- Create your message given the options you just selected.
- Click Save.
- Click Actions > Preview to preview your message. Personalized content is displayed in the preview.

