Setting up notifications for Magento app jobs
Important: This feature is currently released under our Controlled Availability program. To request access to this feature, please log in to My Oracle Support and create a service request.
You can set up notifications for the success and failure of Magento app jobs. Use the Notifications page to set up and manage notifications about import and export job results.
Before you begin:
-
Ensure that the Magento app shows "Enabled" as its status on the Applications page.
-
Ensure that you have set up at least one connection in the Magento app.
-
If you want to set up a notification for a specific import or export, you must create and enable the import or export. If you haven't set up any imports or exports, the only actions available will be to send notifications for all imports or all exports.
Important: The steps in this section must be done by a user enabled with either the Account Administrator or CX Apps Director role.
To access the Notifications page:
- Log in to Oracle Responsys as an Account Administrator or a CX Apps Director user.
-
Click the navigation menu
 and then click Account.
- On the Account page, locate and click App Management. The Applications page is displayed.
- Locate your Magento app and click
 .
. -
From the Magento app page, click Notifications.
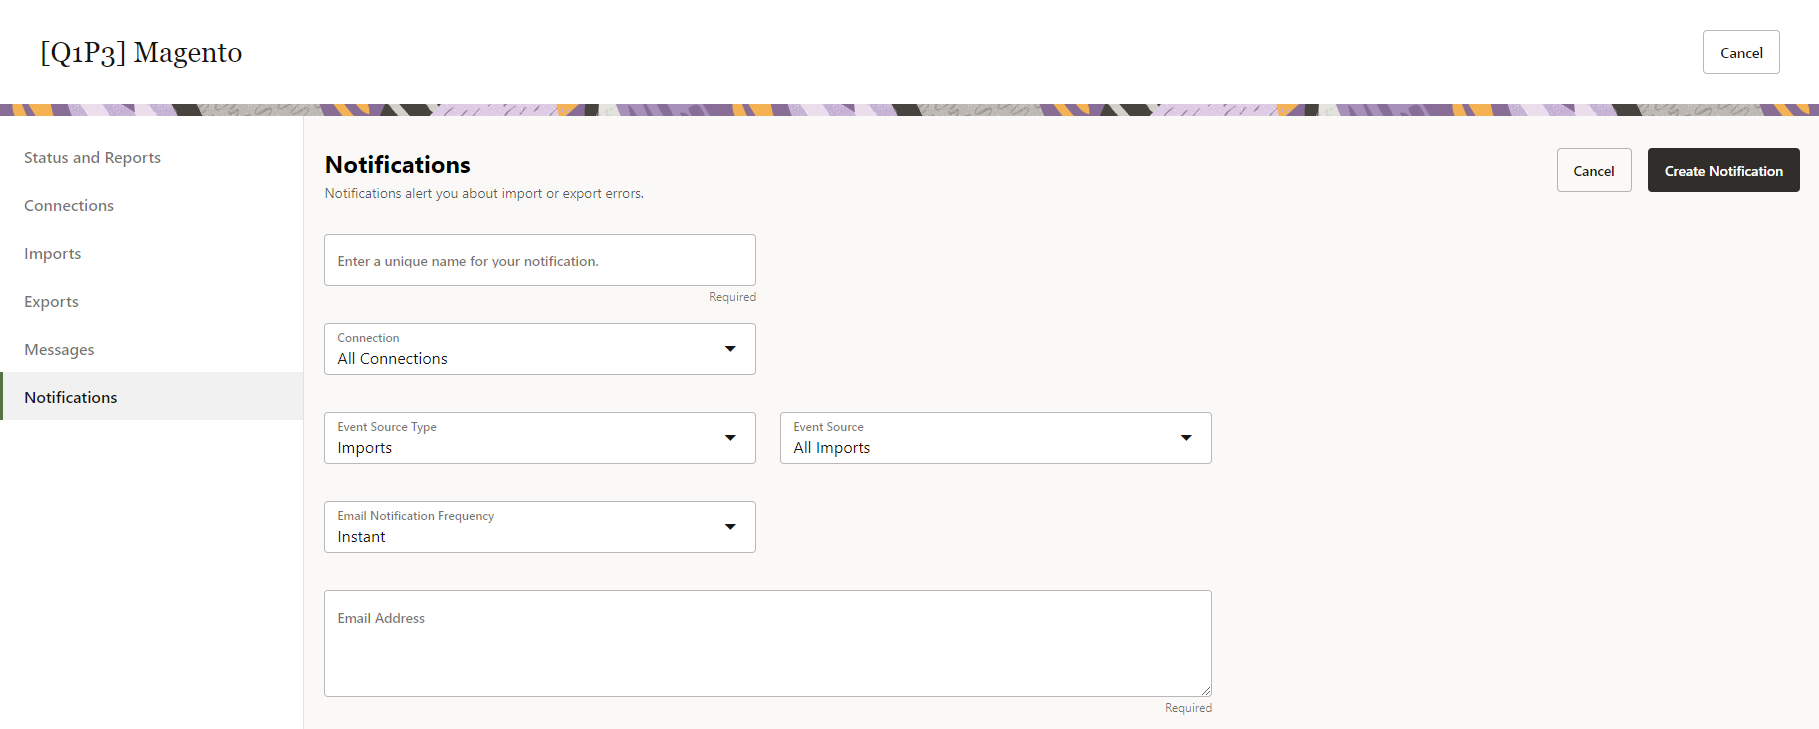
To create a notification:
-
From the Notifications page, click Create Notification.

-
Enter a unique name for your notification.
-
Select a Connection.
- If you are setting up a notification for a specific import or export, choose the specific connection for the import or export.
- If you choose All Connections, your only notification choices will be for All Imports or All Exports, depending on the Event Source Type you choose.
-
Event Source Type: Select Imports or Exports.
-
Event Source: Your options depend on the connection and event source type you selected.
- To receive notifications for all jobs, choose All Imports (for import notifications) or All Exports (for export notifications).
- If you chose a specific connection, you'll see the jobs configured for the selected connection and event type, and you can select a specific job.
-
Email Notification Frequency: Select Instant, Hourly, or Daily.
-
Email Address: Enter all email addresses that you want to receive the notification. Email addresses must be separated by commas, with no spaces after the commas.
-
When you are finished, click Create Notification. The Notificationspage displays your newly created notification.
Note: Newly created notifications are enabled by default.
To perform other actions with a notification:
-
Locate your notification on the page.
-
Click
 and select one of the following actions:
 -
Edit: Opens the edit page for a notification. Make your changes and click Save Notification.
-
Enable or Disable: Toggles the status of the notification to Enabled or Disabled.
-
Delete: Deletes the notification. The notification must be disabled before you can use this action.
Magento Responsys connector, Magento Responsys app, Magento, Magento and Responsys, Magento app, apps, applications, Magento, commerce, commerce apps
Importing data from Magento to Responsys