Data Export for Auditing
Account administrators and users with the Export data role permission can export SuiteProjects Pro data for auditing purpose.
You can export all of your account data or selected tables in MySQL or delimited text format. See Exporting SuiteProjects Pro data.
You can then process the exported data to extract the desired audit information. See Using the Exported SuiteProjects Pro Data for Auditing.
If the Automatic Backup Service feature is enabled on your account, you can use the regular backup instead of exporting your account data manually. See Automatic Backup Service.
Consult the Database Guide and SuiteProjects Pro Data Dictionary for reference when selecting tables for data export and processing the exported data.
To view the SuiteProjects Pro Data Dictionary, use the following URL: https://<account-domain>/database/single_user.html.
-
The URL includes the domain name for your SuiteProjects Pro account
<account-domain>. For more information about your account-specific domain name, see Your Account URLs. -
To view the details of a specific table, append a hash symbol
#followed by the table name to the end of the data dictionary URL. For example, usehttps://<account-domain>/database/single_user.html#projectto view the details of the Project table. -
You can access the data dictionary from the SuiteProjects Pro Help Center using the link in the navigation bar if you have the View Help Center role permission.
Exporting SuiteProjects Pro data
To export SuiteProjects Pro data:
-
Go to Administration Global Settings > Account and click Integration: Import/Export.
-
On the Import/Export page, click the All data in text format or All data in MySQL format link.
-
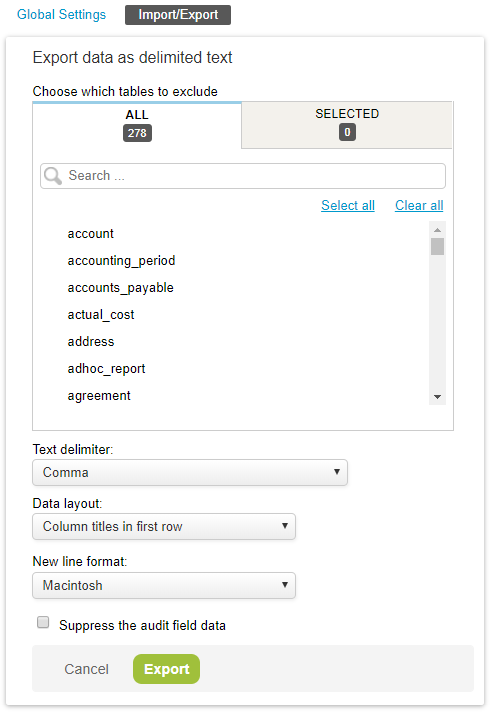
Choose which tables to exclude - select any tables to exclude from the export.
Tip:If you only want to include a small number of tables, first click Select all to exclude all tables, and then select the tables you want to include.
-
If exporting the data as delimited text:
-
Text delimiter - Select comma-delimited, tab-delimited, or a regional setting CSV list separator.
-
Data layout - Select whether to include column headings in the exported data.
-
New line format - Specify the new line format corresponding to the Operating System on your machine.
-
Suppress the audit field data - Check this box if applicable.
Important:Do not check the Suppress the audit field data box when exporting data for auditing purposes.
-
-
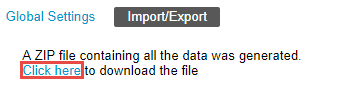
Click Export. A progress bar displays while SuiteProjects Pro generates a ZIP file containing the generated data.
-
Click the Click here link to download the ZIP file with your data.
-
Extract and review the content of the ZIP archive you downloaded. Depending on the format you chose for exporting your data, the ZIP archive will contain:
-
A MySQL file - Use this file to import the data into a MySQL database and run queries and reports.
-
A series of CSV files (one for every table selected for export) - Use these files to import selected data into a spreadsheet or run scripts to analyze the data.
-
Using the Exported SuiteProjects Pro Data for Auditing
You can use the SuiteProjects Pro data exported in MySQL or delimited text format to extract auditing information. Review the User access log and Deleted records log examples below as well as the Quick reference for fields/columns commonly use for auditing purposes.
See the Database Guide and SuiteProjects Pro Data Dictionary for more detailed information about the data structure, tables and fields available in the SuiteProjects Pro database.
To view the SuiteProjects Pro Data Dictionary, use the following URL: https://<account-domain>/database/single_user.html.
-
The URL includes the domain name for your SuiteProjects Pro account
<account-domain>. For more information about your account-specific domain name, see Your Account URLs. -
To view the details of a specific table, append a hash symbol
#followed by the table name to the end of the data dictionary URL. For example, usehttps://<account-domain>/database/single_user.html#projectto view the details of the Project table. -
You can access the data dictionary from the SuiteProjects Pro Help Center using the link in the navigation bar if you have the View Help Center role permission.
User access log
You can audit sign-in attempts using the exported SuiteProjects Pro data.
To audit user sign-in attempts using export data:
-
Export the user_login and user tables as delimited text. See Exporting SuiteProjects Pro data.
-
Extract the content of the ZIP archive containing the export data and open user_login.csv in a spreadsheet.
-
Review the following fields/columns:
-
user_id - The unique ID of the user attempting to sign in. Cross-references user data in the user table.
-
logintime - The date and time of the sign-in attempt.
-
source - The location the sign-in originated from, typically an IP address.
-
status - The status or outcome of the sign-in attempt.
-
api - the sign-in mechanism used.
Note:See Quick reference for fields/columns commonly use for auditing purposes for a detailed description of the status and api fields, including how to read the value for these fields
-
Deleted records log
When a user deletes a record in SuiteProjects Pro, the record is flagged as deleted and continues to be stored in the database for some time before it is permanently deleted. You can export SuiteProjects Pro data and query all or selected tables for records with a deleted flag.
All tables storing records that can be deleted manually by users in SuiteProjects Pro include a deleted field. This field is blank by default. When a user deletes the record, the value of the deleted field is set to 1. Use the audit field to identify who deleted the record and when it was deleted.
Records flagged as deleted which have not been updated for more than 180 days are removed permanently from the database according to a routine schedule. See Data Deletion.
Quick reference for fields/columns commonly use for auditing purposes
|
Field / Column |
Table / CSV File |
Description |
|---|---|---|
|
status |
user_login |
The status of the sign-in. The value is a status code:
|
|
api |
user_login |
The login mechanism. Possible values:
Note:
A A |
|
mfa_status |
user |
The user's two-factor authentication (2FA) status. Possible values:
|
|
audit |
Most tables - refer to SuiteProjects Pro Data Dictionary. |
Each audit trail entry is recorded on a separate line in the audit trail field. Each audit trail entry follows a specific format of information delimited by commas. For example:
The audit trail entry information can be interpreted as follows:
|
|
custom_ [custom field ID] |
Table for the entity to which the custom field is associated |
Custom fields appear in the database under generic names formed of the prefix 'custom_' followed by the unique ID of the custom field (its ID in the cust_field table). |
|
audit_custom_[custom field ID] |
Table for the entity to which the custom field is associated |
Audit extension fields for custom field of types Text Area, Pick List, Multiple Selection and Allocation Grid, appear in the database under generic names formed of the prefix 'audit_custom_' followed by the unique ID of the custom field (its ID in the cust_field table). For these custom field types, values will not be recorded in the audit trail entry unless the audit is extended. See Quick Audit Trail for Custom Fields. If the audit is not extended, the audit trail entry in the audit field will show 'CHANGED' instead of the previous value for the modified field. For example:
If the audit is extended for the custom field, a unique reference is added to the timestamp for the audit trail entry in the audit field. For example:
A similar entry is added to the audit extension field for the custom field and includes the value for the modified custom field. For example:
|
To view the SuiteProjects Pro Data Dictionary, use the following URL: https://<account-domain>/database/single_user.html.
-
The URL includes the domain name for your SuiteProjects Pro account
<account-domain>. For more information about your account-specific domain name, see Your Account URLs. -
To view the details of a specific table, append a hash symbol
#followed by the table name to the end of the data dictionary URL. For example, usehttps://<account-domain>/database/single_user.html#projectto view the details of the Project table. -
You can access the data dictionary from the SuiteProjects Pro Help Center using the link in the navigation bar if you have the View Help Center role permission.