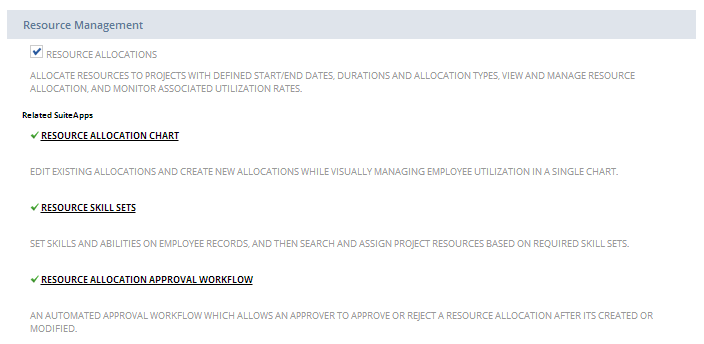
Resource Allocations
For information about the availability of Resource Allocations, please contact your account representative.
Resource Allocations are designed to help resource managers allocate and assign the right resources to projects based on availability, skill sets, and other criteria. After a resource is allocated to a project, the project manager can assign them to specific tasks.
You can also allocate resources directly to project tasks eliminating the requirement for resources to be assigned separately. This is useful if the same person handles both allocations and task assignments.
For each project, it's best to either allocate resources directly to tasks or allocate them to the project and then assign them to tasks. Mixing both methods can cause inconsistencies in your project data.
Resource allocations help companies track employee utilization, a critical efficiency/productivity metric. NetSuite utilization reporting allows customers to select the metrics that matter most to them-worked hours, allocated hours, or assigned hours. These values are divided by available hours, taking into account work calendars and exempt time.
For information about enabling Resource Allocations, see Enabling Project Features.
When you first enable Resource Allocations, NetSuite creates resource allocation records for all existing project assignments using a work queue. You won't be able to access project records during this time, but they'll be available when the process is done.
Resource Allocation Records
To request resource time, enter a resource allocation record. You can select the resource, project, task, dates, and hours for each allocation. For long-term projects, you can set a recurring schedule. After the allocation has been created, the resource is available for project tasks. If you select a project task when creating the allocation, you don't need to assign the resource again. For more information, see Assigning Resources with Allocations.
Resource allocation records for projects don't assign resources to any specific task. Allocating a resource to a project, as opposed to a project task, makes the resource available for assignment to any task on that project.
For example, a resource manager might allocate someone to Project A for 40 hours over two weeks, without selecting a specific task. That person is now available on the project record to be assigned to any task.
Resource allocations for projects don't limit the time frame or duration of project tasks each employee can be assigned to. Resource allocation records should be used as a tool for resource utilization and planning.
NetSuite automatically levels the requested hours over the time period specified. For a resource who typically works a 40 hour work week, an allocation of 20 hours over two weeks would result in 2 hours per day of allocated project work.
If you also use Time-Off Management and select a time period that conflicts with approved time off, you will receive a warning when entering a new resource allocation. The Time-Off subtab on resource allocation records shows any approved time off for the selected employee. Resource managers can use this information to better plan their upcoming resource allocations.
You can create resource allocation records directly from a project record by clicking the New Resource Allocation button at the top of the Resources subtab. Clicking the New Resource Allocation button automatically creates an allocation for the current project.
If you create a resource allocation from a project in view mode, you'll need to refresh the project record before the new allocation shows up for task assignment.
You can also go to Activities > Scheduling > Resource Allocations > New to create a new allocation record. You view all your resource allocation records at Activities > Scheduling > Resource Allocations. If you use inline editing, you can update your resource allocation records directly in the list.
When updating the Allocate By field, any necessary recalculations to the Number of Hours and Percentage of Time fields occur after you refresh the page.
If you make changes to both the Number of Hours and Percentage of Time fields, NetSuite will first look at the Allocate By field to determine which change to honor. For example, if the Allocate By field is set to Hours, then NetSuite will recalculate based on the change made to the Number of Hours field and ignore any updates made to the Percentage of Time field.
You can delete multiple resource allocation records from the list using inline editing. Select the record you want to delete by clicking in one of the editable fields. Hold down the Ctrl key and continue to select records to be deleted. When you have finished selecting records, hover over the green icon in the New column of any selected line and click Delete Record to delete all selected records.
Assigning Resources with Allocations
With the Resource Allocations feature, you can allocate resources to individual projects or directly to project tasks.
For each project, it's best to either allocate resources directly to tasks or allocate them to the project and then assign them to tasks. Mixing both methods can cause inconsistencies in your project data.
When creating a new resource allocation in NetSuite, after you select a project in the Customer:Project field, the Project Task field is populated with all available tasks from the selected project. Selecting a specific project task allocates the chosen resource to that task within the project. Leaving the Project Task field blank allocates the resource to the selected project.
On the project task record, the Resources subtab lists all the project resources allocated to the task. The Estimated Work field is updated for both projects and project tasks based on the allocated time for each resource. You can create new resource allocations from the Resources subtab by clicking New Resource Allocation. Clicking the New Resource Allocation button automatically creates an allocation for the current project task.
Resources allocated to individual tasks can track time against those project tasks. If you delete the allocation, the resource can't track any additional time against those project tasks anymore.
Allocating by Percentage
You can allocate resources by a set number of hours or by percentage of time. If you allocate by percentage, NetSuite uses the resource's work calendar and hours to determine how many hours per day they'll work on the project.
For example, if someone works 8 hours a day, 5 days a week, and you allocate them 50% for two weeks, they'll work 4 hours a day on the project for a total of 40 hours.
Allocation Type
When creating a resource allocation, you must select the allocation type-Hard or Soft.
In the Allocation Type field, select the type of allocation.
-
Hard - This allocation request isn't flexible; the resource is committed to the dates and hours required on this request.
-
Soft - This allocation request is flexible; adjustments can be made to the date and hours if needed to accommodate other priorities.
Allocation types are intended as another tool for resource utilization and planning. Records with a hard allocation type can still be edited. It's best practice to use the allocation types as suggested above when creating resource allocations in NetSuite. Allocation types also don't affect the availability of a resource to be assigned to any specific project task.
Resource Allocation Chart/Grid
After you've enabled Resource Allocations, you can install the Resource Allocation Chart/Grid SuiteApp. This SuiteApp can be installed directly from Setup > Company > Enable Features by clicking Resource Allocation Chart/Grid in the Related SuiteApps section under Resource Management.
Resource Allocation Chart/Grid is a shared bundle. Please contact your account manager for provisioning of the Resource Allocation Chart/Grid bundle.
When installed, administrators and resource managers can access the Resource Allocation Chart/Grid at Lists > Services > Resource Allocation Chart/Grid. The Resource Allocation Chart/Grid offers two tools for visually managing your resource allocations, with the ability to edit existing allocations and create new allocations directly from the chart or grid. For more information, see Resource Allocation Chart/Grid SuiteApp.
Resource Skill Sets
Resource Skill Sets enables you to add information about skills and expertise to employee and vendor records and then search that information for the best matched project resource.
You define skill categories that are available on the new Skills & Expertise tab on employee and vendor records. You can select skills and set a skill level for each person. Define skill categories at Setup > Services > Skill Category.
This SuiteApp can be installed directly from Setup > Company > Enable Features by clicking Resource Skill Sets in the Related SuiteApps section under Resource Management. Resource Skill Sets is designed to work in tandem with Resource Allocations. However, Resource Allocations isn't required to use Resource Skill Sets. For more information, see Resource Skill Sets. After installation, configure script access for internal roles on each Resource Skill Sets deployment. For instructions, see Setting Up Resource Skill Sets.
Resource Skill Sets is a shared bundle. Please contact your account manager for provisioning of the Resource Skill Sets bundle.
Before you install the Resource Skill Sets SuiteApp, make sure that the Per-Employee Billing Rates feature is enabled in your NetSuite account. To enable the feature, go to Setup > Company > Enable Features and check the Per-Employee Billing Rates box under Time & Expenses in the Employees subtab. For more information, see Using Billing Classes.
Resource Manager Role
With Resource Allocations also comes a Resource Manager role. This role offers access to the standard Support Center with additional permissions to access resource allocations and projects. For more information about standard centers, see NetSuite Standard Centers.
After the Resource Allocation feature has been enabled, the resource manager and administrator roles both have access to resource allocations. Additional roles can be customized to add access to resource allocations. For more information about customizing roles, see Customizing or Creating NetSuite Roles.
Users without access to custom record entries can't see skill, skill level, or skill set records in NetSuite or through SuiteScript. Employees will be able to set and update their skills through the My Skill Set page in the Employee Center.
If you use Approval Routing for resource allocations, only administrators can edit an unapproved resource allocation. For more information, see Resource Allocations Custom Approval Workflow.