Grouping Transaction Discounts
With some set up, you can configure your NetSuite Point of Sale (NSPOS) registers to enable transaction discounts against a group or subset of items in a purchase. Some retailers call this a 'Sale Discount.' The cashier scans or enters the items to discount and taps a discount button that you create. Only the items currently in the journal receive the discount. Items added after the discount are applied are excluded.
-
Cashier scans the items that will receive the discount, adding them to the journal.
-
Cashier taps the Sale Discount button. (You can choose your own button name.)
-
Cashier can manually enter the discount, or it can be a preset amount off or a percent off.
-
NSPOS reduces the price of items above the discount line in the journal.
-
Cashier scans additional items for purchase at their regular price or other promotional price.
Mapping a Button for the Grouping Transaction Discount
To prepare your registers to group transaction discounts, you must map one or more buttons in NSPOS. The number of buttons depends on the functionality desired. Note that NSPOS distributes transaction discounts evenly across all items affected. When applied, a 10% transaction discount deducts 10% from the price of each included item.
You can preset a default discount amount by adding a parameter to a button function, or you can leave the parameter empty to require the cashier to enter the discount each time. If a parameter is used, the cashier can override the preset discount if allowed. The parameter is the Discount ID assigned to a Discount Item in NetSuite ERP plus a value.
The available functions tied to NSPOS messages are:
|
FUNCTION |
MESSAGE |
RESULT |
|
Distribute Transaction Discount |
DistributeTransactionDiscount |
|
|
% Sale Discount and Distribute |
Transaction.DiscountWithDistribution |
|
|
$ Sale And Distribute |
Transaction. |
|
If you have questions or can't locate the new functions, please open a case with Customer Support as soon as possible.
A. To open the Button Edit screen for Discounts:
-
Sign on to a NSPOS register as an administrator.
-
Tap Manager Functions > System Configuration > Button Edit.
Or press Ctrl+F12, search for and tap Button Edit.
-
Tap the Side button bar option and tap Pages.
-
Tap Discounts.
-
Tap Activate so that you can see the changes immediately.
-
Tap Buttons.
B. Add the Button
-
Tap New.
-
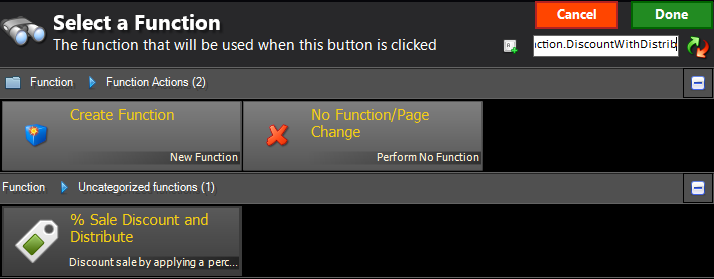
In the top right-hand field, search for the desired message. You can copy and paste from this PDF or Help Center topic. Choose one:
-
DistributeTransactionDiscount -
Transaction.DiscountWithDistribution -
Transaction.DiscountAmountOffWithDistribution
-
-
Tap the function returned by the message search.
-
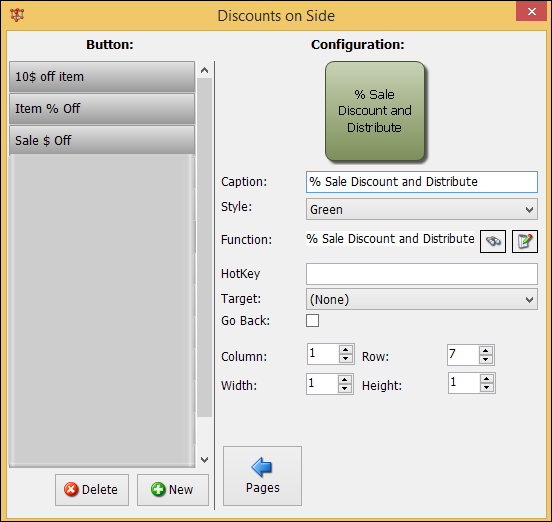
Enter a name for the button in the Caption field or leave it at the default.
-
Choose a color from the Style list.
-
Set the placement for your button by changing the Column and Row fields.
-
If you want to make your button smaller or larger, adjust the Width and Height.
-
If you do not want to add a Parameter, close the Button Edit form.
Your task is complete.
-
For the function:
% Sale Discount and Distribute, message:Transaction.DiscountWithDistribution, you can add a Parameter to map to a different Discount Item ID. This will provide a discount type and optional value that is different from the default.You will need the ID of the Discount Item in NetSuite ERP.
-
Log in to NetSuite ERP as an administrator.
-
Go to Lists > Accounting > Items.
-
Expand the Filters and select a Type of Discount.
-
Click View by the desired Discount Item.
-
With the Discount Item displayed, note the id= at the end of the URL in your browser's address bar. For example:

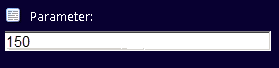
This example Discount Item ID is
150. Record the ID shown in your address bar. -
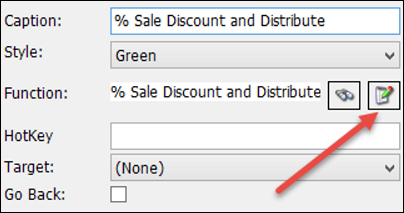
On the Function field, tap the Edit icon.
-
Enter the Discount Item ID in the NSPOS Parameter field.
-
-
Tap Done.
-
Close the Button Edit form when your setup is complete.
Repeat all steps for one register in each Workstation Group.