Custom List CSV Single File Examples
With the single-file approach, be aware of a few rules that affect the way you format data intended for the two sublists, Custom List Values and Custom List Translation.
If you want to import multiple values into the Custom List Values sublist (for any custom list represented in your file), the file must include multiple rows for that particular custom list. For example, if you want the custom list to have five options for users to choose from, you must create five rows for it in your CSV file. Each row must include one of the values to be mapped to the Custom List Values field of the sublist, and any other sublist data needed for that value, such as an abbreviation or a translation. However, the second through fifth rows don't need to contain any body data except for the name of the custom list record.
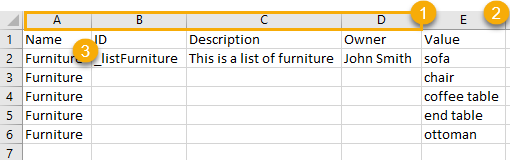
For example, the following illustration shows how you would format a CSV file to import one custom list record that has five values. Note that the ID, Description, and Owner values don't have to be repeated. The Name value does have to be repeated.
|
1 |
Columns A, B, C, and D contain body data. |
|
2 |
Column E contains data for the Custom List Values sublist. |
|
3 |
Name value must be repeated on every line. |
The single-file approach also lets you import multiple records into the Custom List Translation sublist. In these cases, your CSV file must include a language column and a name column for each needed translation. For example, suppose you want to import Czech and Spanish translations for the name of your custom list. Your file must include four columns for the Custom List Translation sublist: two columns to map to the Language field and two columns to map to the Name field.
When naming your columns, use the same naming conventions found in the Import Assistant (for example: Custom List Translation 1: Language, Custom List Translation 1: Name, Custom List Translation 2: Language, and so on) to automatically map your columns. The following example shows how you might use one file to include data for two translations.

The following example shows how you populate both sublists using one file. This file creates two custom lists, each with two translations for its name, and each with three values in its list. In this example, you're creating two translations for each value in each custom list.

When you import a single file, be aware that if your file includes more than one record for the Custom List Translation sublist, the mapping page must include multiple instances of the sublist fields. If you name the columns in your CSV file using the same naming conventions as shown in the preceding screenshot (with the name of the sublist as a prefix), these instances are created for you automatically.
If you used different columns names, you must manually create the additional instances. You can add an extra instance by clicking the plus sign next to the Custom List Translation label.

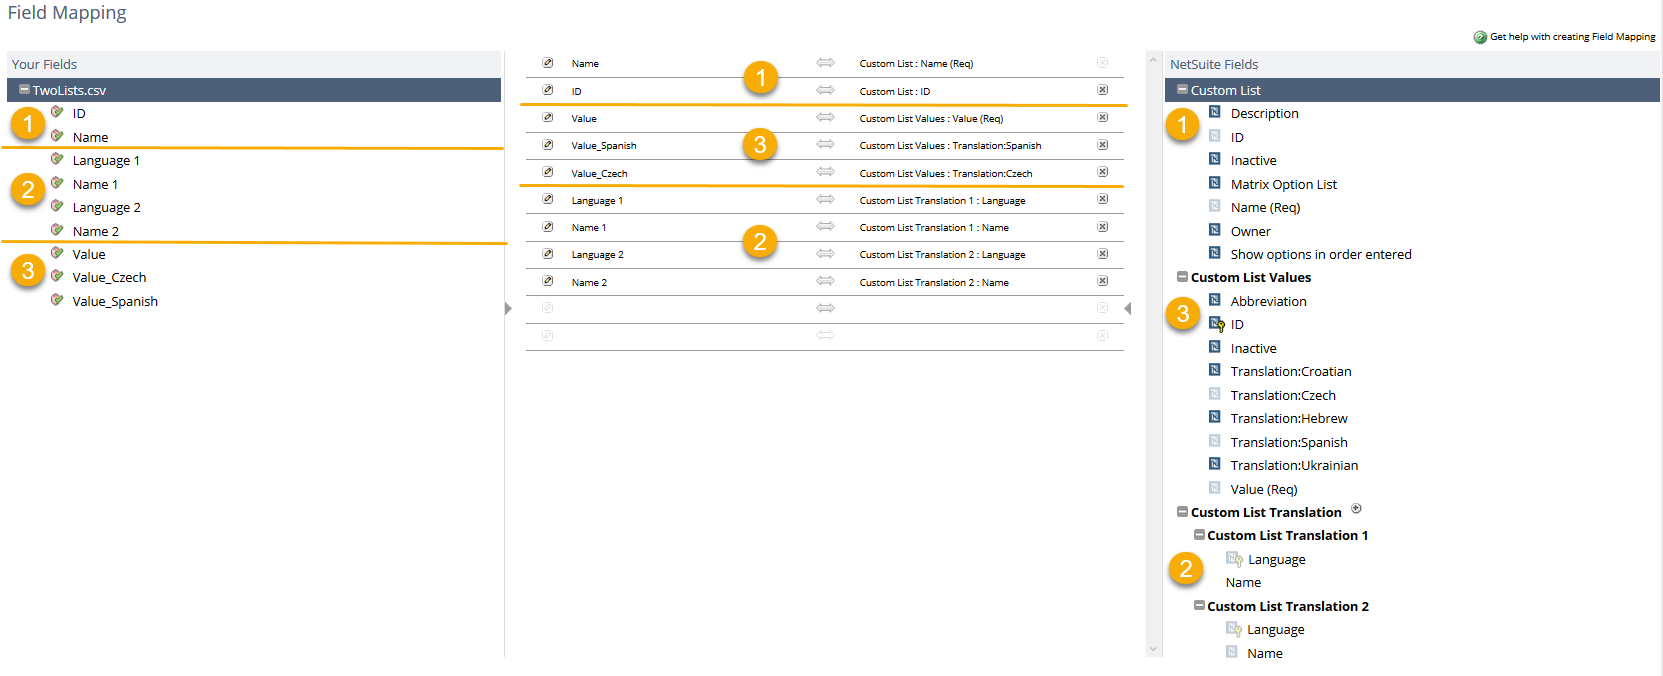
You create multiple instances because the system must know how to pair the language-name combinations in your file. The following illustration shows how you might complete your mapping in this situation:
|
1 |
Body data |
|
2 |
Custom List Translation data Since two languages are used in the CSV file, a second instance of the NetSuite fields is needed on this page. Click the plus sign next to the Custom List Translation to add another instance. |
|
3 |
Custom List Values data The mapping in Your Fields is same as in the multiple-file import. |