Avoiding Storage Issues by Using a Fallback Catalog Limit
Fallback relies on a downloaded copy of your item and price catalog. This copy is refreshed each time a sales associate logs in to the device.
However, mobile iOS and Windows devices have storage limits for a Fallback catalog. Exceeding the storage limit can cause the SCIS application to fail on a device. This limit often applies to catalogs with more than 20,000 items. See Fallback and Storage Limits for Mobile Apps for more information about storage limits.
The Fallback Catalog Limit feature limits periodic catalog downloads to your mobile devices to 20,000 item SKUs. You can select the items to include plus rely on a NetSuite script to flag and include items purchased in recent orders. Manually-selected items have priority over items flagged due to being recently purchased.
Initial Fallback Catalog Limit Download
The first time the script runs, it reviews past orders for items that weren't manually selected for inclusion. It flags and adds those unique items to the manual items until the item count reaches 20,000. These items are included in your initial Fallback item catalog.
Subsequent Fallback Catalog Limit Downloads
The next weekly run looks for items that were sold but not currently in the catalog list. Then the script removes items with the oldest transaction dates and replaces them with items from recent purchases. It also adds items recently marked to Include Item in Fallback and removes items that were inactivated. To maintain performance, subsequent catalog downloads consist of catalog updates only.
Enabling the Catalog Limit also enables using the Fallback Open Item for SKUs not downloaded. Together, these options ensure that your sales associates are covered in the event of an outage. See Avoiding Storage Issues by Using the Fallback Open Item.
Changes made to manually include or stop including items can take up to two hours to download.
Setting up a Fallback Catalog Limit and Open Item option
Use these procedures to enable a Fallback Catalog limit and configure how SCIS selects the items to include.
To adjust the scheduled query used to keep your Fallback Catalog current, see Working with the Fallback Catalog Limit Script Schedule.
Fallback must be enabled in your SCIS setup. To verify that Fallback is ready, go to Commerce > Instore > Fallback Mode Settings. If one or more Subsidiaries or Locations are highlighted, then Fallback is enabled.
1. Enable the Fallback Catalog Limit Feature
In addition to enabling a Fallback Catalog Limit, these steps enable the Open Item option.
If you've used Fallback during internet interruptions and haven't experienced issues, you probably don't need to enable this feature.
To enable the Fallback Catalog Limit:
-
Go to Commerce > InStore > Settings > Search.
-
Click Edit for your settings record.
-
Open the General subtab.
-
Check the Enable Fallback Catalog Limit box.
-
Click Save.
2. Add Fallback Catalog Limit Field Sets
These field sets add the catalog limit check boxes to the item record page.
To add Fallback Catalog Limit field sets to your website:
-
Go to Commerce > Websites.
-
Click Edit for the website associated with your SCIS setup.
-
Open the Field Sets subtab.
-
Locate the SCIS Fallback section.
-
Open an insertion field by clicking in the right-hand column of that section.
-
Add the field sets from the Field Set list:
-
Click the list icon.
-
In the - Select - field, begin entering the first field set:
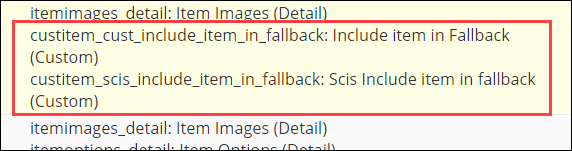
Include item in Fallback (Custom)(You can also scroll through the list.)
-
Select the set and click Add.
-
Begin entering the second field set:
Scis Include item in fallback (Custom) -
Select the set and click Add.
-
Click Submit.
-
-
Click OK.
You'll see the two sets added to the SCIS Fallback section.
-
Click Save.
Note:If you disable the Fallback Catalog Limit option later, it's not necessary to remove these field sets.
3. (Optional) Choose Specific Items to Include
In addition to using the Fallback Catalog Limit script to identify items from recent orders, you can choose which items should always be available in Fallback. Items selected manually using these steps take priority over items identified from the transaction history. These manual items aren't replaced when the history changes.
To choose items for your Fallback Catalog Limit:
-
In NetSuite, go to Lists > Accounting > Items.
-
Expand the Filters list and select Inventory Item.
-
Locate the item you want and click Edit.
-
Open the Custom subtab.
-
Check the Include Item in Fallback box.
-
Click Save.
-
Repeat for the next item as appropriate.
Working with the Fallback Catalog Limit Script Schedule
You can adjust when the script reviews orders and items for inclusion in the Fallback Catalog download. You might make this change to ensure orders from your busiest days are included in the count sooner. The default runtime is weekly on Monday night.
To adjust the Fallback Catalog Limit script schedule:
-
In NetSuite, go to Customization > Scripting > Scripts.
-
Expand the Filters list and select Map/Reduce.
-
Find the Check fallback items script and click View.
-
Open the Deployments subtab and click the script Title.
-
To adjust the Schedule, click Edit and change as you want.
-
Open the Parameters subtab.
-
The Total Items value is the number of items to be included in your Fallback Catalog Limit.
Warning:You shouldn't increase the Total Items to greater than 20,000. Otherwise, your devices can experience storage issues.
-
Choose the period to Prioritize Items Sold In.
This field optimizes how NetSuite populates your Fallback Catalog. The script reviews the transaction history and identifies items that are likely to be purchased. Items are identified by how many times they were sold during the previous period.
The period length should be based on your business volume. If the number of items regularly sold is large, you can limit the number of unique items by reducing the period length. For example, your catalog might be more current or focused if you limit transaction history to the previous quarter or month instead of the previous year.
If the number of items identified as frequent purchases exceeds the Total Items limit, NetSuite only includes the items found before the limit was reached.
Note:Inventory item records with Include Item in Fallback checked are added to the Fallback Catalog first. Items found by the script are added next.
-
Click Save.