Configuring the SCIS Mobile App
Installation of the SCIS for iOS or SCIS for Windows mobile app is required.
This section provides instructions for configuring the SCIS for iOS or SCIS for Windows mobile app after installation. After you've installed the mobile app, you can set up Guided Access or Full Screen Mode. This is optional for iOS devices, but recommended for Windows devices. For more information, see Setting Up Guided Access.
To configure SCIS mobile apps on iPads and Windows tablets:
-
Launch SCIS on your tablet.
If you use an iPad, tap Configure Account, after the Welcome screen.
-
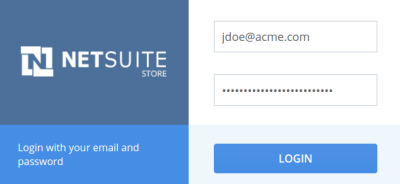
Log in to SCIS. Enter your login credentials.
-
If you have access to more than one NetSuite account with SCIS installed, you can access any of those accounts. Choose an account.
-
Choose a role that is capable of configuring devices, such as the Administrator role.
-
On the next screen, the Device ID is automatically configured. Enter the internal website ID for your SCIS Website.
To find this ID:
-
Log into NetSuite.
-
Go to Commerce > Websites > Website Lists.
-
Click Edit for the website you'll use with the point-of-sale mobile device.
-
View the URL (web address) in your browser's address bar. The internal website ID is the digit or digits at the end, after n= or id=.
-
Click Cancel to exit the Website Setup page.
-
-
Choose the following configuration settings based on the operating system on your tablet:
-
iOS devices:
-
Guided Access - Optional.
-
Printing Technology - Choose Airprint.
-
-
Windows devices:
-
Assigned Access - An administrator can configure assigned access to limit an existing user account to use only SCIS. Refer to Microsoft Docs for configuration steps. This is best practice.
Note:Ensure that peripherals used by the Windows device are installed after the SCIS for Windows application is configured on the device, but before the device is placed in Assigned Access mode. You may not be able to access certain websites for driver installation when the device is in Assigned Access mode.
-
Printing Technology - Select Star or Epson, depending on the printer you'll use with this device. Note that AirPrint isn't supported on Windows devices using SCIS.
Important:You must download the appropriate drivers for your printer on the mobile device to use Star native printing. To learn which printers are supported, see Compatible Peripherals.
-
-
-
Click Done.
When you click Done, an SCIS Mobile Device record is created in NetSuite, configured for Production.
Device configuration is now complete and you're redirected to the SCIS login screen. Log in using your existing credentials to access SCIS. Next, set up your printing preferences. For more information, see Setting Up Receipt Printers for SCIS.
Setting Up Guided Access
You can enable Guided Access on an iOS tablet or a Windows tablet. Guided Access is a type of 'kiosk' view, which keeps the device in a single application and prevents unauthorized use of additional applications on the device. Guided access is optional for using SCIS for iOS, but you should enable guided access when using SCIS on Windows.
The steps here cover Guided Access for iOS tablets. Review your Windows tablet documentation for the Windows steps.
Before placing the device in Guided Access mode and handing it over to a sales associate, install any required peripherals. Check the manufacturer's handbook for specific setup requirements for peripherals. For more information, see Compatible Peripherals.
To set up Guided Access on an iOS device:
-
Tap Settings > General > Accessibility.
-
Scroll to Learning > Guided Access.
-
Switch Guided Access to on.
-
Tap Passcode Settings and enter a four-digit pin code.
Note:Don't use obvious pin codes such as '0000', '1234', or any known dates or the main device Pin code.
-
Press the home button.
-
Launch the SCIS for iOS app.
-
Triple-click the home button.
-
Tap Options on the Guided Access set up screen.
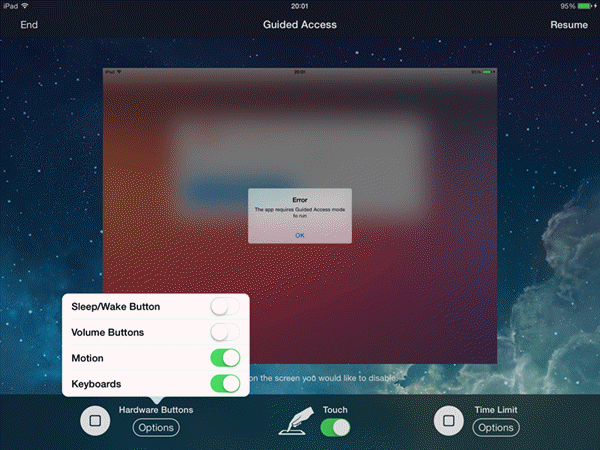
-
Set the required options. Don't enable Time Limit.
-
Tap Done to save the Guided Access preferences.
-
Tap Start to begin Guided Access and lock the device to the SCIS for iOS app.
-
Triple-click the home button to end or reset options for the guided access session, you'll be prompted to enter your Guided Access pin.
After you've finished these steps, the device is ready for the sales associate to use. Upon launching the app, the user is prompted to enter their usual SCIS login and passcode.