Attaching a Client Script to a Form
You can attach a client script to a form after you have made sure that it is a valid script, as described in SuiteScript 2.x Entry Point Script Validation.
After you attach a script to a form, it is deployed on that form and will run whenever the form is used. You can attach a client script to a custom entry form, a custom transaction form, or a custom address form.
You must have at least the Edit level SuiteScript permission to attach a script to a custom form by editing the Custom Code subtab of the form record. Users with the View level SuiteScript permission can see the Custom Code subtab, but they can't edit it.
To attach a client script to a form:
-
Go to the form that you want to attach the script to. For example, go to Customization > Forms > Entry Forms.
-
Locate the appropriate form and click the corresponding Edit link.
-
Go to the Custom Code subtab.
-
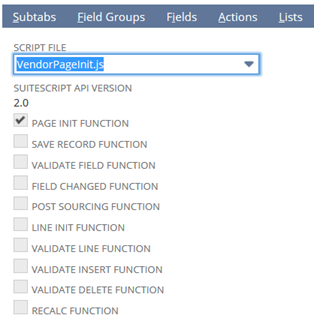
In the Script File list, select the SuiteScript 2.x script that you want to attach. If the script file you want to use hasn't yet been uploaded to the File Cabinet, you can upload it from this page. To upload a file, point to the area at the right of the list to display a Plus icon. Click this icon to display a popup window. You can use this popup window to upload a file from your local environment.
After you select the file, it is displayed in the Script File field. The SuiteScript API Version field gets updated based on your selected file. The page also updates to include a list of all possible client script entry point functions. Check marks are displayed next to the functions that are included in your script. For example, this script uses includes only the Page Init entry point function:
The boxes on the Custom Code subtab can't be edited directly. Instead, you edit the script to add or remove functions as appropriate and the boxes automatically reflect the newly added or removed functions when you save the changes to your script file (and upload it to the File Cabinet as needed).
-
Click Save.