Custom Record for Custom Content Type
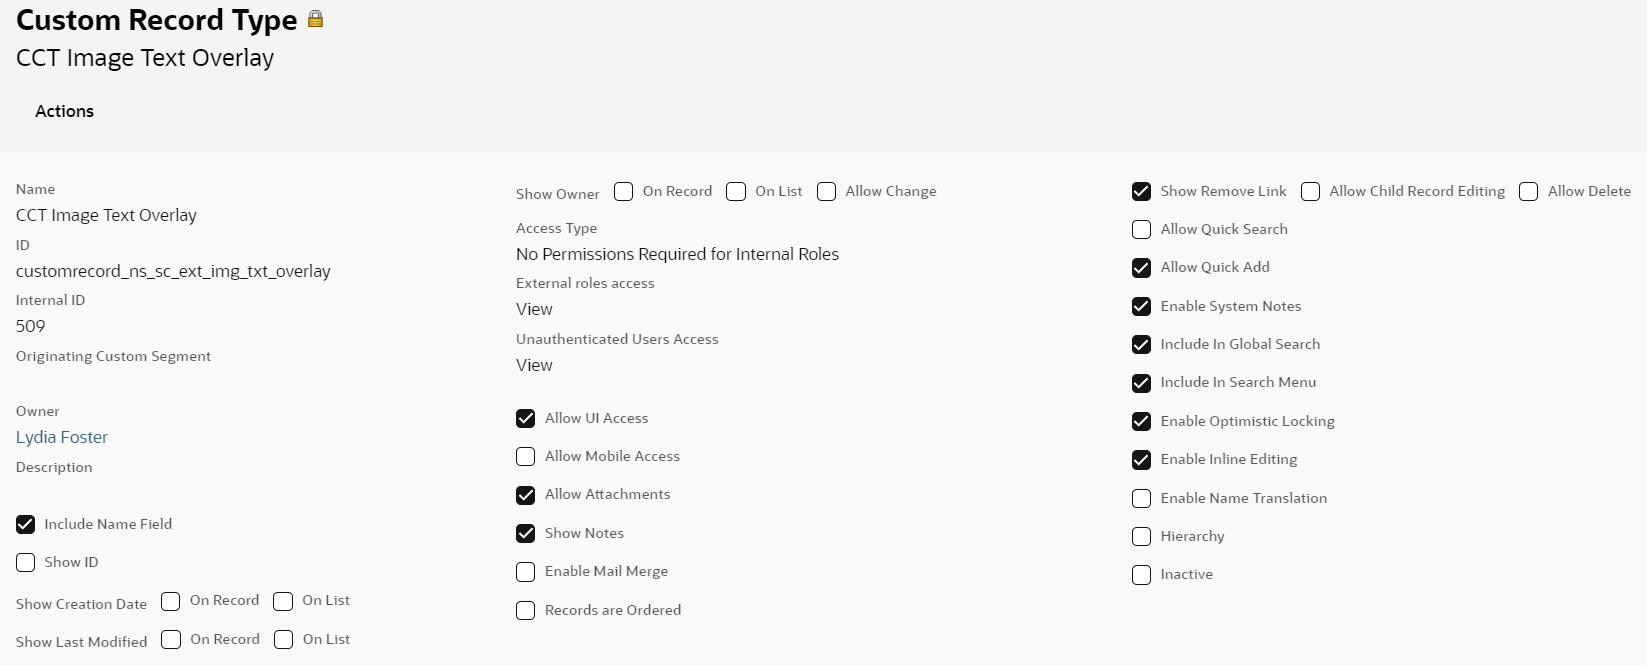
Site Management Tools (SMT) custom content types use NetSuite Custom records and fields to define the settings and values each custom content type needs. For example, if you have a custom content type that displays an image with a text overlay, you need to create a custom record for it and then add the custom fields your content needs. In the following screenshot you see the custom record for the SC CCT Image Text Overlay. As part of implementing a custom content type, you link this custom record to a matching CMS Content Type record. For more information, see CMS Content Type Record.
To let any custom employee roles log in to SMT and edit or create CMS content, set the permission access level for the custom records that are listed below to Full.
To let any custom customer roles browse and shop on your web store, set the permission access level for the custom records below to View.
-
CMS_HTML
-
CMS_IMAGE
-
CMS_MERCHZONE
-
CMS_MERCHZONE2
-
CMS_TEXT
For more information about users and roles in SMT, see Users and Roles in Site Management Tools.
Custom Fields for Custom Content Type
After you create the custom record, the next step is to set up the custom fields. The custom fields you add display in the side panel in SMT when you add the custom content type to a page. In this example, the custom fields define the information that's displayed by the custom content type. These fields include:
-
Message - A text area that lets you enter text to overlay on the image.
-
Vertical Align - Lets you select the vertical alignment for the text. In this example, the Vertical Align field is set up as a list/record type and linked to a custom list.
-
URL - Where you set the image source.
To use these custom fields in your custom content type module, use the ID assigned to each one. In this example, the IDs for custom fields are:
-
custrecord_sc_cct_iv_text - Message field
-
custrecord_sc_cct_iv_valign - Vertical Align field
-
custrecord_sc_cct_iv_imageurl - URL field
Custom content types don't support the Password field type.
After your custom content type is set up, it displays in SMT. The following screenshot shows the SC CCT ImageViewer custom content type.

Your custom content type is available in SMT only after you finish all the setup steps.
Tabs for Custom Content Type
Depending on your custom content type and the number, type, or function of fields, you may want to add tabs to organize the fields. You can add tabs in the custom record for your custom content type and assign fields to the tabs. The tabs and field setup appear in the custom content types settings in the side panel in SMT.
For more information about custom records and fields, see Custom Records Overview.
Custom Content Type Records
Each time you use SMT to add an instance of a custom content type to your site, it creates a CMS content record and a custom record for that content type. The CMS content record controls how and where your custom content displays. For details, see CMS Contents Record. The custom record for the content type saves the values for your custom content elements. For the ImageViewer example, these values include:
-
Message
-
Vertical Align
-
URL
You can view or edit custom content types in NetSuite, but it's best to make changes in SMT.
To view a custom content type record in NetSuite:
-
Go to Customizations > Lists, Records, & Fields > Record Types.
-
In the Record Types list, find your custom content type record and click List.
-
This displays all the instances of that custom content type.
Parent Child Record Associations
This information refers to SuiteCommerce or the 2019.2 release of SuiteCommerce Advanced or later.
With parent-child record associations, you can build more complex data sets in your custom content types. For example, you create a Custom Record Type named blog, then create a new CMS Page Type named blog, and, finally, you use the Custom Record Type dropdown menu to select which record type to link to your page type.
This way of creating new page types gives you many options, like adding specific templates, headers, footers, and more.
You must use SuiteScript or NetSuite to add, edit, or delete the custom records. Site Management Tools only manages the page types linked to your custom record and lets you manage the fields you created in your custom record. After you create a new page in Site Management Tools, the pop-out menu displays your custom fields when you click Landing Page, and you can manage your content there.