Associating a Contact with a Record
You can attach contacts to lead, prospect, customer, vendor, and partner records on the Contacts subtab. This lets anyone viewing the record get the names, phone numbers, and email addresses they need to communicate with other companies.
You can add new contacts while you're creating an entity record but you'll need to save a new record before you attach existing contacts.
The following instructions are for standard subtabs. To learn more about choosing which fields appear on these subtabs, see Configuring Fields or Screens.
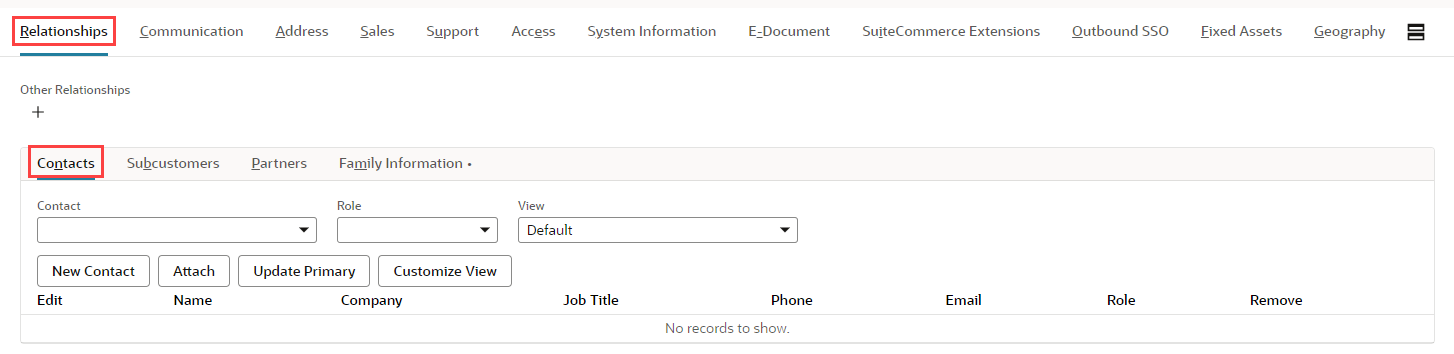
The following screenshot from a customer record shows the Relationships and Contacts subtabs with the fields and buttons of the Contacts subtab.
To attach an existing contact to a record:
-
Open the entity record for viewing.
-
In the Relationships, Contacts subtab, select a contact from the Contact list.
-
From the Role list, select this contact's role for this record.
Contact roles are one of the CRM lists at Setup > Sales > Setup Tasks CRM Lists > New.
-
From the View list, select the list view for this list of contacts.
Click Customize View to create a custom layout for this list.
-
Click Attach.
-
Click Save.
To attach a new contact to a record:
-
Open the entity record for viewing.
-
In the Relationships, Contacts subtab, click New Contact.
-
In the popup Contact page, enter information about the new contact.
-
Click Save.
To update assigned role to a contact:
-
In the Relationships, Contacts subtab, click Update Roles.
-
In the popup Update Primary page, click Edit.
On this page, you can change the role of any contact on this subtab. The following screenshot shows the popup window in edit mode with multiple contacts.

-
Click Save.