How to Use the Project Task Manager
The administrator can access the SuiteApp by default. Other roles need additional permissions to access the SuiteApp. The table below outlines the permissions required for accessing the Project Task Manager. For information about customizing roles, see Customizing or Creating NetSuite Roles.
|
Permission |
Level |
|---|---|
|
Lists > Projects |
View |
|
Lists > Project Tasks |
View Full (required for editing or creating new tasks) |
|
Lists > Work Calendar |
View |
|
Lists > Employees |
View |
|
Lists > Vendors |
View |
|
Lists > Items |
View |
|
Lists > Customers |
View |
|
Lists > Generic Resources |
View |
|
Lists > Documents and Files |
View |
|
Transactions > Track Time |
View |
|
Required if Resource Allocations is enabled: |
|
|
Lists > Resource Allocations |
View |
|
Required if Classes, Departments, or Locations, or all three options are enabled: |
|
|
Lists > Classes |
View |
|
Lists > Departments |
View |
|
Lists > Locations |
View |
If you're logged in as an administrator, you can find the Project Task Manager at Lists > Custom > Project Task Manager. When logged in with other roles, the Project Task Manager is located in the following places:
|
Center |
Navigation |
|---|---|
|
Accounting |
Vendors > Other > Project Task Manager |
|
Executive |
Expenses > Other > Project Task Manager |
|
Support |
Cases > Other Lists >Project Task Manager |
|
Marketing |
Campaigns > Other Lists > Project Task Manager |
You can adjust the settings of your Project Task Manager by clicking the Settings icon  at the top of the chart.
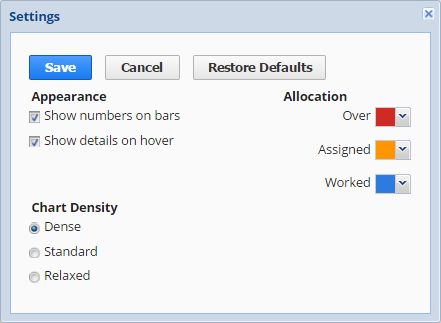
The Settings popup lets you control the appearance of your Project Task Manager. You can choose to show numbers and details, select colors for the task bars, and select how your information is displayed.
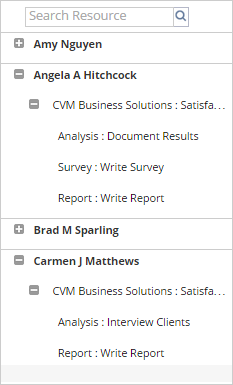
Task assignments are listed by resource in the far left pane. You can expand or collapse specific resources or projects by clicking the box beside the name.
Working with Views
You can choose which data is shown in the Project Task Manager by setting up views.
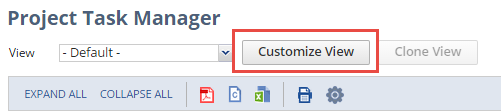
The default view shows all task assignments in your NetSuite account, but you can create your own view by clicking the Customize View button at the top of the page.
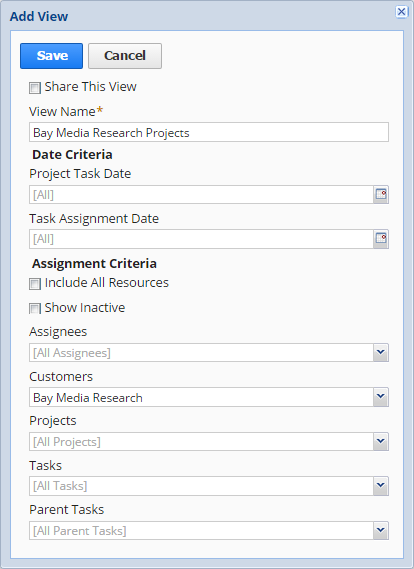
You can filter task assignments by date, resource, customer, or by task or project. If you want to make your view available to other staffing managers, check the Share This View box.
After you make a custom view, you can click Edit View to make changes to the view you are currently using. Click Clone View to create a new view from an existing one, making it faster for you to create views that are similar but with slight differences.
Each time you view the Project Task Manager, the filter you selected previously is used by default.
If your data goes over the SuiteScript usage limit, you'll see a message saying the data is incomplete. You can usually avoid this by adding more filters to limit the data shown.
Selecting a Time Period to View
You can do any of the following tochange the time period shown in the Project Task Manager:
-
Click Daily, Weekly, or Monthly in the top header row to change the chart to that time period.
-
Click the Next and Previous buttons on either side of the date range move the chart forward and backward.
In the top right corner of the chart, use the Next and Previous buttons or the dropdown to display more pages if you have lots of projects and resources.
Adjusting and Reassigning Tasks
The Project Task Manager gives you a full view of your task assignments and lets you adjust them to use resources effectively. Use the Search Resource field at the top of the page to quickly find tasks associated with specific resources.
You can modify task assignments in the chart directly or by clicking on an assignment and making changes in the Edit Task Assignment Details popup.
In the chart, you can do the following:
-
Change a task assignment's estimated hours by stretching or shortening the start or end of the bar.
-
Reassign a task by moving it up or down in the chart to another resource.
Task assignments that are set to begin As soon as possible can't be rescheduled to change their start date. Task assignments that are set to begin As late as possible can't be rescheduled to change their end date.
Changing the start date or estimated hours on preceding task assignments could affect the scheduling of later tasks that are set to begin As soon as possible.
You can reassign all task hours (actual and planned) by dragging and dropping them to a new resource. This doesn't affect time entries for reassigned tasks. Time entered for the task remains attributed to the original resource on their time transaction. When you drag and drop a task, a green check mark means the new spot is available, and a red "No" symbol means it's not allowed.
When you click on a task assignment in the chart, you can change the resource, end date, estimated work, unit cost, unit price, units %, and service item in the Task Assignment Detail pane. After making changes, click Save to update the chart.
Changing the units % or estimated hours updates the length of the bar in the chart.
Exporting and Printing
You can export and print the data displayed in your Project Task Manager by using the buttons at the top left corner of the chart.
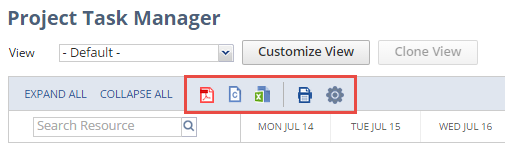
Click the icon that corresponds with how you want to export your information-PDF, CSV, Excel, or print.
If you export your data to CSV and open the CSV file in Excel, any commas or special characters won't be converted properly. You can use Excel to open your CSV files only if your resource and task names don't contain any special characters. If you use special characters, you must open your CSV file in plain text.