Editing Day Reports
Report Options
Each customize report will need to be assigned a name. This new named report will be available under your existing Shift Reports.
Next, you will can choose the required features for the report, such as the inclusion of the date. To change the selection simply click on the "off" slider to turn it on, and vice versa.
The last option is the choice to create a new page for each day of the week, this will reduce the chances of misreading the timetable.
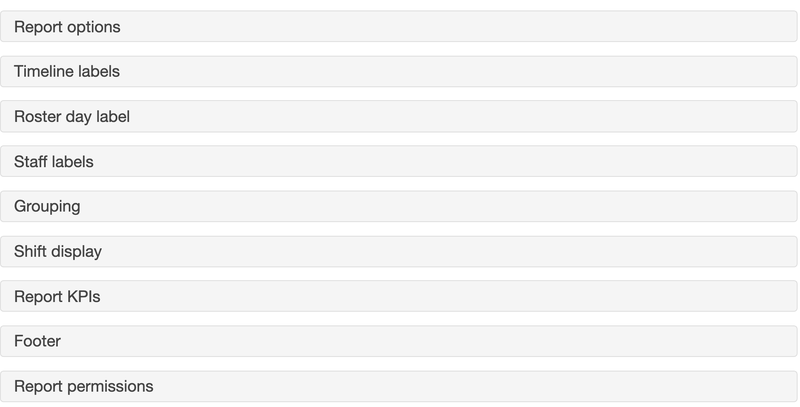
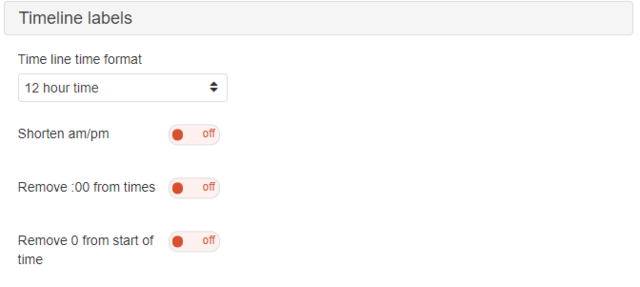
Timeline Labels
Day Reports have a useful timeline feature that appears at the top of a report, when editing a report you can change features on how the time is displayed. An example is whether it will be in 12 or 24 hour format.
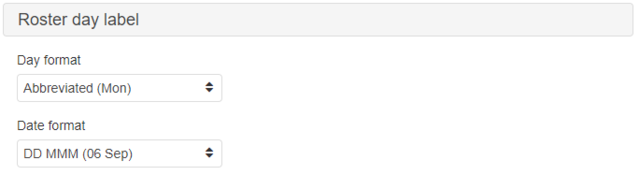
Roster Day Label
This section is mostly around the aesthetics of the report, focusing on whether you would like the day to be abbreviated or not; and the heading date format. Staff Labels
The next section is about how you require your employees details to be displayed. You firstly have to choose the order of the employees' names, this can be a mix of first name, last name, and/or preferred name.
The next two options are self explanatory, where you can choose to shorten their name with initials and/or have their WFM ID showing.
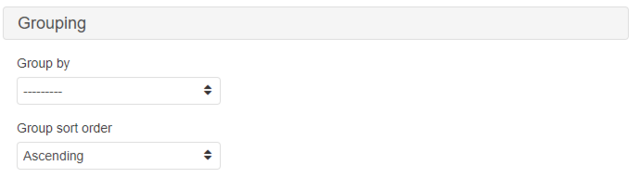
Grouping
Grouping helps segregate different employees into sections, you can choose what time or grouping you want from the selection tab. And again you are able to choose whether this is in ascending or descending order.
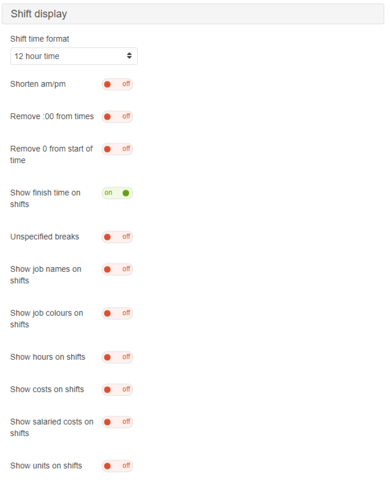
Shift Display
Shift display is the most important section as you will be able to select which key information is displayed on the report. (If a large amount of information is chosen to be displayed, privacy considerations may be applicable.)
The majority of the choices are self explanatory such as the first four options; these options focus on aesthetic features.
"Unspecified Breaks" will reduce the information given for breaks, this is helpful when employees are given breaks at a range of different times.
The next two options give you the option to include information about the employees job, and whether the color of the job shows up on the report.
The next few options focus on some key information that revolve around management. The "Show Hours" option is fairly straight forward; and the "Show Costs" option will add a new column on each day, this column will contain the daily costs for each employee.
The final two choices give you the option to show the salaried costs of the employees on their shift, and the units sold by the employees.
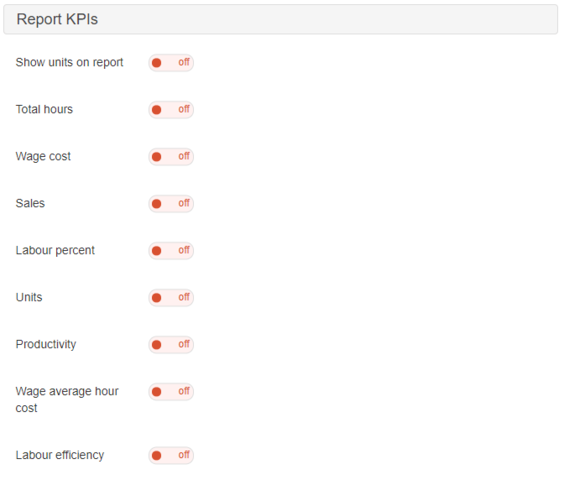
Report KPI's
Having Key Performance Indicators on a report helps management evaluate key information; this section should only be used when creating reports for management.
Every option will create another row below the shifts, this is so that it can clearly show any information for a specific day; at the end of each row there is a weekly total or average, depending on which option it is.
The first option is to choose whether you would like there to be units on any of the options below.
Total hours will create a row stating how many hours are being worked in a day from all of the employees for the location(s).
Wage Cost and Sales will state the cost of the employees scheduled on for a day, and the amount of sales predicted/made for the day.
Labor percent is an option that will compare the wages of the employees to the sales.
Productivity shows how efficient the scheduled employees can be. If you have employees scheduled on that aren't as productive as you require, you will be able to look at this report and change the schedule accordingly.
The next option is quite straight-forward, where it creates a wage average for all of the shifts on a particular day.
Labour Efficiency is a row that shows the difference from your set labor percent goal. e.g. If you set the goal to be $15000, and the wages cost $14600, the Labor efficiency would be $400.
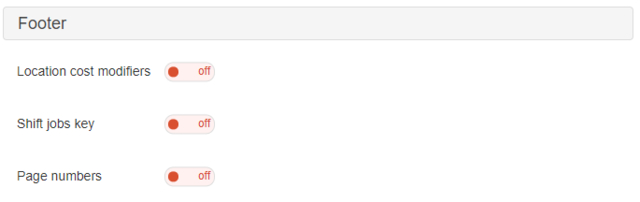
Footer
Footer gives the option to have small aesthetic features implemented on to the bottom of the page.
The first option will let you choose to see the any cost modifiers that a location has implemented.
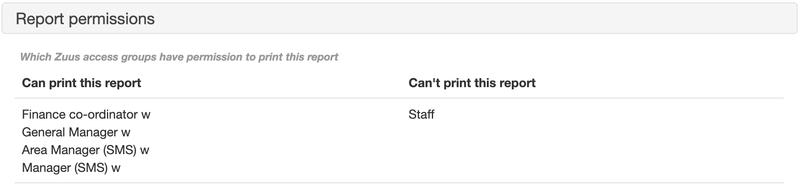
Report Permissions
Report Permissions will show a list of all of the groups that have access to the report.
The Shift Jobs Key is an option that gives a small list of each of the jobs and the colors that are affiliated with them.