Creating Allocation Rules with the Designer Screen

Allocation rules form the core of a Profitability and Cost Management application. They determine how allocated data flows and how drivers determine allocation amounts.

To define allocation rules for one POV in an application using the Designer features:

  1. On the Home page of an application with data, click Models, Models button.
  2. Click Designer, Designer button.

    The Designer screen opens. Confirm that the Waterfall Setup page is open.

  3. Enter POV data to select a year, period, and other relevant data. Then, click Refresh button (Refresh).
  4. Select a rule set, such as Activity Costing in the sample application.
  5. Click Create button (Create), and select Allocation Rule.
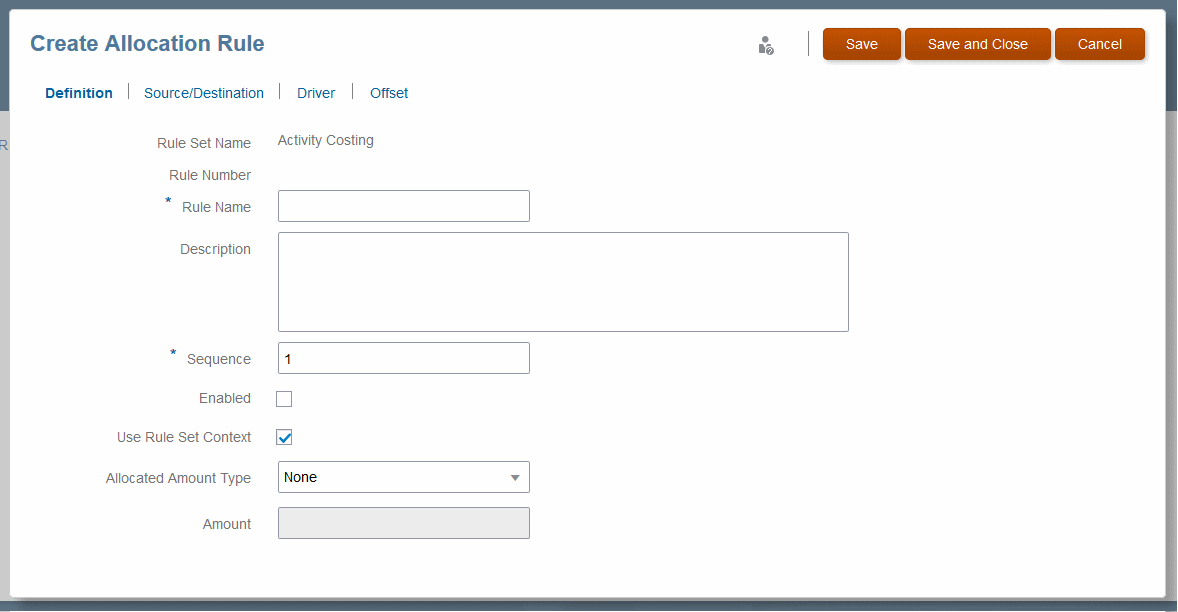
    The Create Allocation Rule screen opens to the Definition page.

    Figure A-5 The Definition Page of the Create Allocation Rule Screen


    Definition page of the Create Allocation Rule screen, as described below.
  6. Enter a name for the rule.
  7. Optional: In the Description box, enter a description of the rule.
  8. Enter a Sequence number to determine the order in which the rule runs within the rule set.

    Rules with the same sequence number will run at the same time if parallel calculation is enabled for the rule set and the computer hardware supports it.

  9. Optional: Select Enabled to indicate that the rule is active when the calculation is performed.
  10. Optional: Select Use Rule Set Context to apply the rule set context, if one was defined.

    If a global context has been enabled for the application, it is also applied.

  11. For Allocated Amount Type, indicate if the allocation amount should be interpreted as a percentage or currency, and then enter the amount.
  12. When the rule set definition is complete, click Save.

Tip:

The next step is to define a funding source and destination for the allocation rule (Defining a Source and Destination for Allocation Rules (Designer).