Setting Up the Landing Page for Registered Users
You set up the public landing page for registered users who have entered credentials to access the service.
You can configure these elements on the Registered User Landing Page:
Banner image
Alerts banner
Banner summary
Quick actions (I Want To)
Tiles
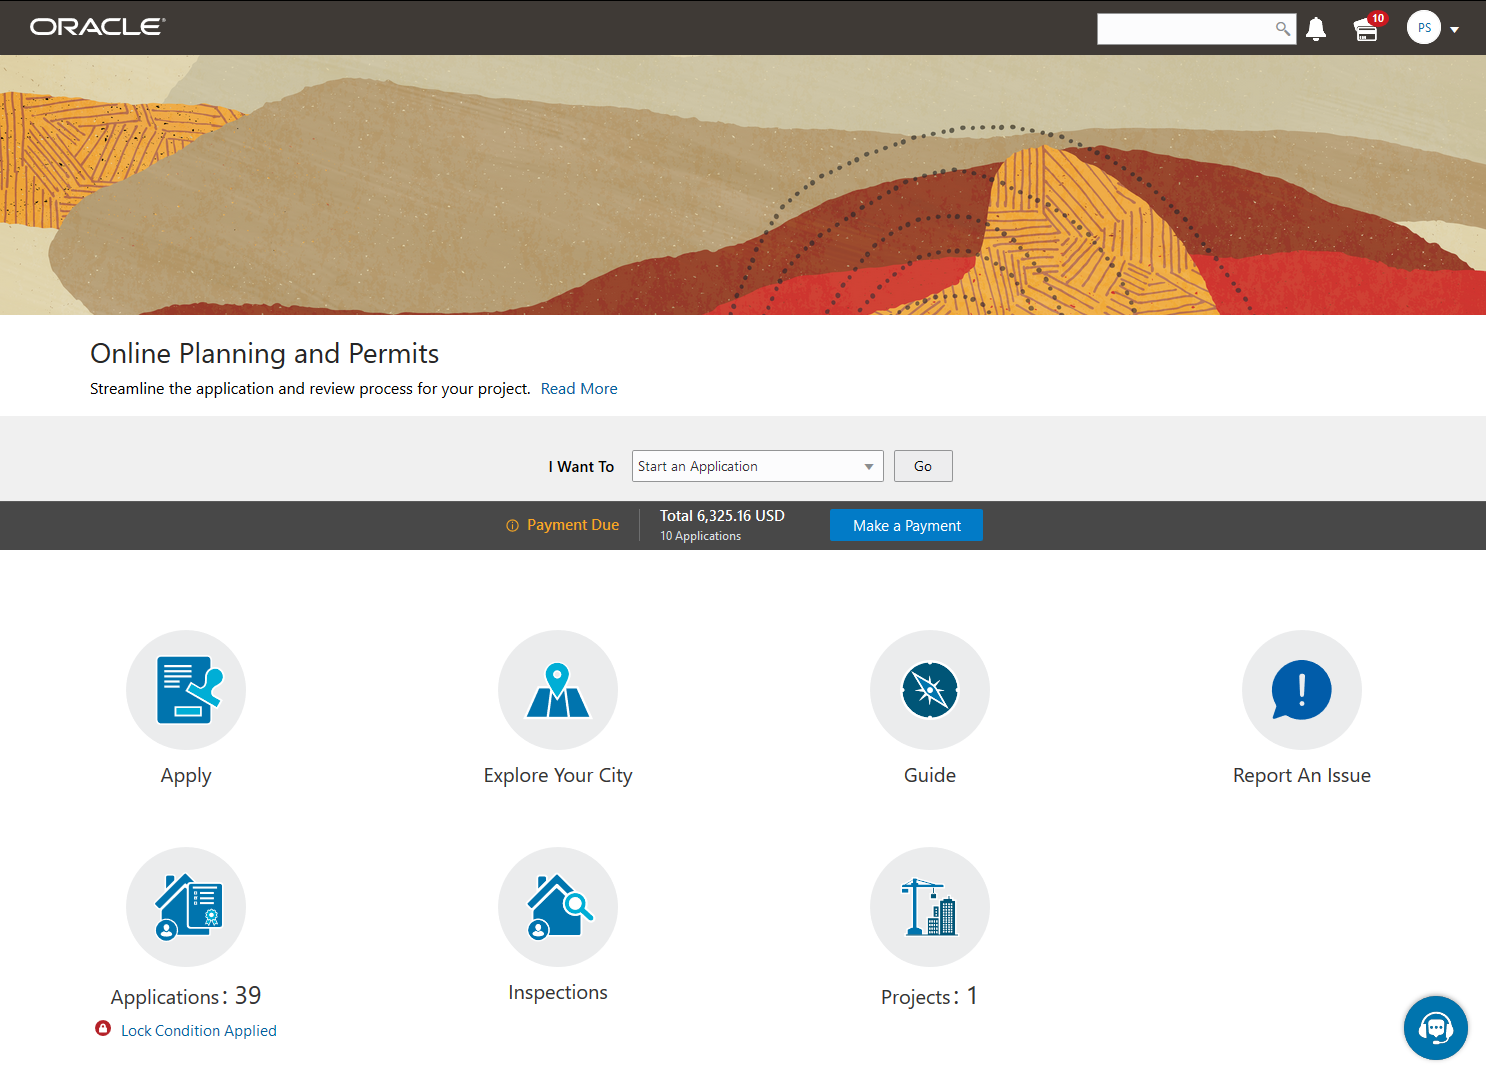
This example illustrates the Registered User Landing page.
Setting Up the Banner Image
You use the Oracle Fusion Application Appearance page to upload and store the branding images that you will use for your Public Sector system. For information about setting up the banner image see Applying Branding Images.
Defining Alerts
You display alert messages on the Registered User Landing Page in an alerts banner.
For information about setting up alert messages, see Defining Alerts and Working with Ad Hoc Communications.
Setting Up the Banner Summary
You provide welcome information on the landing page for anonymous users and registered users in the banner summary element. You can also link to an external page from the banner summary.
For information about setting up welcome information, see Defining Summary Details.
Configuring the Quick Actions Section
The quick actions section includes I Want To actions in a drop-down list on both the Registered User Landing Page and Agency Springboard. Each link provides access to specific pages and functionality. You can show or hide the I Want To bar and include the link provided in the I Want To Content folder.
This example illustrates the quick actions section, including the I Want To label, drop-down list, and Go button.

To show the quick actions section:
Select .
On the Configure Menu Structure page, select the Products menu.
Click Open Menu.
Expand the Agency Springboard Data folder.
Select the I Want To menu link:
Menu Link
Description
I Want To
Show available actions for registered users in the I Want To actions bar.
A registered user can select from these actions:
Start an Application
Estimate Fees
Go to Applications
View Recommendations
Schedule an Inspection
View Payment History
View Invoice History
The actions for agency staff and registered public users are determined by security setup.
Select the desired menu item and click the Edit button.
On the Link Details page, go to the Show On field and select an option:
All devices, Tablets and larger, or Smartphones only - Displays the quick actions section.
None - Hides the quick actions section.
Note: When you configure the quick actions section to appear on the Agency Springboard, the section also appears on the Registered User Landing Page.Click Close.
Managing Tiles on the Registered User Landing Page
You can show or make small modifications to tiles on the landing page for registered users, but you cannot delete delivered menu links. For more information about modifying tiles, see Configuring Menu Structure.
To manage tiles on the Registered User Landing Page:
Select .
On the Configure Menu Structure page, select the Products menu.
Click Open Menu.
Use the menu links for the tiles in the Anonymous Landing Page Data folder.
You can show or hide the delivered tiles:
Apply
Applications
Businesses
Business Licenses
Explore Your City
Guide
Inspections
Projects
Report an Issue
For more information about the tiles and their usage, see Overview of Public Landing Pages.
On the Link Details page for a tile, you can change the tile image by selecting any delivered image from the Icon drop-down options.