Explore the new Redwood Enhancements to the Self-Report a Life Event page
Explore the new Redwood enhancements to the self-report a life event page.
You can now choose which self-service groupings to display on the self-report a life event page.
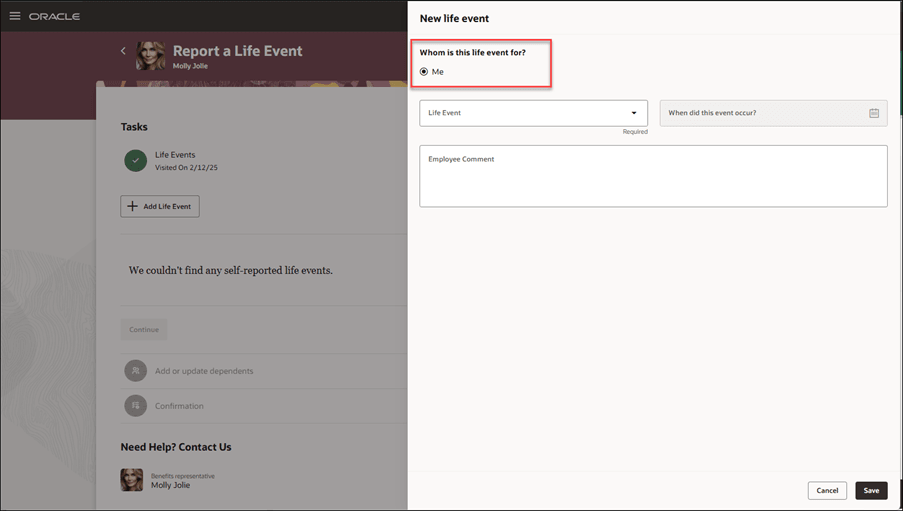
Self-Service Groupings
You can now change the self-service grouping display text on the self-report a life event page to fit your needs.

Self-Service Groupings
You can now hide Need Help? Contact Us region on the self-report a life event page or you can personalize to meet your needs.
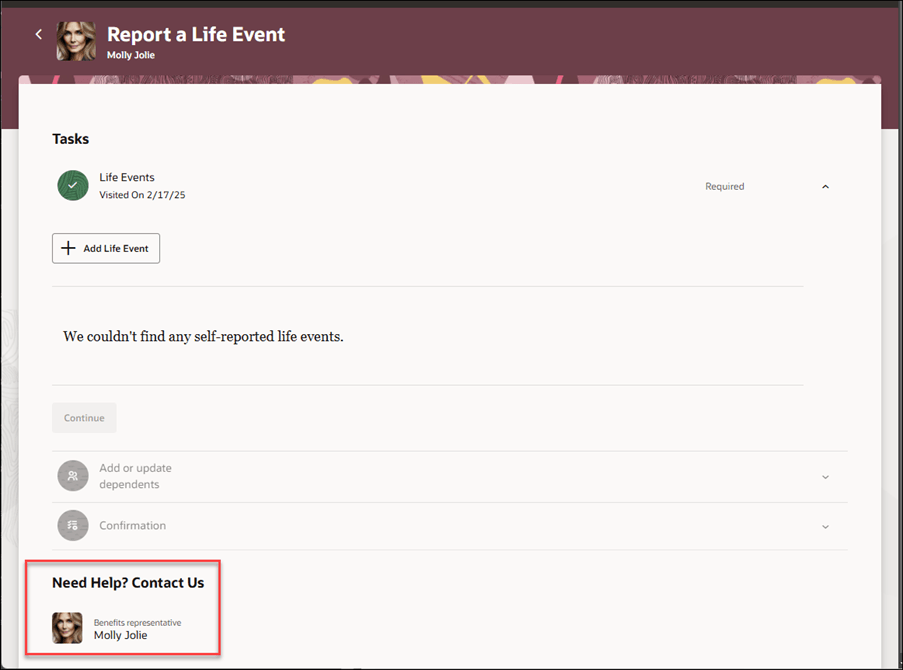
Need Help? Contact Us Region
This feature lets you experience Redwood’s high-fidelity interactions.
Here's the demo of these capabilities:
Steps to Enable
How do I personalize the self-report a life event page?
How do I personalize the Need Help Contact Us region in various Benefits pages?
Tips And Considerations
- HTML code is supported only in customNeedHelpDefaultText field.
- When creating custom Need Help? and using journeys, they will be displayed as a hyper-link and tasks will open in a drawer.
- Use caution when replacing user interface strings because some strings are used in other modules.
- In the report a life event page, you can display all self-service groupings, only two, or just one. Using the user interface strings to rename these fields gives you more flexibility in your groupings.
Key Resources
- How do I adopt Redwood for Benefits?
- Start Here- Learning opportunities to get started with Benefits Redwood Adoption
- Extending Redwood Applications for HCM and SCM Using Visual Builder Studio
- Administering Visual Builder Studio
Access Requirements
If you have custom roles, ensure that the respective privileges and aggregate privileges of the functional modules are part of your role hierarchy.
After adding the privileges and aggregate privileges, regenerate the data role and verify the user interfaces.Here's how you regenerate a role:
- Navigate to Workforce Administration > Workforce Structures > Data roles and security profiles.
- Search for the role.
- Click Edit, Next.
- Review and submit the changes.
If you have direct job roles assigned to users, you need to create data role out of the job role for the data security to work.
- As an administrator, you must have certain privileges to assign the necessary roles:
- These privileges are required for everyone who assigns Oracle Cloud Applications roles to their users:
- Cloud administrator
- Service administrator
- Application administrator
- In Oracle Identity Cloud Service (IDCS), you must have either an Identity Domain Administrator or User Administrator role. You only need these roles if IDCS role synchronization has been turned off and you need to assign the VB Studio IDCS roles manually.
- These privileges are required for everyone who assigns Oracle Cloud Applications roles to their users:
This table shows the mapping between the VB Studio IDCS roles and the Oracle Cloud Application roles:
| Oracle Cloud Application Role | VB Studio IDCS Role |
|---|---|
|
VB Studio administrator (DEVELOPER_ADMINISTRATOR) |
|
VB Studio user (DEVELOPER_USER) |