Redwood: Manage Planning Level Profiles Using a New User Experience
You can use the Redwood user experience to view, create, modify, duplicate, or delete a planning level profile. Using this capability, you can define exactly which hierarchies (for example, Customer) and levels (for example, Customer Site) planning data should be aggregated to. After defining the planning level profile, you can run the scheduled process named Aggregate Collected Planning Data to aggregate historical data. You can then reference that profile in a plan so that it reads, forecasts, and analyzes data at the chosen aggregate level going forward.
In the Redwood work area named Supply Chain Planning, for a demand plan, click More Actions > View More to open the Actions drawer, and then click Planning Level Profiles in the Configuration section.
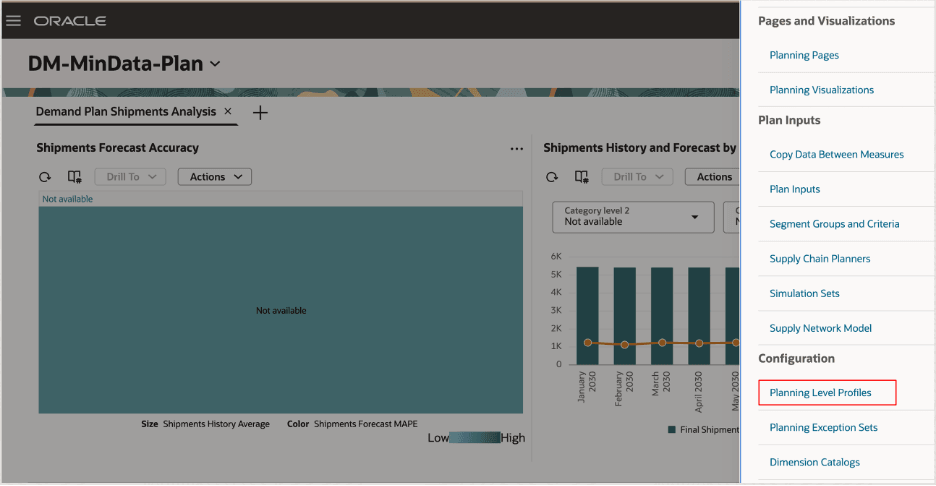
Actions Drawer for Demand Plan
The Planning Level Profiles page will open on a new tab and display a list of existing planning level profiles.
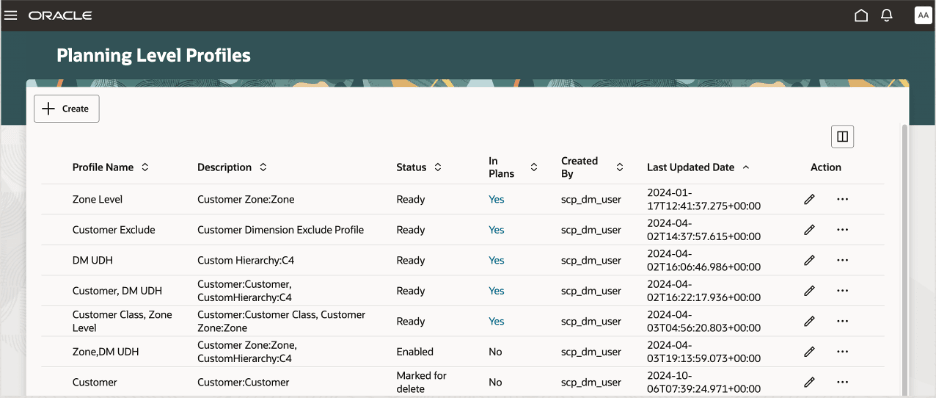
Planning Level Profiles Page
You can use the sorting options for each column. Also, you can click the Customize Columns icon to open the Columns dialog box, in which you can arrange the columns and select those that you want to show or hide on the page.
You can perform these actions:
- Create a planning level profile.
- Duplicate a planning level profile.
- Edit a planning level profile.
- Delete a planning level profile.
- View the associations for a planning level profile.
Create a Planning Level Profile
Note these points about creating a planning level profile:
- You can create a planning level profile by clicking the Create button.
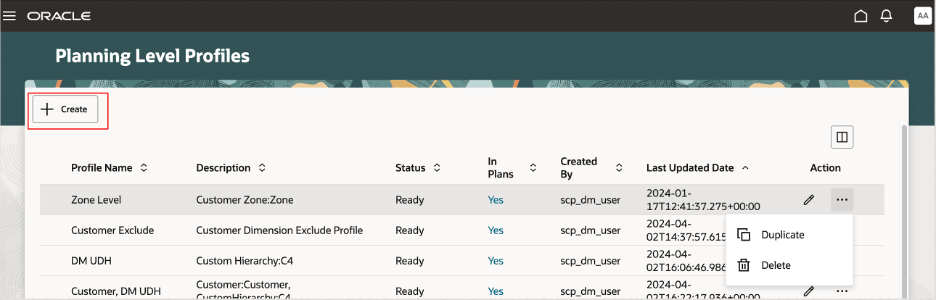
Create Button on Planning Level Profiles Page
- In the drawer named New planning level profile, you can provide the name and description and select aggregation levels for the Customer dimension.
When you click Create, the planning level profile is created, and a confirmation message is displayed.
Once the planning level profile is created, you can see it on the Planning Level Profiles page.
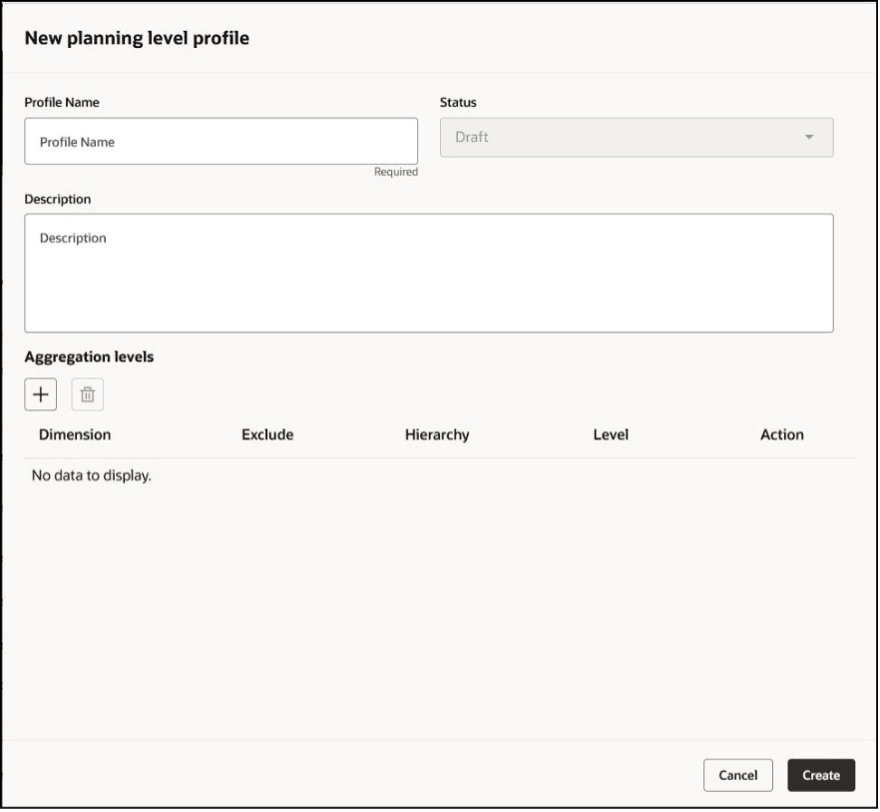
Drawer Named New Planning Level Profile
- When the planning level profile meets your business requirements, you can change the status to Enabled. The planning level profile will be ready for submission through the scheduled process named Aggregate Collected Planning Data.
- Once the planning level profile is processed by the scheduled process, the status will be automatically updated to Ready. You can then select the planning level profile on the Scope tab in the Plan definition step in the guided process for creating a demand plan.
Duplicate a Planning Level Profile
Note these points about duplicating a planning level profile:
- You can create a planning level profile by duplicating an existing one.
Then, you can edit the new planning level profile and use it in your plan after aggregated data is available.
- For the planning level profile you want to duplicate, in the menu in the Action column, select Duplicate to open the drawer named Duplicate planning level profile. The planning level profile being copied is indicated in the drawer.
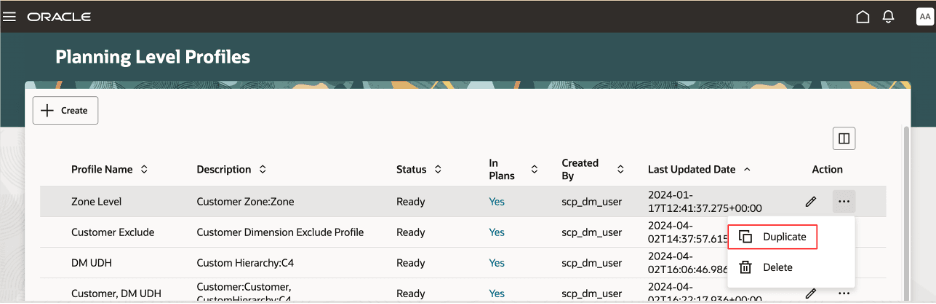
Duplicate Option on Planning Level Profiles Page
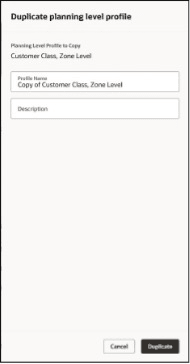
Drawer Named Duplicate Planning Level Profile
- You can enter a name and description for the new planning level profile.
When you click Duplicate, the planning level profile is duplicated, and a confirmation message is displayed.
- If any errors or warnings occur, they will be displayed at the top of the page.
Edit a Planning Level Profile
Note these points about editing a planning level profile:
- For the planning level profile you want to edit, click the Edit icon in the Action column to open the drawer for the planning level profile.
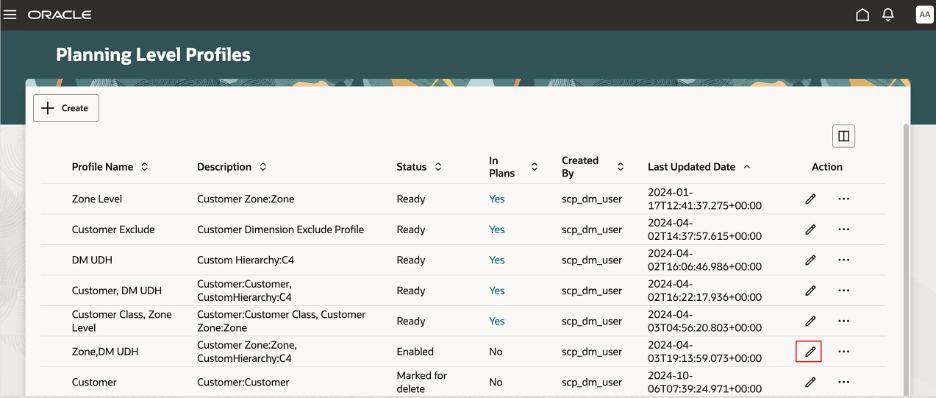
Edit Icon on Planning Level Profiles Page
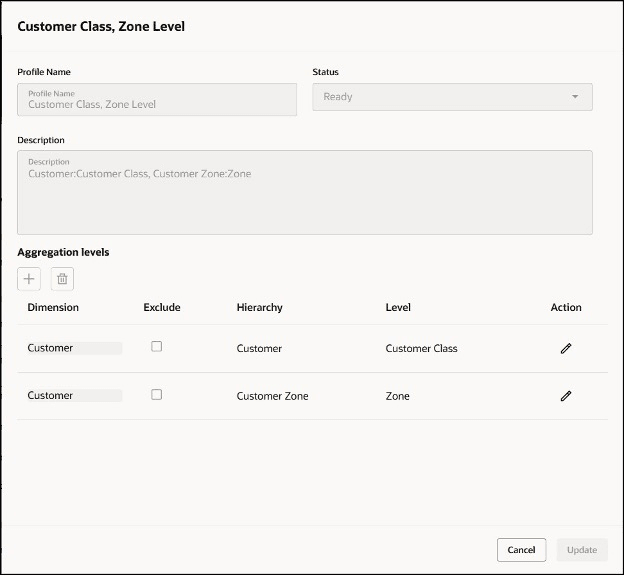
Drawer for Editing Planning Level Profile
- In the drawer for the planning level profile, you can review the details and edit them.
If you have view privileges, you can only view the details. If you have edit privileges, you can edit the planning level profile.
- You can click Update to save the changes.
You will see a confirmation message.
Delete a Planning Level Profile
Note these points about deleting a planning level profile:
- For the planning level profile that you want to delete, in the menu in the Action column, select Delete.
In the warning message, click Delete.
The status of the planning level profile is changed to Marked for delete, and the planning level profile is deleted when you run the scheduled process named Aggregate Collected Planning Data.
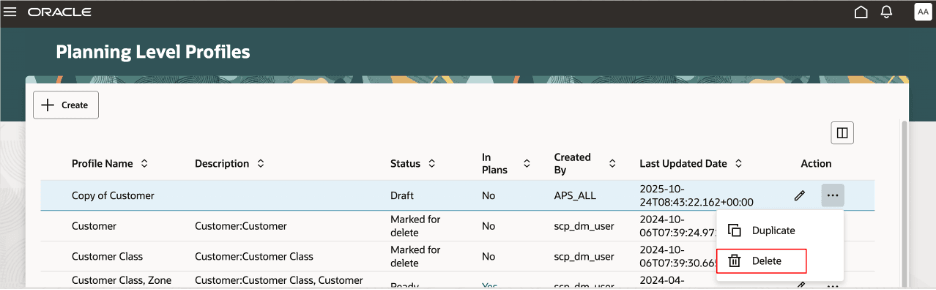
Delete Option on Planning Level Profiles Page
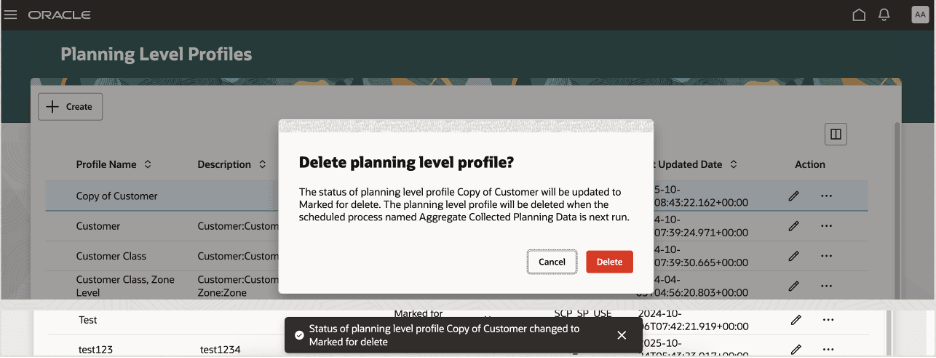
Warning and Confirmation Messages for Deleting Planning Level Profile
- You won’t be able to delete the planning level profile if it’s associated with any plans. In this case, the Associations drawer will open and indicate the plans that contain the planning level profile.
View the Associations for a Planning Level Profile
If a planning level profile is associated with plans, the Yes link will be displayed in the In Plans column. Click the link to open the Associations drawer that displays a list of the plans that use the planning level profile.
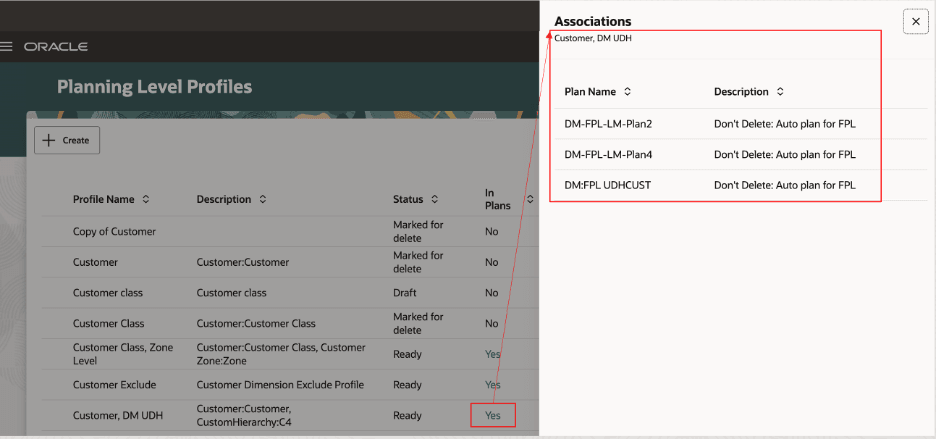
Associations Drawer for Planning Level Profile
Steps to Enable and Configure
You don't need to do anything to enable this feature.
Key Resources
- Refer to the Cloud Applications Readiness content for the following features for Oracle Fusion Cloud Supply Chain Planning:
- Plan at Flexible Levels for the Customer Dimension (24A)
- Redwood: Manage Plans Using a New User Experience (25B)
- Redwood: Create Demand Plans and Edit Demand Plan Options Using a New User Experience (25C)
- Redwood: Run Demand Plans Using a New User Experience (25B)
- Increase Performance of the Aggregate Collected Planning Data Scheduled Process when Run in Net Change Mode (24B)
- View Open Sales Orders in Plans with Aggregated Customer Levels (24D)
- Copy a Measure Data Between Plans with Different Customer Aggregation Levels (24D)
- For information on Planning Level Profiles, refer to the chapter titled Planning Levels Profiles in the Using Demand Management guide on the Oracle Help Center.
- Visit https://redwood.oracle.com/ for more information about the Redwood experience.
Access Requirements
Users who are assigned a configured job role that contains these privileges can access this feature:
- Edit Planning Level Profiles (MSC_EDIT_PLANNING_LEVEL_PROFILES_PRIV)
- View Planning Level Profiles (MSC_VIEW_PLANNING_LEVEL_PROFILES_PRIV)
These privileges were available prior to this update.