Add New Companies and Contacts to Eloqua
You can add companies and contacts to Oracle Eloqua by following these steps.
Topics:
Watch this video to see how to find new leads from DaaS.
- Tasks
- Search for Data in DaaS
-
The first step to finding companies or contacts is to search DaaS. Click
 Search.
See Use Advanced Search.
- Export Data from DaaS
-
When you export data from DaaS, you select a mapping between the attributes in the search export file that you create and those in Eloqua. You can use a provided mapping or you can create a new mapping. Then, you export the company data into a file for later import.
-
From your search results, click Select Companies to Export or Select Contacts to Export.
-
Choose Export All for everything listed in the Results section.
-
Choose Export Selected for selected items in the Results section.
-
-
In the Export dialog, complete the fields using the descriptions in the following table:
Field
Description
Name
Enter a unique name for your export mapping. Consider a name that matches the name of the company or contact you are targeting; for example,
company_company_exportorcompany_contact_export.If you don't specify a name, then
DAAS_COMPANY_EXPORT_year_month_day_timeis applied to a company mapping andDAAS_CONTACT_EXPORT_year_month_day_timeis applied to a contact mapping.Description
Optionally, enter a description for the export mapping.
Mapping
Select a Marketing Cloud mapping from the list. For most match export jobs, you can use the default MarketingCloudCompanyMatch for companies, MarketingCloudContactMatch for contacts or MarketingCloudContact&CompanyMatch for both.
Default mappings set by the administrator cannot be edited or deleted. See Edit Marketing Cloud Mappings. If you need to add fields, you can create a new mapping by clicking Create Mapping then selecting Marketing Cloud from the Template Type list.
Note: New mappings are created using the existing Marketing Cloud template map definition. You may want to create a new mapping if you only need a subset of the provided attributes, or if you created a custom attribute in Eloqua that you need to map to a DaaS attribute.
The Create Mapping page displays with the attributes discovered in your search of DaaS. Now, you must map those attributes to the attributes in Eloqua. When you select the Marketing Cloud template, DaaS automatically maps the discovered attributes to those in Eloqua.
-
Use the following elements to complete the mapping:
Element
Description
Name
Enter a unique name for your export mapping.

Click this icon to remove any attributes you don't want.
Add Attribute
Use this to add any attributes you extended in Eloqua.
Or, add an attribute mapping that you accidentally removed but that you still want added. For each drop-down list displayed, select the attribute or object.
See Edit Marketing Cloud Mappings for information about Marketing Cloud attributes.
-
Click Save & Select. The Select Mapping dialog appears.
-
From the Mapping list, select the mapping that you just created, and click Download to save the file to your local drive.
-
When prompted, save the file to a location on your machine in CSV format.
-
View the contents of the file to see the number of records.
-
- Import Data into Eloqua
-
Next, import the CSV file into Eloqua:
-
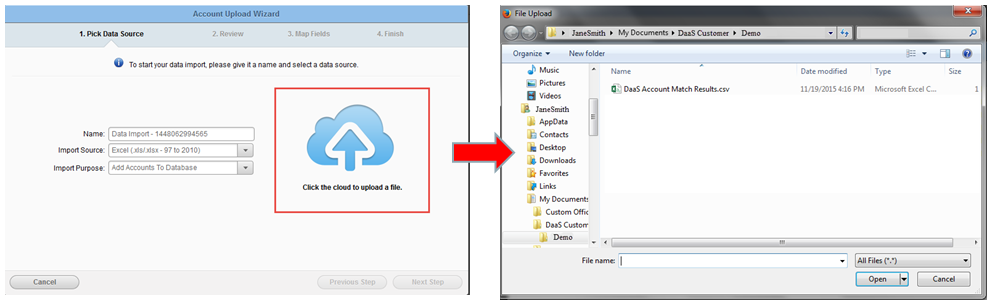
In Eloqua, from the Contacts tab, navigate to Contacts, and click Upload.

-
Upload the contact file you downloaded from DaaS.
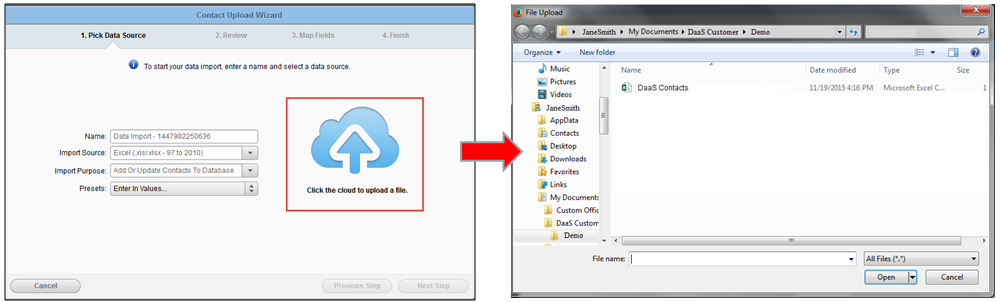
-
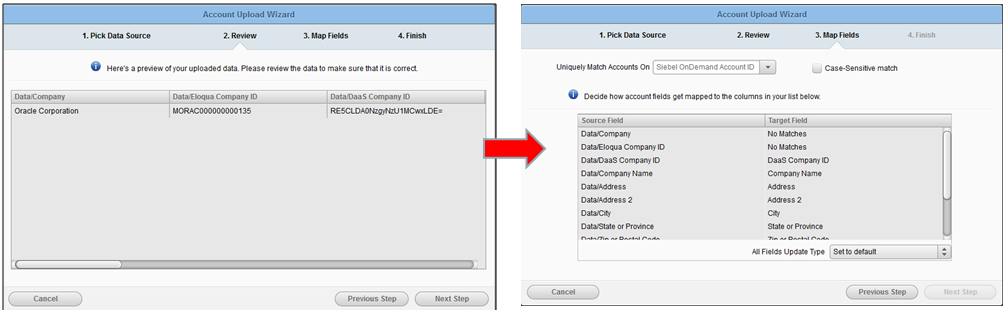
Review the mapping.
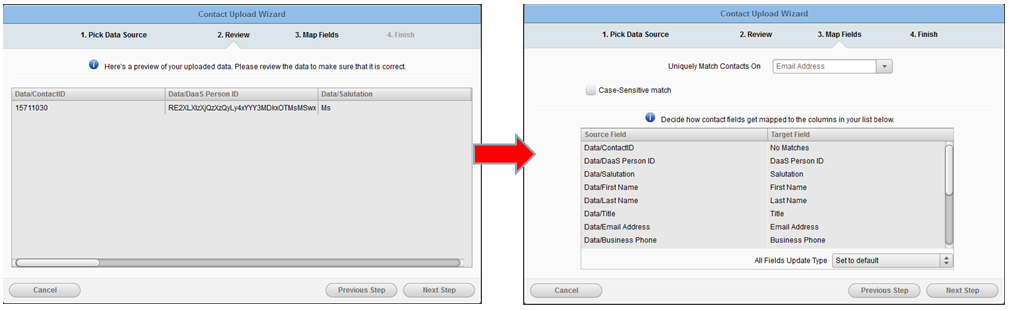
-
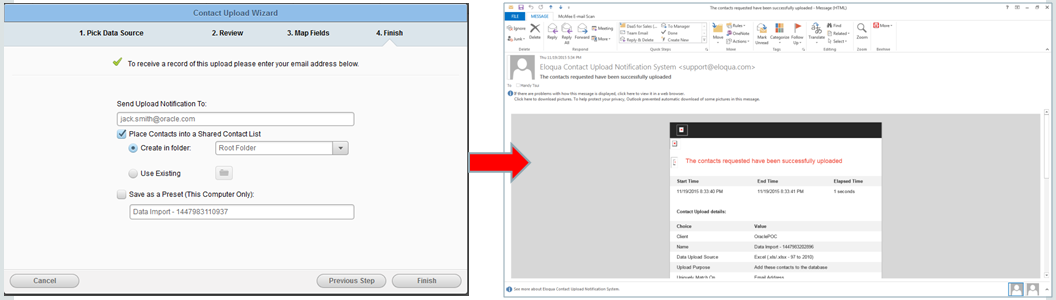
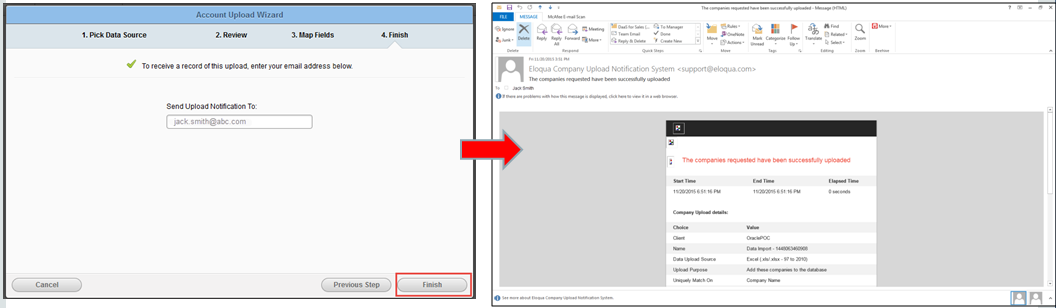
Enter your email address, select to receive confirmation email for upload, and click Finish.
There are two ways to store data in Eloqua:
-
Store both contact and company attributes on the contact record in Eloqua.
-
Store contact attributes on the contact record, and store company attributes on the account record, using the DUNS Number to connect them.
If you already uploaded both the contact and company data into the contact records, then there's no need to proceed with finding the company.
-
To additionally find the company associated with this new contact, follow these steps:
-
Prepare the file to find companies in DaaS.
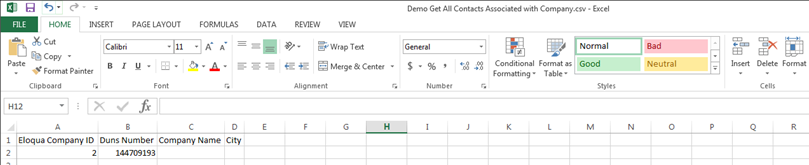
-
Upload the file with the DUNS number for matching.
-
Perform company match based on the DUNS number.
-
Export the results, and save the file to your machine in CSV format. Downloaded company record:

-
In Eloqua, from the Contacts tab, navigate to Accounts, and click Upload.

-
Upload the accounts.
-
Review the mapping.
-
Enter your email address, select to receive confirmation email of upload, and click Finish.
-
- Verify the Import of Data into Eloqua
-
To check that the company or contact data from DaaS imported successfully, view the uploaded record in Eloqua; for example:

Prerequisite: Create Fields and Views in Eloqua
An Eloqua administrator must create certain fields and views before users can add or enrich data from DaaS. This is a one-time task.
First, add the following DaaS fields to Eloqua:
| Object | Display Name | Data Type | Field Type | Description |
|---|---|---|---|---|
|
Contact |
DaaS Person ID |
Text |
Textbox |
The unique ID of the contact in DaaS, used to look up the same contact in DaaS in the future for updated contact data. |
|
Company |
DaaS Company ID |
Text |
Textbox |
The unique ID of the company in DaaS, used to look up the same company in DaaS in the future for updated contact data. |
|
Contact |
DUNS Number |
Text |
Textbox |
The unique D&B ID of the company on the contact record. |
|
Company |
DUNS Number |
Text |
Textbox |
The unique D&B ID of the company on the company record. |
-
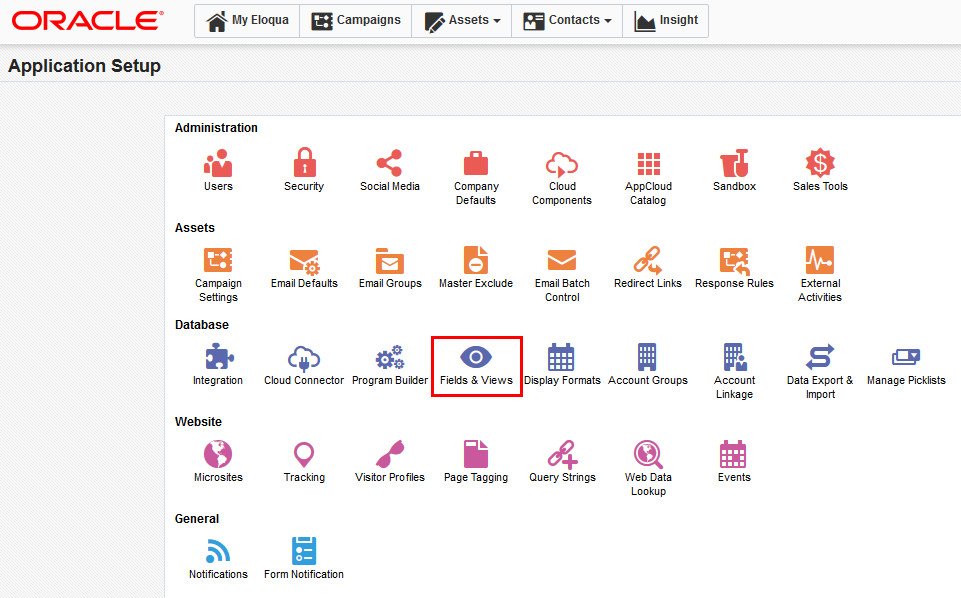
Log on to Eloqua, and from the wrench icon, select Setup.
-
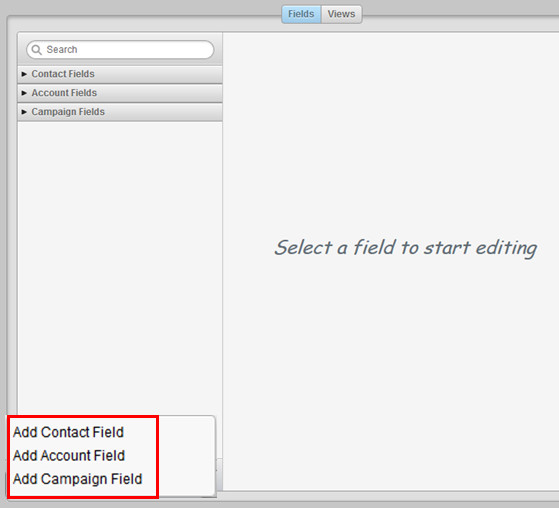
Select the Fields and Views tab.
-
On the Fields tab, click the + button to add a field. Select the type of field (Contact or Account) as shown at the beginning of this task.
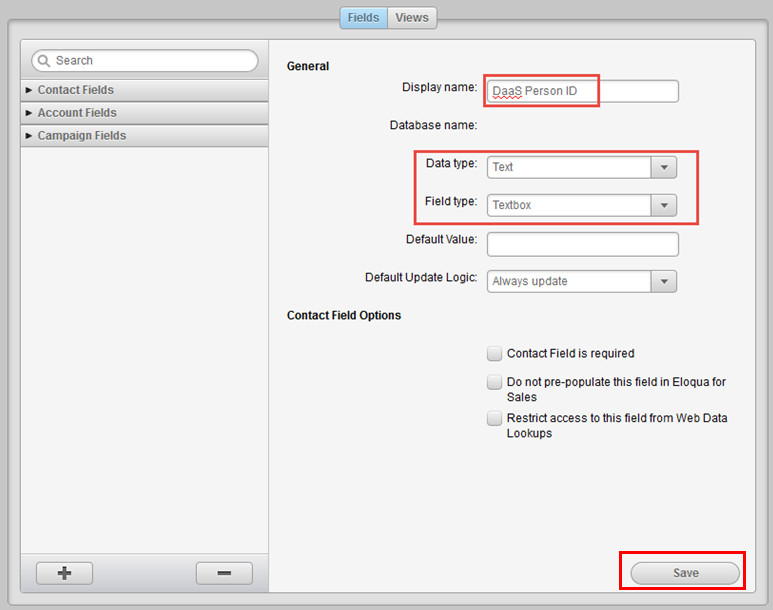
-
Enter the Display name, Data type and Field type for that field as shown at the beginning of this task, and click Save.
-
Repeat until you have entered all four fields shown at the beginning of this task.
Next, on the Views tab, add the DaaS for Sales views to Eloqua.
-
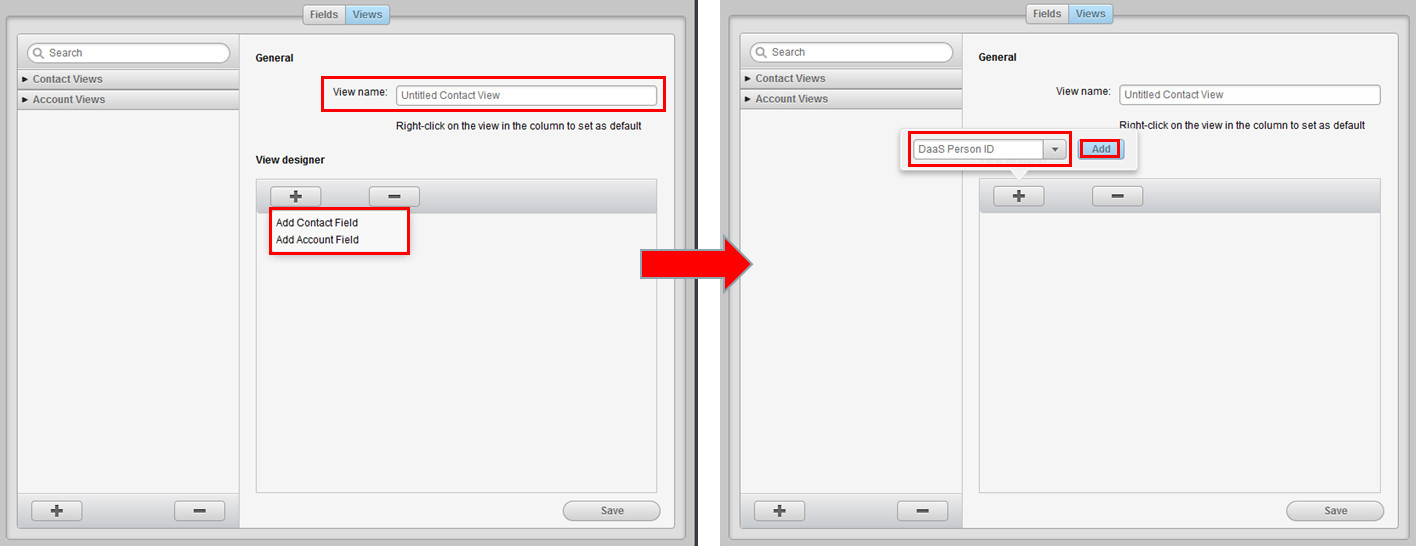
Click the + button and select to add either a contact view or an account view.
-
Add fields to the view by entering the view name and selecting the type of field (contact or account).
Then enter the type of field you want to add (like DaaS Person ID), and click Add.
-
Click Save, so that you can use the view when adding companies and contacts from DaaS.
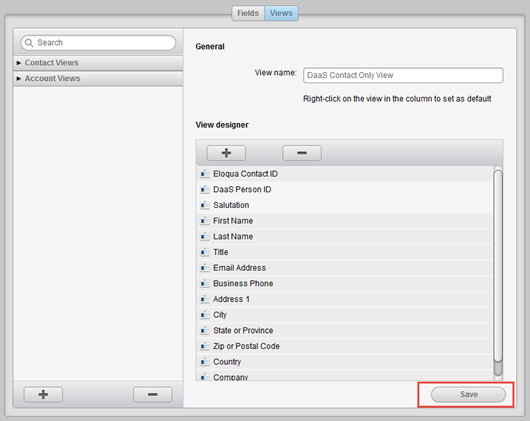
The following views should exist in Eloqua for users to add or enrich data from DaaS.
| Field Name | Description |
|---|---|
| DaaS Company ID | Custom field to capture unique ID of contact from DaaS |
|
Eloqua Company ID |
Eloqua unique company ID |
|
Company Name |
Eloqua standard field |
|
Address |
Eloqua standard field |
|
Address 2 |
Eloqua standard field |
|
City |
Eloqua standard field |
|
State or Province |
Eloqua standard field |
|
Zip or Postal Code |
Eloqua standard field |
|
Country |
Eloqua standard field |
|
Business Phone |
Eloqua standard field |
|
Fax |
Eloqua standard field |
| DUNS Number | The unique D&B ID of the company on the company record. |
| Field Name | Description |
|---|---|
|
DaaS Person ID |
Custom field to capture unique ID of contact from DaaS |
|
Eloqua Contact ID |
Eloqua unique contact ID |
|
Salutation |
Eloqua standard field |
|
First Name |
Eloqua standard field |
|
Last Name |
Eloqua standard field |
|
Title |
Eloqua standard field |
|
Email Address |
Eloqua standard field |
|
Business Phone |
Eloqua standard field |
|
Address 1 |
Eloqua standard field |
|
City |
Eloqua standard field |
|
State or Province |
Eloqua standard field |
|
Zip or Postal Code |
Eloqua standard field |
|
Country |
Eloqua standard field |
|
Company |
Eloqua standard field |
| DUNS Number | The unique D&B ID of the company on the contact record. |