Loading the Data Import File
To import the data file:
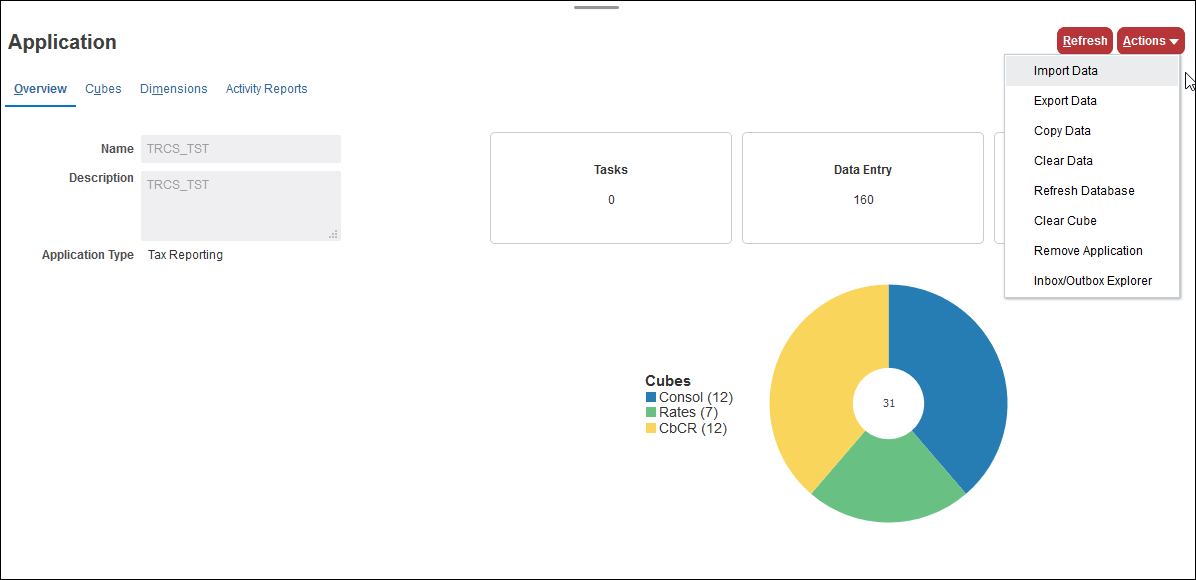
- On the Home page, click Applications, and then click Overview.
- On the Application screen, click the Overview tab, and then from Actions, select Import Data.

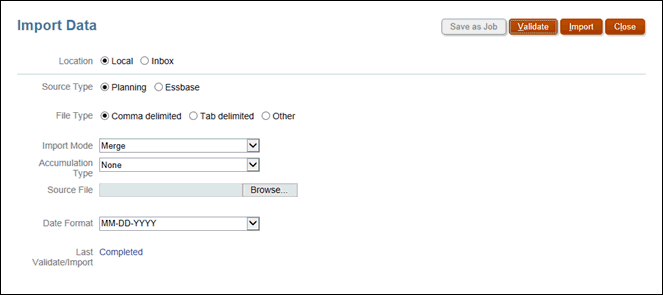
- On the Import Data screen, click Create. A second Import Data screen is displayed.

- Under Location, select the location of the data import file:
- Local—Imports the data import file from a location on your computer.
- Inbox —Imports the data import file from the server.
- For Source Type, select the data source type:
- Planning
- Essbase
- For File Type, select an option:
- Comma delimited
- Tab delimited
- Other—Enter the delimiter character that is used in the import file. For a list of supported delimiter characters and exceptions, see Other Supported Delimiter Characters.
- Select the Import Mode:
- Merge - Overwrite data in the application. Each record of data is imported into the cell, replacing the old data, if any.
- Replace - Replace data in the application. In Replace mode, before the first record for a specific Scenario/Year/Period/Entity is encountered, the entire combination of data for that Scenario, Year, Period, and Entity is cleared.
- Select the Accumulation Type:
- None - Replace the existing value in the database for the record.
- With Database - Add the data to the existing value of the cell.
- Within File - Accumulate the cell values that are within the file.
- Select the source file: Under Source File, browse to select the source file, and then click Update.
- If you selected Local, click Browse to navigate to the file.
- If you selected Inbox, enter the name of the file in Source File.
- From Date Format, select the format that you want to use.
- Under Last Import, review the date of the previous import. If this is the first time, a message is displayed to advise that there is no data to display.
- Optional: If the selected location is Inbox, click Save as Job to save the import operation as a job, which you can schedule to run immediately, or at a later time.
- Optional: If the selected location is Local, click Validate to test whether the import file format is correct.
- Optional: Before beginning the import, review the selected options.
Note:
When importing data, no validation is performed on intersections to determine which are valid, and data is loaded to all intersections. To review data that has been loaded into invalid intersections, run the Invalid Intersection report before importing data to see and clear invalid intersections. See Creating and Invalid Intersection Report. - Click Import.
- From the information message that the data was submitted successfully, click OK.
- To view details about the import process, click Application, then click Jobs, and under Recent Activity, click the link for the import to view the details.