Installation from OCI Marketplace
The Agent Factory OCI Marketplace deployment is an application stack that provisions a VM by using a custom Oracle Linux 8 image preconfigured to run Agent Factory. This custom image contains the same Agent Factory binary that is publicly released at the time of publication, allowing you to deploy a ready-to-configure environment with minimal setup.
The resulting VM is not managed by the Agent Factory team. See Security and Operational Requirements for information about customer responsibilities related to maintenance, security updates, certificates, and tenancy-specific requirements.
Note: If you already have a Marketplace instance configured, see Upgrade Your Marketplace Instance for instructions on upgrading to a newer version.
Prerequisites
To successfully deploy the application through OCI Marketplace, you must meet the following requirements:
Marketplace deployment policies: You must have access to a tenancy where you have the privileges to create instances from Marketplace. If your account does not have these privileges, contact your tenancy administrator.
Virtual Cloud Network (VCN) and Subnet: The recommended VCN configuration contains a 10.0.0.0/16 CIDR block, an internet gateway for external connectivity, a route table directing 0.0.0.0/0 traffic to the internet gateway, and a security list allowing inbound SSH (port 22), HTTP (port 8080), and Oracle Database (port 1521) traffic from any source. A public subnet (10.0.1.0/24) is also defined, associated with the custom route table and security list, with public IPs allowed on Virtual Network Interface Cards (VNICs).
Flex shapes specification: To deploy the application using a Flex shape, it must have a minimum of 8 CPU cores, 16 GB of RAM, and 120 GB of boot volume. A boot volume of 500 GB is recommended.
You can install the Agent Factory application from the Oracle Cloud Marketplace in just a few steps:
Launch Stack
Important: Deployment failures related to compute instance creation are often caused by OCI tenancy limits, service quotas, or shape availability, rather than issues with the Agent Factory Marketplace stack itself.
When deploying from Marketplace, the selected compute shape must:
- Be available in the target OCI region
- Be supported by your tenancy
- Have sufficient available capacity and quota
If deployment fails during instance creation, consider the following:
- Verify that the selected shape is available in your region
- Try a different supported shape or architecture
- Try deploying in another OCI region
- Review tenancy quotas and service limits
- Contact your tenancy administrator if additional capacity or permissions are required
Shape availability and capacity can vary between regions and tenancies. A shape that is available in one region or tenancy may not be available in another.
-
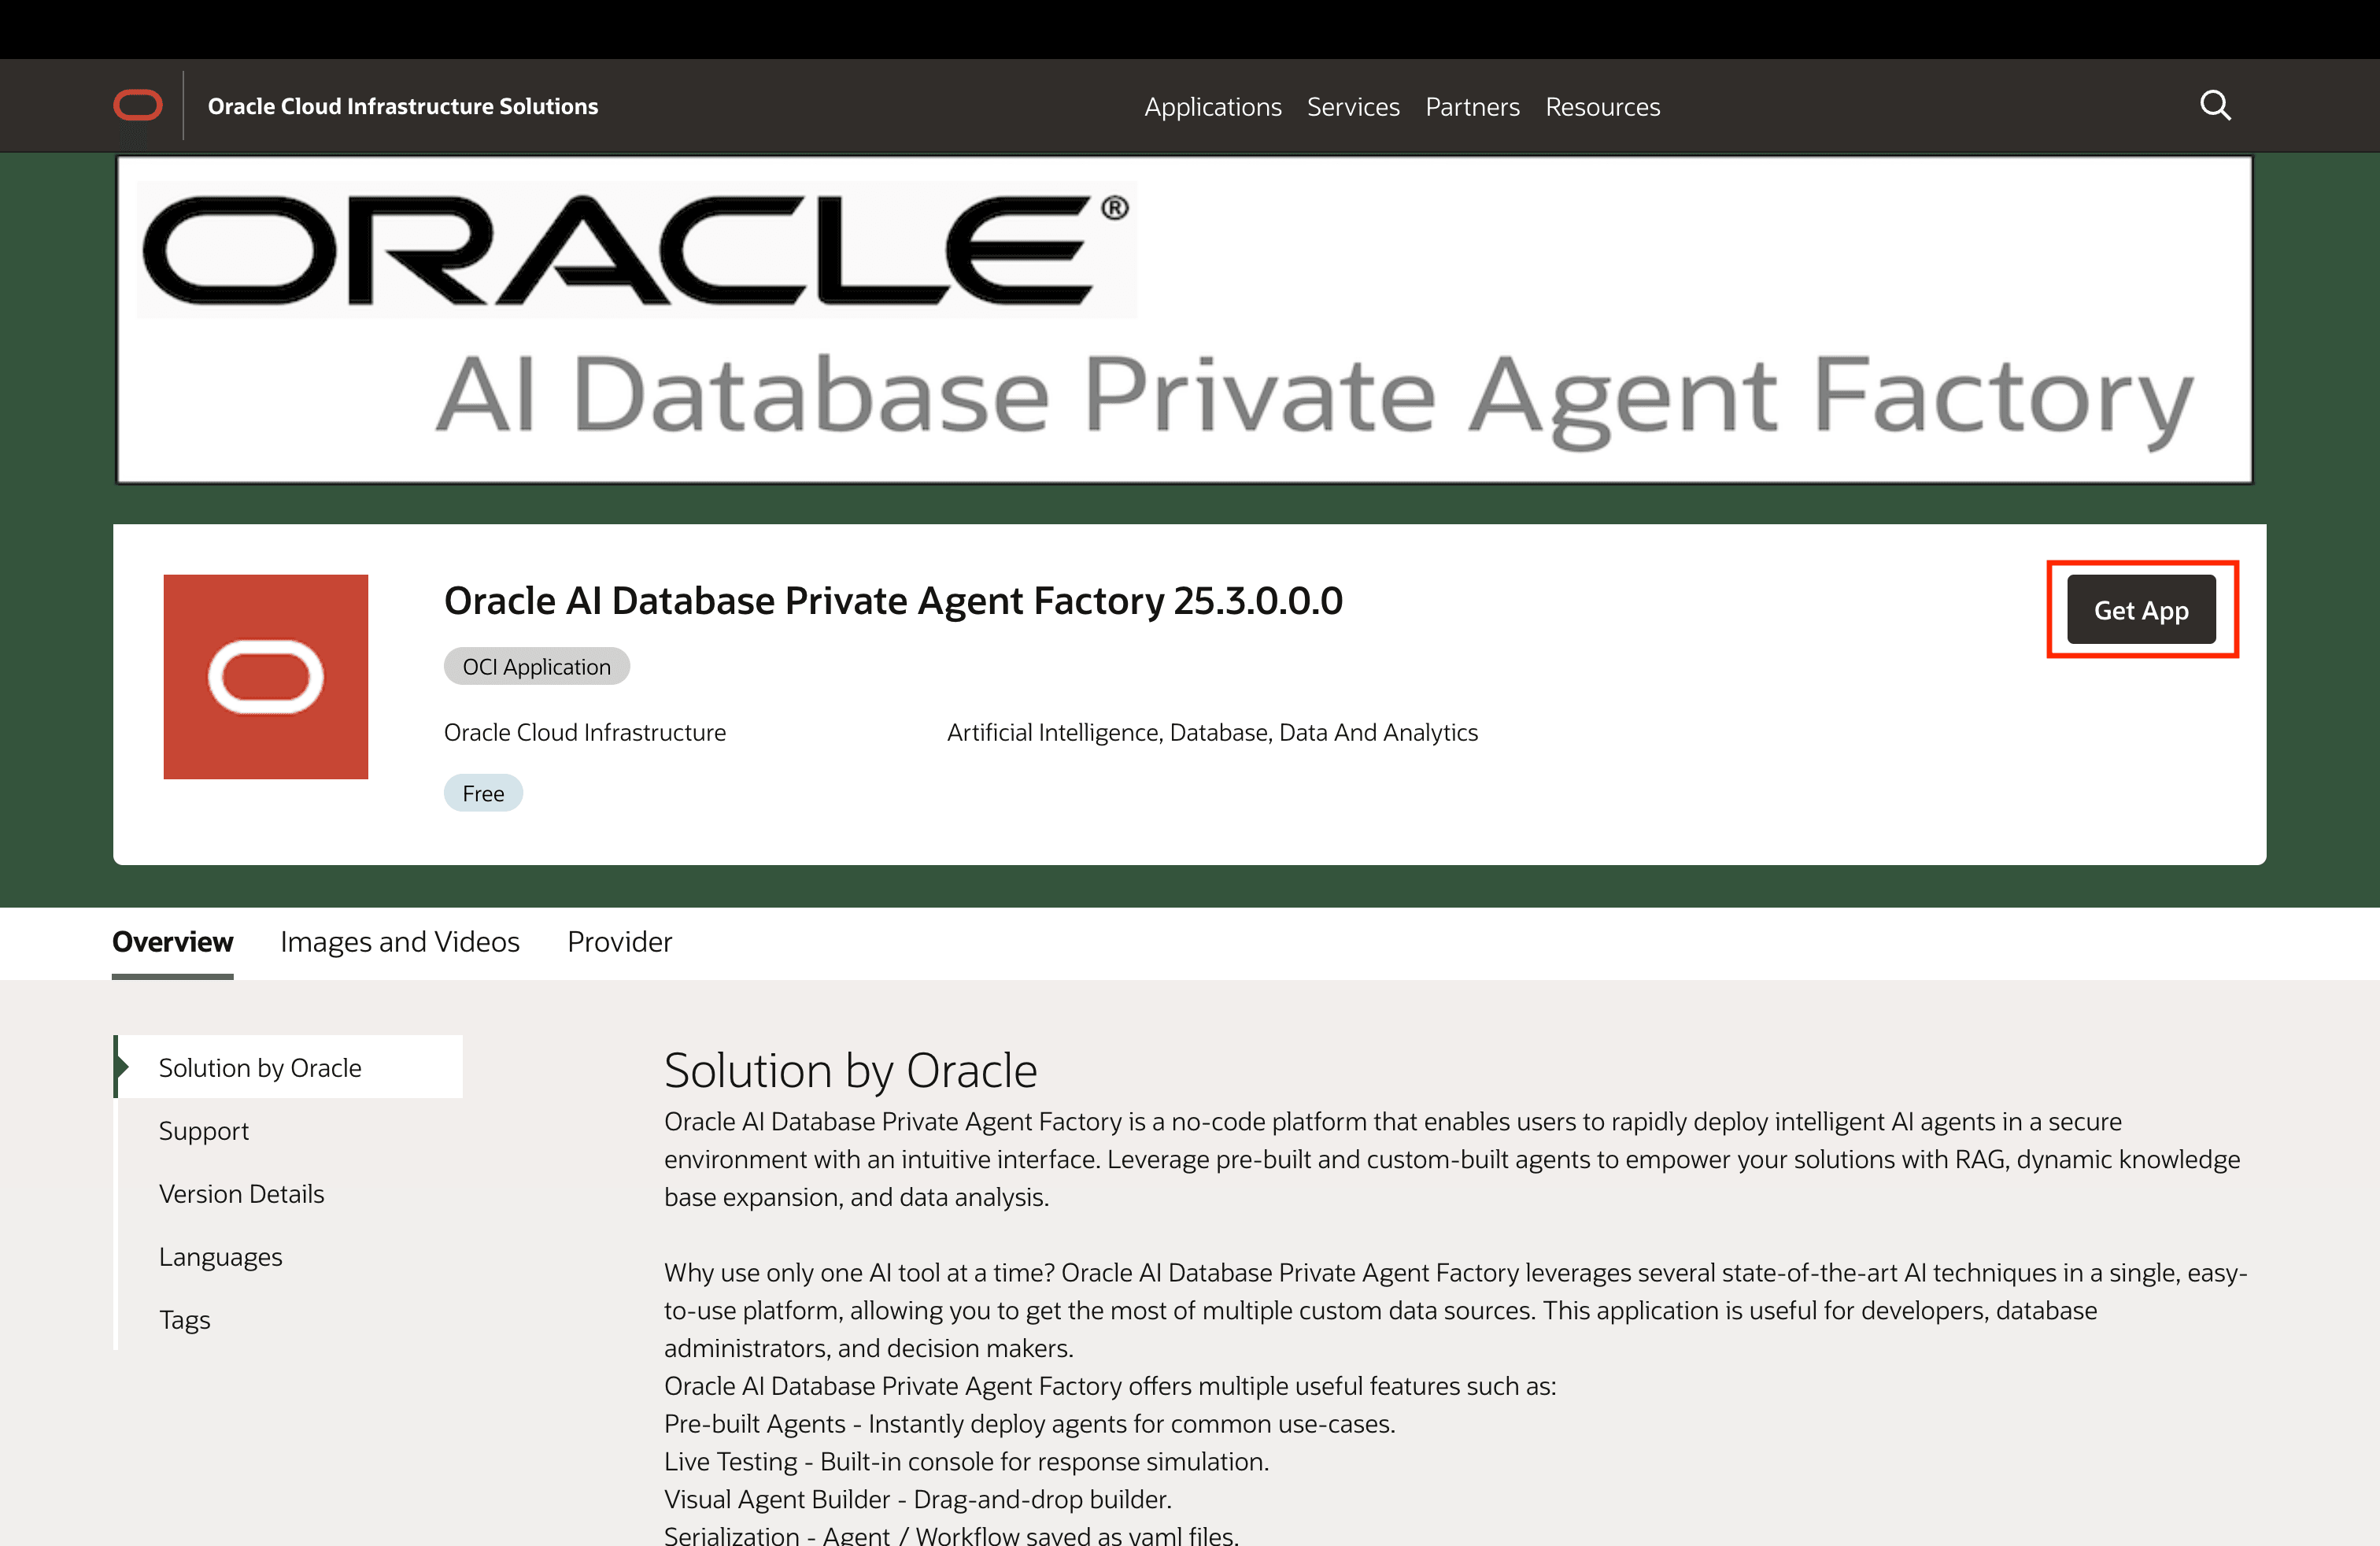
Visit the Agent Factory listing on Oracle Cloud Marketplace.
-
Click Get App and sign in to your OCI tenancy.
-
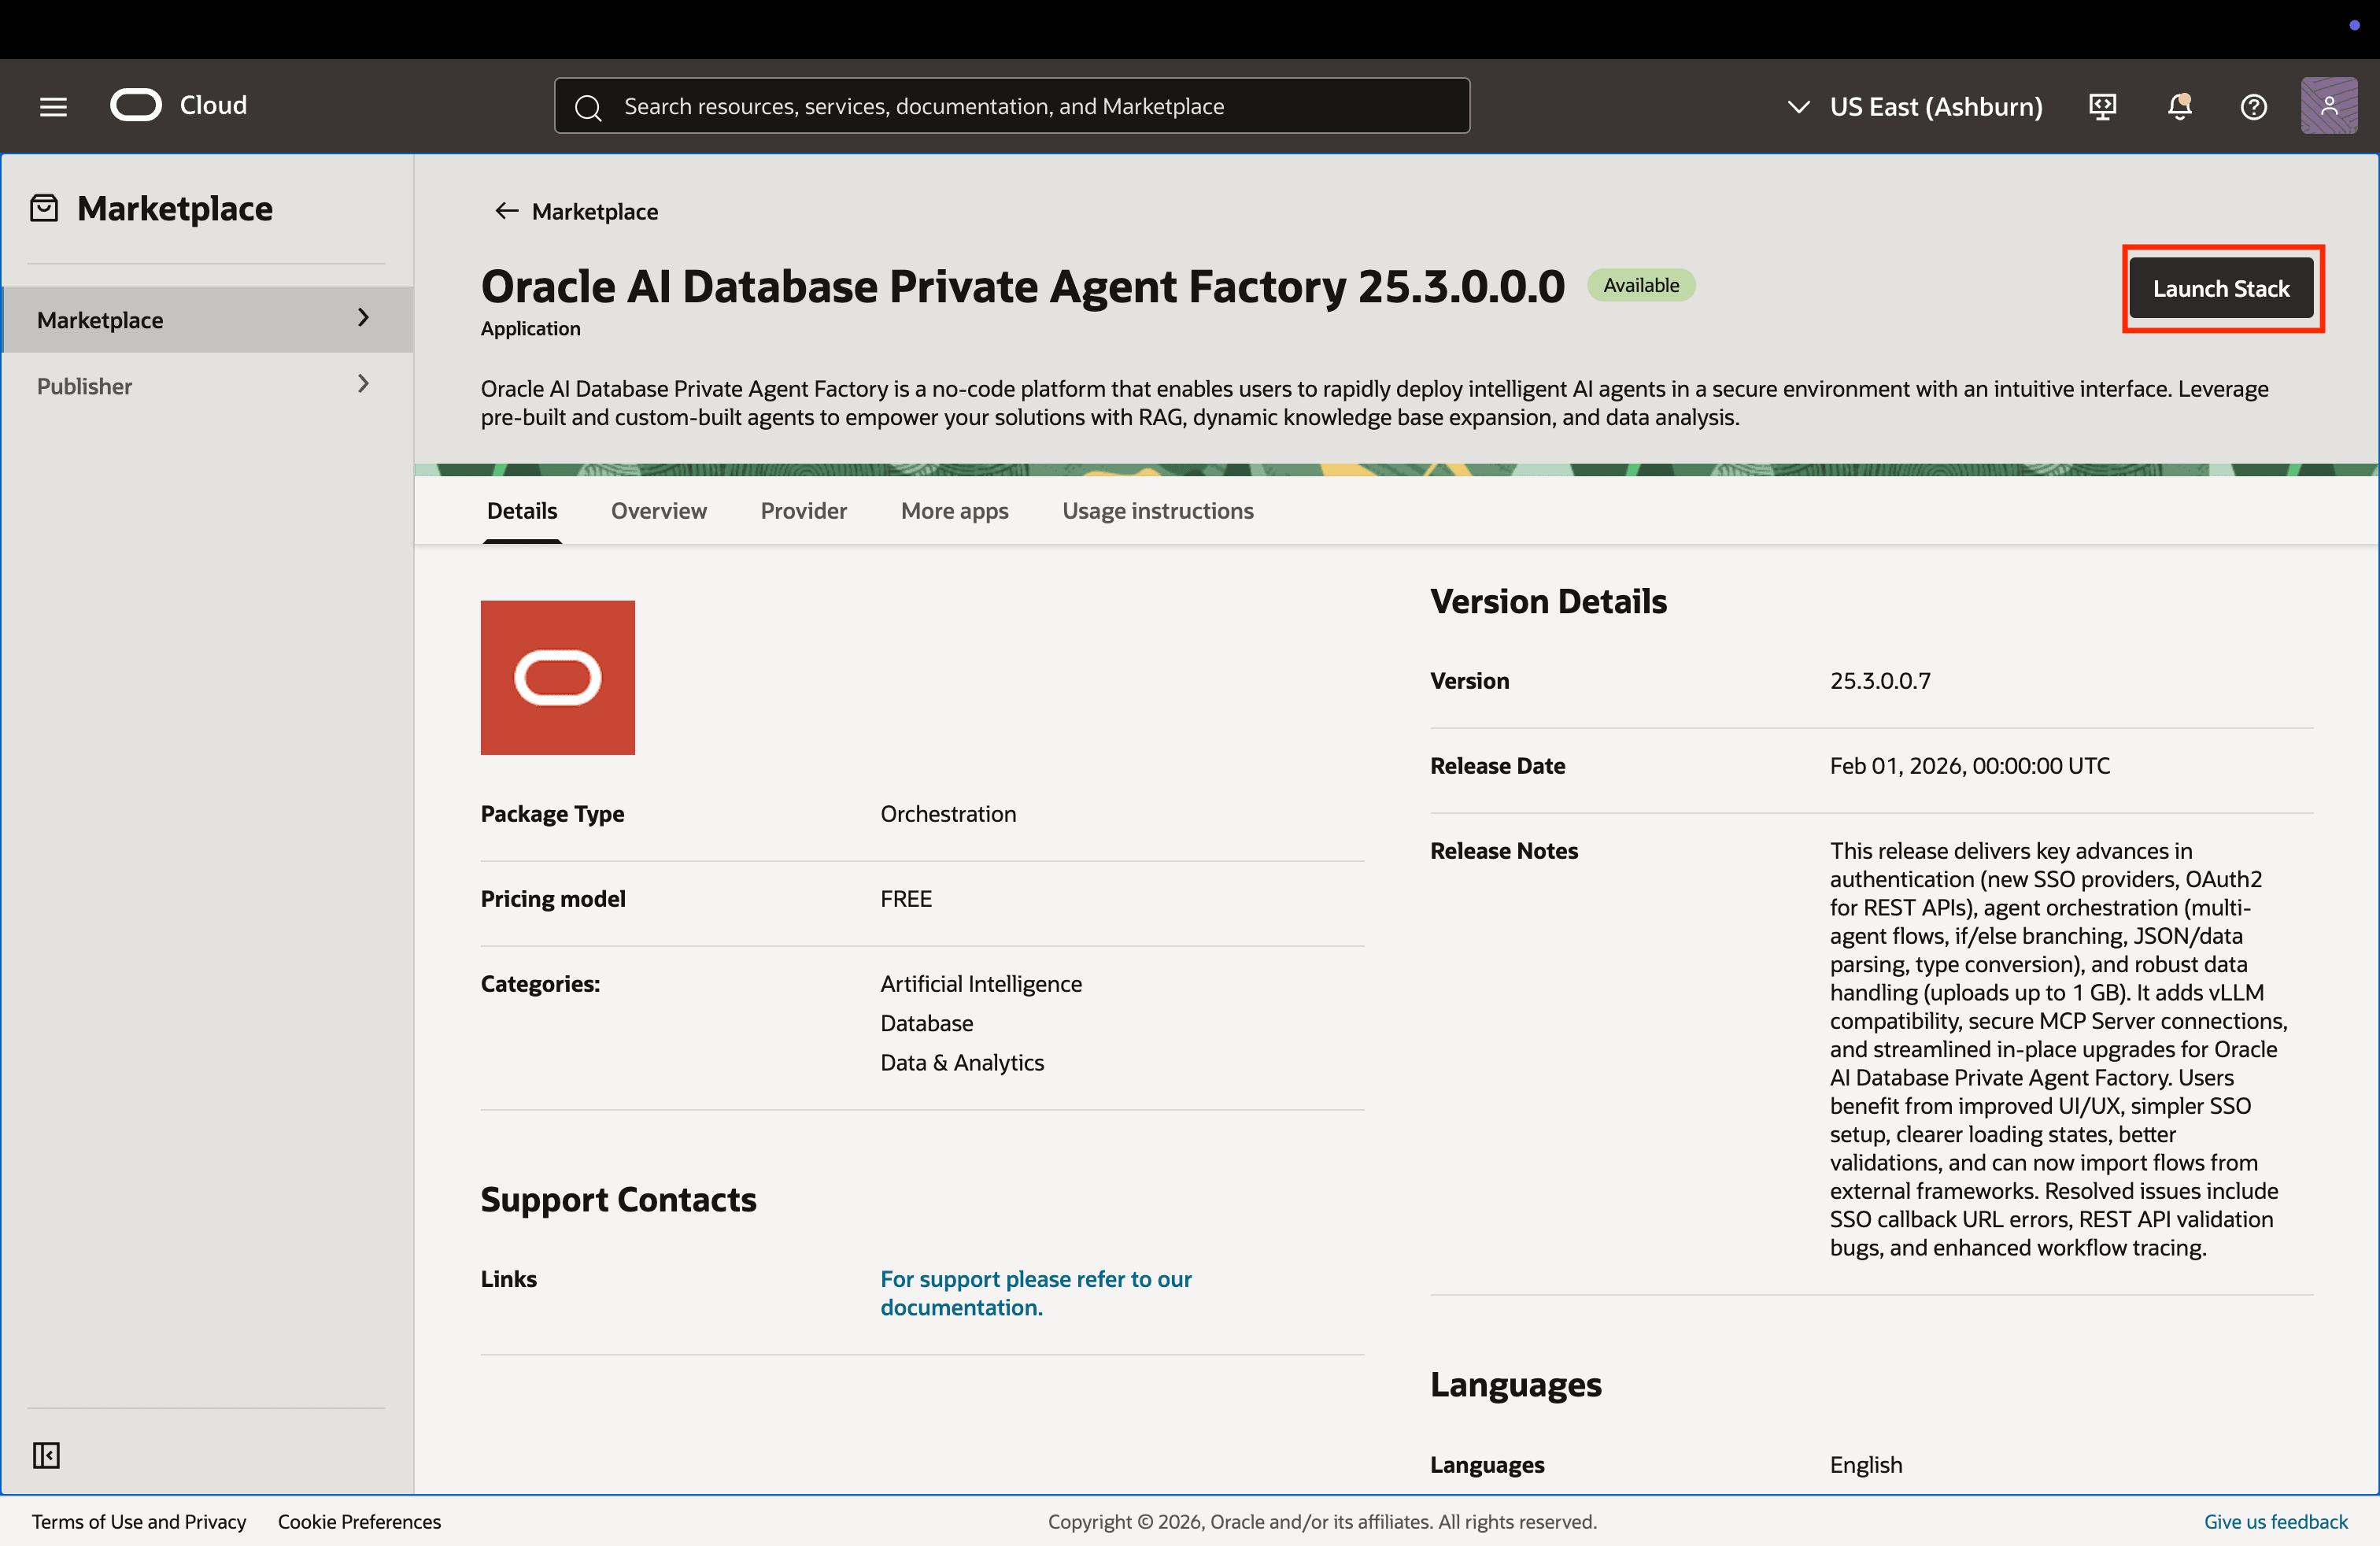
On the product overview page, review the details and usage instructions. Then, select the Launch Stack button in the top right corner.
-
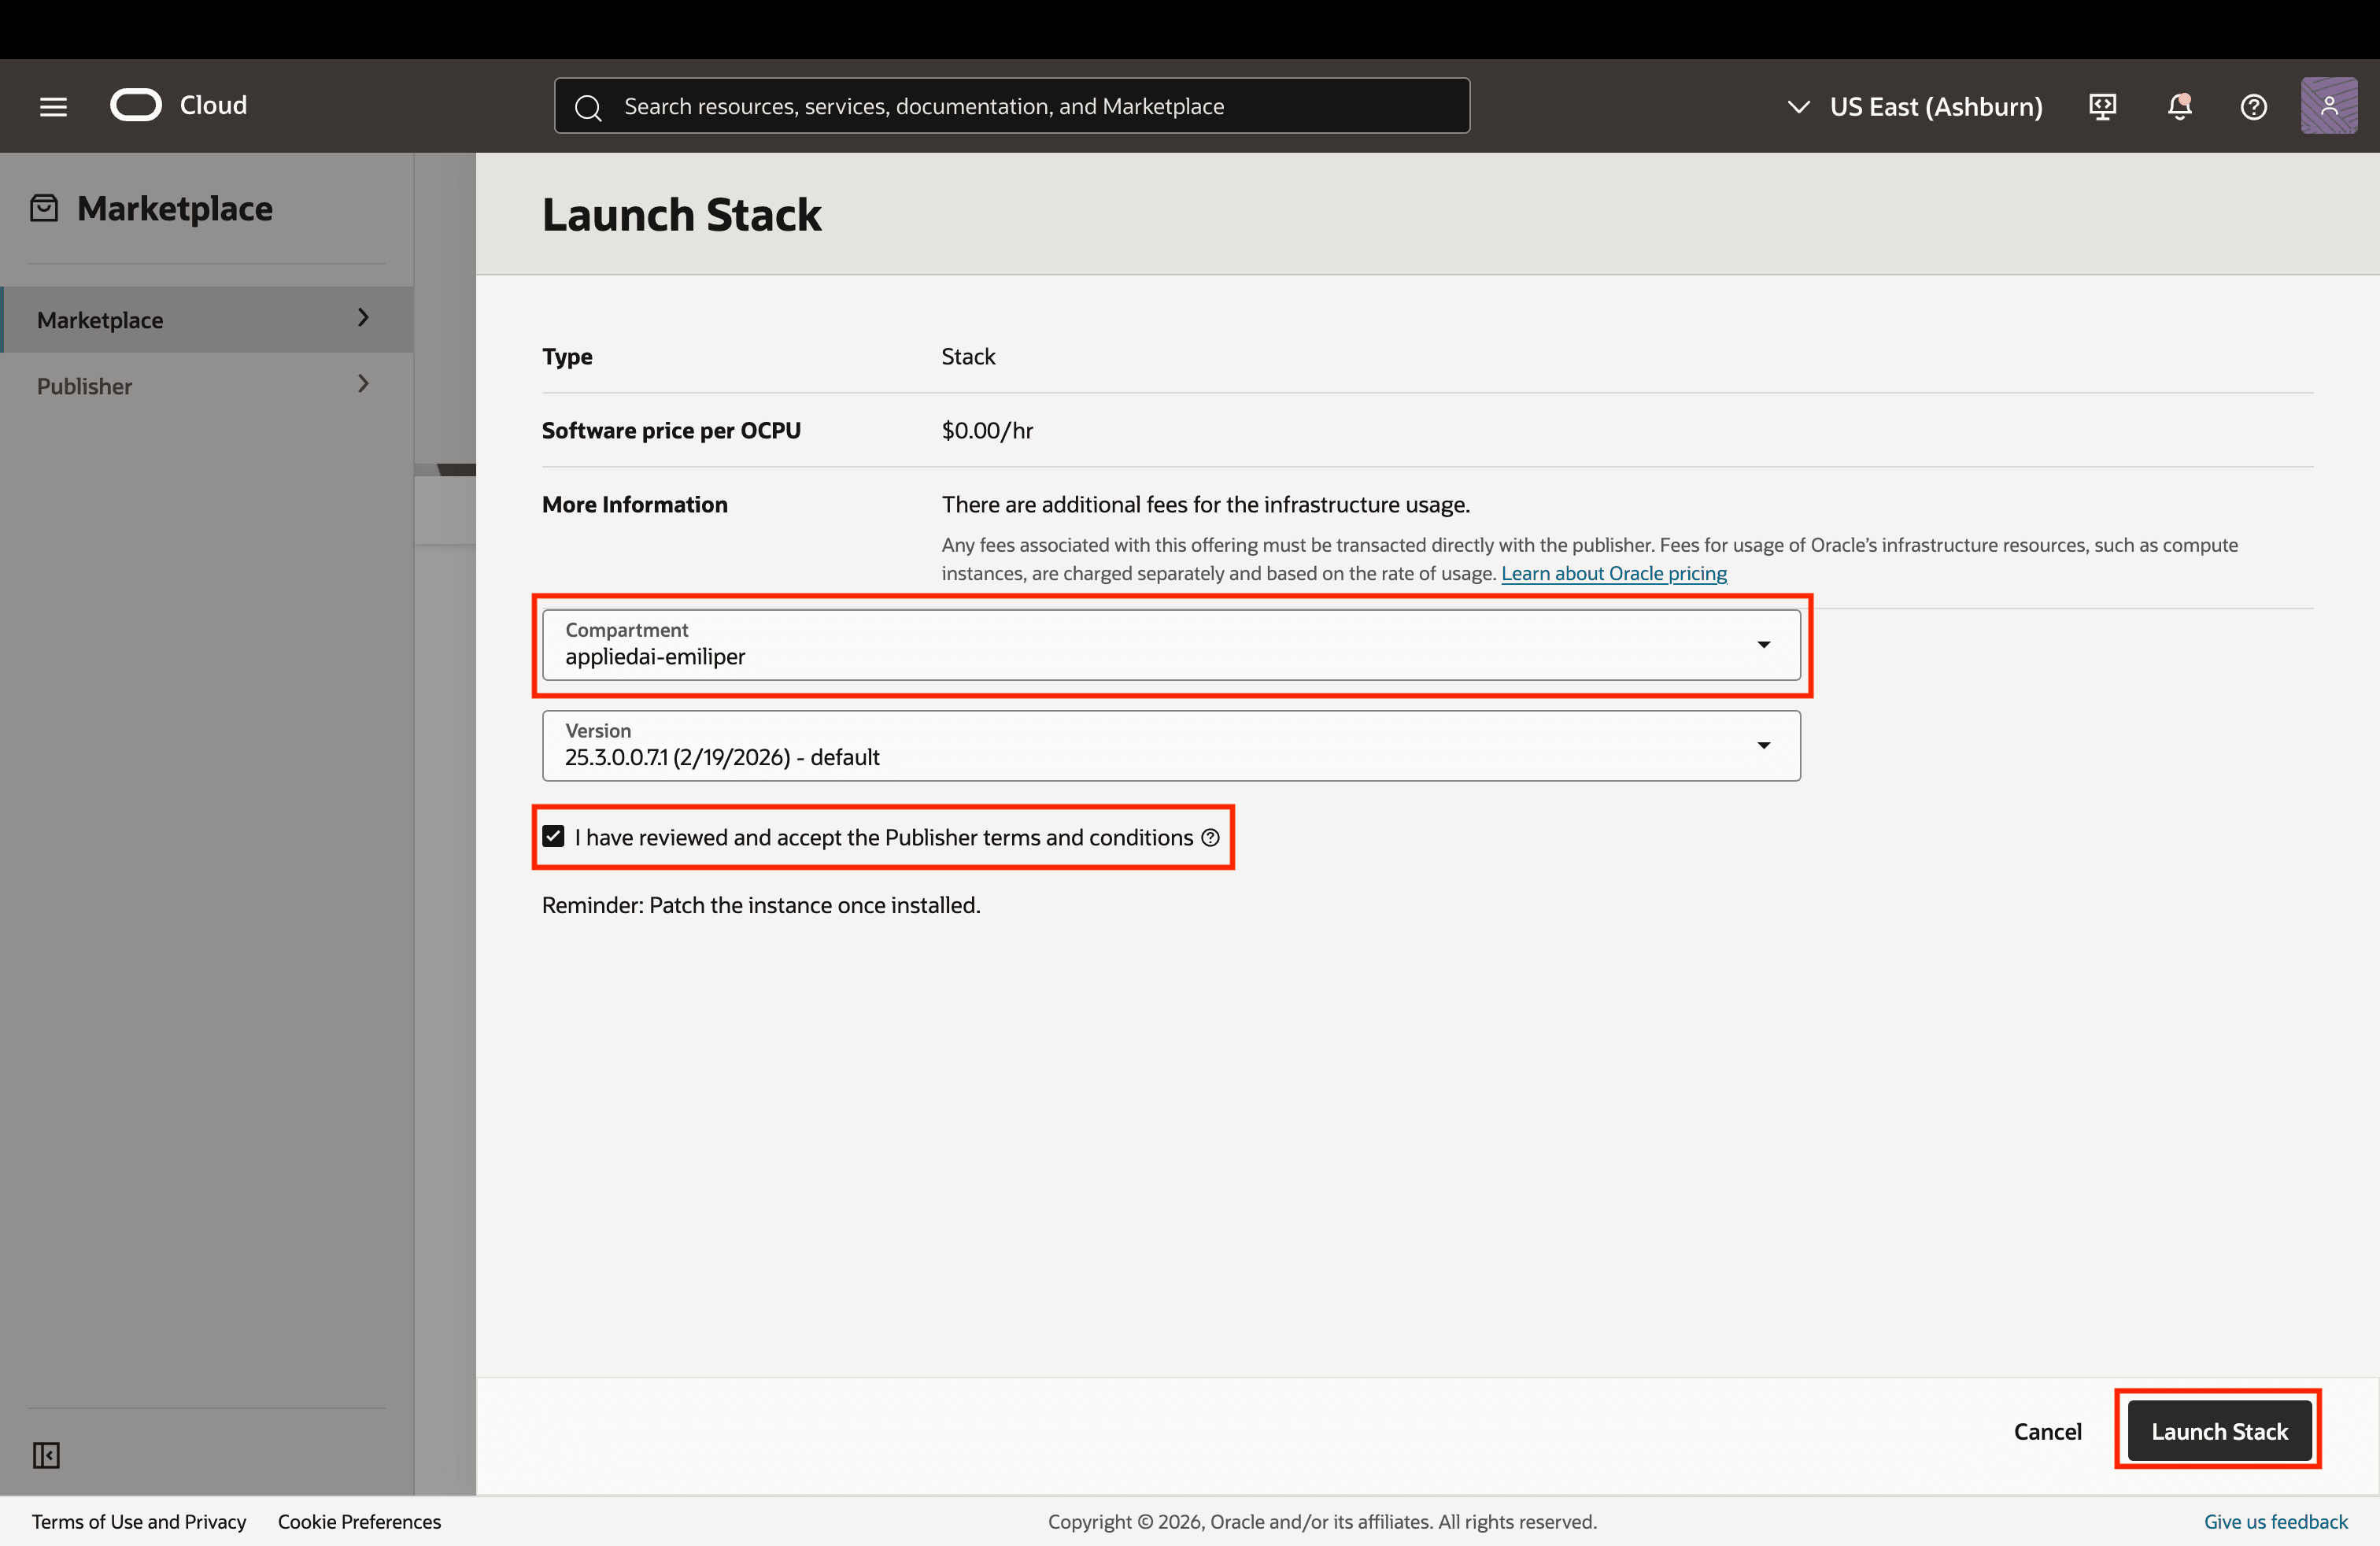
After you review and accept the Oracle Standard Terms and Restrictions, select the Launch Stack button in the bottom right corner.
By default, the stack is created in the Resource Manager of your current compartment.
-
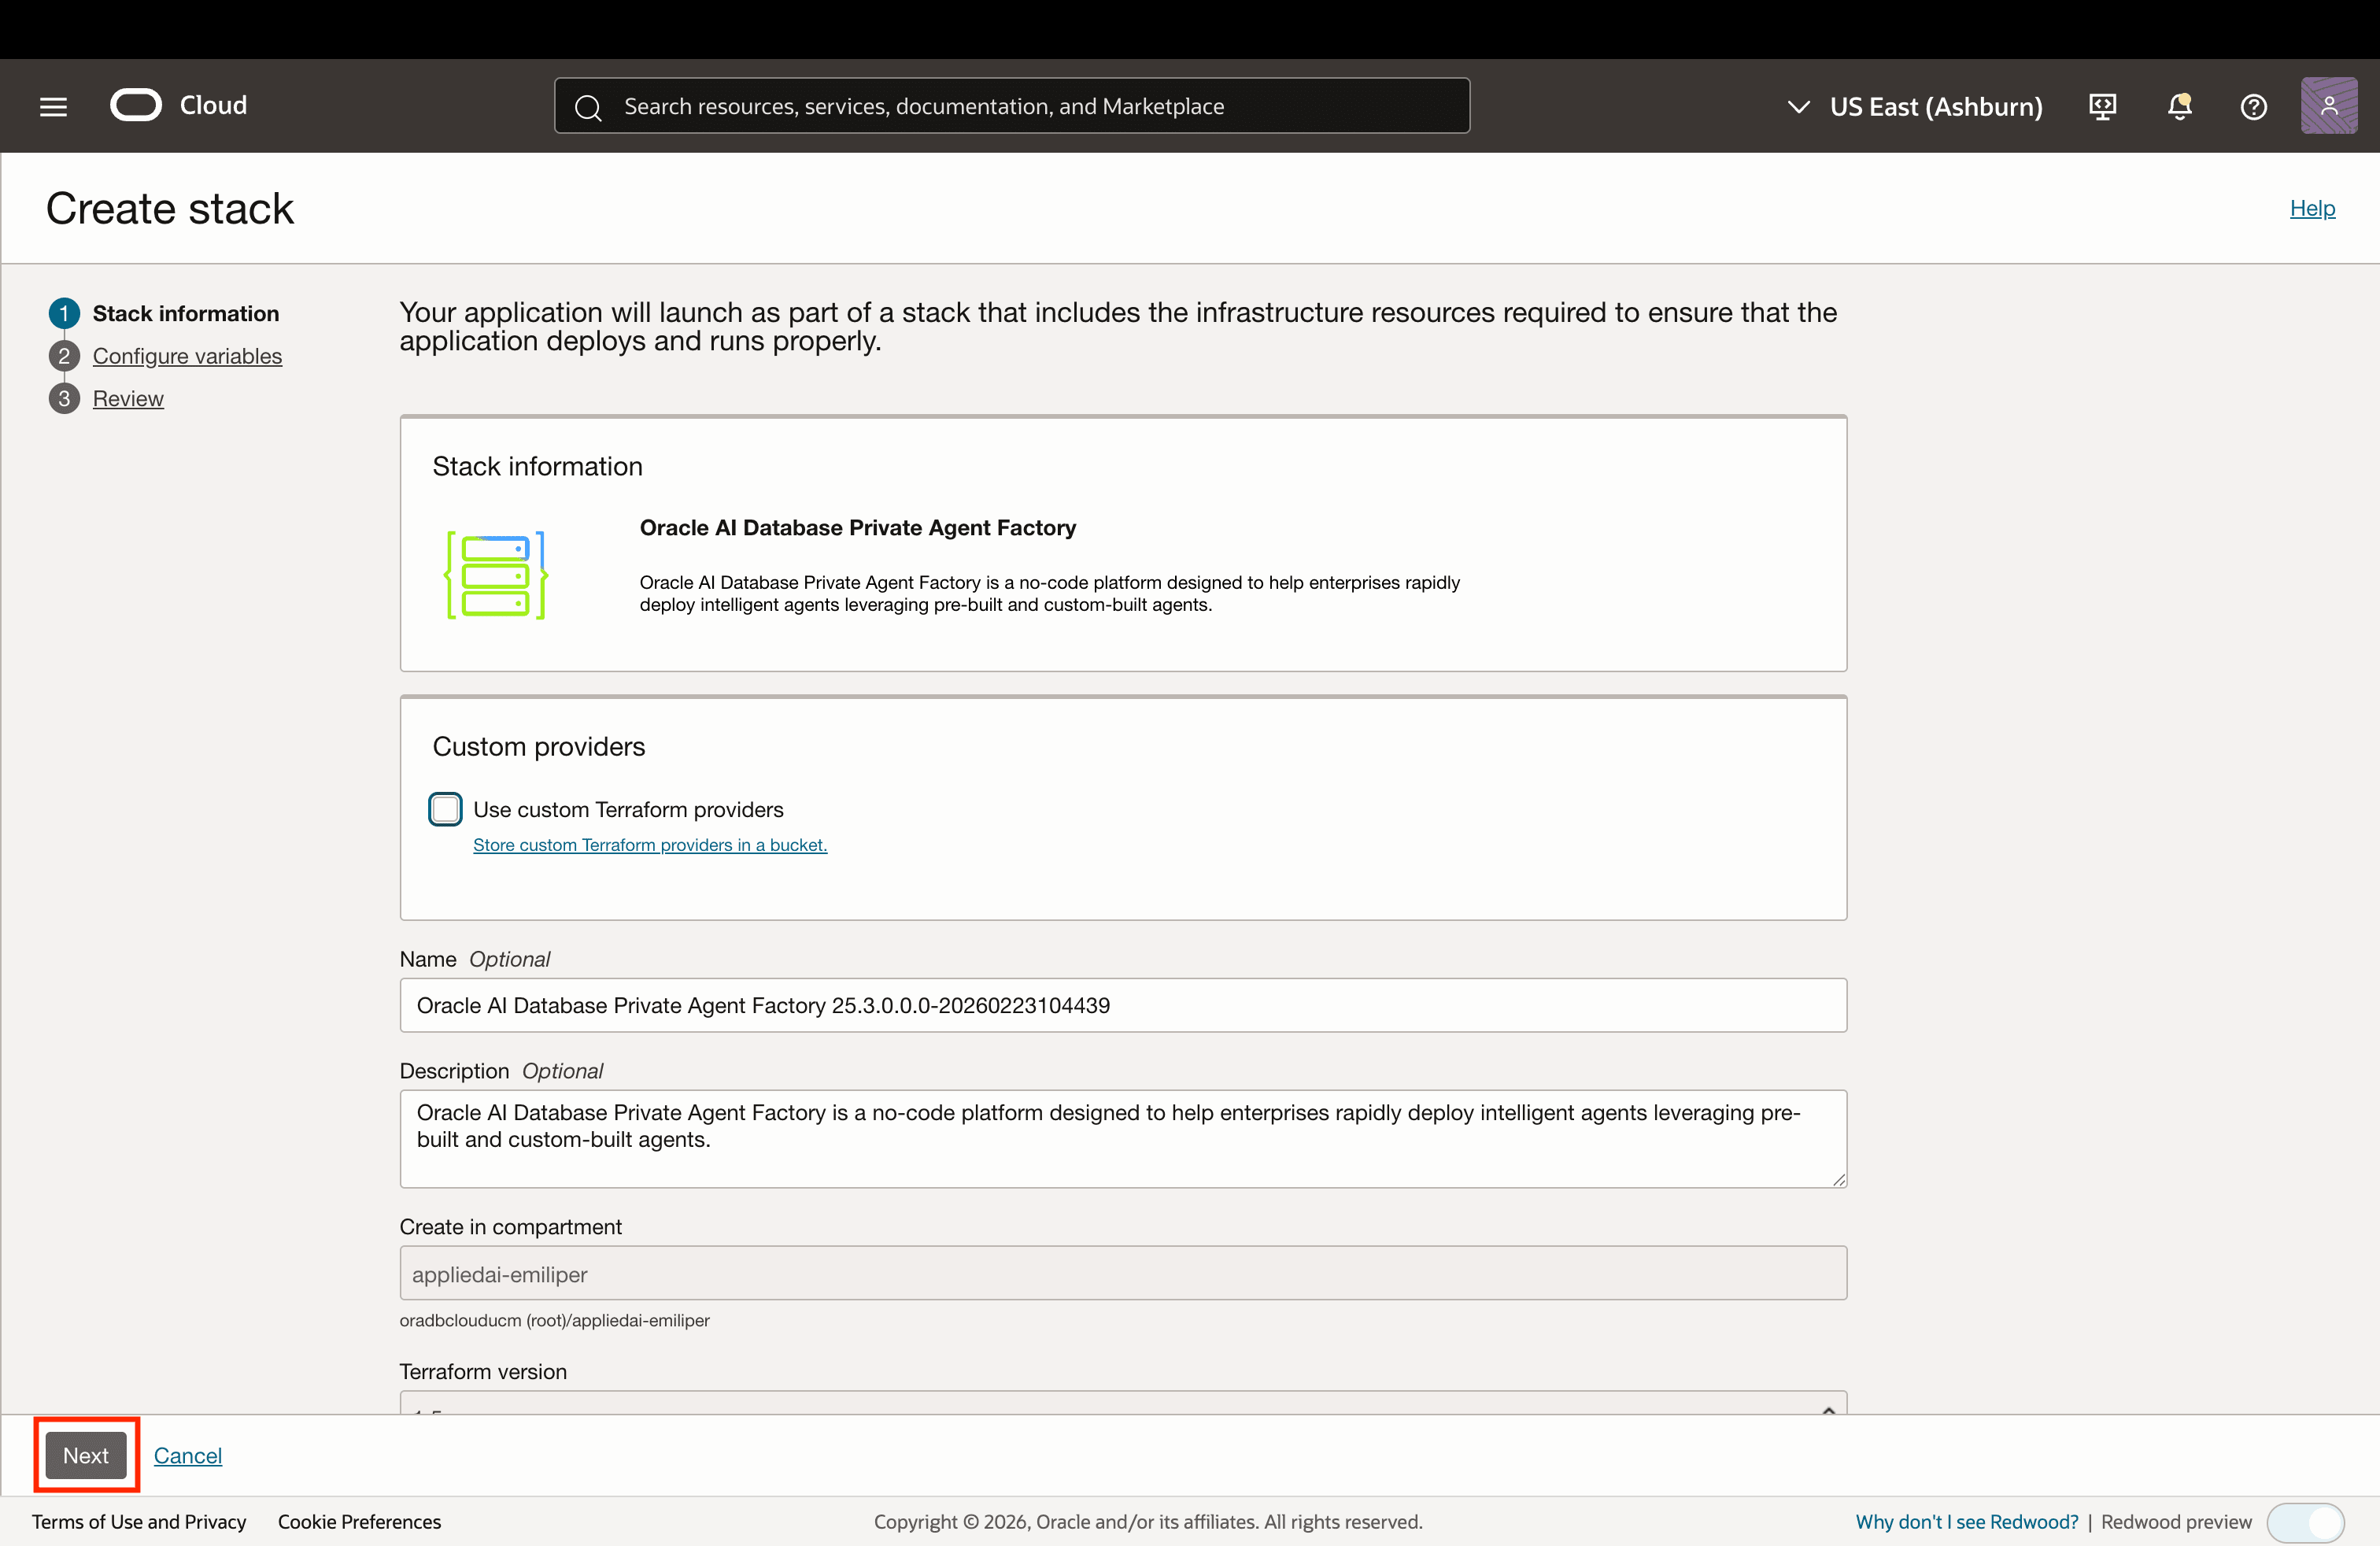
In Stack Information, you can rename the stack you are creating. Agent Factory prefills the stack information.
-
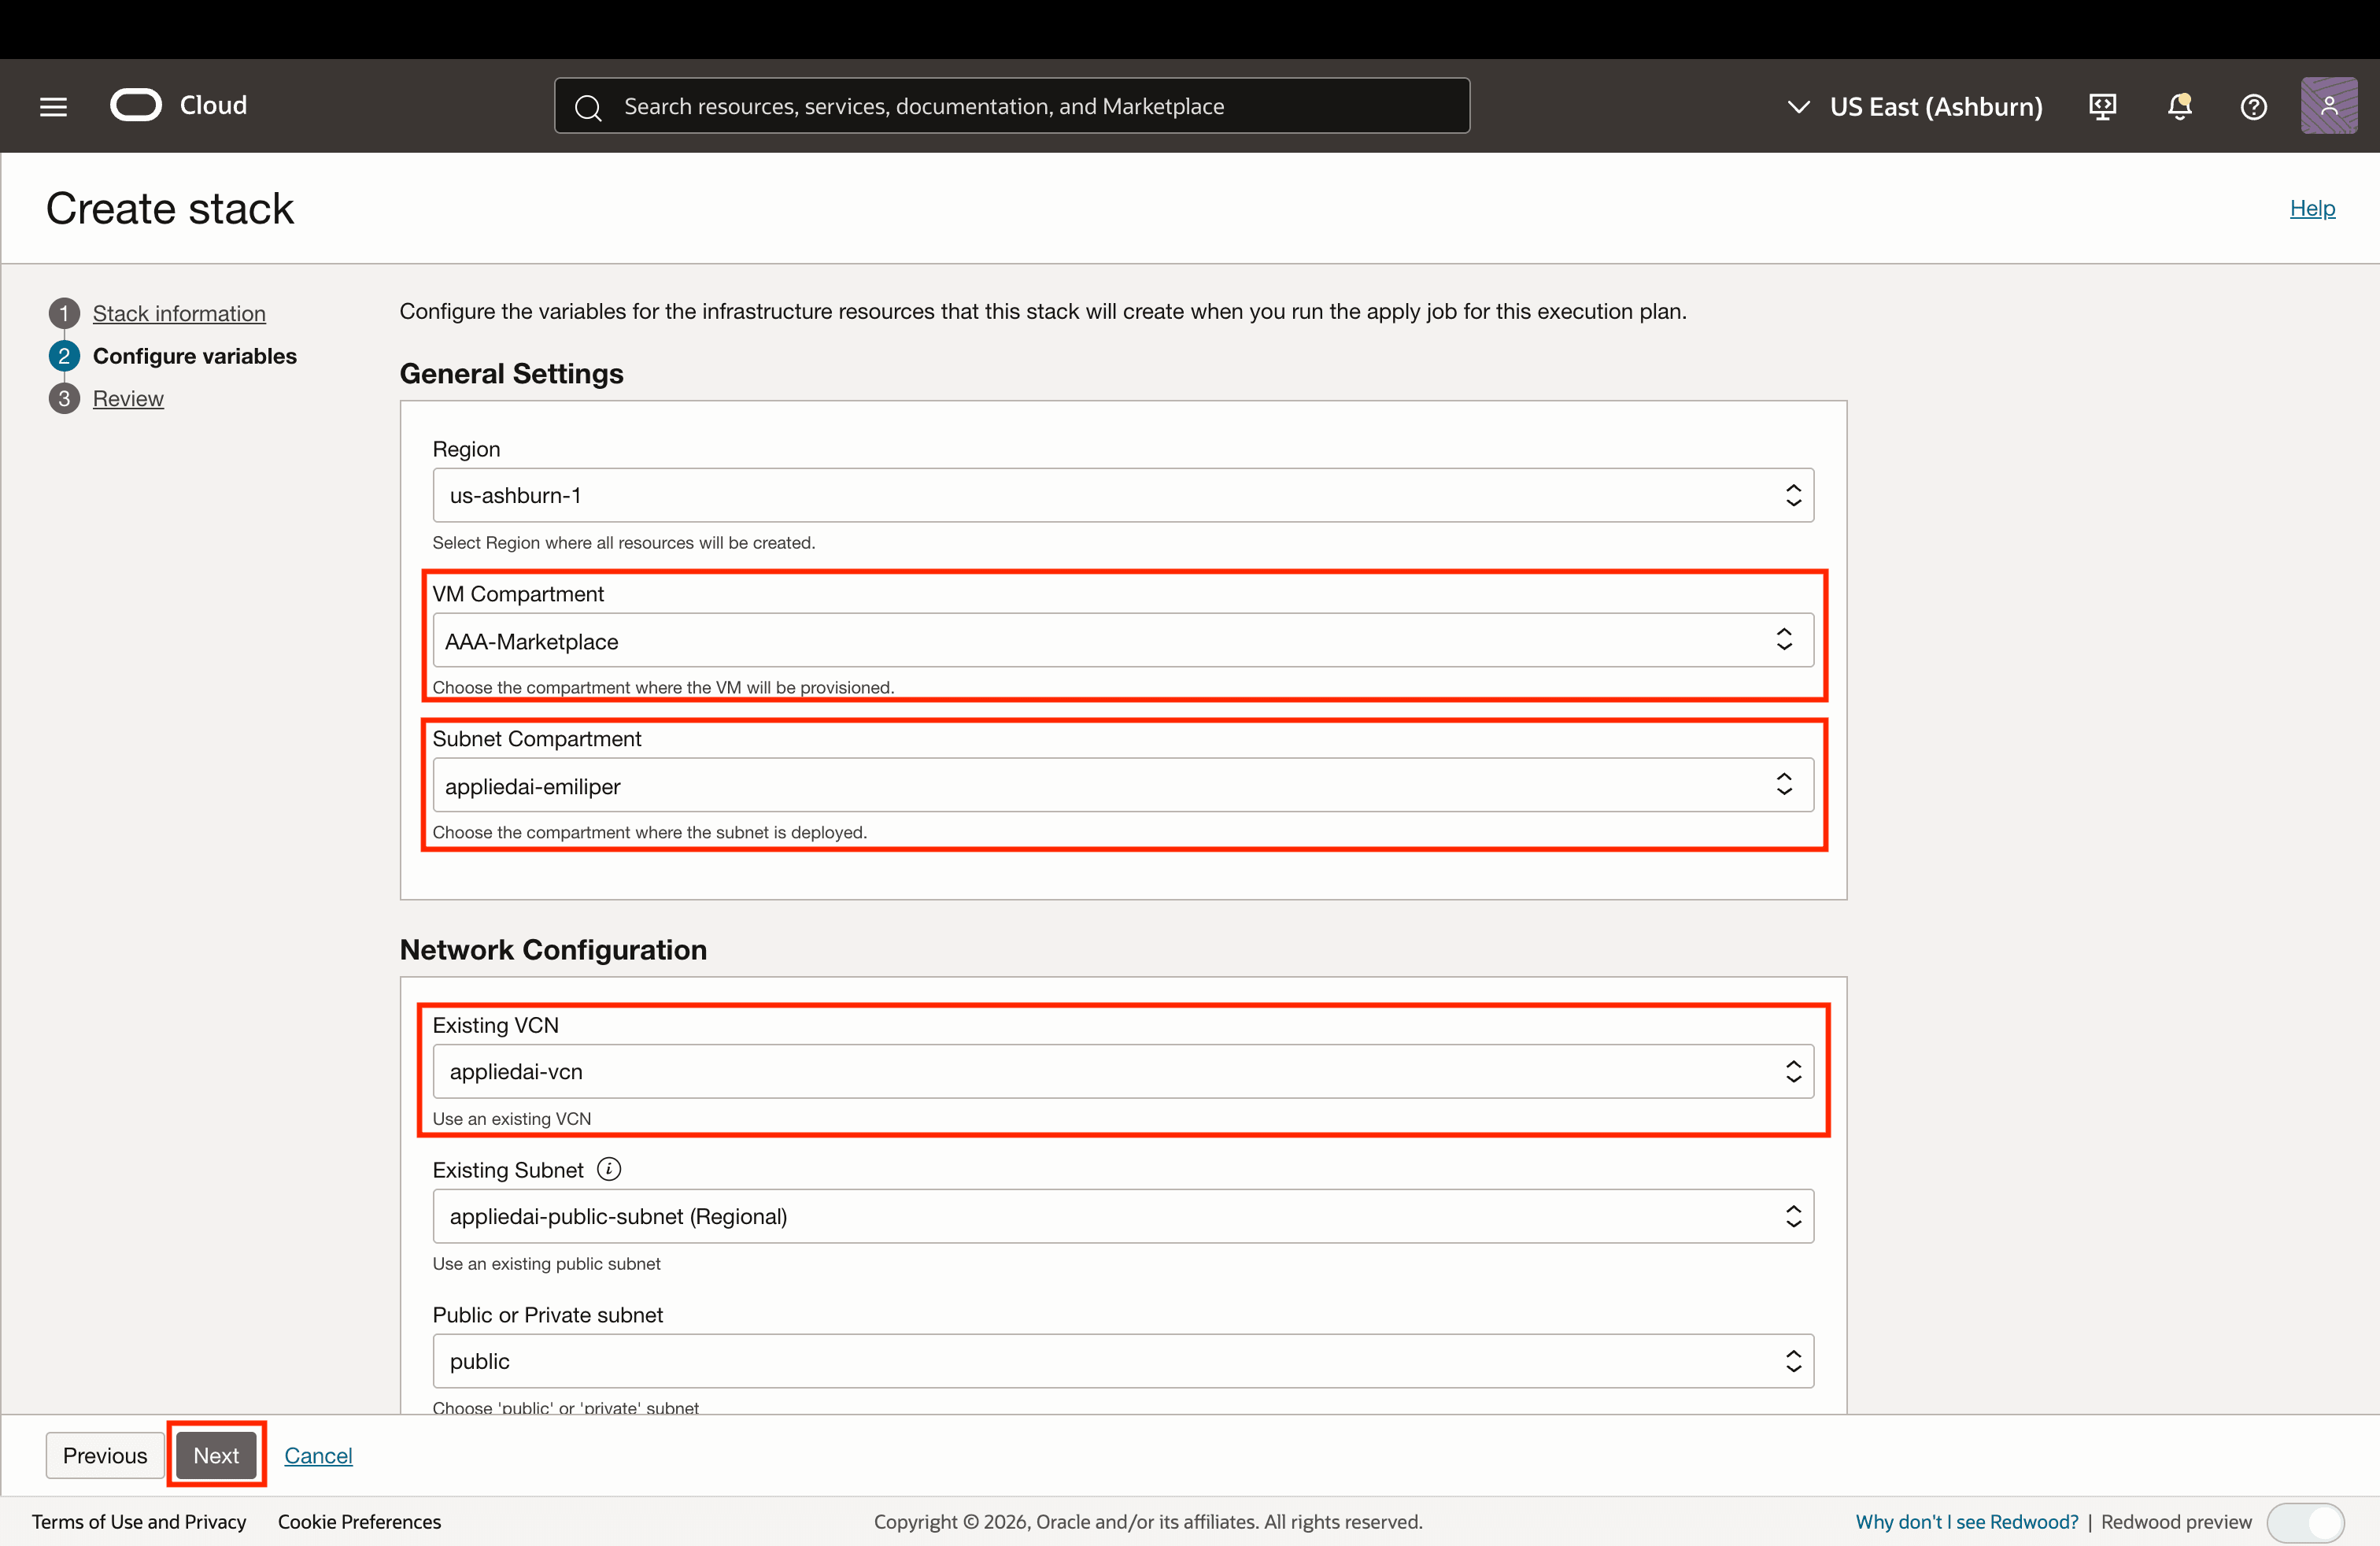
Under General Settings, select your preferred region, the compartment for deploying the VM, and the compartment that contains the VCN and subnet for the VM. Both compartments can be the same or different as needed.
This configuration is intended for users who have permissions to create VMs in one compartment but can only use VCNs from another.
-
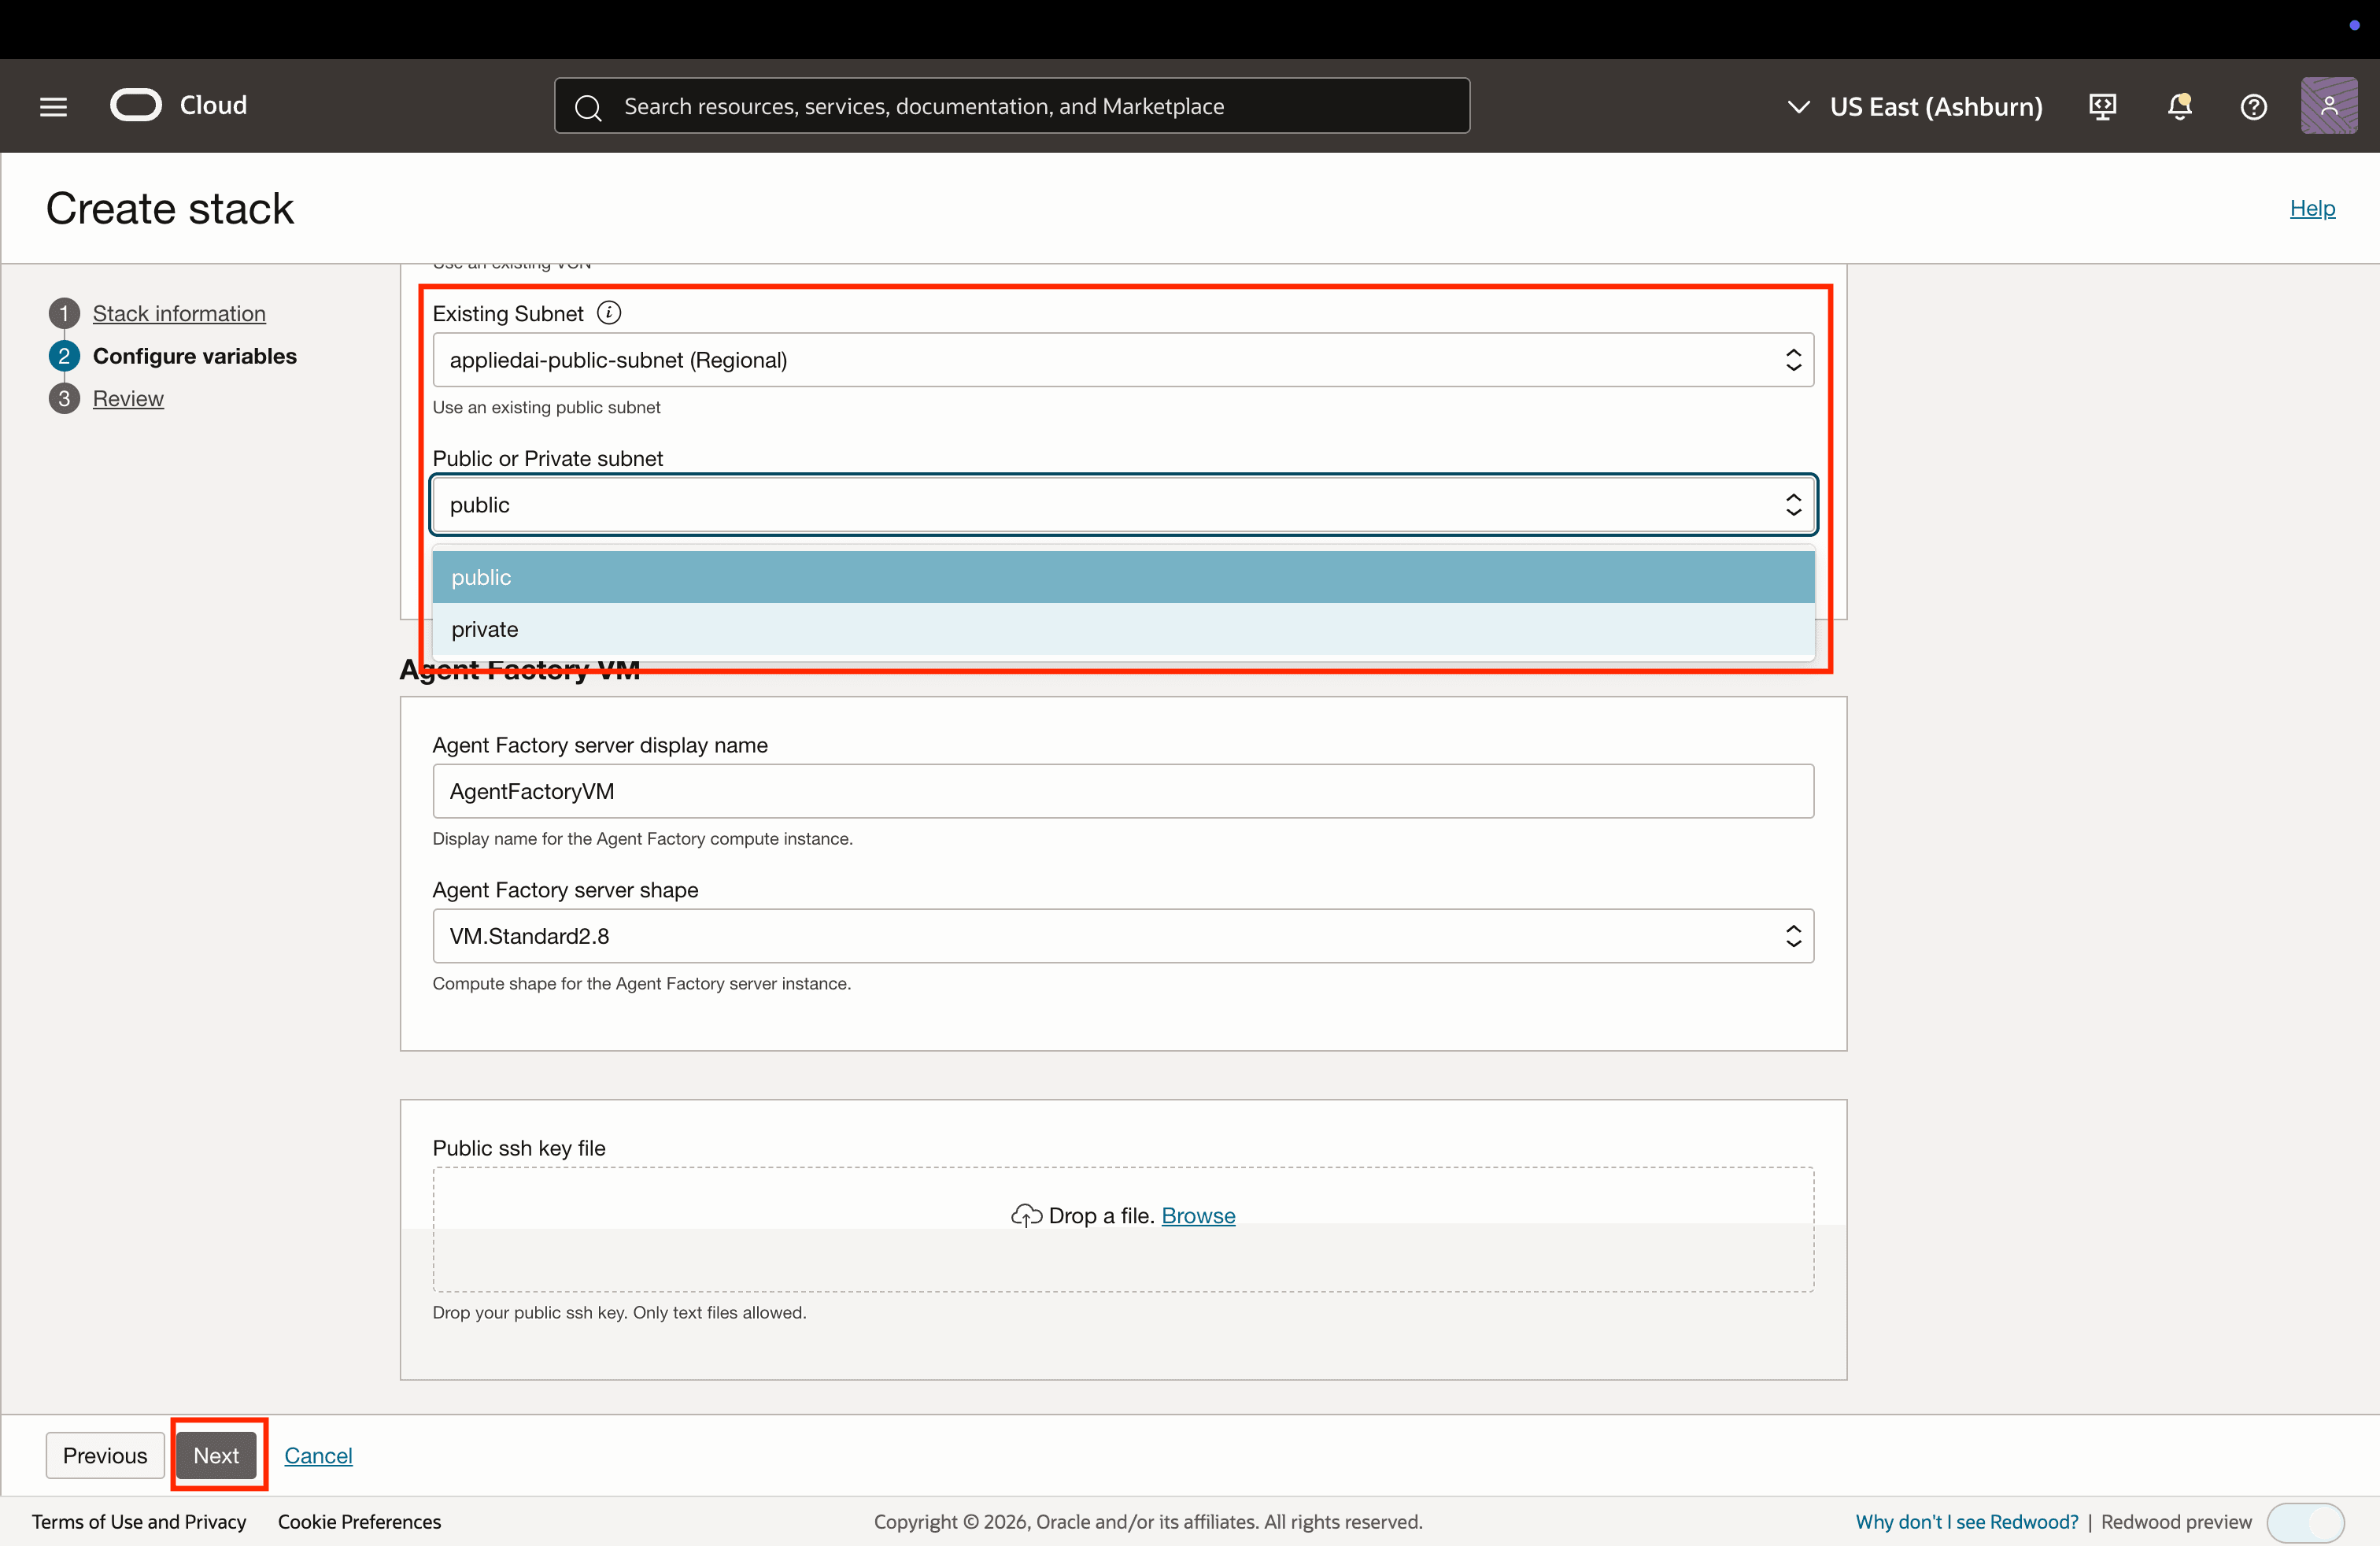
Under Network Configuration, select an existing VCN and subnet. Configure them as described in the prerequisites section. See Prerequisites. You can use private or public subnets. Select the correct type for a successful setup.
Upload your own public SSH key to access the created VM later.
-
Provide a display name and an instance shape for the Agent Factory server, and select Next.
-
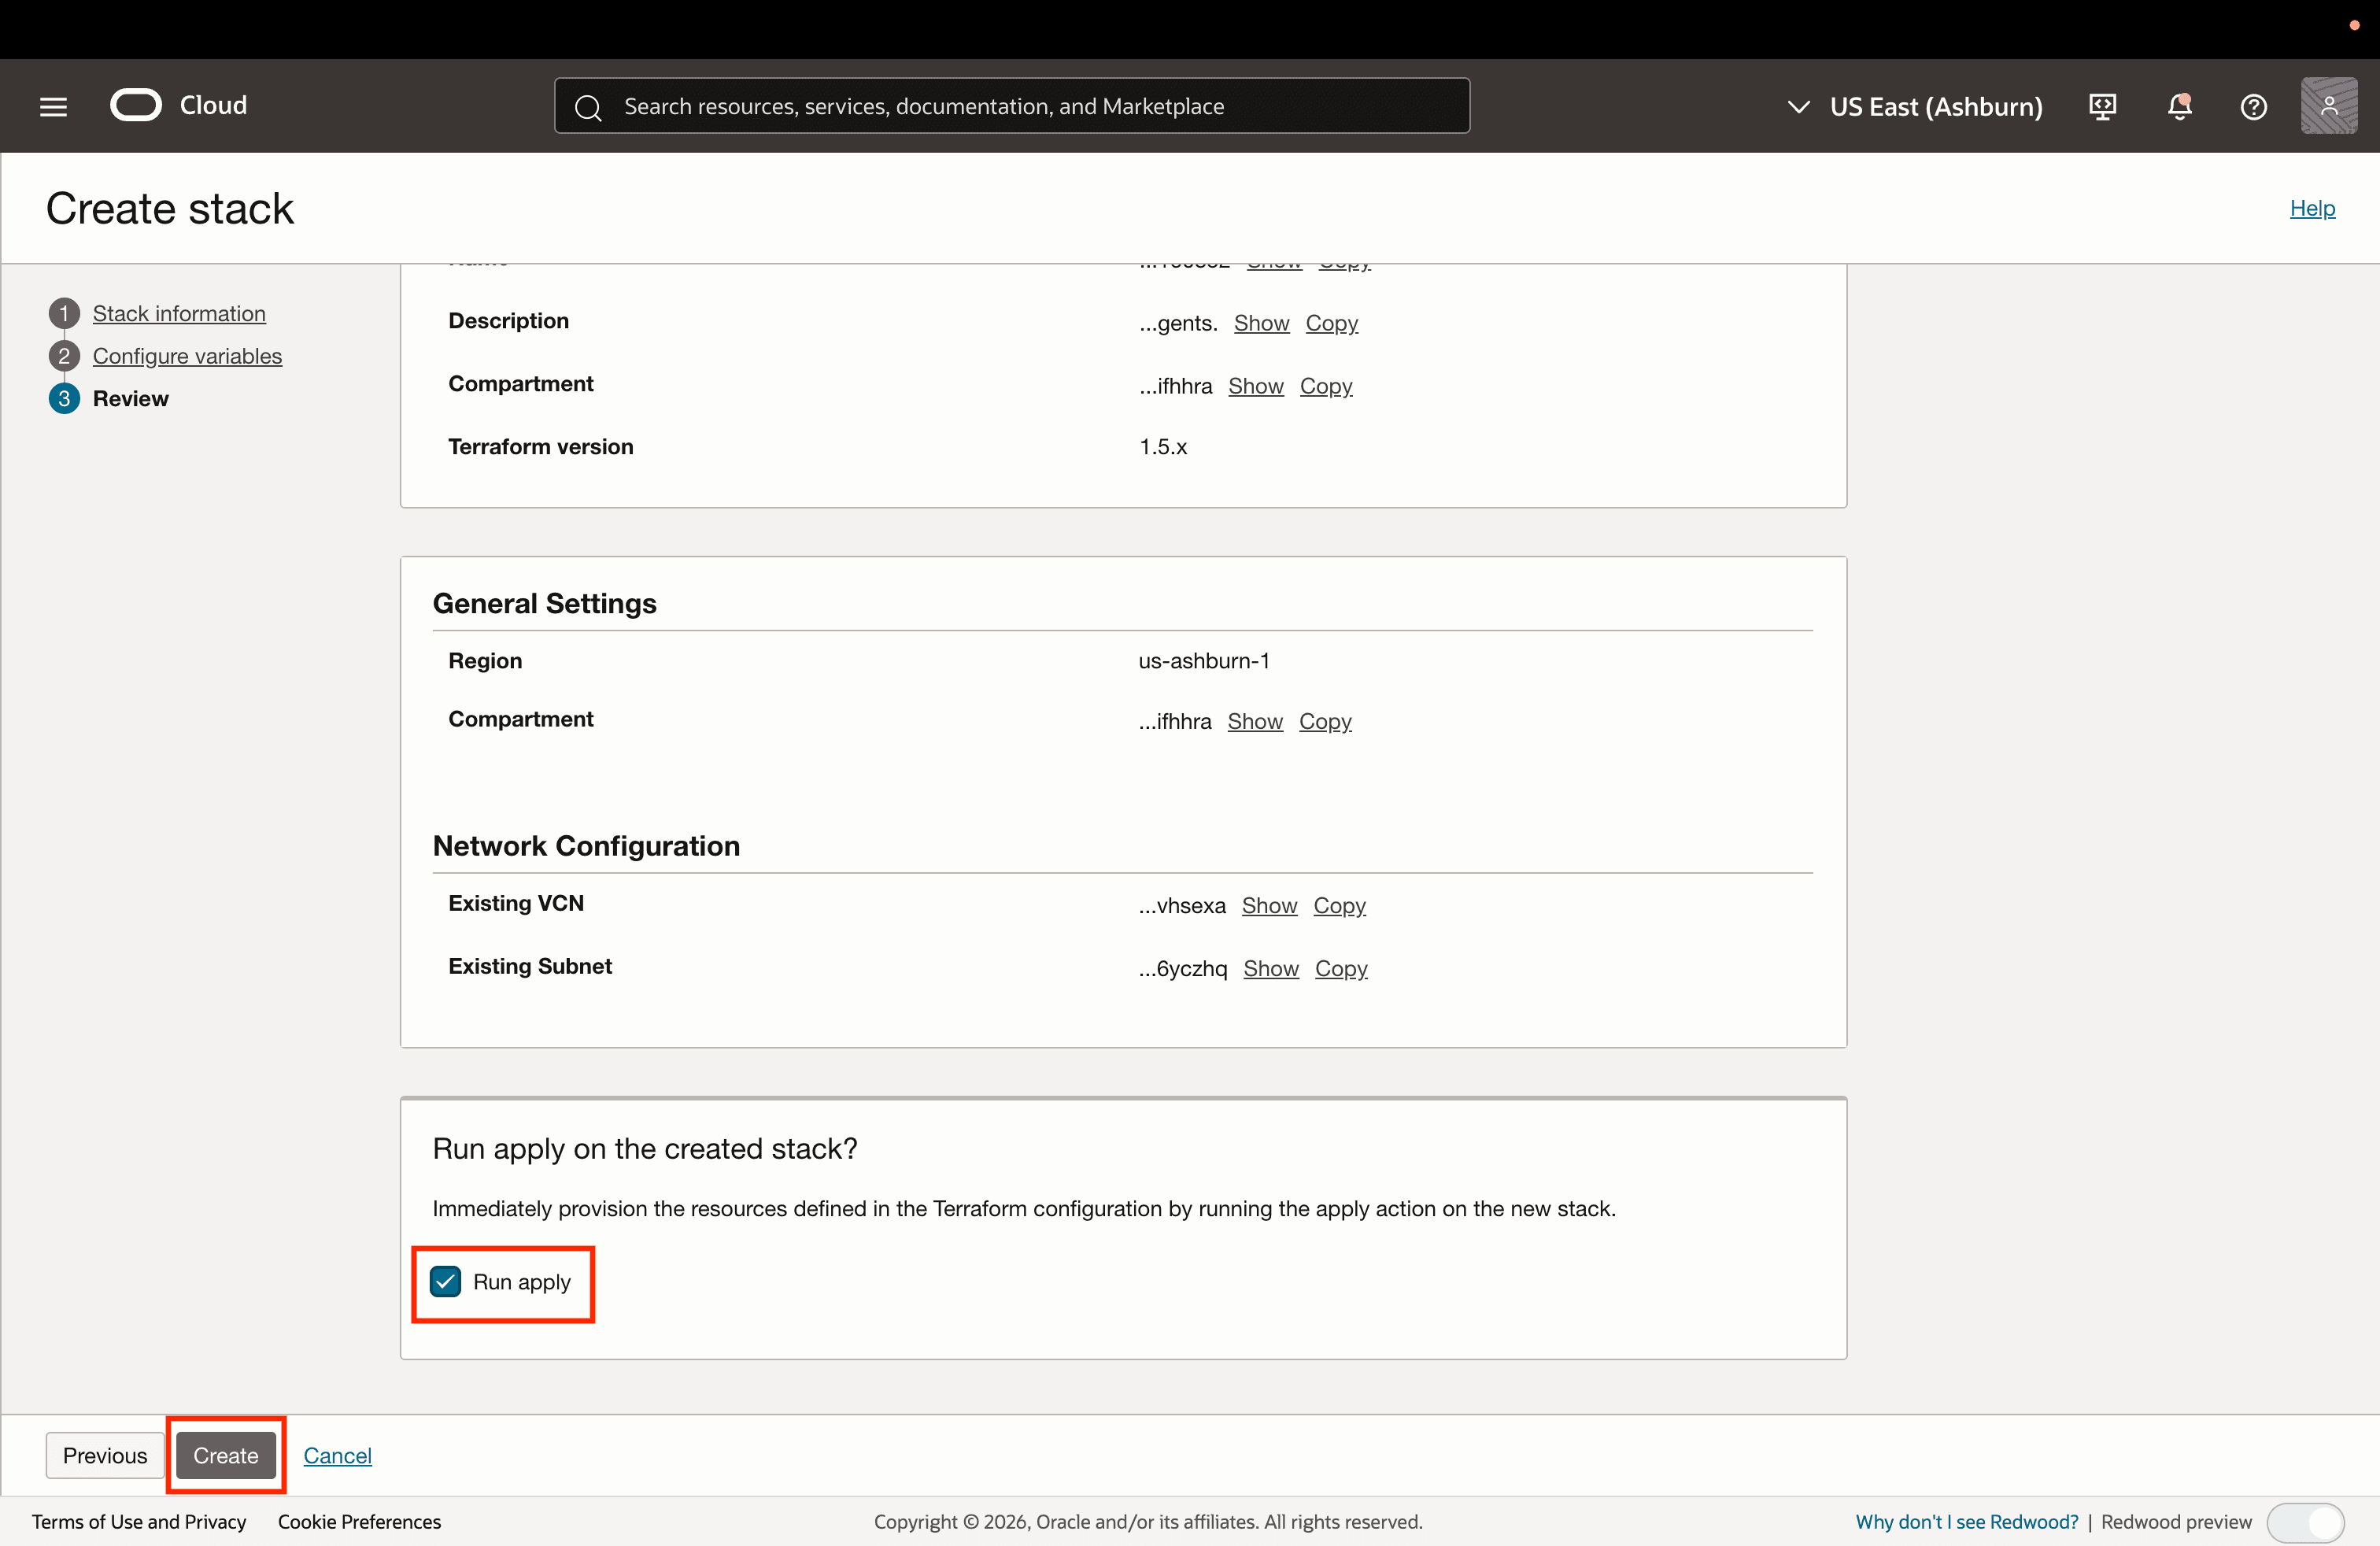
Review the details and select Create to start the instance creation job.
-
After the job succeeds, copy the application URL in the format
https://<instance_public_ip>:8080/agentFactory/installation, as displayed in the logs.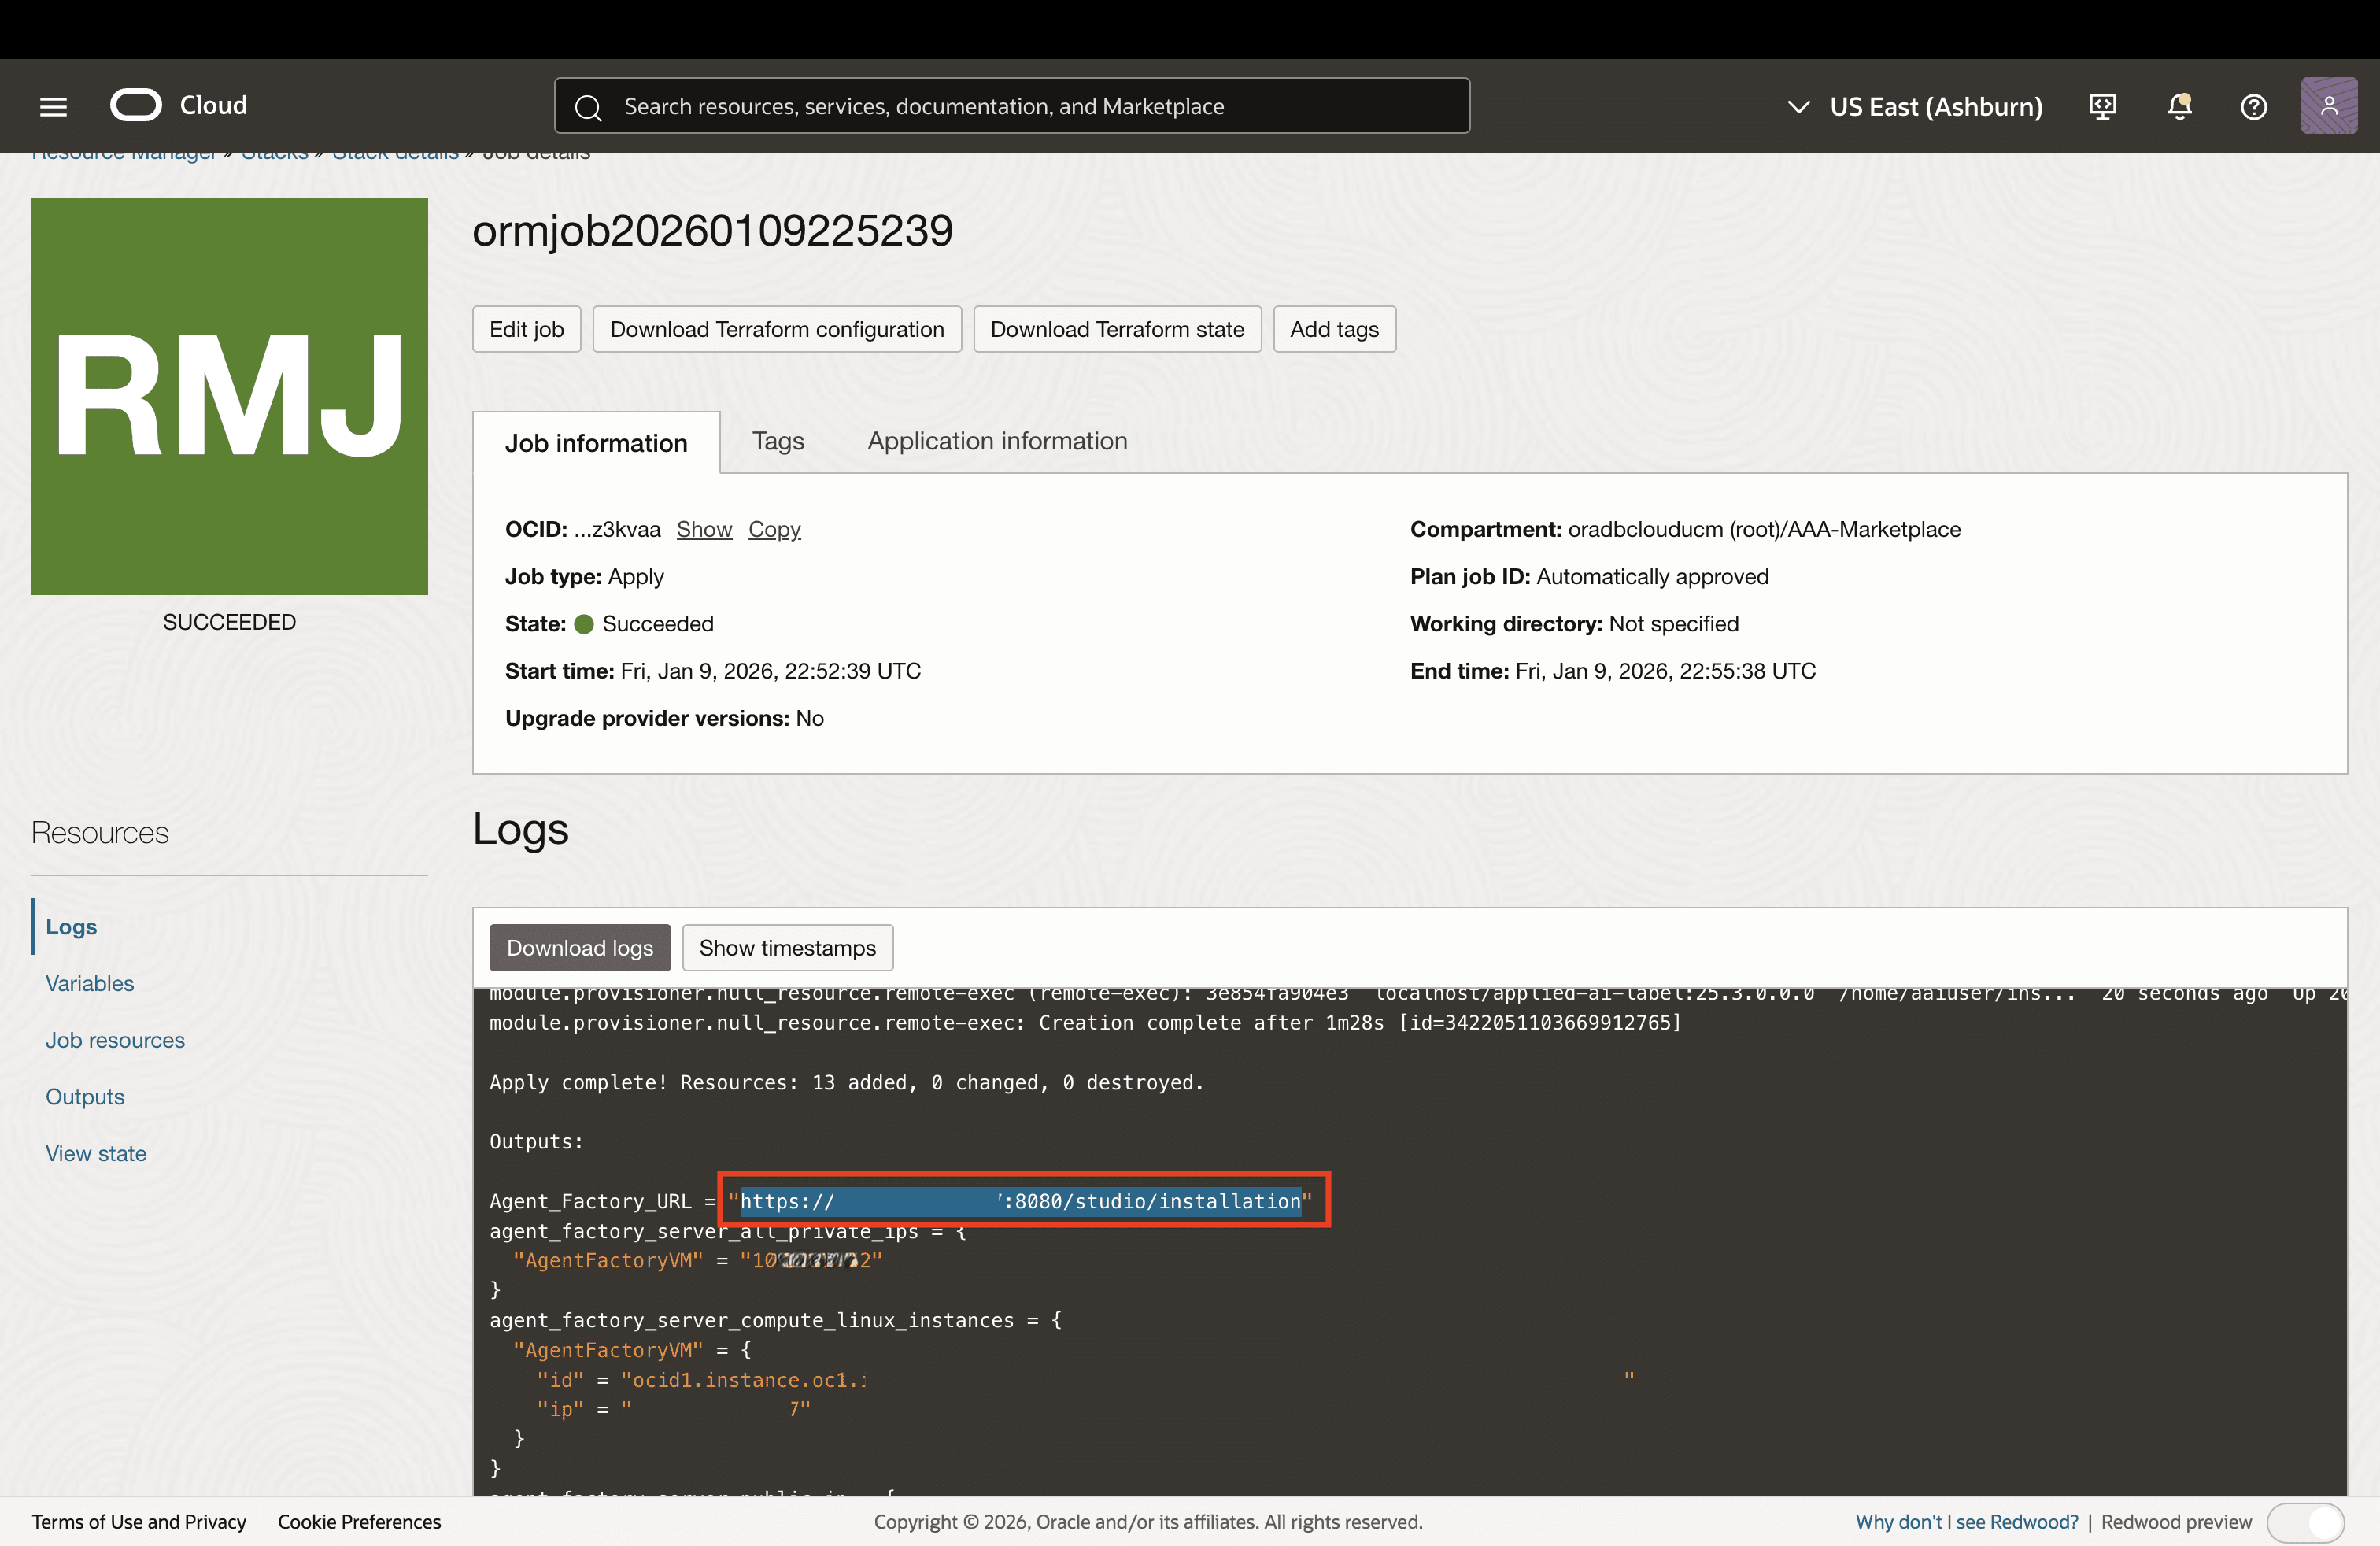
-
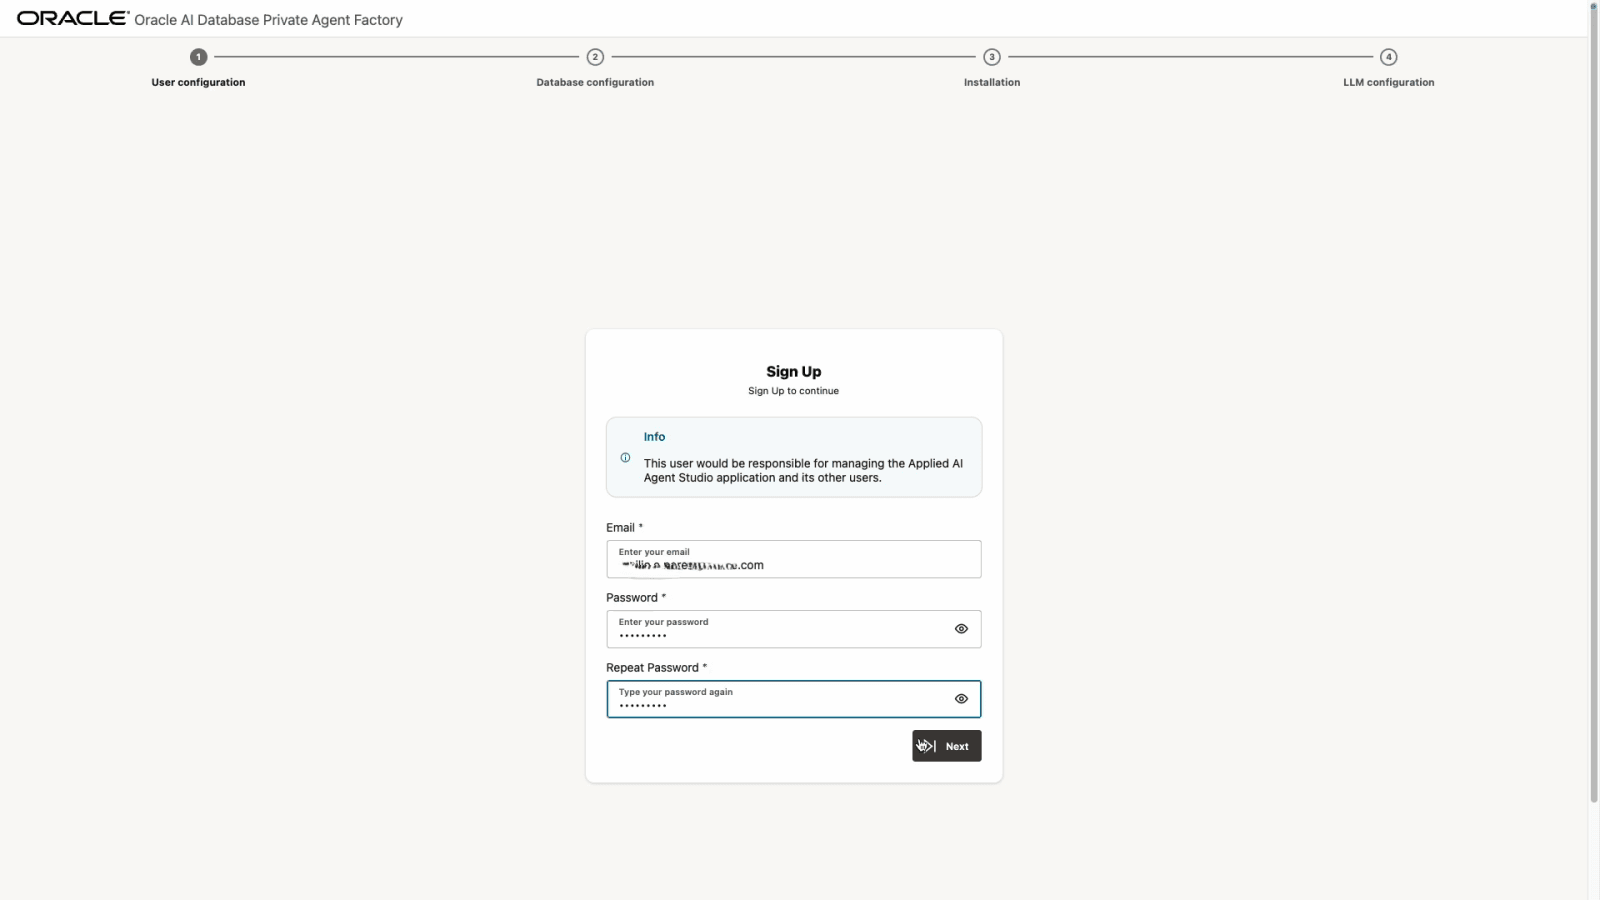
Access the URL to view the Sign Up page of the Oracle AI Database Private Agent Factory and start setting up the application.
Note: See Access Agent Factory Deployed in a Private Subnet to learn how to access Agent Factory when deploying in a private subnet.
Configure Application
The following prerequisites are required to successfully set up the Oracle AI Database Private Agent Factory:
-
Oracle Database 26ai. You need access to an instance of Oracle Database 26ai. Create a dedicated user for this purpose. Use this user exclusively for managing these tables, not for storing production data. The following SQL script is recommended for creating the dedicated user:
CREATE USER <DB_USER> IDENTIFIED BY <DB_PASSWORD> DEFAULT TABLESPACE USERS QUOTA unlimited ON USERS;
GRANT CREATE SESSION, CREATE TABLE, CREATE SEQUENCE, CREATE TRIGGER, CREATE TYPE, CREATE PROCEDURE, CREATE VIEW, CREATE SYNONYM TO <DB_USER>;
GRANT READ, WRITE ON DIRECTORY DATA_PUMP_DIR TO <DB_USER>;
GRANT SELECT ON SYS.V_$PARAMETER TO <DB_USER>;
CREATE USER AAI_RO_<DB_USER> IDENTIFIED BY <SAME_DB_PASSWORD_AS_DB_USER> ACCOUNT UNLOCK;
GRANT CREATE SESSION TO AAI_RO_<DB_USER>;
exit;
For Autonomous Database, use the
SYS.V_$PARAMETERsyntax shown above. See Database Preparation and Grants. -
LLM endpoint. The Oracle AI Database Private Agent Factory relies on integration with a Large Language Model to function properly. You need appropriate authentication credentials or an access key to connect the application with an available LLM instance of your choice.
Access the Application
-
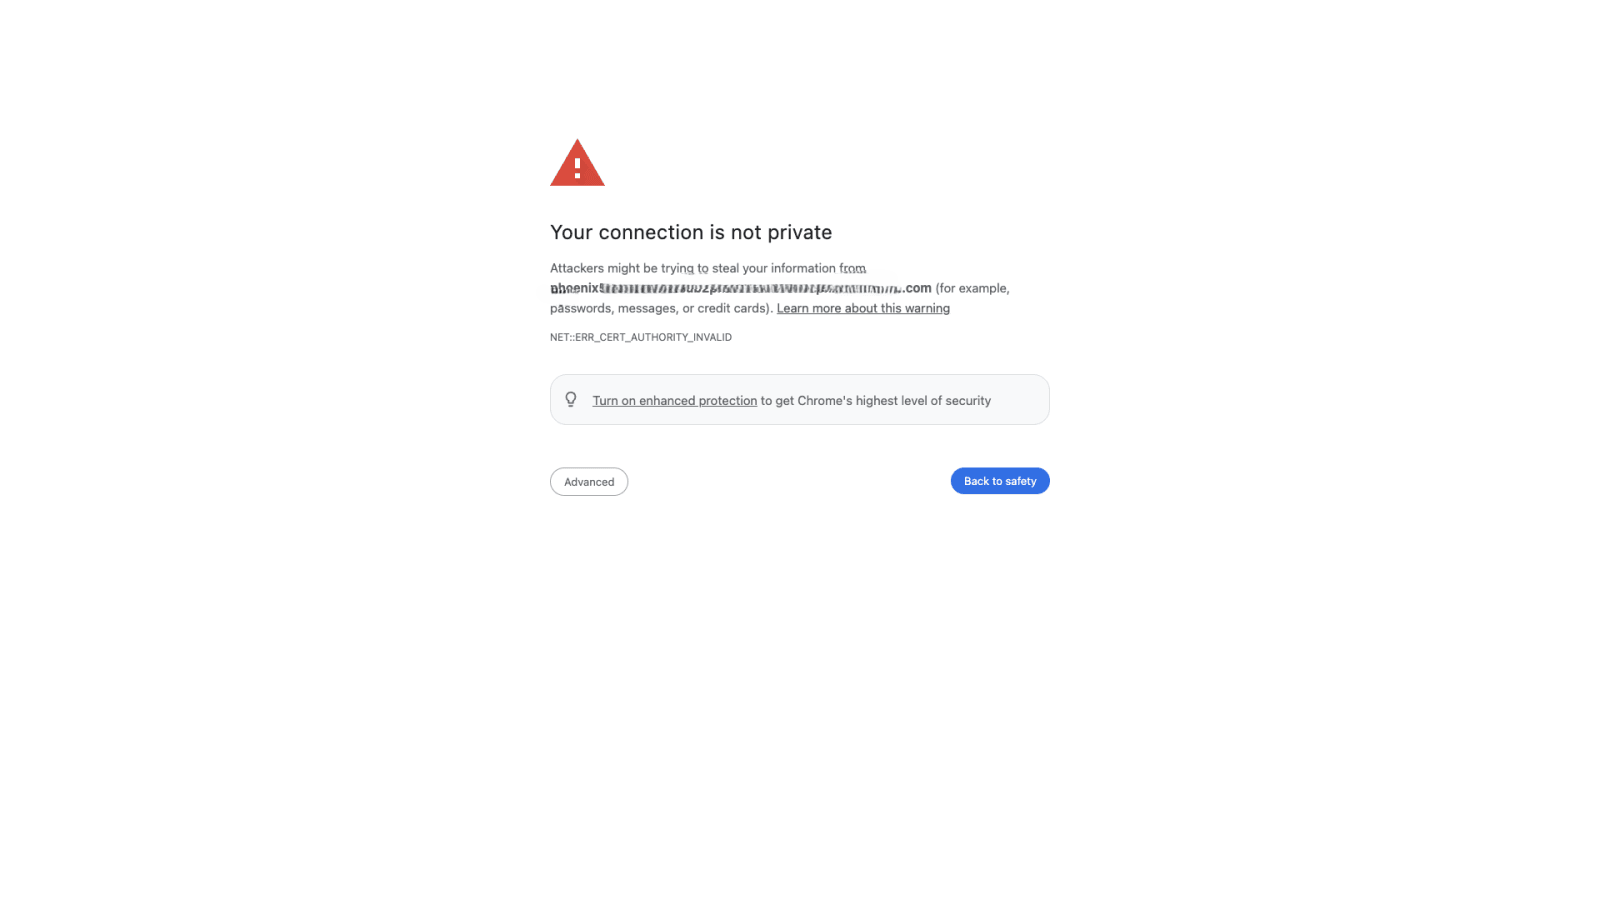
Copy and paste the application URL in a browser. A page similar to the following is displayed.
-
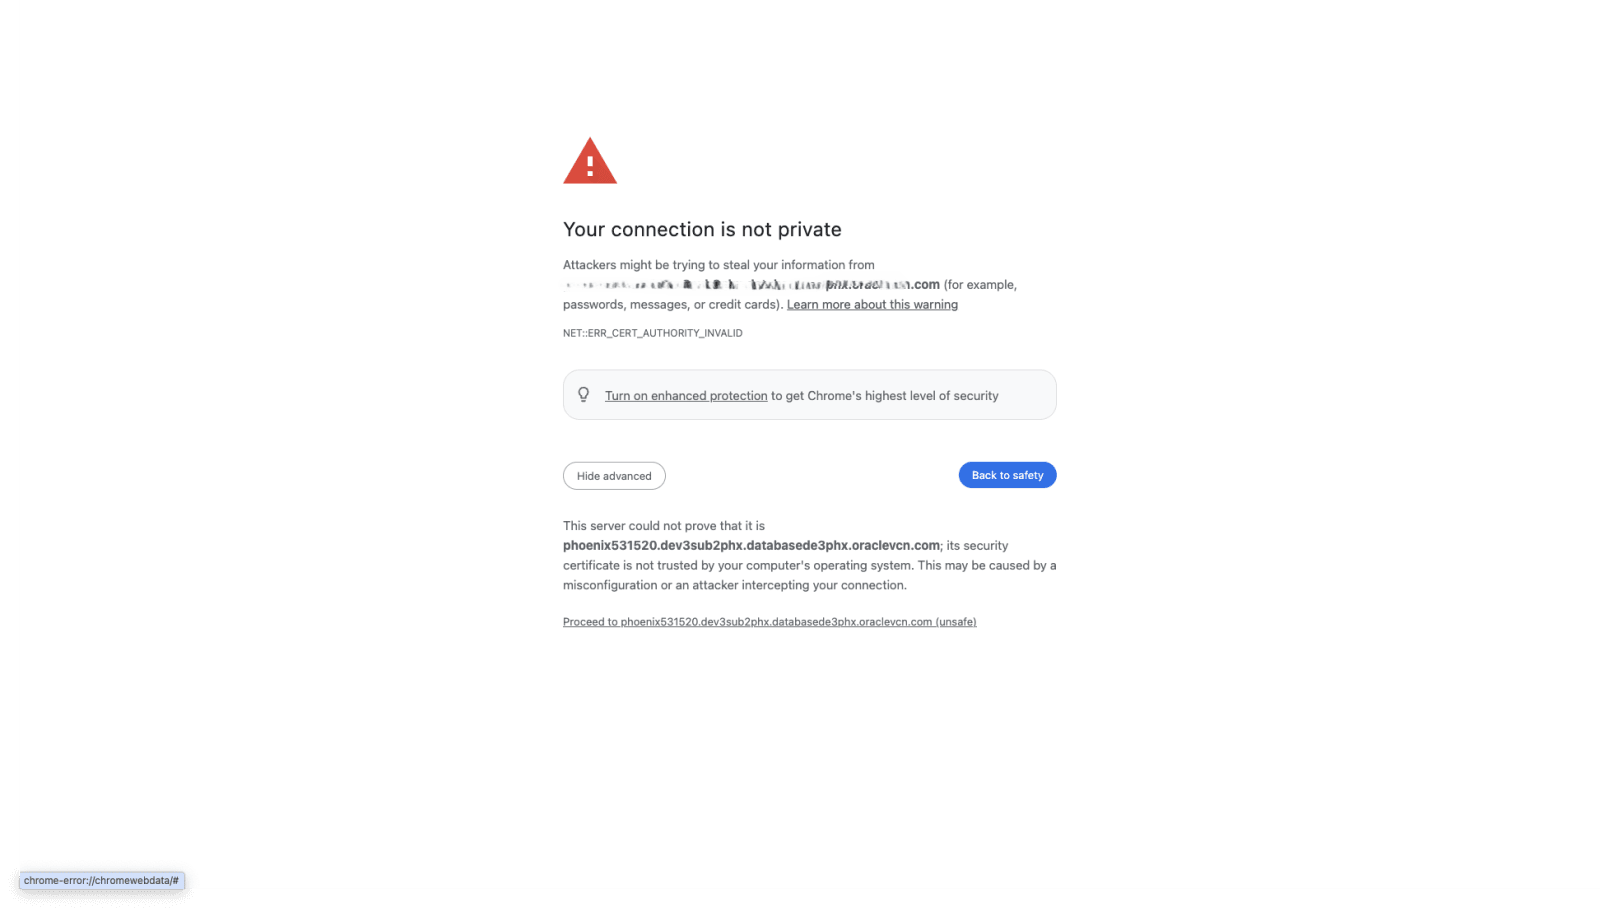
Click Advanced, and then click Proceed to host.
Configure User
Set up an email and a secure password.
Configure Database Connection
-
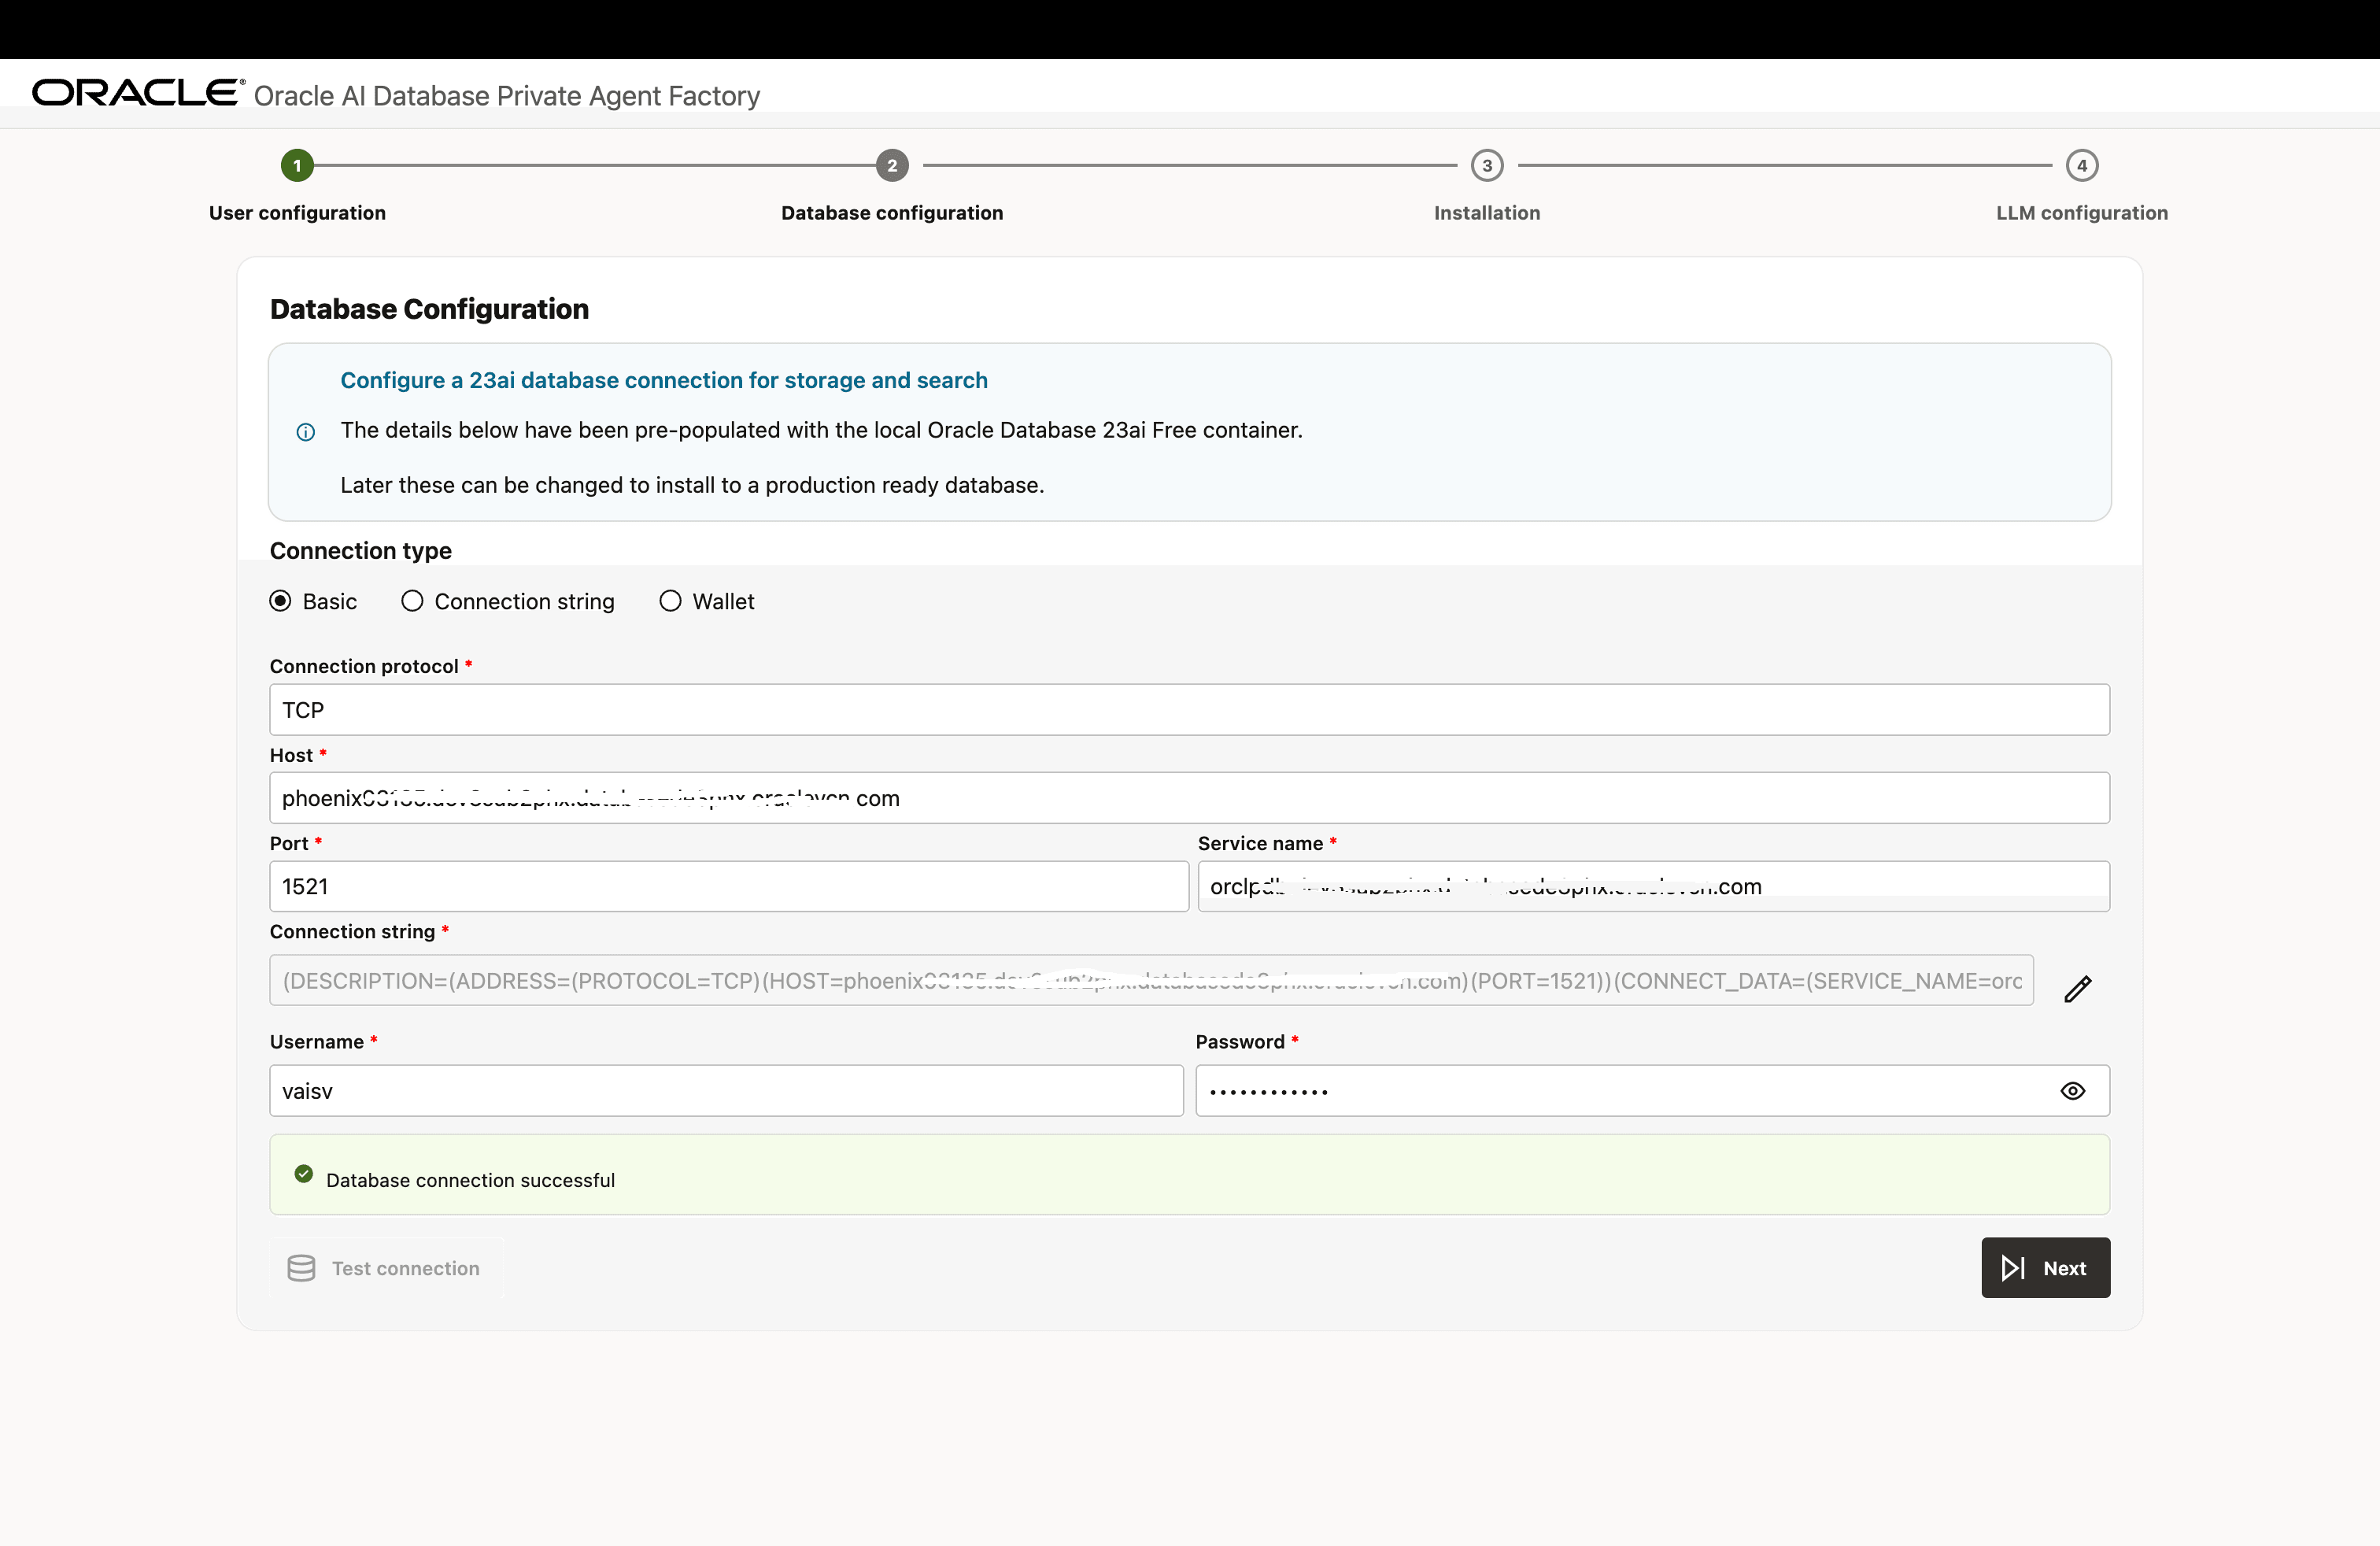
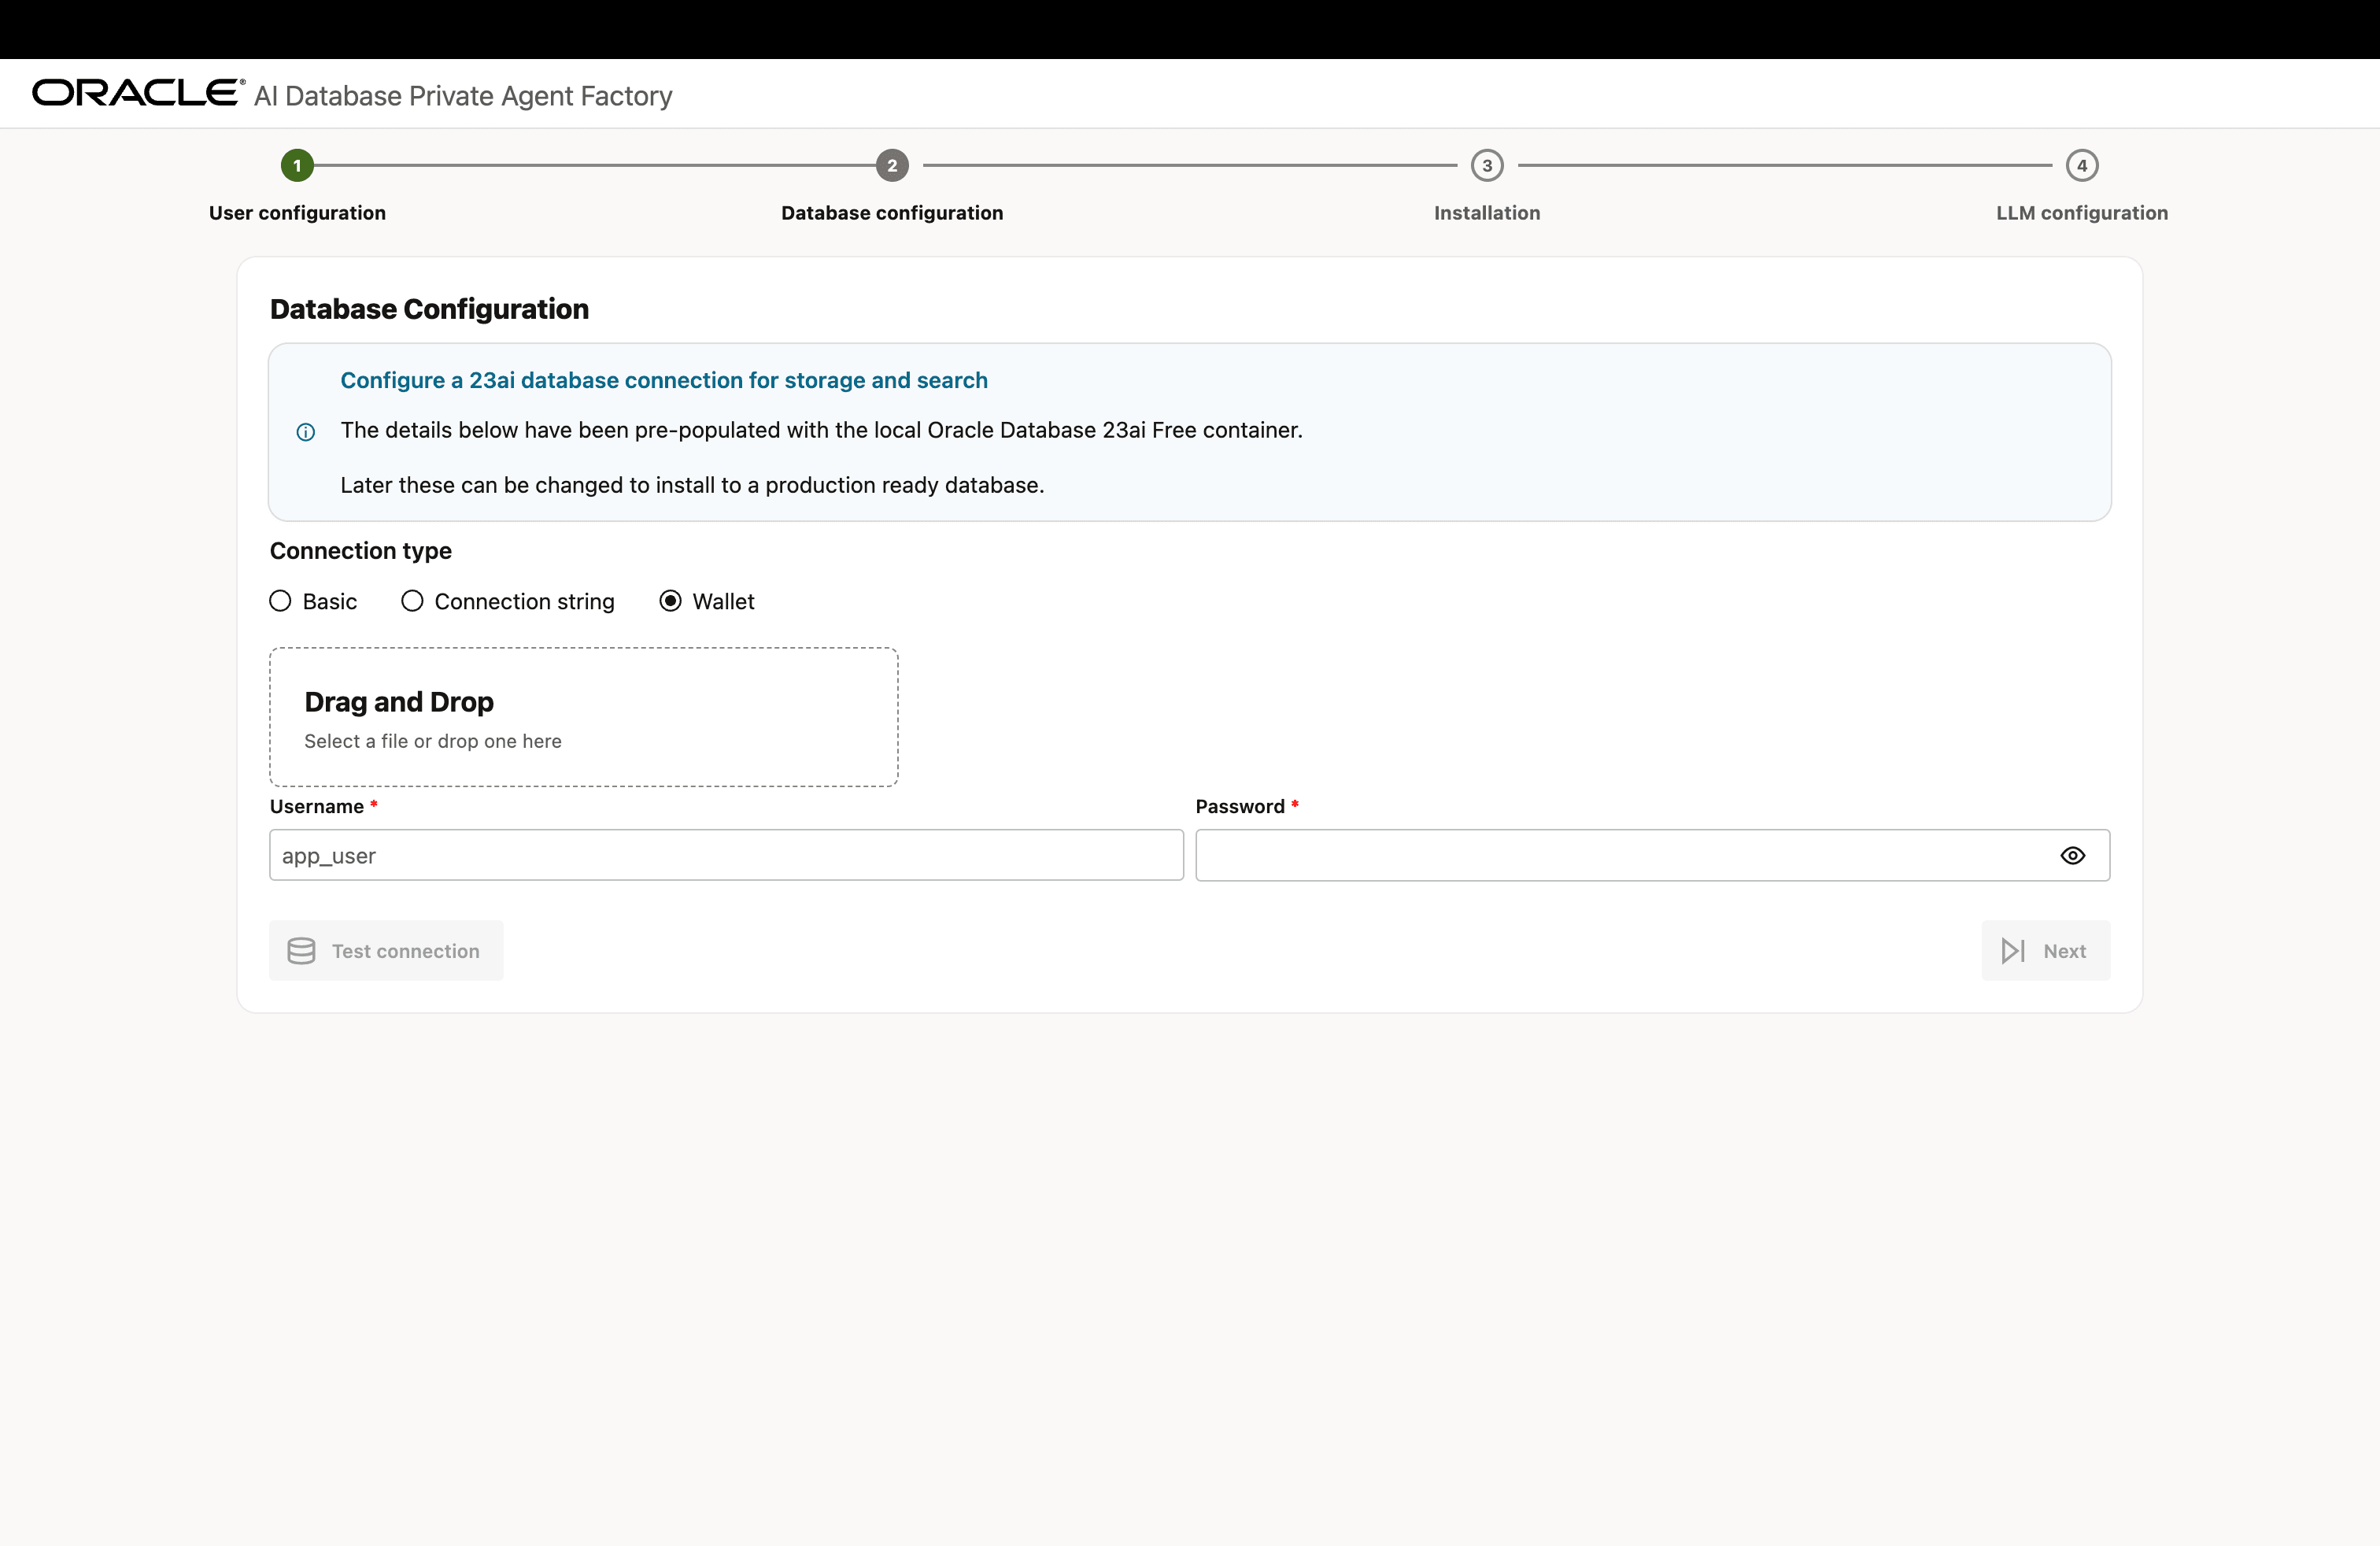
Provide your database connection details. You can enter the Oracle AI Database 26ai connection details directly, provide the connection string, or upload a database wallet file, along with a user and password.
-
Basic: Enter all the connection details manually and the previously created database user and password.
Description of the illustration install-step-2-db-config-1.png
-
Connection String: Enter the Database Connection String and the previously created database user and password.
Description of the illustration install-step-2-db-config-2.png
-
Wallet: Upload a Database Wallet File and enter the previously created database user and password.
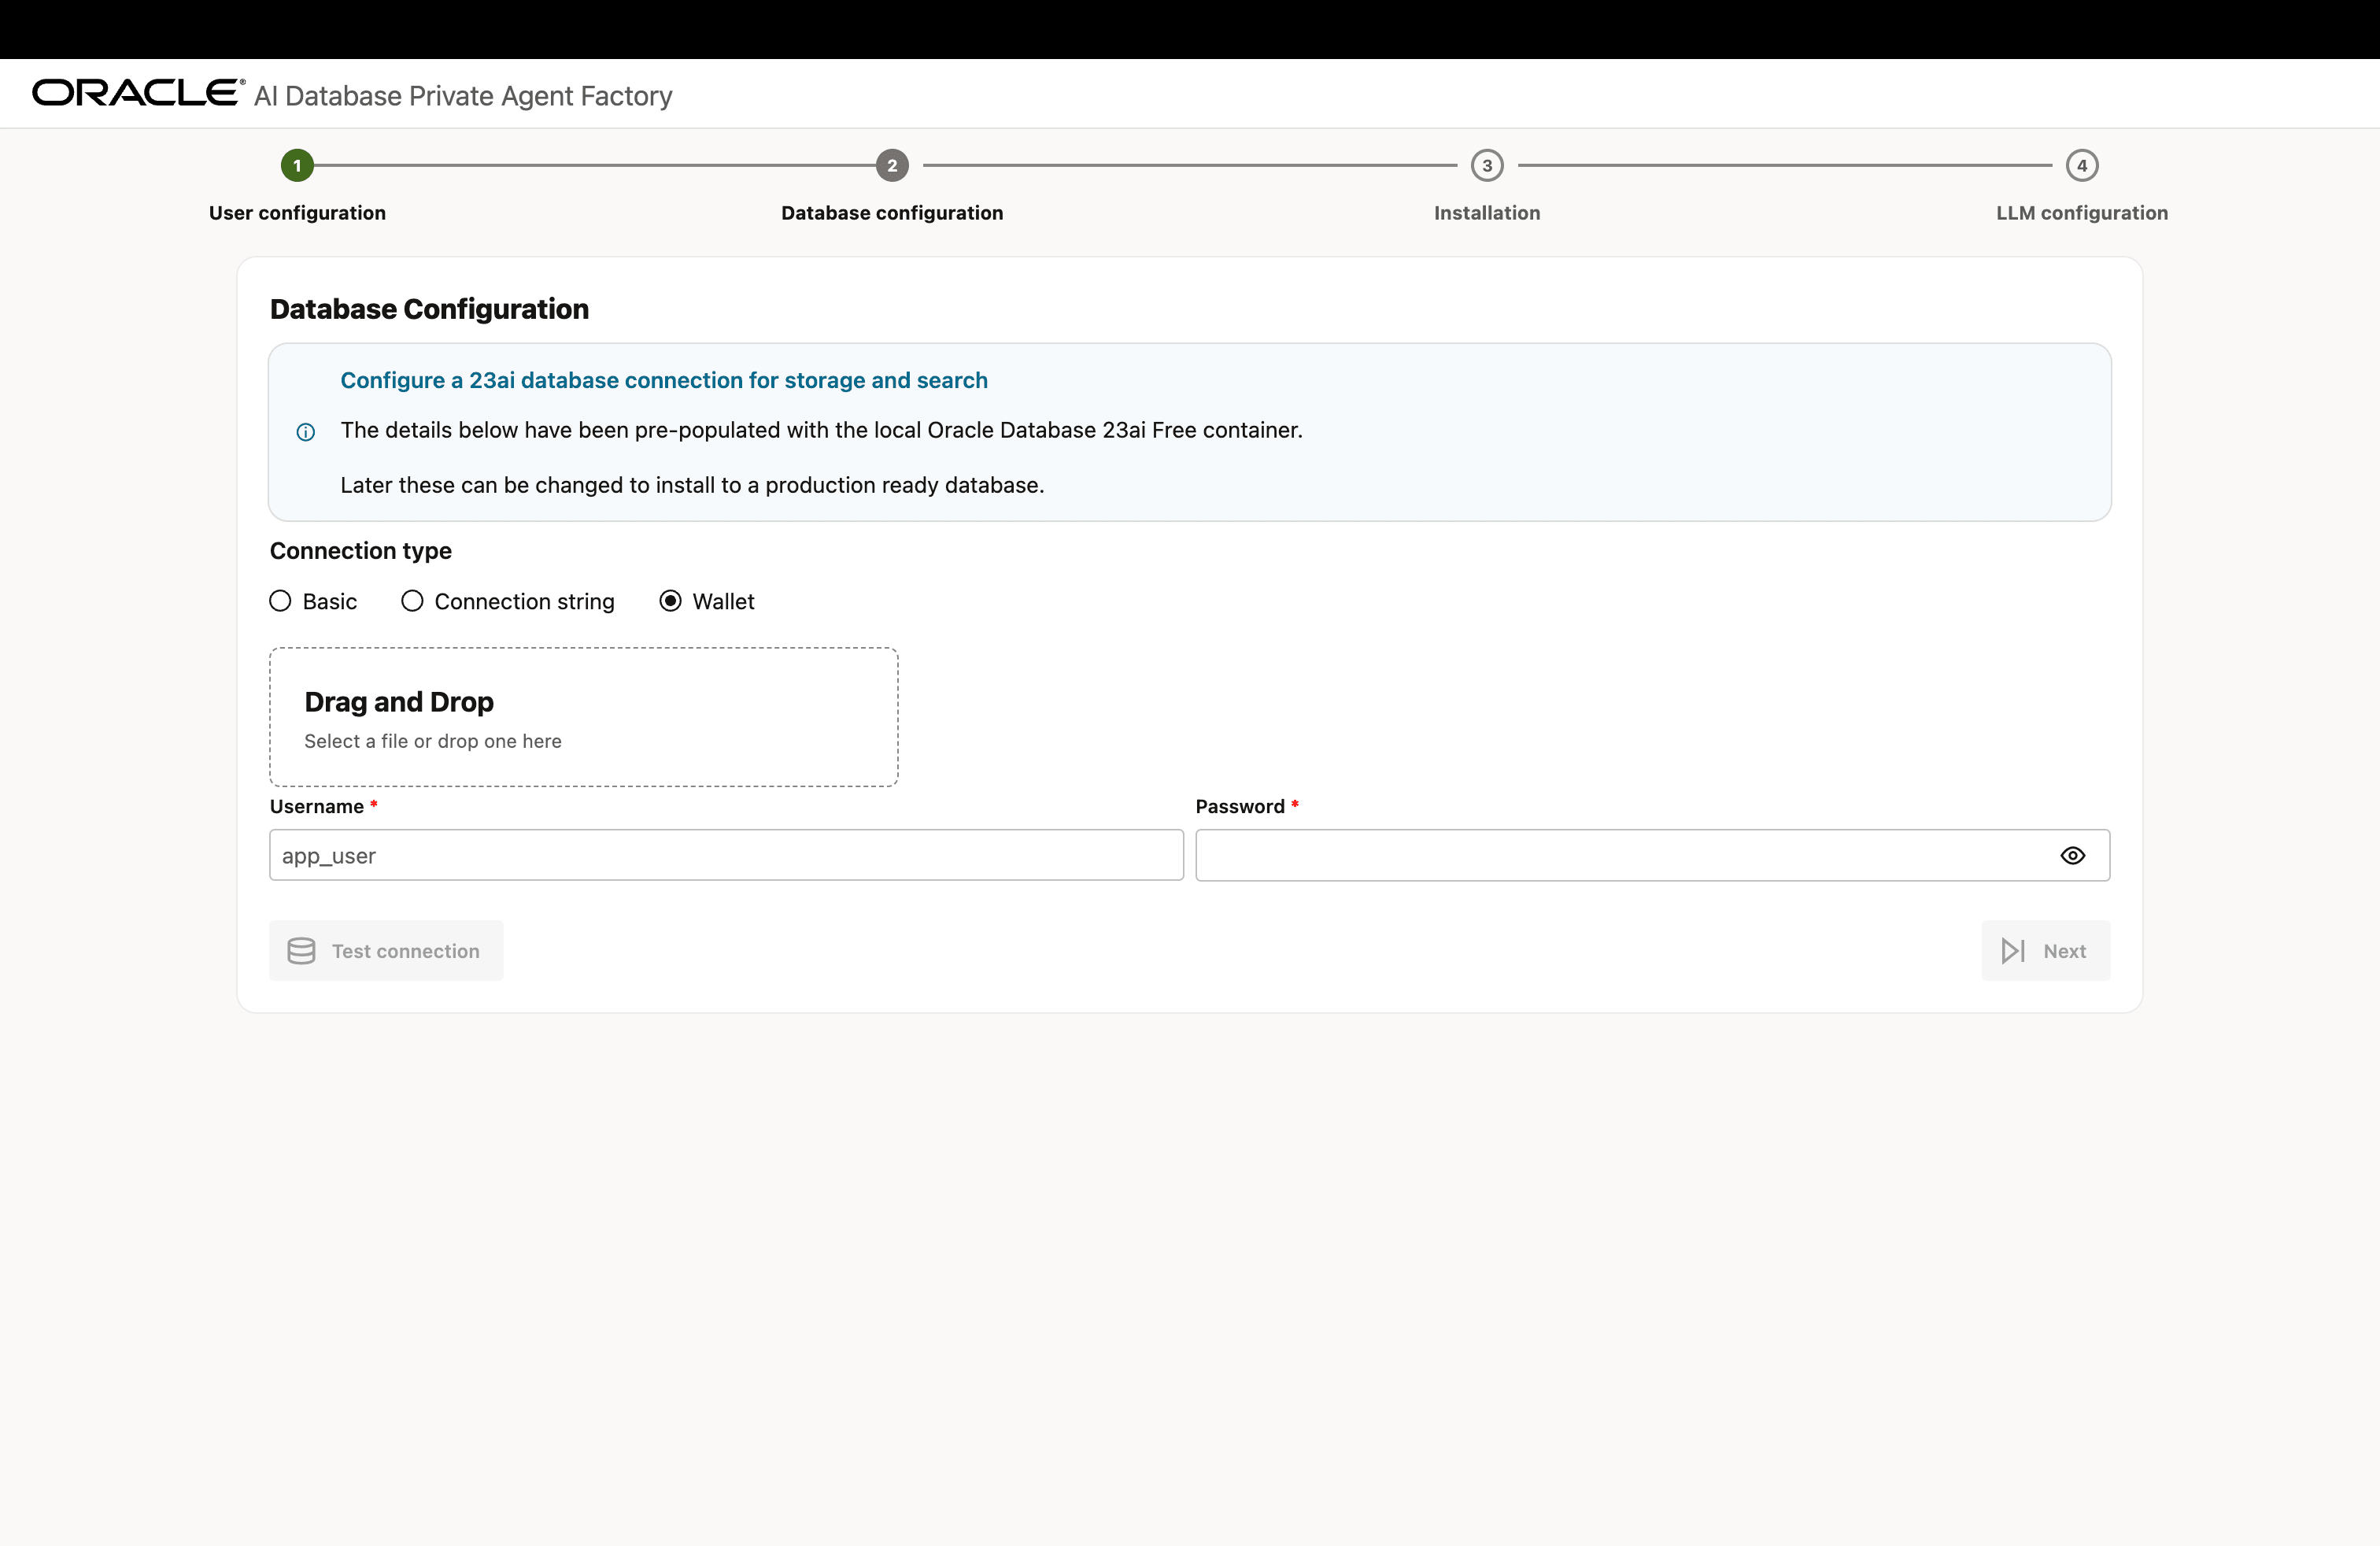
Description of the illustration install-step-2-db-config-3.png
Important: The core Knowledge Agent does not require SSL certificates or wallet configuration. SSL wallet setup is required only when you install the optional Oracle AI Database Private Agent Factory Knowledge Assistant, which answers questions about Agent Factory documentation. Skipping this assistant does not affect the installation or functionality of Private Agent Factory or the core Knowledge Agent.
To install the Oracle AI Database Private Agent Factory Knowledge Assistant when using database wallets, the database environment must not be air-gapped and must be able to access OCI Object Storage using Pre-Authenticated Request (PAR) files.
- On the database server, check the
sqlnet.orafile forWALLET_LOCATIONorENCRYPTION_WALLET_LOCATION. - When either parameter is configured, verify that the wallet contains the required OCI certificates.
-
For any missing certificates, download the required certificate bundle and add the certificates to the wallet. The following example assumes that the SSL wallet is located at
/u01/app/oracle/dcs/commonstore/wallets/ssland that you have unpacked the certificates in/home/oracle/dbc:#! /bin/bash # Check if the certificates are available under "Trusted Certificates" orapki wallet display -wallet /u01/app/oracle/dcs/commonstore/wallets/ssl # Add certificates if they are missing for i in $(ls /home/oracle/dbc/DigiCert*cer) do orapki wallet add -wallet /u01/app/oracle/dcs/commonstore/wallets/ssl -trusted_cert -cert $i -pwd <SSL Wallet password> done
See Create SSL Wallet with Certificates for more information.
-
-
Click Test Connection to verify that the information entered is correct. After a successful connection, the Database connection successful notification is displayed. Click Next.
Install Components
-
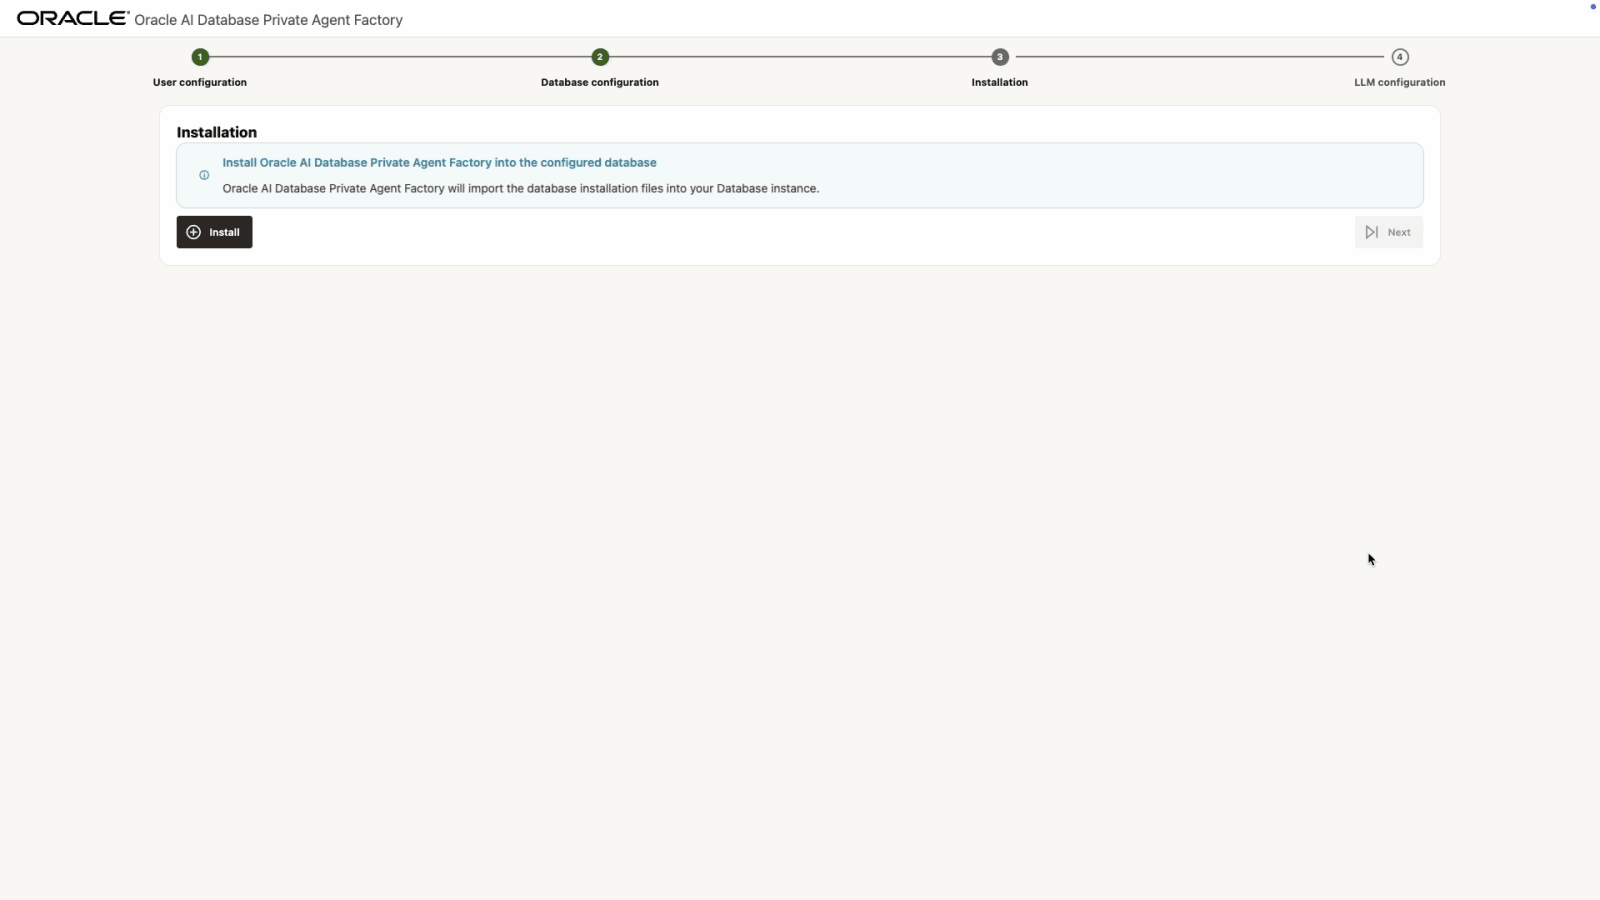
Click Install and wait a few minutes for the setup to complete.
-
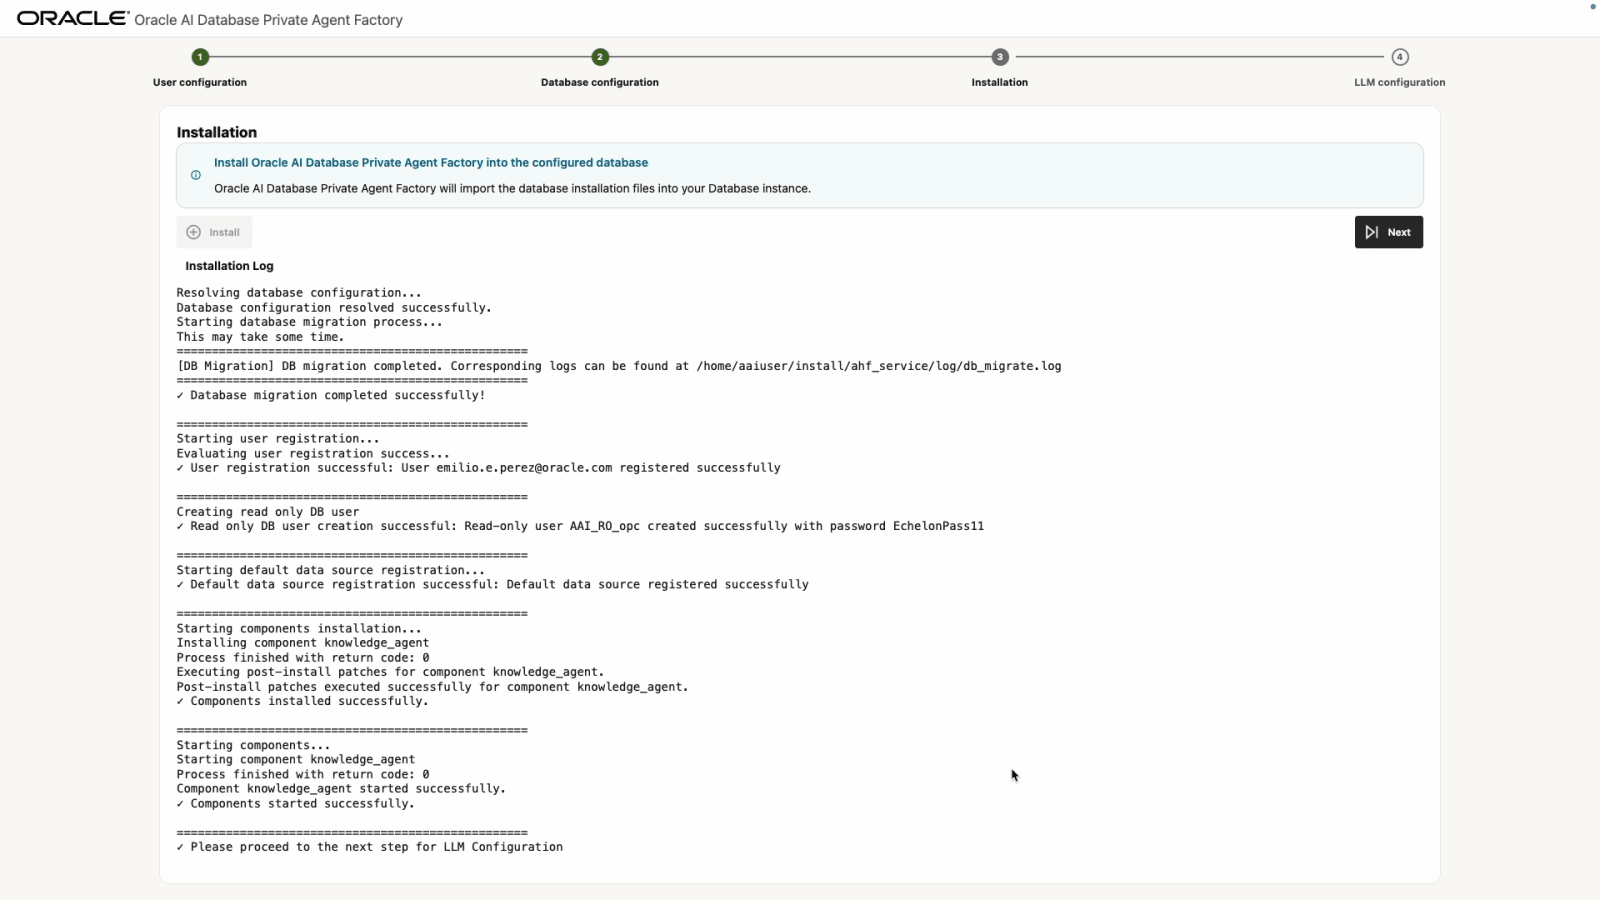
When the setup is finished, the message Please proceed to the next step for LLM Configuration is displayed. Click Next.
Configure LLM
Before you continue, see Manage LLM to review the supported models and LLM providers, and how to set them up.
-
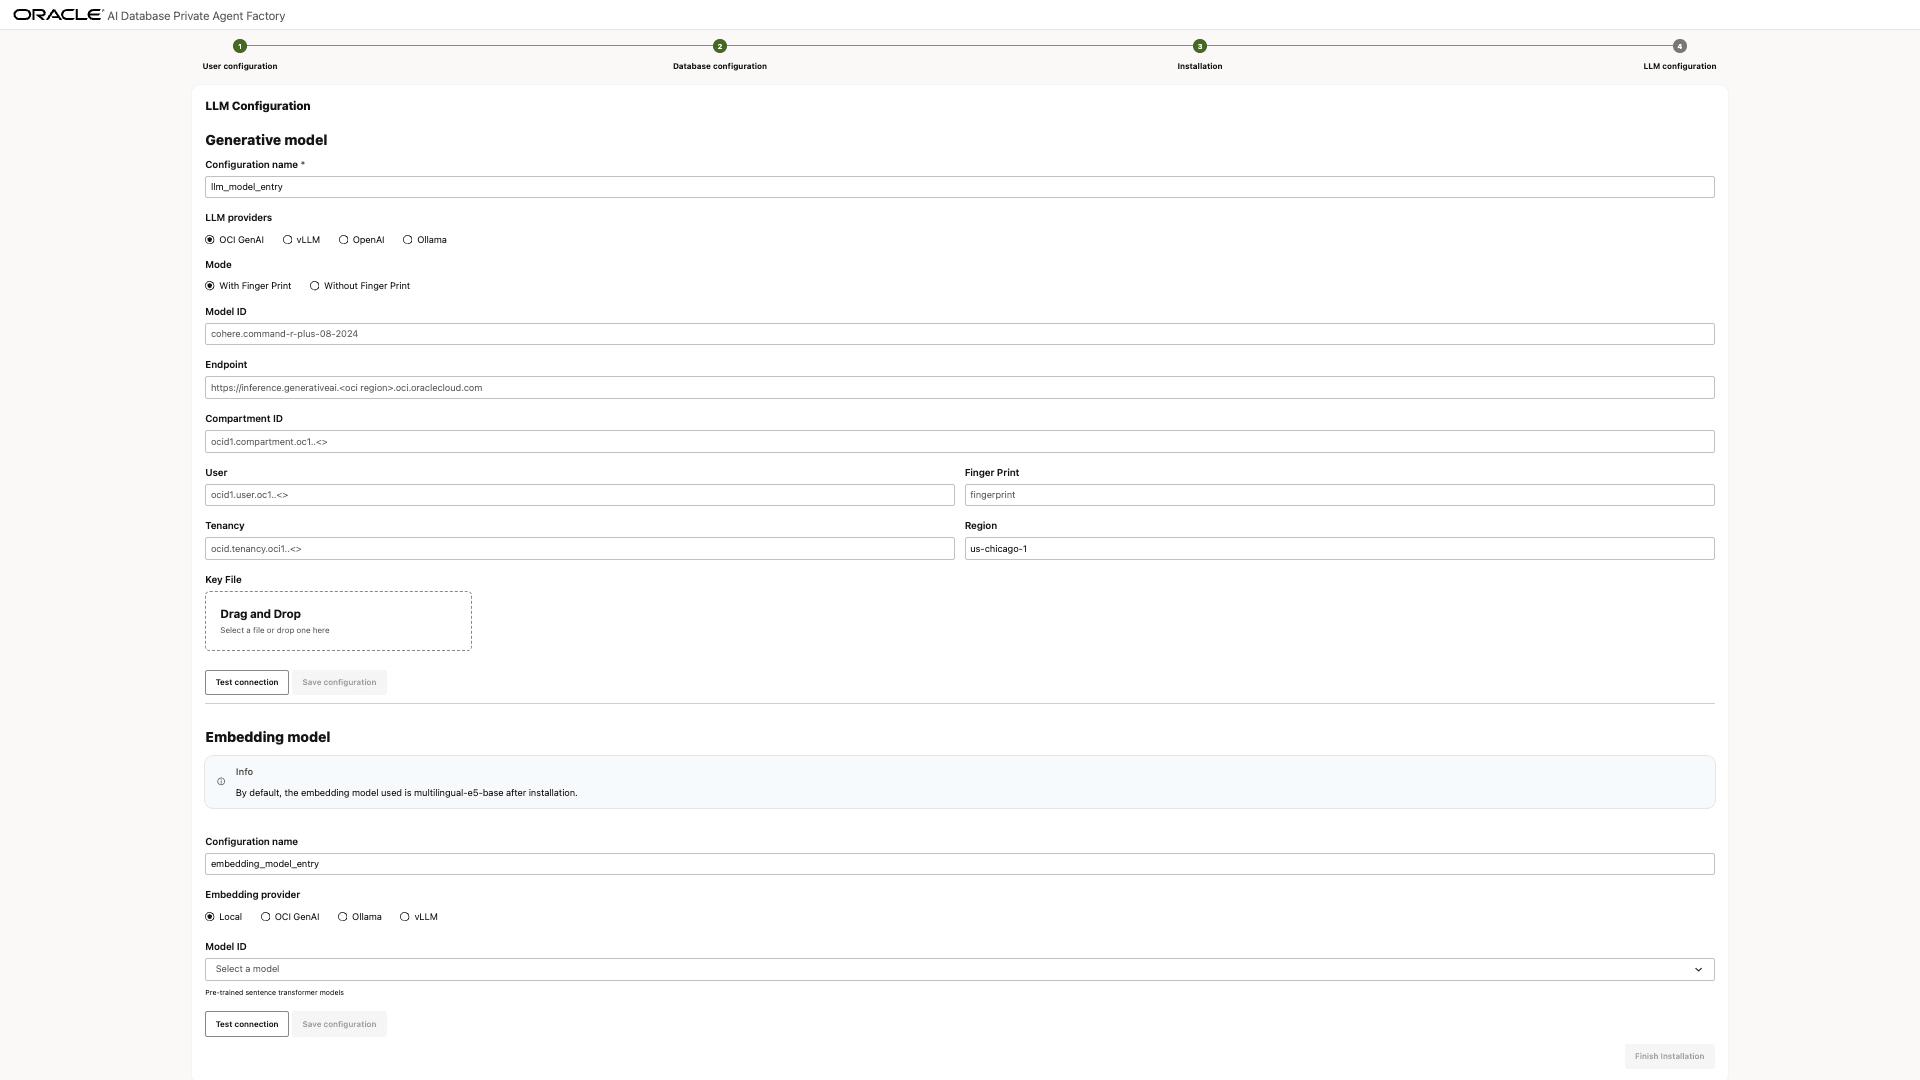
Select an LLM configuration based on your LLM provider. The application supports integration with Ollama, vLLM, OpenAI, and the full suite of OCI GenAI offerings. Depending on your selected provider, the required connection credentials may differ.
-
Enter the required details in the selected LLM configuration and select Test Connection. Once you see the Connection successful message, select Save Configuration.
Optionally, configure an embedding model to use for data ingestion and retrieval. By default, the
multilingual-e5-basemodel is used to generate embeddings and is also the local embedding model included with the service. If you choose OCI GenAI as the embedding provider, note that the following embedding models are supported for Knowledge Agents.- cohere.embed-v4.0
- cohere.embed-english-v3.0
- cohere.embed-multilingual-v3.0
- cohere.embed-multilingual-light-v3.0
-
Finally, select Finish Installation to complete the setup and be redirected to the login page.
Log In to the Application
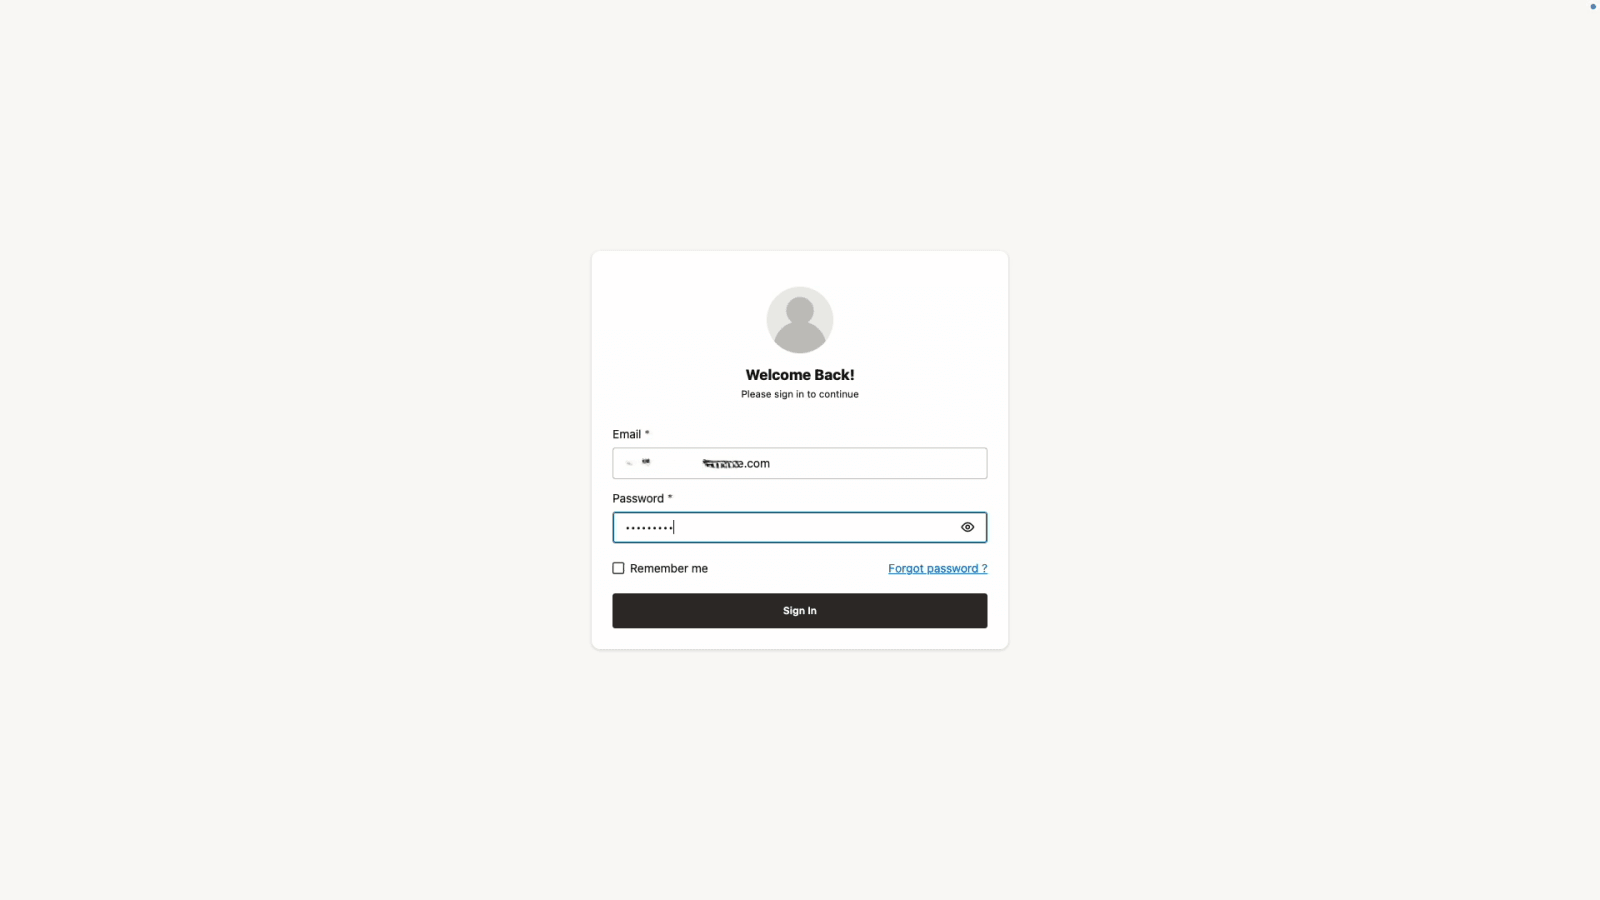
Log in with the email and password created previously. After you log in, the Get Started screen is displayed.
Security and Operational Requirements
When you deploy Agent Factory through OCI Marketplace, review the following security and operational requirements.
-
Host Security Software. The Agent Factory Marketplace deployment does not include endpoint security software, such as Falcon, Griffin, or similar sensors. Each tenancy must comply with its security and operational policies. Install any required monitoring, security, or compliance tooling according to your organizational standards.
-
SSH Key Support. SHA-1-based SSH keys are not supported. Agent Factory supports ED25519 SSH keys for Marketplace deployments.
-
SSL Certificates. Agent Factory includes self-signed certificates by default. Certificate management requirements vary by organization, and some deployments do not have a registered domain name for obtaining trusted certificates.
You are responsible for managing the certificate lifecycle. You can:
- Import organization-approved certificates
- Replace the default certificates with trusted CA-signed certificates
- Regenerate self-signed certificates using the built-in tooling
For more information, see Managing SSL Certificates.
-
Ongoing Security Maintenance. The Marketplace deployment provisions a VM and installs Agent Factory, but you are responsible for maintaining the environment. This includes:
- Applying operating system security updates
- Addressing newly disclosed vulnerabilities
- Installing organization-specific security tooling
- Maintaining certificates and access controls in accordance with internal policies
Evaluate and remediate security findings identified after deployment according to your security requirements.