3.7.2 Creating a Cloud Connection to an Autonomous Database Instance

You can create a Spatial Studio connection to an Autonomous Database instance.

As a prerequisite, you must download and save the wallet for your Autonomous Database instance from the Oracle Cloud Infrastructure (OCI) console. See Download Client Credentials (Wallets) for more information.

You can perform the following steps to setup a cloud connection to your Autonomous Database instance:

  1. Navigate to the Connections page.
  2. Click Create Connection.
    The Create Connection dialog opens as shown in Figure 3-32.
  3. Select Oracle Autonomous Database as the connection type and click Next.

    The Upload wallet dialog opens.

  4. Drag and drop your saved wallet file or click to upload the wallet from your system.
  5. Click OK.
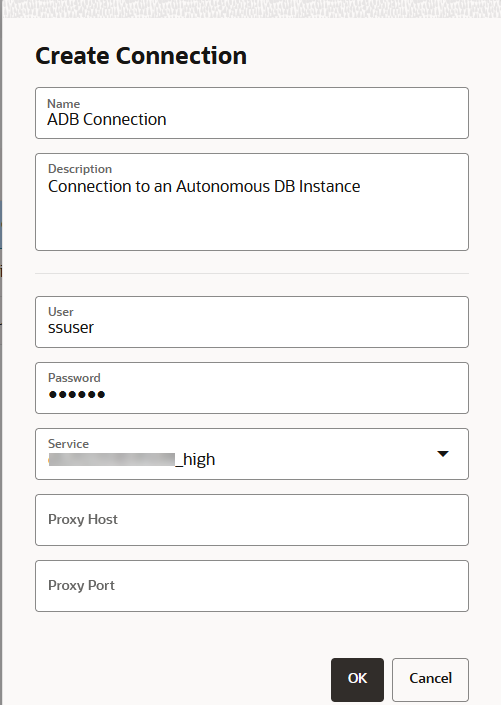
    The Create Connection dialog opens as shown:

    Figure 3-34 Creating a Connection to an Autonomous Database Instance

    Description of Figure 3-34 follows
    Description of "Figure 3-34 Creating a Connection to an Autonomous Database Instance"
  6. Optionally, change the default Spatial Studio connection Name.
  7. Optionally, enter a Description.
  8. Enter the Autonomous Database User name and the Password for the user.
  9. Select the appropriate Service from the drop-down list.
  10. Optionally, enter the Proxy Host and Proxy Port details.
  11. Click OK.
    The connection to the Autonomous Database instance gets created. This database type connection is displayed on the Connections page.