Perform Cube Administration Tasks in Cube Designer
You can perform many cube administration tasks in cube designer.
- Delete Applications and Cubes in Cube Designer
- Unlock Objects in Cube Designer
- View Logs in Cube Designer
- Manage Applications Using EAS Lite in Cube Designer
- Reset a Dimension in Cube Designer
- Update Cubes Incrementally in Cube Designer
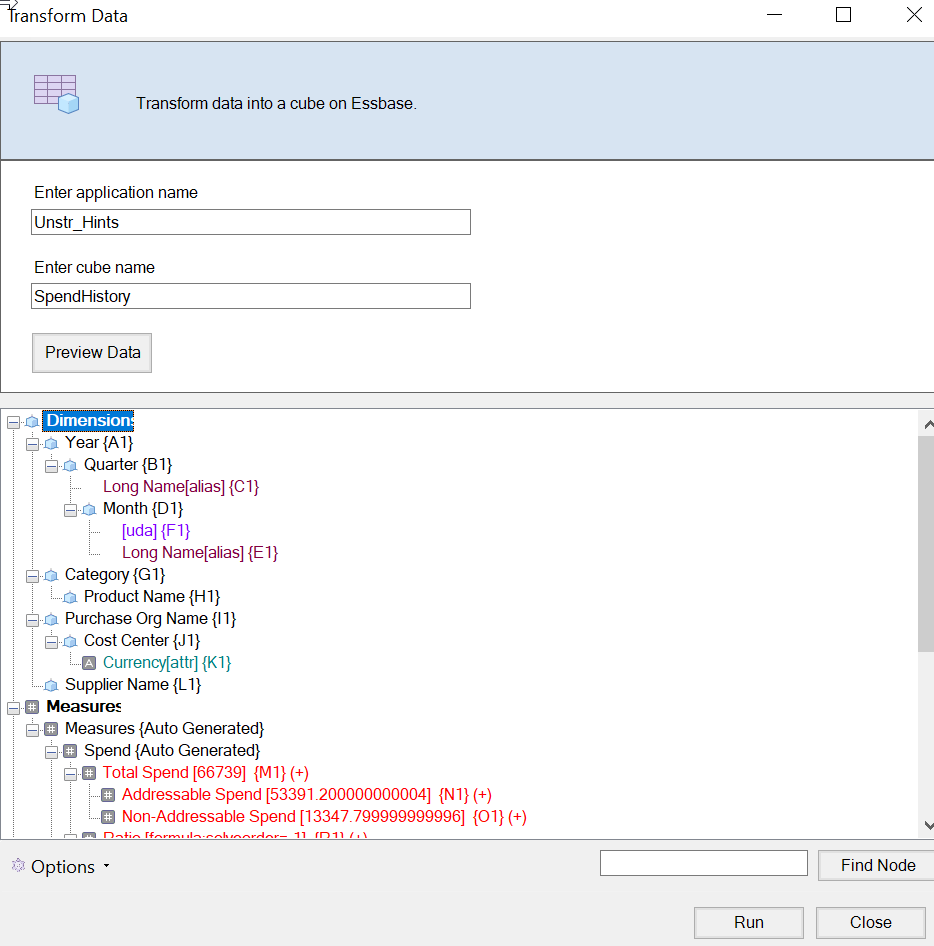
- Create a Cube from Tabular Data in Cube Designer
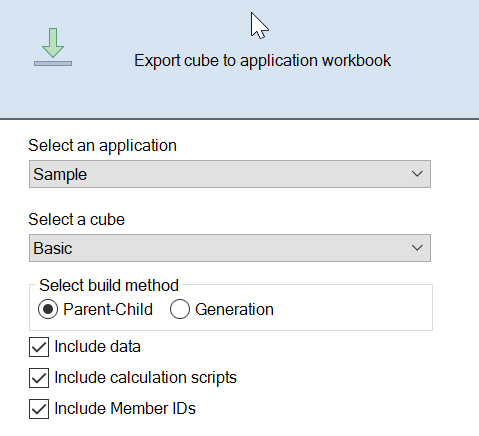
- Export Cubes to Application Workbooks in Cube Designer
Delete Applications and Cubes in Cube Designer
In Cube Designer, you can delete any application or cube that exists in Essbase. Deleting an application or cube cannot be undone.
- In Excel, on the Cube Designer ribbon, select Admin tasks
 .
. - From the menu, select Delete Application or Delete Cube.
- From the Delete Application or Delete Cube dialog box, select the application or cube you want to delete.
Unlock Objects in Cube Designer
Essbase uses a checkout facility for cube objects (such as calculation scripts and rules files). Objects are locked automatically when they are in use and the locks are deleted when they are no longer in use.
- In Excel, on the cube designer ribbon, select Admin tasks

- Select Unlock Essbase objects.
- Enter your login credentials if prompted to do so.
- Under Select an application, select the application containing the object you want to unlock.
- Under Select a locked object, select the object you want to unlock.
- Click Unlock.
View Logs in Cube Designer
In cube designer, you can view the platform log or an application log.
- In Excel, on the cube designer ribbon, select Admin tasks

- From the menu, select View Logs.
- Select a log to view:
- Select View Platform Log to view the log for the platform service.
- Select View Application Log to view the log for an individual application.
Manage Applications Using EAS Lite in Cube Designer
You can select in cube designer which applications to manage in Essbase Administration Services (EAS) Lite.
Although the Essbase web interface is the modern administration interface that supports all current platform features, a lite version of Essbase Administration Services is a limited-support option for continued management of your applications if your organization isn't ready to adopt the new interface. This option is available only for Essbase 21c independent installations of Essbase.
See Use Essbase Administration Services Lite for more information about EAS Lite, and to learn how to set applications to EAS managed in cube designer.
Reset a Dimension in Cube Designer
To perform certain dimension editing operations while retaining all data using cube designer, you must use the Reset Dimension Incremental Mode on the dimension worksheet in the application workbook.
Using reset dimension clears the members from the dimension and then rebuilds them, retaining the data.
You must update the entire dimension when using reset dimension, otherwise members and data will be lost.
- Re-order members
- Insert a new member in a specific location
- Remove members and maintain the shared members
- Move the members and retain the shared members
- Move parent members and have all the children move with them
Leave Allow Moves set to No, otherwise, you will not be able to build shared members.
Renaming members using this technique is not supported.
- Open the application workbook.
- On the cube designer ribbon, click Designer
Panel
 .
.
- In the designer panel, click To Sheet
 .
.
- In the application workbook, select the dimension you want to reset.
- In the designer panel, in the Incremental Mode drop-down menu, select Reset Dimension.
- In the designer panel, select To Sheet
 .
.
- In the application workbook, on the dimension sheet, make sure that Allow Moves is set to No.
- Save the application workbook.
- Rebuild the cube. See Create, Load, and Calculate the Cube in Create an Application and Cube in Cube Designer.
Update Cubes Incrementally in Cube Designer
Updating a cube is how you load dimensions and members to a cube outline using a data source and a rule file.
You can also use Essbase to add dimensions and members manually (see Creating and Updating Cubes from Tabular Data).
In an existing cube, you can incrementally update a dimension, or add a new one.
You cannot use Cube Designer to delete dimensions or rename members in an existing cube.
-
In Excel, on the Cube Designer ribbon, select Build Cube.
 .
.
-
Choose an Update Cube option from the Build Option menu.
When an outline was changed by a dimension build, the database may be restructured. Each of these options specifies how data values are handled during restructures:
-
Update Cube - Retain All Data
All data values are preserved.
-
Update Cube - Retain Input Data
All blocks (both upper-and lower-level) that contain loaded data are preserved.
This option applies only to block storage cubes.
-
Update Cube - Retain Leaf Data
Only leaf (level 0) values are preserved. If all data required for calculation resides in leaf members, then you should select this option. If selected, then all upper-level blocks are deleted before the cube is restructured. Therefore, the disk space required for restructuring is reduced, and calculation time is improved. When the cube is recalculated, the upper-level blocks are re-created.
-
Update Cube - Remove All Data
All data values are cleared.
This option applies only to block storage cubes.
-
-
Dimension build definitions are contained within the application workbook and automatically generate the necessary rules files. You do not select a rule file when building dimensions in Cube Designer.
-
When making changes to user-defined attributes (UDAs) while updating a cube incrementally using Cube Designer and an application workbook, you must specify all the UDAs in the dimension sheet, both new ones you are adding and existing UDAs in the outline. If you specify some UDAs (such as those you are adding), but not all of them, those that are not specified are deleted.
-
When incrementally adding a dimension to an existing cube using an application workbook, the data is automatically mapped to the new top member. There is not a way to choose a stored member to which to map the existing data. If the new dimension has a top member that is dynamic calc, the data is lost because dynamic members can’t store data.
When using an application workbook to add a new dimension in which you want the top member to be dynamic calc, follow these steps:- Add the new dimension with the top member as stored.
- Run a calc script to copy the data from the new top member into another stored member in that dimension.
- Change the top member to dynamic calc.
Create a Cube from Tabular Data in Cube Designer
This workflow uses two sample tabular data Excel files to demonstrate the concepts of intrinsic and forced-designation headers (hints). See Transform Tabular Data to Cubes.


