Web Switching Sheets
Switching Sheet Types
Web Switching Management supports the following types of switching sheets.
• Planned - Used for switching sequences that are prepared ahead of time. In scheduled or planned switching, you can create, study, and approve switching steps in a Viewer in study mode prior to completing them in real-time. Planned switching sheets require information that is not needed for emergency switching sheets, such as a start and end date.
Note: When creating a switching sheet from an event in the Work Agenda or Event Details, the Planned switching sheet type is not available.
• Emergency - Used for switching sequences that are prepared and implemented in real-time when overloads or unplanned outages occur.
Notes:
• Emergency Switching Sheets cannot be created from Web Switching Request.
• FLISR sheet types are created by the FLISR tool and are another form of an Emergency switching sheet. Users cannot create FLISR switching sheets from scratch. In automatic mode, FLISR can create and execute a switch plan without operator intervention. See Executing FLISR in Automatic Mode. In manual mode, you generate and then execute the switch plan manually. See Generating a Switch Plan with FLISR in Manual Mode.
• Optimization - Optimization sheets are created by Network Optimization module. See Using Optimization in Real-Time Mode.
• Load Shed - Load Shed sheets are created by the Load Shed and Restoration tool. See Using the Load Shed and Restoration Tool.
• Template - Used to record and store frequently performed switching step sequences that can be copied into a switching plan. A template is not used to perform actions, but rather to create and save "pre-built" sheets with step sequences. You can create a template from scratch or by copying an existing template, planned, or emergency switching sheet.
Note: When creating a switching sheet from an event in the Work Agenda or Event Details, the Template switching sheet type is not available.
• ANMS Template - Used to create ANMS scheme templates.
• Outage Correction - Used to correct outage information. Outage events are associated to this switching sheet type and then steps are recorded to reflect the actual events leading up to the outage. An option on the sheet then allows you to update the associated event, including customer counts associated to the outage.
Note: Outage Correction switching sheets cannot be created from Web Switching Request.
Additional or alternative sheet types can be configured for your project; see the Oracle Utilities Network Management System Configuration Guide for details on creating custom sheet types.
Switching Sheet States
A switching sheet passes through different phases during the creation and completion of the sheet. These phases are represented by "states" that follow a logical sequence and determine what you can do with a switching sheet at any time. Each sheet type has a unique set of state transitions. For example, planned switching sheets have more state transitions than emergency sheets.
Normal Progression of Planned Sheet | Normal Progression of Emergency Sheet |
|---|---|
1. New 2. Requested 3. Prepared 4. Checked 5. Approved (optional) 6. Scheduled 7. Issued 8. In Progress 9. Completed | 1. New 2. In Progress 3. Completed |
See Changing the Switching Sheet State for a complete description of each possible state and instructions for changing the sheet state.
Note: The state of the switching sheet should not be confused with the state of individual switching steps within the switching plan, which may also progress through a series of states. See Switching Sheet Step States.
Switching Sheet Window Components
Menu and Toolbar Features
File Menu
The table below describes the options available on the File menu.
Menu Option | Description | Toolbar Icon |
|---|---|---|
Save Sheet | Saves the switching sheet. | |
Copy As... | Opens the Copy Switching Sheet As dialog box that allows you to copy the current sheet into a newly created sheet. The new sheet can be one of the following types: Planned, Emergency, Template, or Outage Correction. See Copying a Switching Sheet for details. | -- |
Print Preview... | Opens the Switching Report Content Selection dialog box that allows you to choose the criteria for previewing a switching report. | |
Print... | Opens the Switching Report Content Selection dialog box that allows you to choose the criteria for printing a switching report. | |
Email... | Opens the Switching Report Content Selection dialog box that allows you to choose the criteria for emailing a switching report. | |
Export... | Export the switching sheet as a JavaScript Object Notation (JSON) text file to your local file system. This file can then be imported into NMS as an Administration or Trainer user type from the Switching Sheet List. See Exporting/Importing Switching Sheets for details. | -- |
Toggle Dockable Window | Dock or undock the window into the NMS environment window. The tool will be docked where it was last docked. See Understanding Docked Panes and Standalone Window Tools for information. | -- |
Exit | Closes the active switching sheet. | -- |
Actions Menu
The options available in the Actions menu are dependent on the sheet type. Actions available will typically also be available through the right-click context menu and/or toolbar. The following are always in the Actions menu
Option | Description | Tab | Toolbar Button |
|---|---|---|---|
Check In/Create New Version | The Check In button allows you to check in and save a copy of the switching sheet. This is used for auditing purposes to determine differences between steps in two versions of a switching sheet. When you check in a sheet, this button changes to Create New Version, which manually increments the sheet's version number and sets the sheet to Editing mode. See Working with Switching Sheet Versions for more information. | All | |
Edit Mode/ View-Only Mode | Edit and View-Only Modes When the sheet is in Edit mode, you are the only user who can edit it. When it is in View-Only mode, you cannot edit the sheet and it is available for editing by other users. The Edit/View-Only Indicator button toggles the sheet between Edit and View-Only modes. When you open a sheet for editing, the sheet is automatically placed into Edit mode and blocks other users from editing it. If you open a sheet that is currently being edited by another user, you are not allowed to make any changes. | All | |
Refresh | Refreshes the data in a view-only sheet. The Refresh option is available when another user has locked and edited the sheet. | All | |
Update Device‑Related Fields | Updates the Substations and Feeders fields with values related to the switching sheet's device and step device values. The Location and Voltage values will be updated with values related to the sheet's device value. If the sheet's device value is invalid or empty and the steps have no device related operations, then the fields will be cleared when this option is selected. | Request | |
Insert Blank Step | Inserts a blank step below the current step row. | Steps | |
Place Step Insertion Indicator | Adds a step insertion indicator icon to the row. | Steps | |
Remove Step Insertion Indicator | Removes the step insertion icon. | Steps | |
Link to Safety Document | Links the selected safety document to the currently selected step in switching sheet. This option is only visible when the switching sheet has active safety documents linked to it. | Steps | |
Remove Links to Safety Documents | Disassociates the safety document that is linked to the step and updates the step. | Steps | |
Add New Block Header | Isolate Fault Location Maintenance Restore Construction Custom... | Steps | |
Rename Block Header | Isolate Fault Location Maintenance Restore Construction Custom... | Steps | |
Load Safety Documents... | Display the safety documents linked to the highlighted steps. | Steps | |
Clear Planned Time | Clear the Planned Date values for the highlighted steps. This option is only visible when at least one of the highlighted steps has an Planned Date value. | Steps | |
Update Step Control Zone Data | Iterate through the selected steps and update their control zone related data. This may be required if the step's device has been recently moved to a new control zone. | Steps | |
Update Operation Step Details | Recalculate all step details based on the current step order and the current study model. This is available when in study mode only. | Steps | |
Clear Crews | Clear the Instructed To values for the highlighted steps. This option is only visible when at least one of the highlighted steps has an Instructed To value. | Steps | |
Model Verify | This action is available if model changes have occurred that impact one or more devices in the switching sheet. The Web Switching service checks all the opened switching sheet steps after a model edit has occurred. If a step has a device that matches a device that was directly impacted by a model change, that step will be marked as needing verification. When the sheet is displayed, these steps will be highlighted in yellow. You can either check off each step in the sheet as they are verified or check off the entire sheet. Notes: • Outage Correction sheets are not included in this processing. Outage Correction validates the devices when the correction is made. • While the sheet has verifications pending, step executions cannot be performed within the sheet. • Switching sheets in the Completed or Rework states are not included in this processing. | Steps | |
Move Crew | Move a crew to the device associated with the selected step. This option is enabled when a single highlighted step is instructed to an en-route crew. | Steps | |
Clear Condition Indexes | Removes the condition class and index associated to the selected step. An error dialog box will be displayed if the selected steps' condition handles cannot be cleared. The action is only available for steps that are not in a terminal state and that are not associated to safety documents. | Steps | |
Update Instructed Dates... | Opens the Update Instructed Date dialog box, which allows you to enter a new Instructed Date for selected steps. Steps that have not been instructed will not be updated. | Steps | |
Move Steps to Misc Log | This action moves Real Time Completed, Aborted, Failed or Instructed steps to the Miscellaneous Log. SCADA Pending steps cannot be moved until they have transitioned to one of the states already stated. Steps associated to safety documents are also not allowed to be moved. Any step in a New or Uninstructed state will not be moved as the Miscellaneous Log only displays Real Time steps that are in a terminal or Instructed state. Any attempt to move an immovable step will result in an error dialog box and the steps will not be moved from the switching sheet's steps list. To move steps to the Miscellaneous Log, select one or more steps and select Move Steps to Misc Log from the Actions menu or from the right-click context menu. | Steps | |
Group Steps | Groups two or more contiguously selected steps. | Steps | |
Ungroup Steps | Ungroups steps that have been grouped. | Steps | |
Reset Operation Text... | Resets the text in the Operation field to its calculated value following a manual edit. This option is only visible once the step's Operation field has been manually edited. This is not possible for all types of steps and with Product configuration this is limited to non-operational steps. In other words, any step that does not actually impact the model, manipulate a condition, or interact with any other tools in the environment. | Steps | |
Clear Clipboard | Clears copied steps from your computer clipboard. Alternatively, press the Escape (Esc) key. | Steps | |
View... | Opens Viewer 1 if not already open, and then focuses Viewer 1 on the device from the selected step rows. | Steps | |
Feeder Load Management... | Launches Feeder Load Management for the feeders associated to the currently highlighted steps. This option is also available on the right-click option menu in the Steps table. This option is only available when Power Flow and FLM are both licensed and configured. | Steps | |
Power Flow Analysis | Submenu Options • Run…: This action brings up the power flow wizard to perform power flow analysis. See Power Flow Analysis in Switching Management for more details. • View Results…: This action brings up the Power Flow Analysis details dialog box. • Update Results: This action updates the Power Flow Analysis using the same parameters used to run the last analysis. • Clear Results: This action clears the Power Flow Analysis results of the plan. Notes: • View, Update and Clear options are enabled only if a sheet has power flow results. • Power Flow Analysis button is enabled only for planned sheets provided power flow is licensed. • View Only users can view only the power flow results. No other option is enabled. • The menu options, tool bar buttons, power flow columns are not displayed for Switching Request users. | Steps |
Help Menu
Option | Description | Toolbar Button |
|---|---|---|
Web Switching Management Help | Opens online help content for the switching sheet's active tab. For example, if the Request tab is active, the "Completing the Request Tab" will be returned. | -- |
About Web Switching Management | Opens a window with environment and software information. | -- |
Switching Sheet Tabs
Each switching sheet tab displays a row of tabs that you can use to view and edit all of the information associated with the sheet. Some tabs, like the Steps tab, have their own toolbar with shortcuts for supported actions.
The following table describes the tabs displayed for each switching sheet.
Tab | Description |
|---|---|
Request | Use this to view and enter information about the user who requested the switching sheet, including phone number and contact, the sheet's owner, charge number, start and finish dates, feeder and voltage information. See Completing the Request Tab. |
Steps | Use this to view, add, and edit switching steps. See Adding and Editing Steps. |
Impacted Customers | Use this to view, print, email, and maintain the list of impacted customers. See Viewing Impacted Customers. |
Overlaps | Use this view to identify overlaps that the sheet may have with other sheets in the system. The search criteria can include date/time, control zone, and affected devices. See Checking for Overlaps. |
External Documents | Use this to attach external documents to the switching sheet. See Adding External Documents to a Switching Sheet. |
View Areas | Use this to save and reload viewing areas from a Viewer window. See Saving and Loading View Areas. |
Safety Documents | Use this to view, load, and delete safety documents that have been defined for this sheet. See Working with Safety Documents. |
Tracking/Audit Log | Use this to view audit log entries associated with this sheet. See Viewing the Audit Log. You can also use this to view the current sheet state or transition to another state. See Changing the Switching Sheet State. |
Status Bar
The switching sheet status bar provides several indicators about the switching sheet and related system status.
Status Bar Indicator | Description |
|---|---|
Mode Indicator 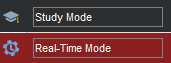 | Indicates the current operating mode: • Study Mode: Allows you to complete switching operations without affecting the real-time data model. You can apply the actions to the steps, but the actions are not applied to the real-time data. • Real-Time Mode: Allows you to apply real-time changes to the state of devices in the data model. |
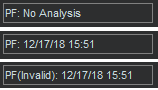 | PF Indicator: Power Flow Indicator shows the status of power flow analysis for the plan. The status can be one of the following: 1. PF: No Analysis. This status is shown when the plan does not have power flow analysis results or the results are cleared out. 2. PF: Date and Time the last analysis was run. This status is shown when the plan has a valid power flow results. 3. PF (Invalid): Date and Time the last analysis was run. This status is shown when the last power flow analysis results are invalidated by changing the plan. Note: The power flow indicator is only displayed for planned switching sheets. |
Overlap Indicator | Indicates whether the switching sheet will result in overlap of affected devices or control zones during the same time period. This icon will only be displayed when overlaps exist. Overlaps are determined when you click Update Overlaps on the Overlaps tab. See Checking for Overlaps for more information. |
Impacted Customer Indicator | Indicates whether the switching operations will impact customers. This icon will only be displayed when customers are impacted by the switching sheet. Impacted Customers are determined when you select the Rebuild button on the Impacted Customers tab. See Viewing Impacted Customers for more information. |
Recording Indicator 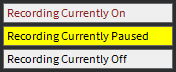 | Indicates whether recording is turned on, paused, or turned off. • When recording is on, you can add steps by taking actions in the Viewer with the Control Tool. • Recording Currently Paused is displayed if recording is on for the sheet, but another sheet or step recording tool has focus and is actively recording. For example, you are recording steps in a planned switching sheet, but you open Event Details for another event and record some actions on the Event Details Steps tab; while recording is on for Event Details, the planned switching sheet will display Recording Currently Paused. |
Version Indicator (Text) | Indicates the switching sheet version and whether or not your latest changes have been checked in. See Working with Switching Sheet Versions for more information. |
Version Menu 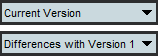 | Indicates the version currently displayed and allows you to select a previous version to compare against the current version. See Working with Switching Sheet Versions for more information. |
Edit/View-Only Indicator : Edit mode : View-Only mode | Edit and View-Only Modes When the sheet is in Edit mode, you are the only user who can edit it. When it is in View-Only mode, you cannot edit the sheet and it is available for editing by other users. The Edit/View-Only Indicator button toggles the sheet between Edit and View-Only modes. When you open a sheet for editing, the sheet is automatically placed into Edit mode and blocks other users from editing it. If you open a sheet that is currently being edited by another user, you are not allowed to make any changes. You can override the lockout by stealing the other user's lock over the switching sheet. See Opening Locked Documents for more details. |