- Core User Manual
- Group Corporate Onboarding
- Step 8: Approval Rules
- Approval Rules - View
16.9.2 Approval Rules - View
To view the approval rules for corporate users:
- Navigate to one of the above paths.The Approval Rules screen appears.
- In the Approval Rules screen, enter the search
parameters and click Search.The Approval Rules screen with search results appears based on the searched criteria.
- Click the Rule Code link, for which you want to view the
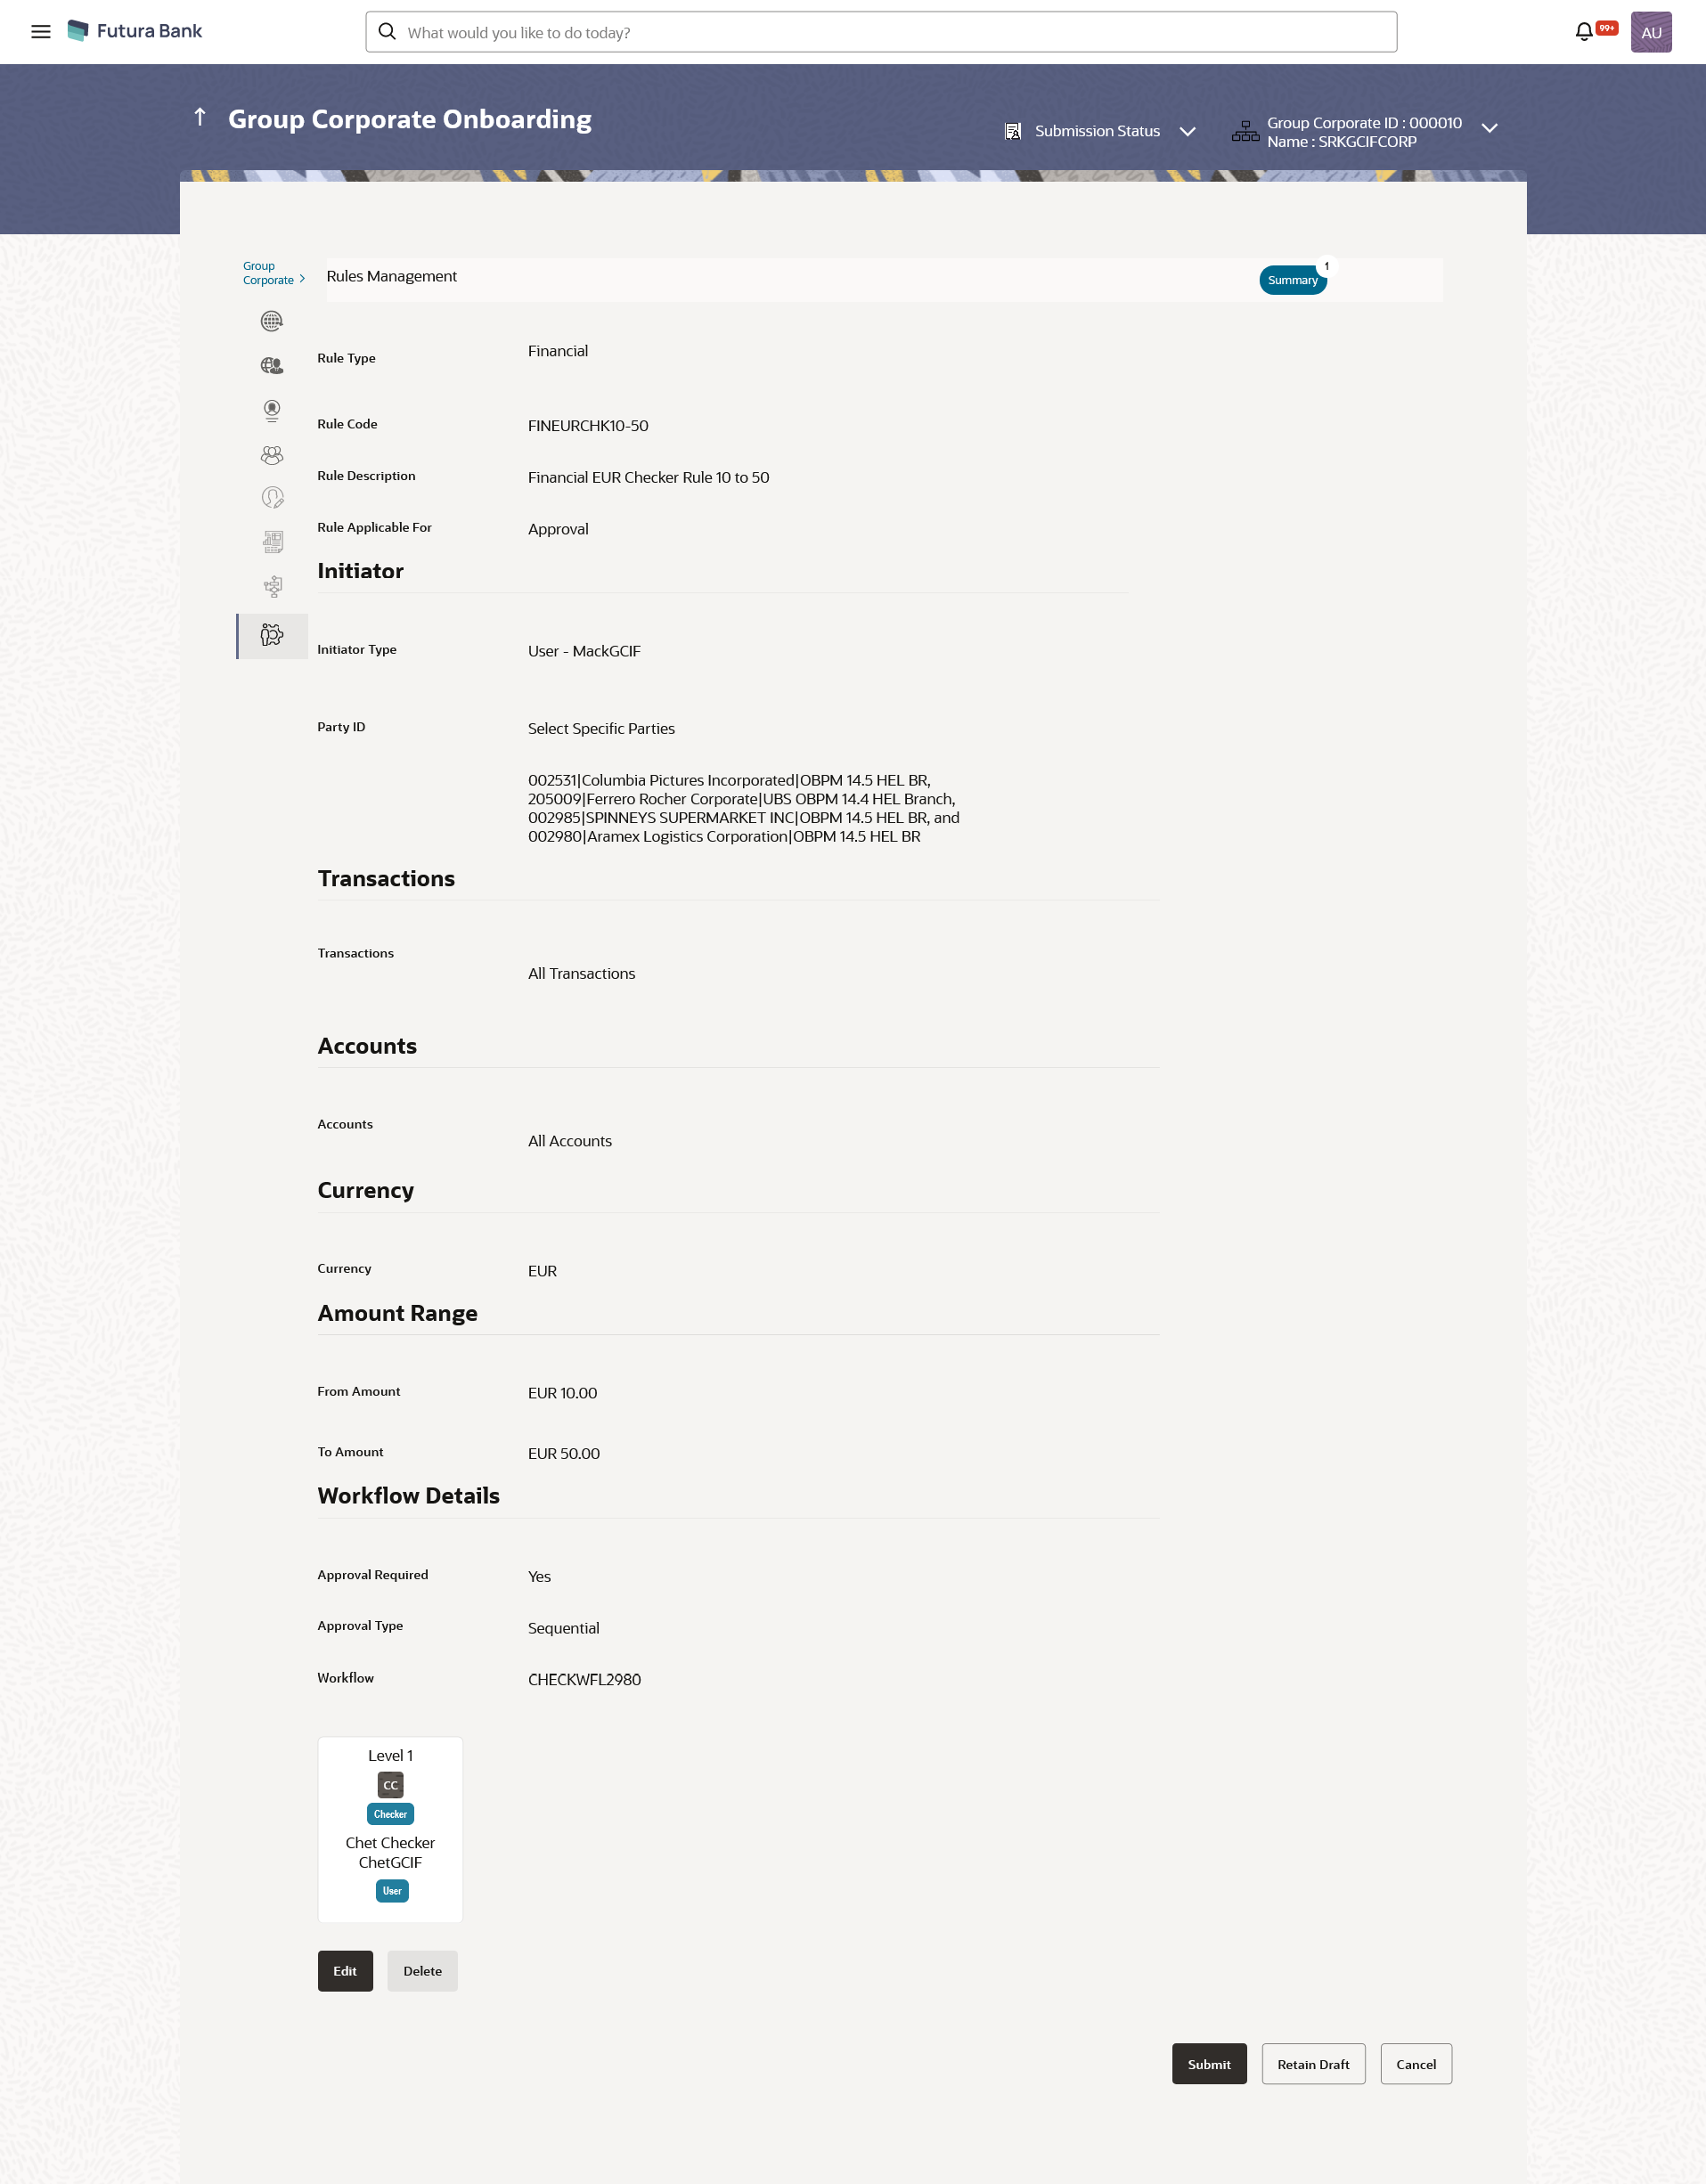
details.The Approval Rules - View screen appears.
Table 16-45 Field Description
Field Name Description View Rule Type Transaction rule type for which the approval rule is set up. The transaction rule for corporate user are:- Financial
- Non Financial
- Maintenance
- Non Account Financial
- Administration
- Service Request
Rule Code Approval rule code. Rule Description Approval rule description. Rule Applicable For Displays for which the rule is set up. It could be:- Approval
- Releaser
Initiator Initiator Type Initiator type specified while creating a rule. Note:
“ All Users’ will be displayed for Initiator Type if rule is created with Initiator type as “All users”User Name / User Groups Name of the user or user group defined as initiator for the rule condition. Party ID Displays one or multiple Party IDs mapped to the selected Group Corporate ID. Transactions The transactions for which the rule is being set up. The options are:- All Transactions
- Select Specific Transactions
- All Service Request – rule will be applicable for all the service requests available in the form builder
- Select Specific Category – all the service request categories available in the form builder will be listed for selection where one category can be selected
- Select Specific Service Request - all the service requests available in the form builder will be listed for selection where one service requests can be checked
Type of transactions available depends on the selection of rule type.
The option ‘All Service Requests’, ‘Specific Service Request’ or ‘Specific Category’ is enabled only if the Service Request option is selected in Rule Type field.
Accounts Field will display the accounts along with their names mapped based on the Party ID selection for which rule being viewed is set up. The options are:- All Accounts
- Select Specific Accounts
This field appears if you select Financial and Non Financial in the Rule Type field.
Currency Currency type in which the financial approval rule for a corporate is defined.
This field appears if you select Financial and Non Account Financial in the Rule Type field.
Note:
1) Entity’s base currency (maintained in System Configuration) will be defaulted in the currency field.2) User will be able to select the currency other than the default currency from the currency list.
Amount Range From Amount/ To Amount Transactions allowed for the user between the amount range. This field appears if you select Financial and Non Account Financial in the Rule Type field.
Workflow Details Approval Required Field displays whether approval is required or not. The options are:- Yes
- No
Approval Type Displays the Approval workflow type. Possible value will be:- Sequential
- Parallel
This field is displayed if Yesoption is selected in Approval Required field and when workflow preference is set at Rule Level in Group Corporate Profiling setup.
Workflow Field displays the approval workflow details along with the defined approval levels. For release, it displays the release workflow details. This field appears if you select Yes in the Approval Required field.
- Click Edit to edit the approval rule.The Approval Rule - Edit screen with values in editable form appears.
OR
Click Delete to delete the approval rule.
OR
Click Back to navigate back to previous screen.
OR
Click Next to proceed to the next logical step.
OR
Click Submit to submit the steps performed so far for approval.
OR
Click Retain Draft to save the details entered as draft.
OR
Click Cancel to cancel the transaction.
Parent topic: Step 8: Approval Rules
