29.2 Biller Category Maintenance - Add Category

Using this option, the System Administrator can add a new biller category.

To add a new biller category:

  1. Navigate to one of the above paths.
    The Biller Category Maintenance screen appears.
  2. Click Create to create biller category.
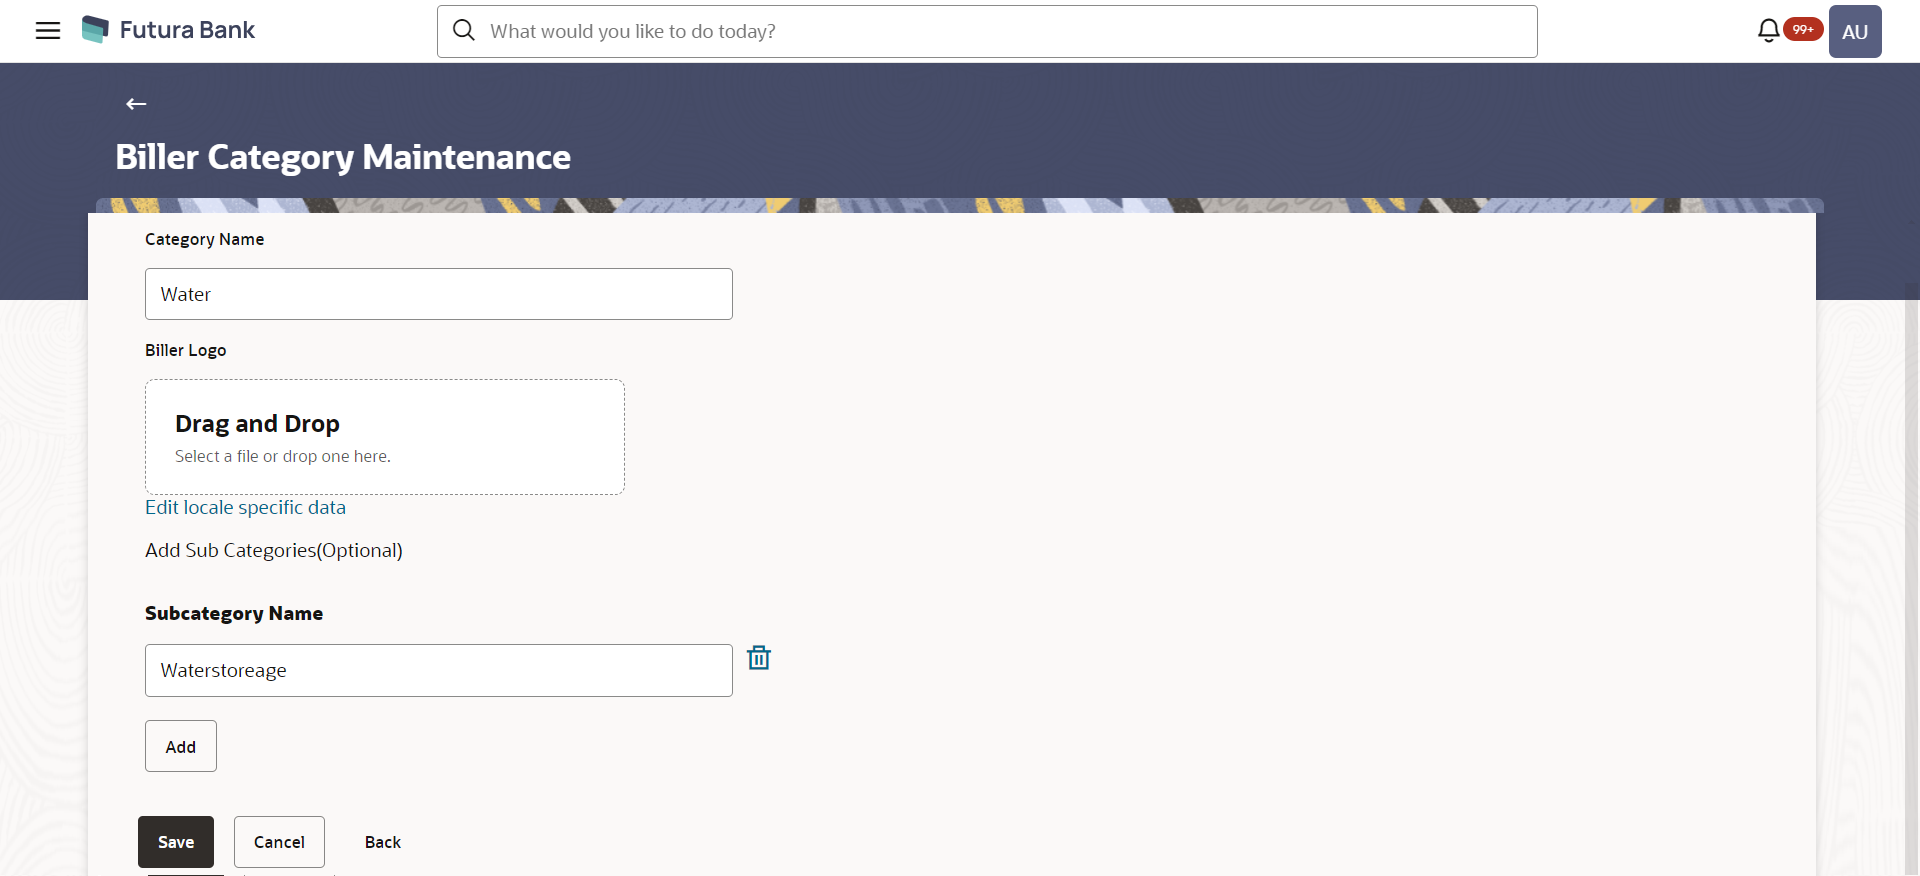
    The Biller Category Maintenance screen with a row to add new category appears.

    Figure 29-4 Biller Category Maintenance - Create Category


    Table 29-3 Field Description

    Field Name Description
    Category Name The name of the biller category. Category name should be unique.

    Category name entered here will appear as a Biller Category drop-down to the customers screens.

    Biller Logo The image associated with the category.

    Displays the preview of the image uploaded for the category.

    Biller Logo Browse or drag and drop image associated with the biller category.

    Displays the preview of the image uploaded for the category.

    Subcategory Name The name of the sub biller category.
  3. In the Biller Category field, enter the name of the biller category.
  4. Drag and Drop the biller logo or browse the biller logo . OBAPIS provides a set of icons for categories out of the box. These image files have to be copied to the user’s local drive before selection. Alternatively user can select his own icon images as long as they are in SVG or PNG format.
  5. In the Subcategory Name field, enter the name of the sub biller category.
  6. Click Add to add subcategory of the biller.
    OR

    Click delete to delete the subcategory of the biller.

    OR

    Click  Save to save the changes and create biller category.

    OR

    Click  Back to navigate back to previous screen.

    OR

    Click Cancel to cancel the transaction.

    OR

    Click on the Remove link to remove the uploaded image and upload a new biller image.

  7. The success message of saving the biller category appears along with the status and reference number.
    Click OK to complete the transaction.