- Core User Manual
- Product Maintenance
- Product Maintenance - Edit
25.2 Product Maintenance - Edit
This function enables the System Administrator to edit the product mapping. The
System Administrator can map or delete the products to the product module.
To search feedback template:
- Navigate to one of the above path.The Product Maintenance screen appears.
- Click the Product Mapped link of the user record for
which you want to edit the details.The Product Maintenance - View screen appears.
- Click Edit to edit the user-segment - product
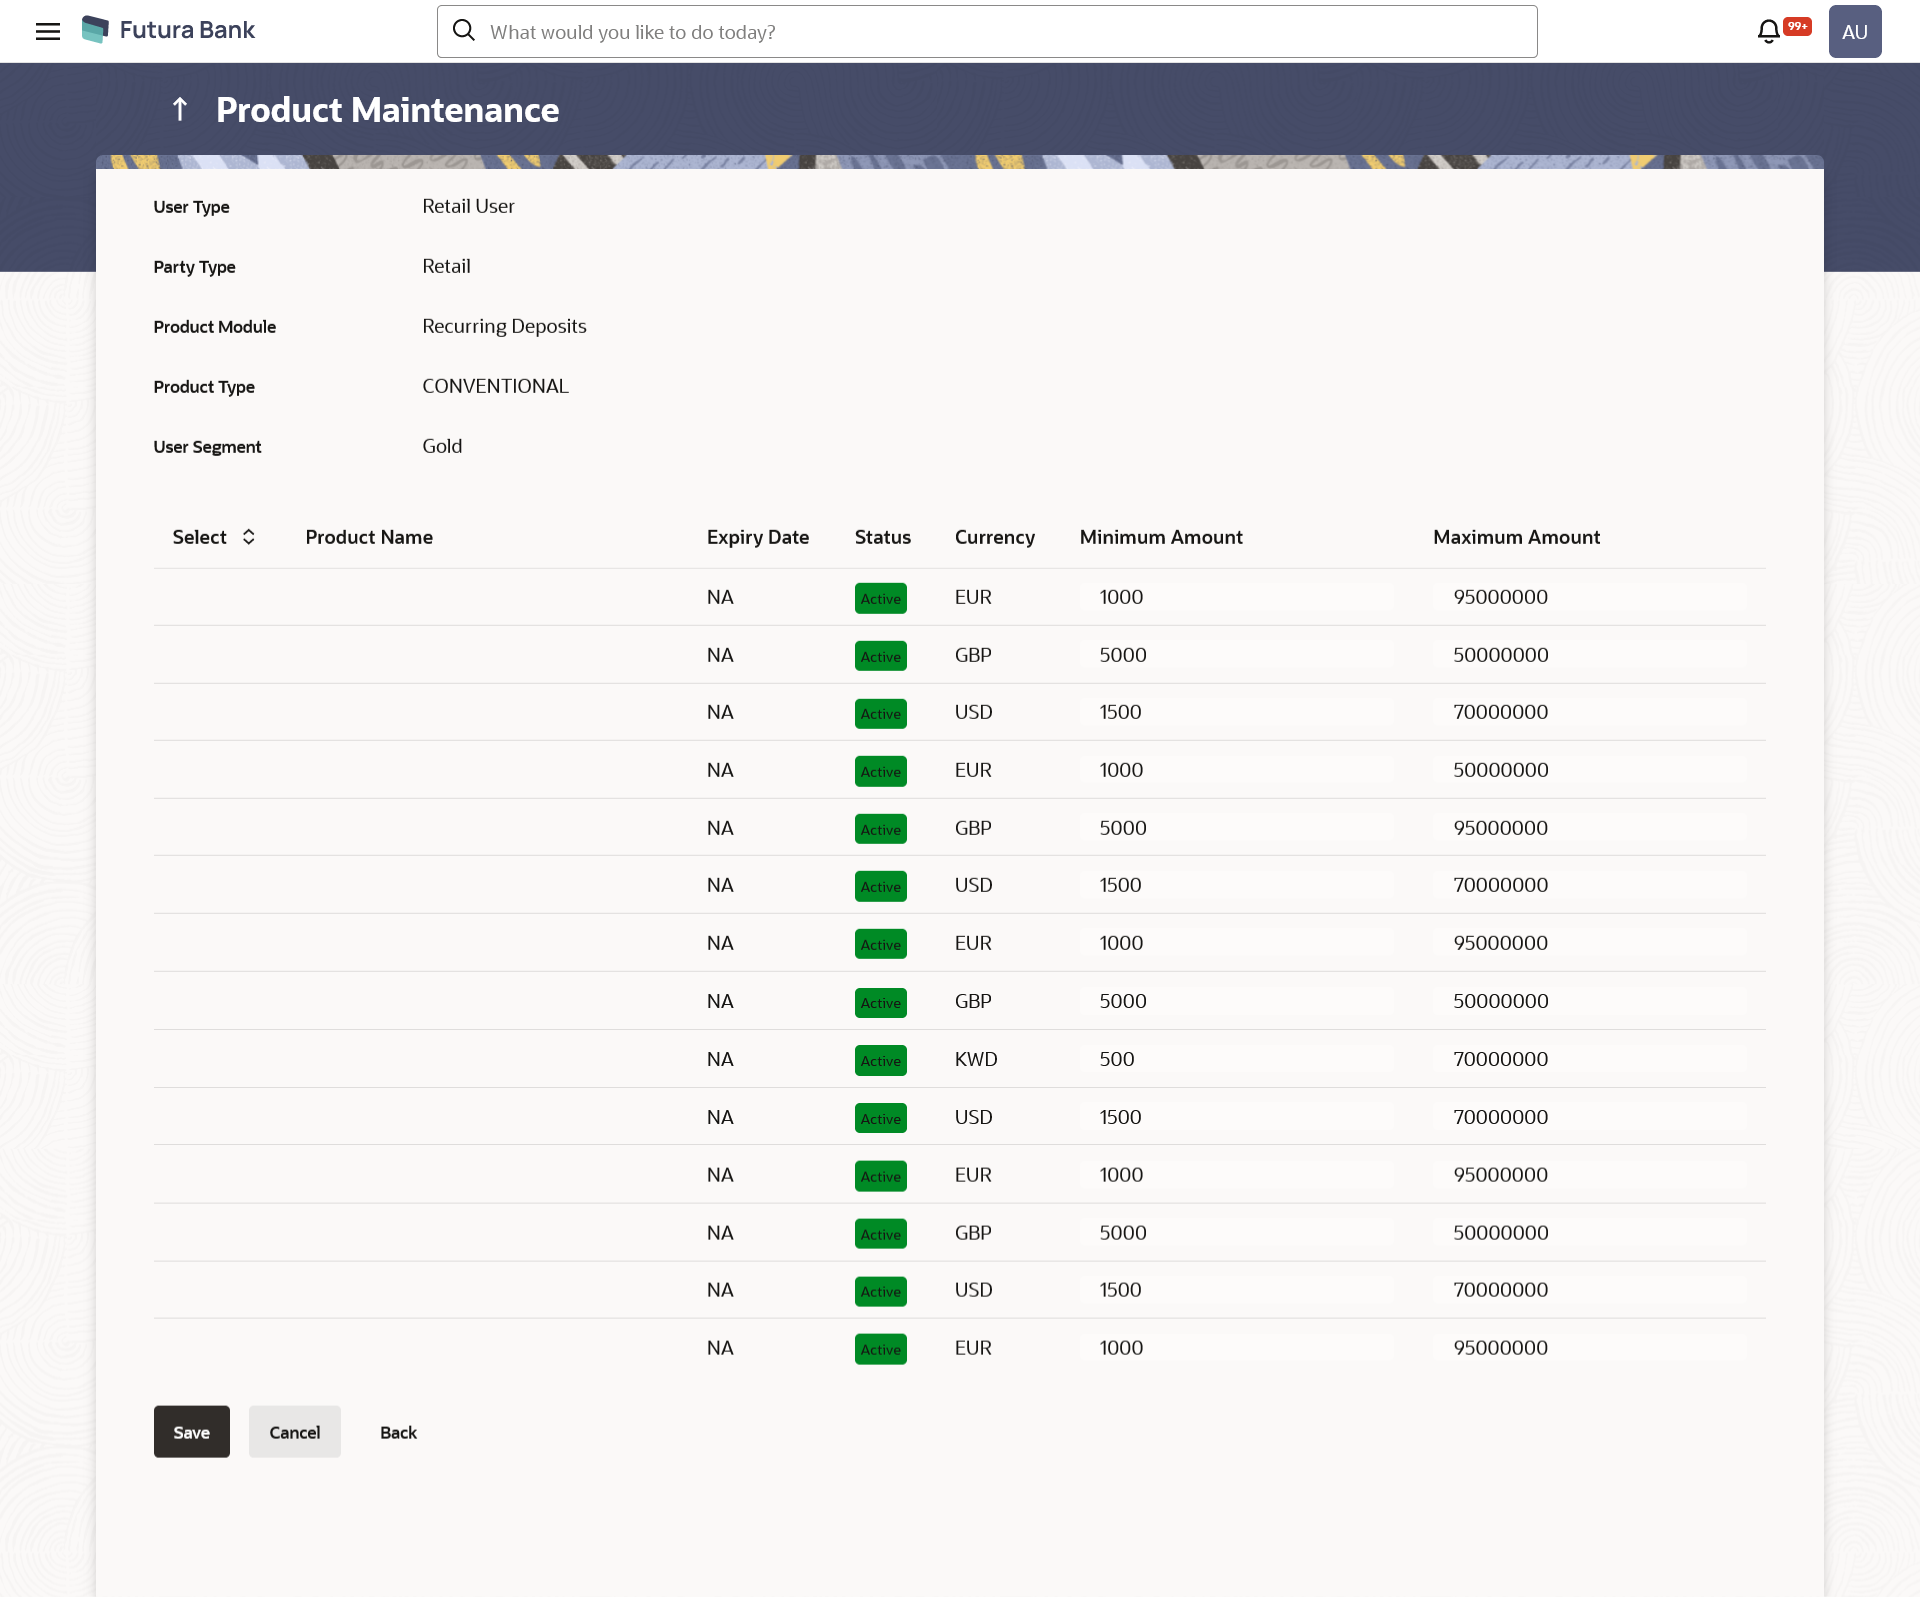
mapping.The Product Maintenance - Edit screen appears.
OR
Click Cancel to cancel the transaction.
OR
Click Back to navigate to the previous screen.
Table 25-3 Field Description
Field Name Description Edit User Type The user for which products are mapped. Party Type The Type of party for the user. Applicable only for user type Retail & Business user. Product Module One of the following product modules for which the mapping is to be edited: - Term Deposit
- Recurring Deposit
Product Type The list of product type, available for mapping. User Segment The user segment, for which products are mapped. Product Name Name of the product which is mapped to the user type for the selected product type and product module. Expiry Date The expiry date of the product. If the product is expired, an 'Expired' flag is shown against products.
Status The current status of the product. Currency The currency in which products are maintained. Minimum Amount The minimum permissible amount for opening deposit under the selected product. Maximum Amount The maximum permissible amount for opening deposit under the selected product. - Edit View the defined values for fields, in an editable form.
- Edit the required details.
- Click Save to save the changes.OR
Click Cancel to cancel the transaction.
OR
Click Back to navigate to the previous screen.
- The Review screen appears.Verify the details, and click Confirm.
OR
Click Cancel to cancel the transaction.
OR
Click Back to navigate to the previous screen.
- The success message of transaction submission appears along with the
transaction reference number and status.Click OK to complete the transaction.
Parent topic: Product Maintenance
