- Core User Manual
- Group Corporate Onboarding
- Step 5: User Account Access
- User Account Access – View
16.6.2 User Account Access – View
To view the account and transaction access:
- Navigate to one of the above paths.The User Account Access screen appears.
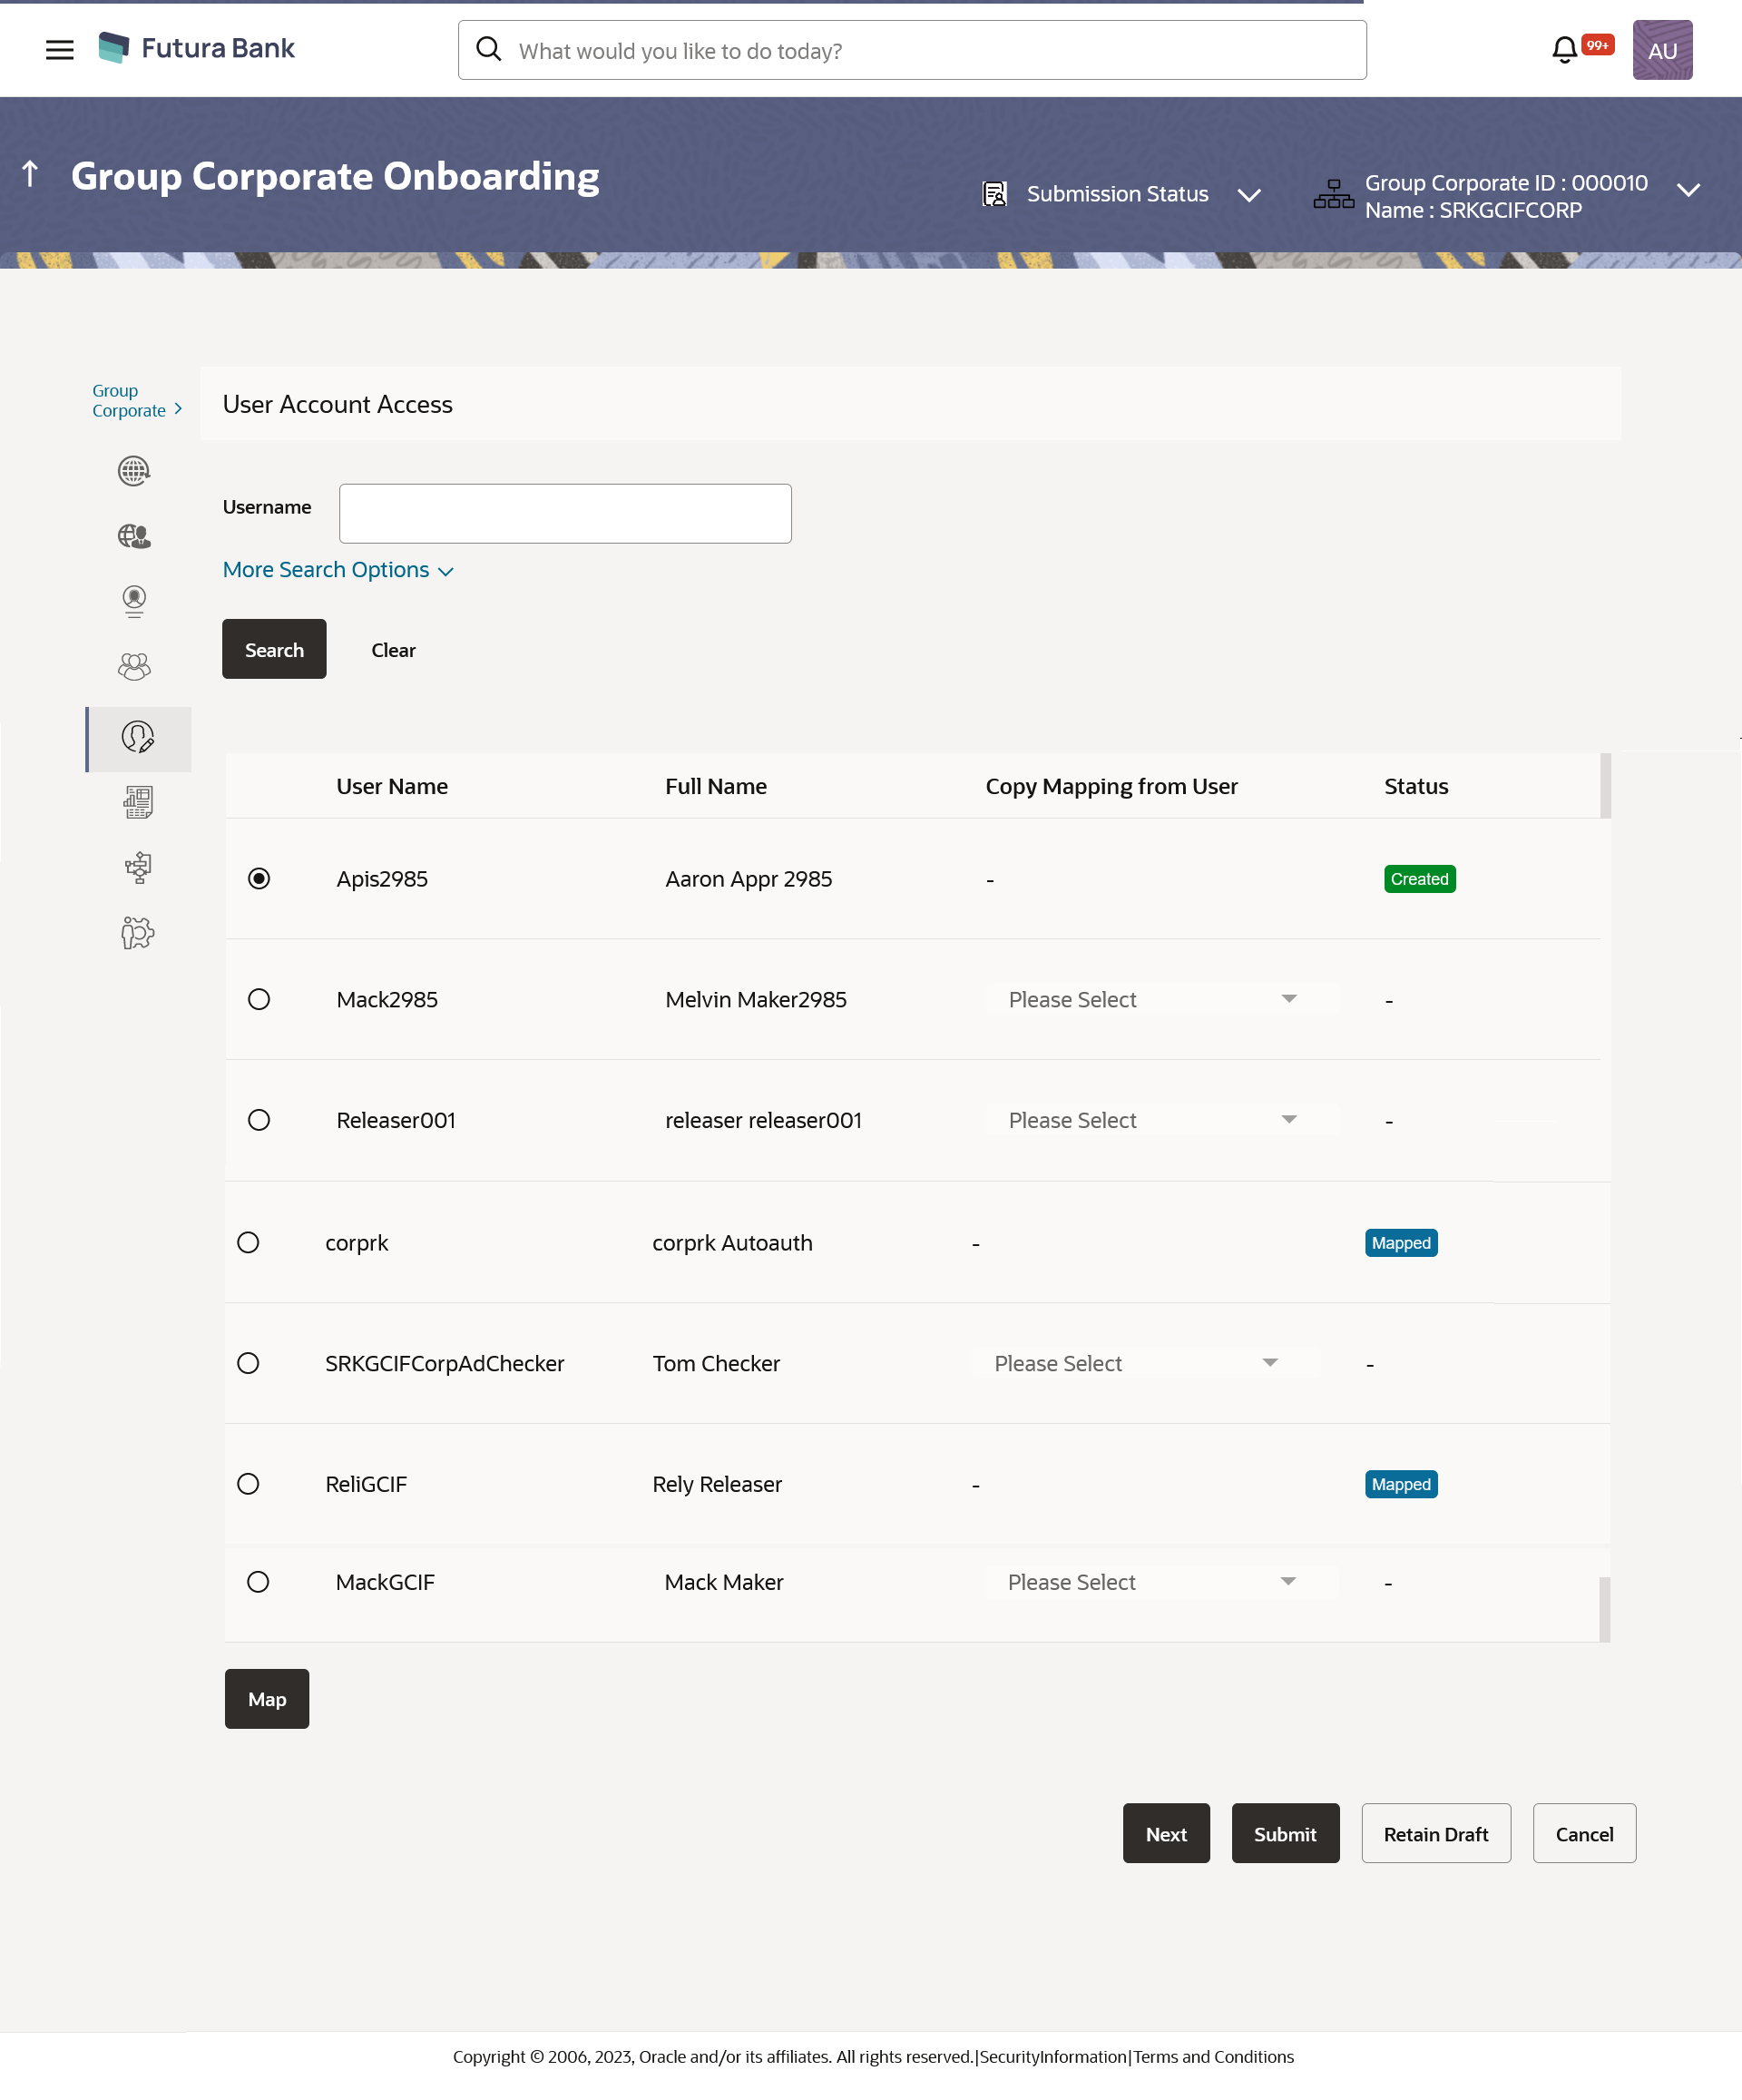
- In the User Search field search users for whom
Transaction Account access is being viewed.OR
Select the user from list displayed below.
- Select the user ID and click on “Map” to navigate to
Account Access summary.
Figure 16-53 User Account Access – Search and Search Result
Table 16-32 Field Description
Field Name Description Search (User) User quick search panel so search user for setting up the account access. Search Result User ID User ID the corporate user User Name User name of the corporate user Copy Mapping from User Select this to Inherit and copy account maintenance from already setup user to new user Status Displays the account mapping status for the corporate user. - Mapped: Corporate user for which accounts mapping is being done and authorized.
- Modified: Corporate user for which accounts mapping is being done but pending approval by authorizer.
- Deleted: Corporate user for which accounts mapping is deleted.
- From the Mapping Summary of Party dropdown list, select
the corporate party id associated with Corporate User.OR
Click Cancel to cancel the transaction.
OR
Click Back to navigate to the previous screen.
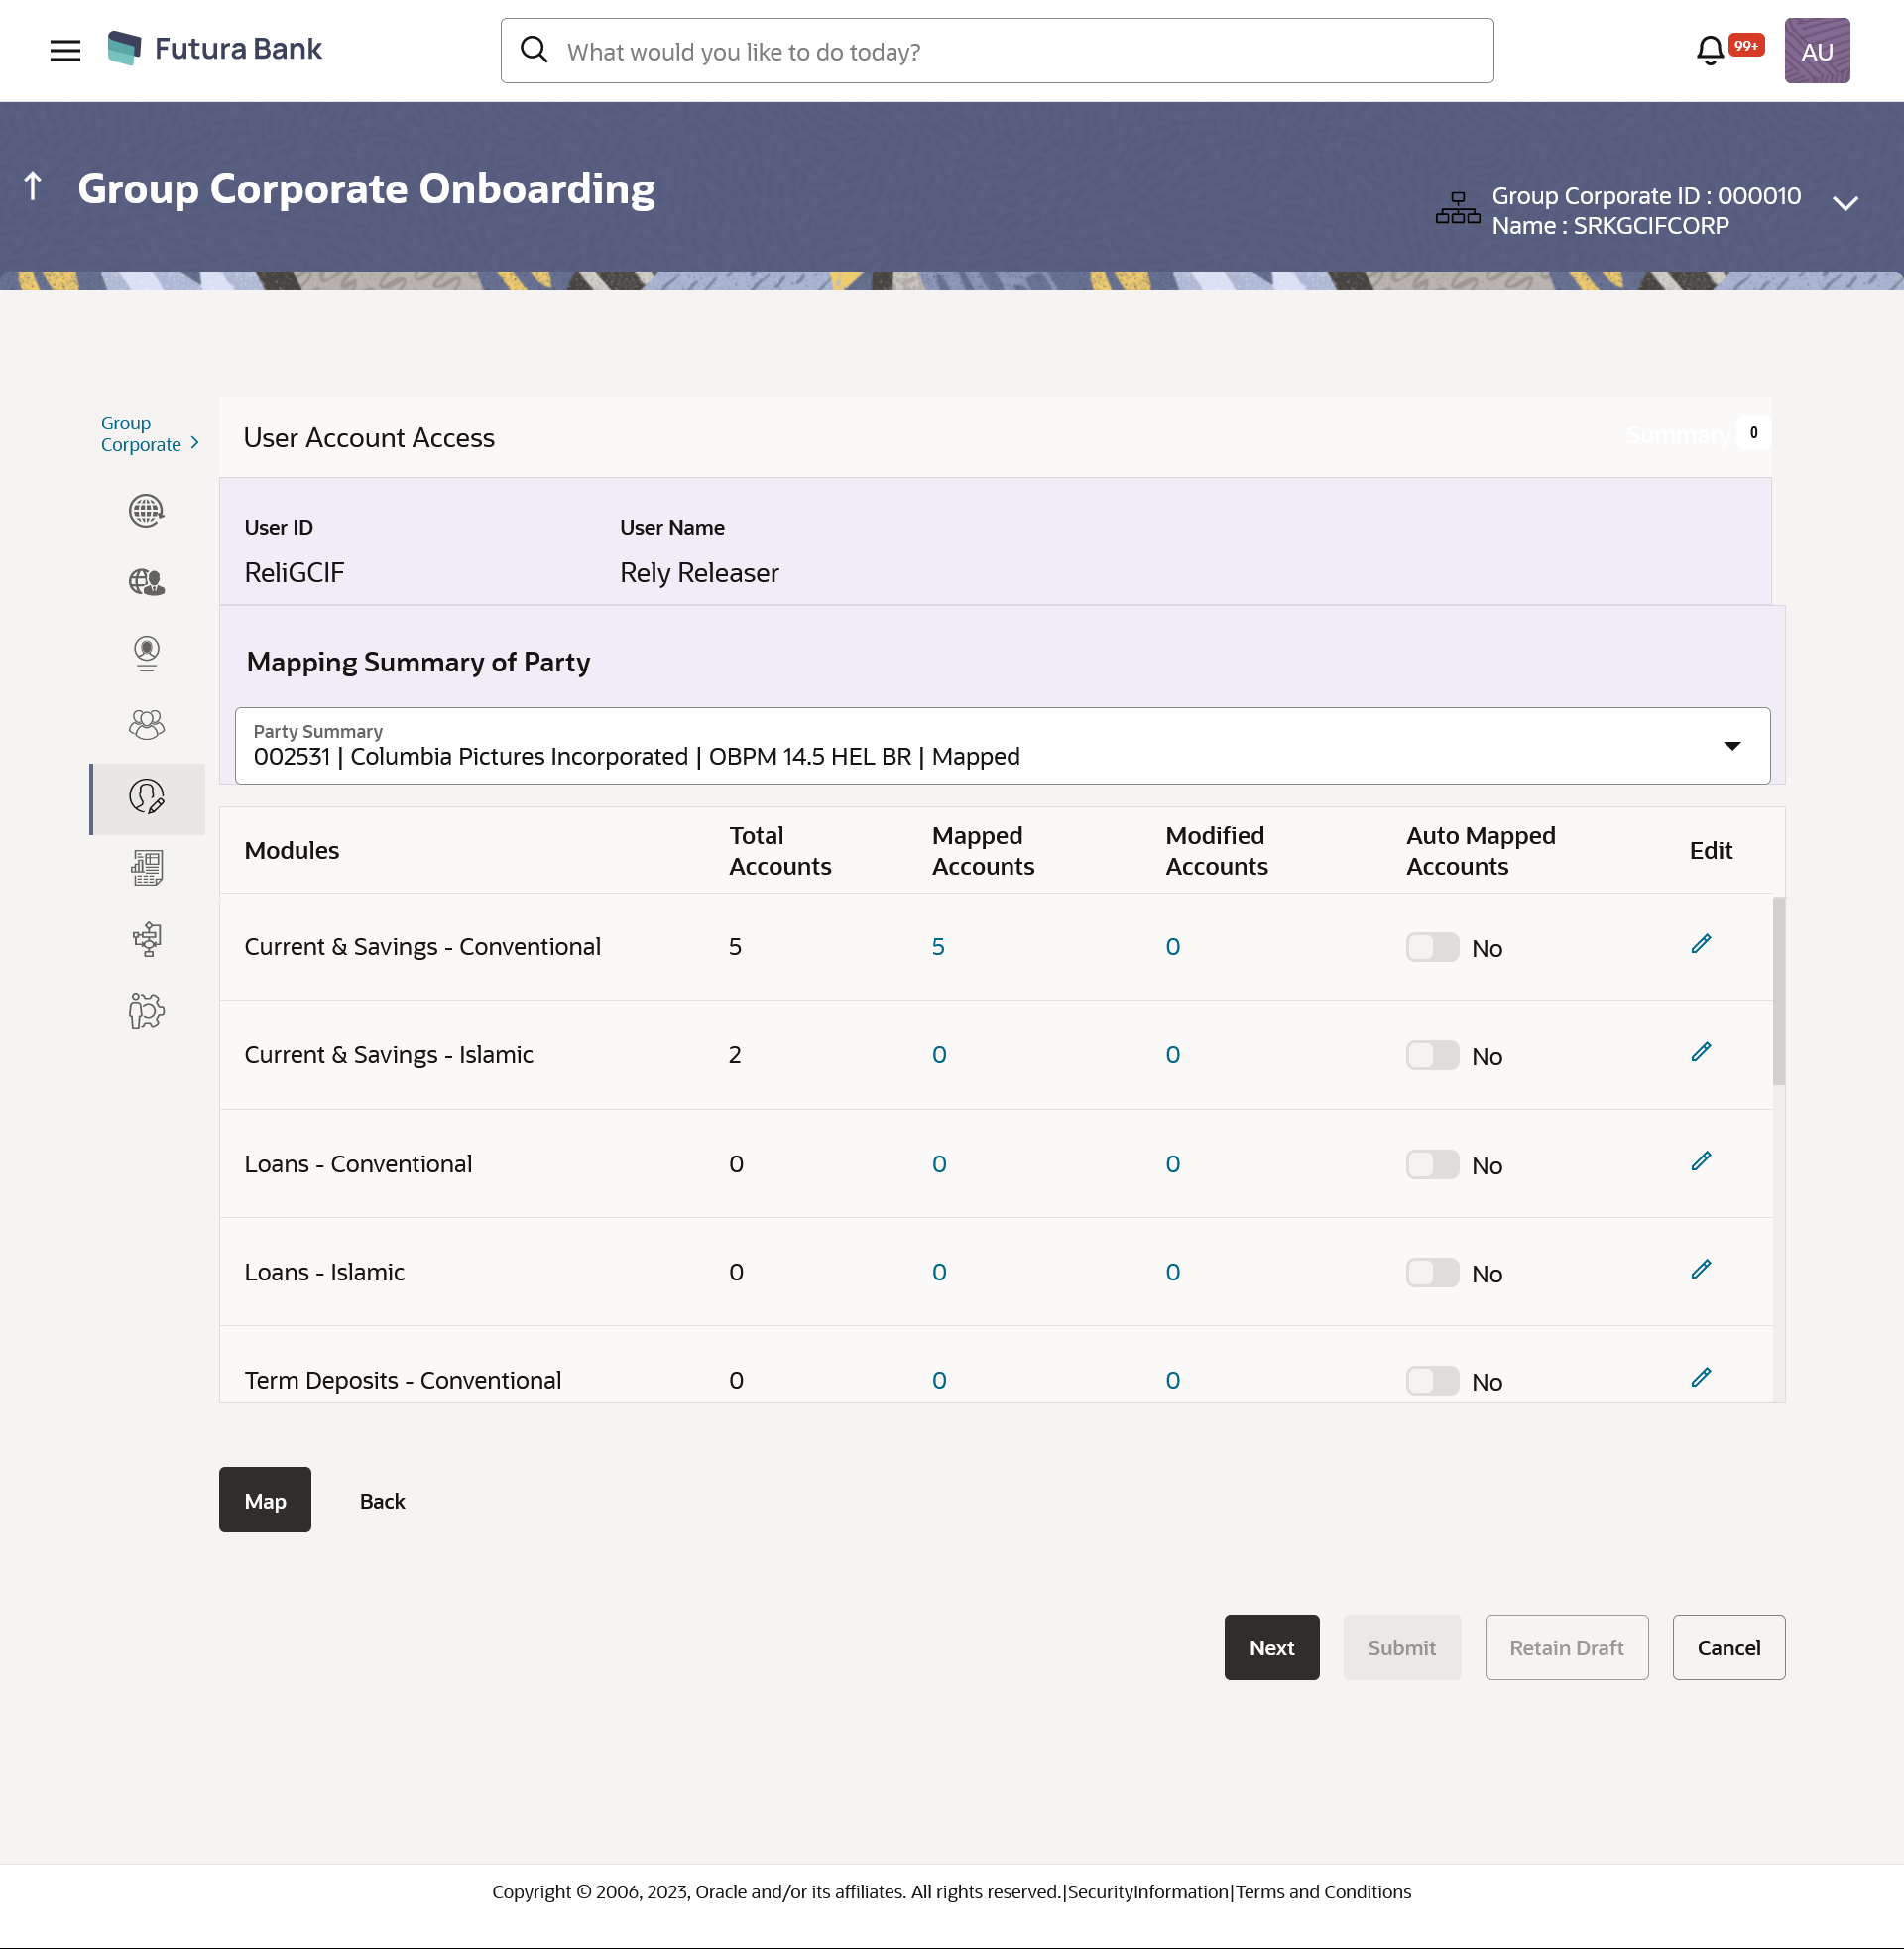
- For a searched user, summary screen will be displayed with total accounts
associated with corporate party of that user, status of the accounts mapped for
the internet banking for user, modified accounts if any and Auto account mapping
status.
Figure 16-54 User Account Access – Summary Results

Description of "Figure 16-54 User Account Access – Summary Results"Table 16-33 Field Description
Field Name Description User ID User ID the corporate user User Name User name of the corporate user Mapping Summary of Party The corporate party for which Party accounts access is being viewed Modules Banking module names. Total Accounts Total number of accounts available under the party that can be map with corporate user. Mapped Accounts Number of accounts mapped to the particular account type of corporate user. Modified Accounts Number of accounts modified for the particular account type of corporate user. Auto Mapped Accounts Mapping status of the accounts. The options can be:- Auto: gives default access to all newly added accounts and transactions of the party as soon as the account is opened in future.
- Manual: gives specific access to future accounts. The new accounts and transactions need to be mapped explicitly if access needs to be provided
Edit or Map Click on the icon next to every module or click on Map button to edit User account access - If there is no mapping done for a user, the count for the Mapped Accounts will be ‘0’.
- All the accounts held by the selected party as a relationship with the bank as
available in the core banking system or the respective mid-office system will be
fetched and displayed in the respective categories
Table 16-34 Field Discription
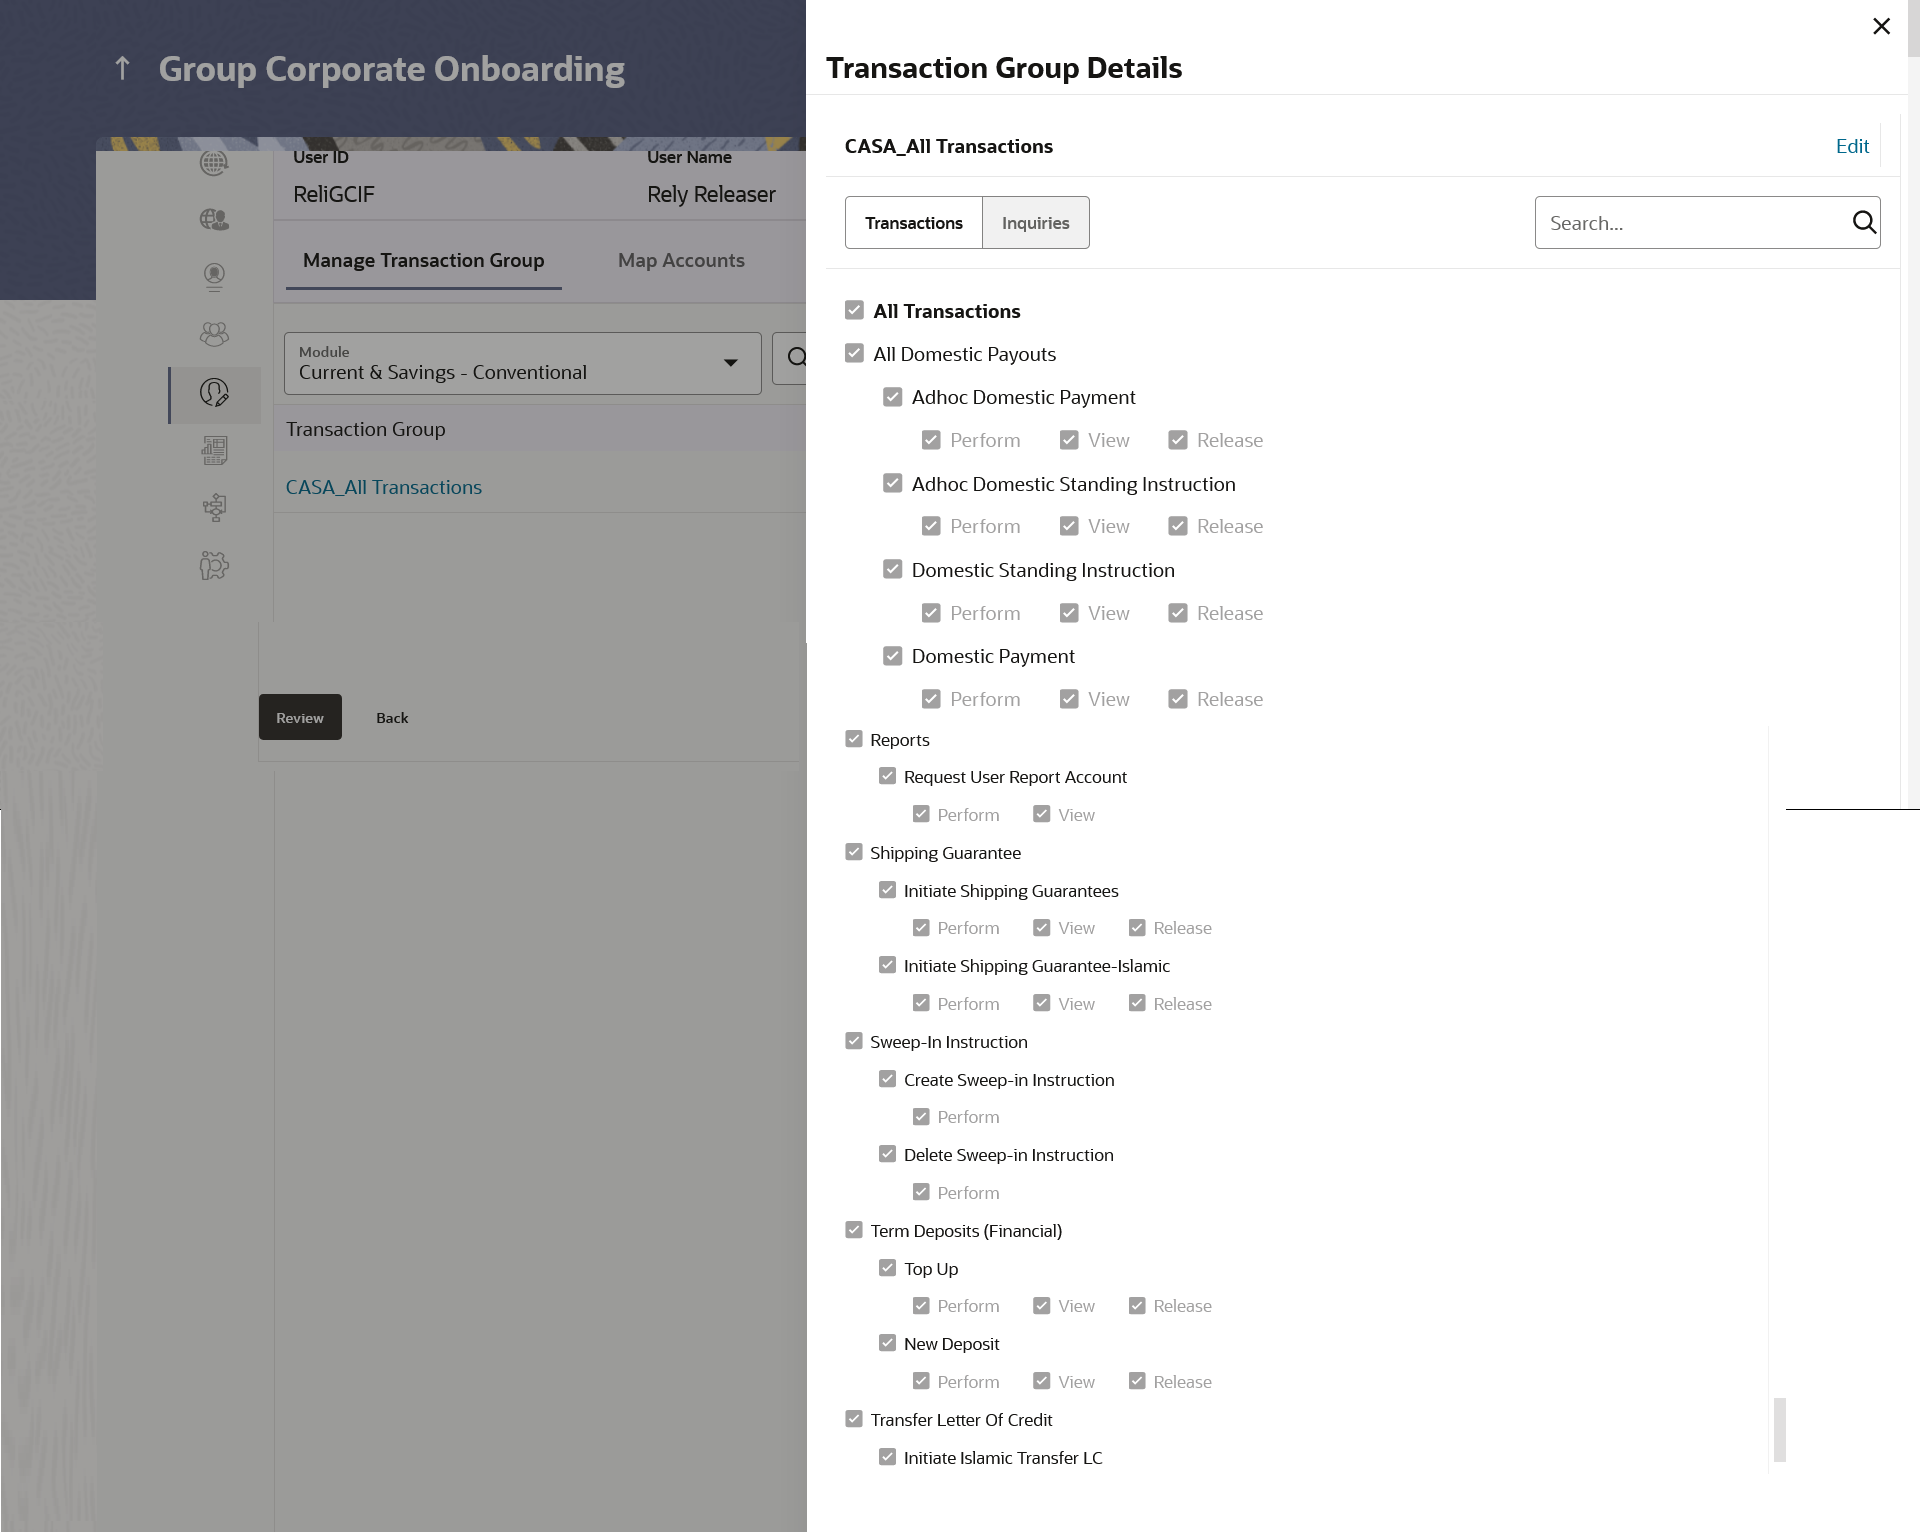
Field Name Description Modules Display name of the product for which account access is being viewed. Mapped Transaction Group Display the transaction groups selected to setup the user account access. Transaction Groups Details Display the Transaction group details with which user account access is maintained along with transaction and inquiries mapped to it. - The User Account Access details screen has two section. First section displays the lists down all the transaction groups mapped.
- In the second column, user can view the transaction group details with all the transactions and inquiries access.
- Click Edit / Map to update the User Account
Access account mapping for new accounts and existing
accounts.OR
Click Back to navigate to the previous screen.
OR
Click Next to proceed to the next logical step.
OR
Click Submit to submit the steps performed so far for approval.
OR
Click Retain Draft to save the details entered as draft.
OR
Click Cancel to cancel the transaction.
Parent topic: Step 5: User Account Access

