- Core User Manual
- User Group - Service Request Mapping
- User Group - Service Request Mapping - Modify
40.3 User Group - Service Request Mapping - Modify
Using User Group – Service Request Mapping - Modify option; System Administrator can edit the user group - Service Request mapping.
To edit the User Group - Service Request Mapping:
- Navigate to one of the above paths.The User Group - Service Request Mapping screen appears.
- In the Mapping Code field, enter the user group -
service request mapping code for which you want to view the details.OR
In the Description field, enter the user group - service request mapping description for which you want to view the details.
OR
From the Group Code list, select the group code already maintained to view the details of the same.
- Click Search to display results based on search criteria.
- Click the Mapping Code for which you want to view the
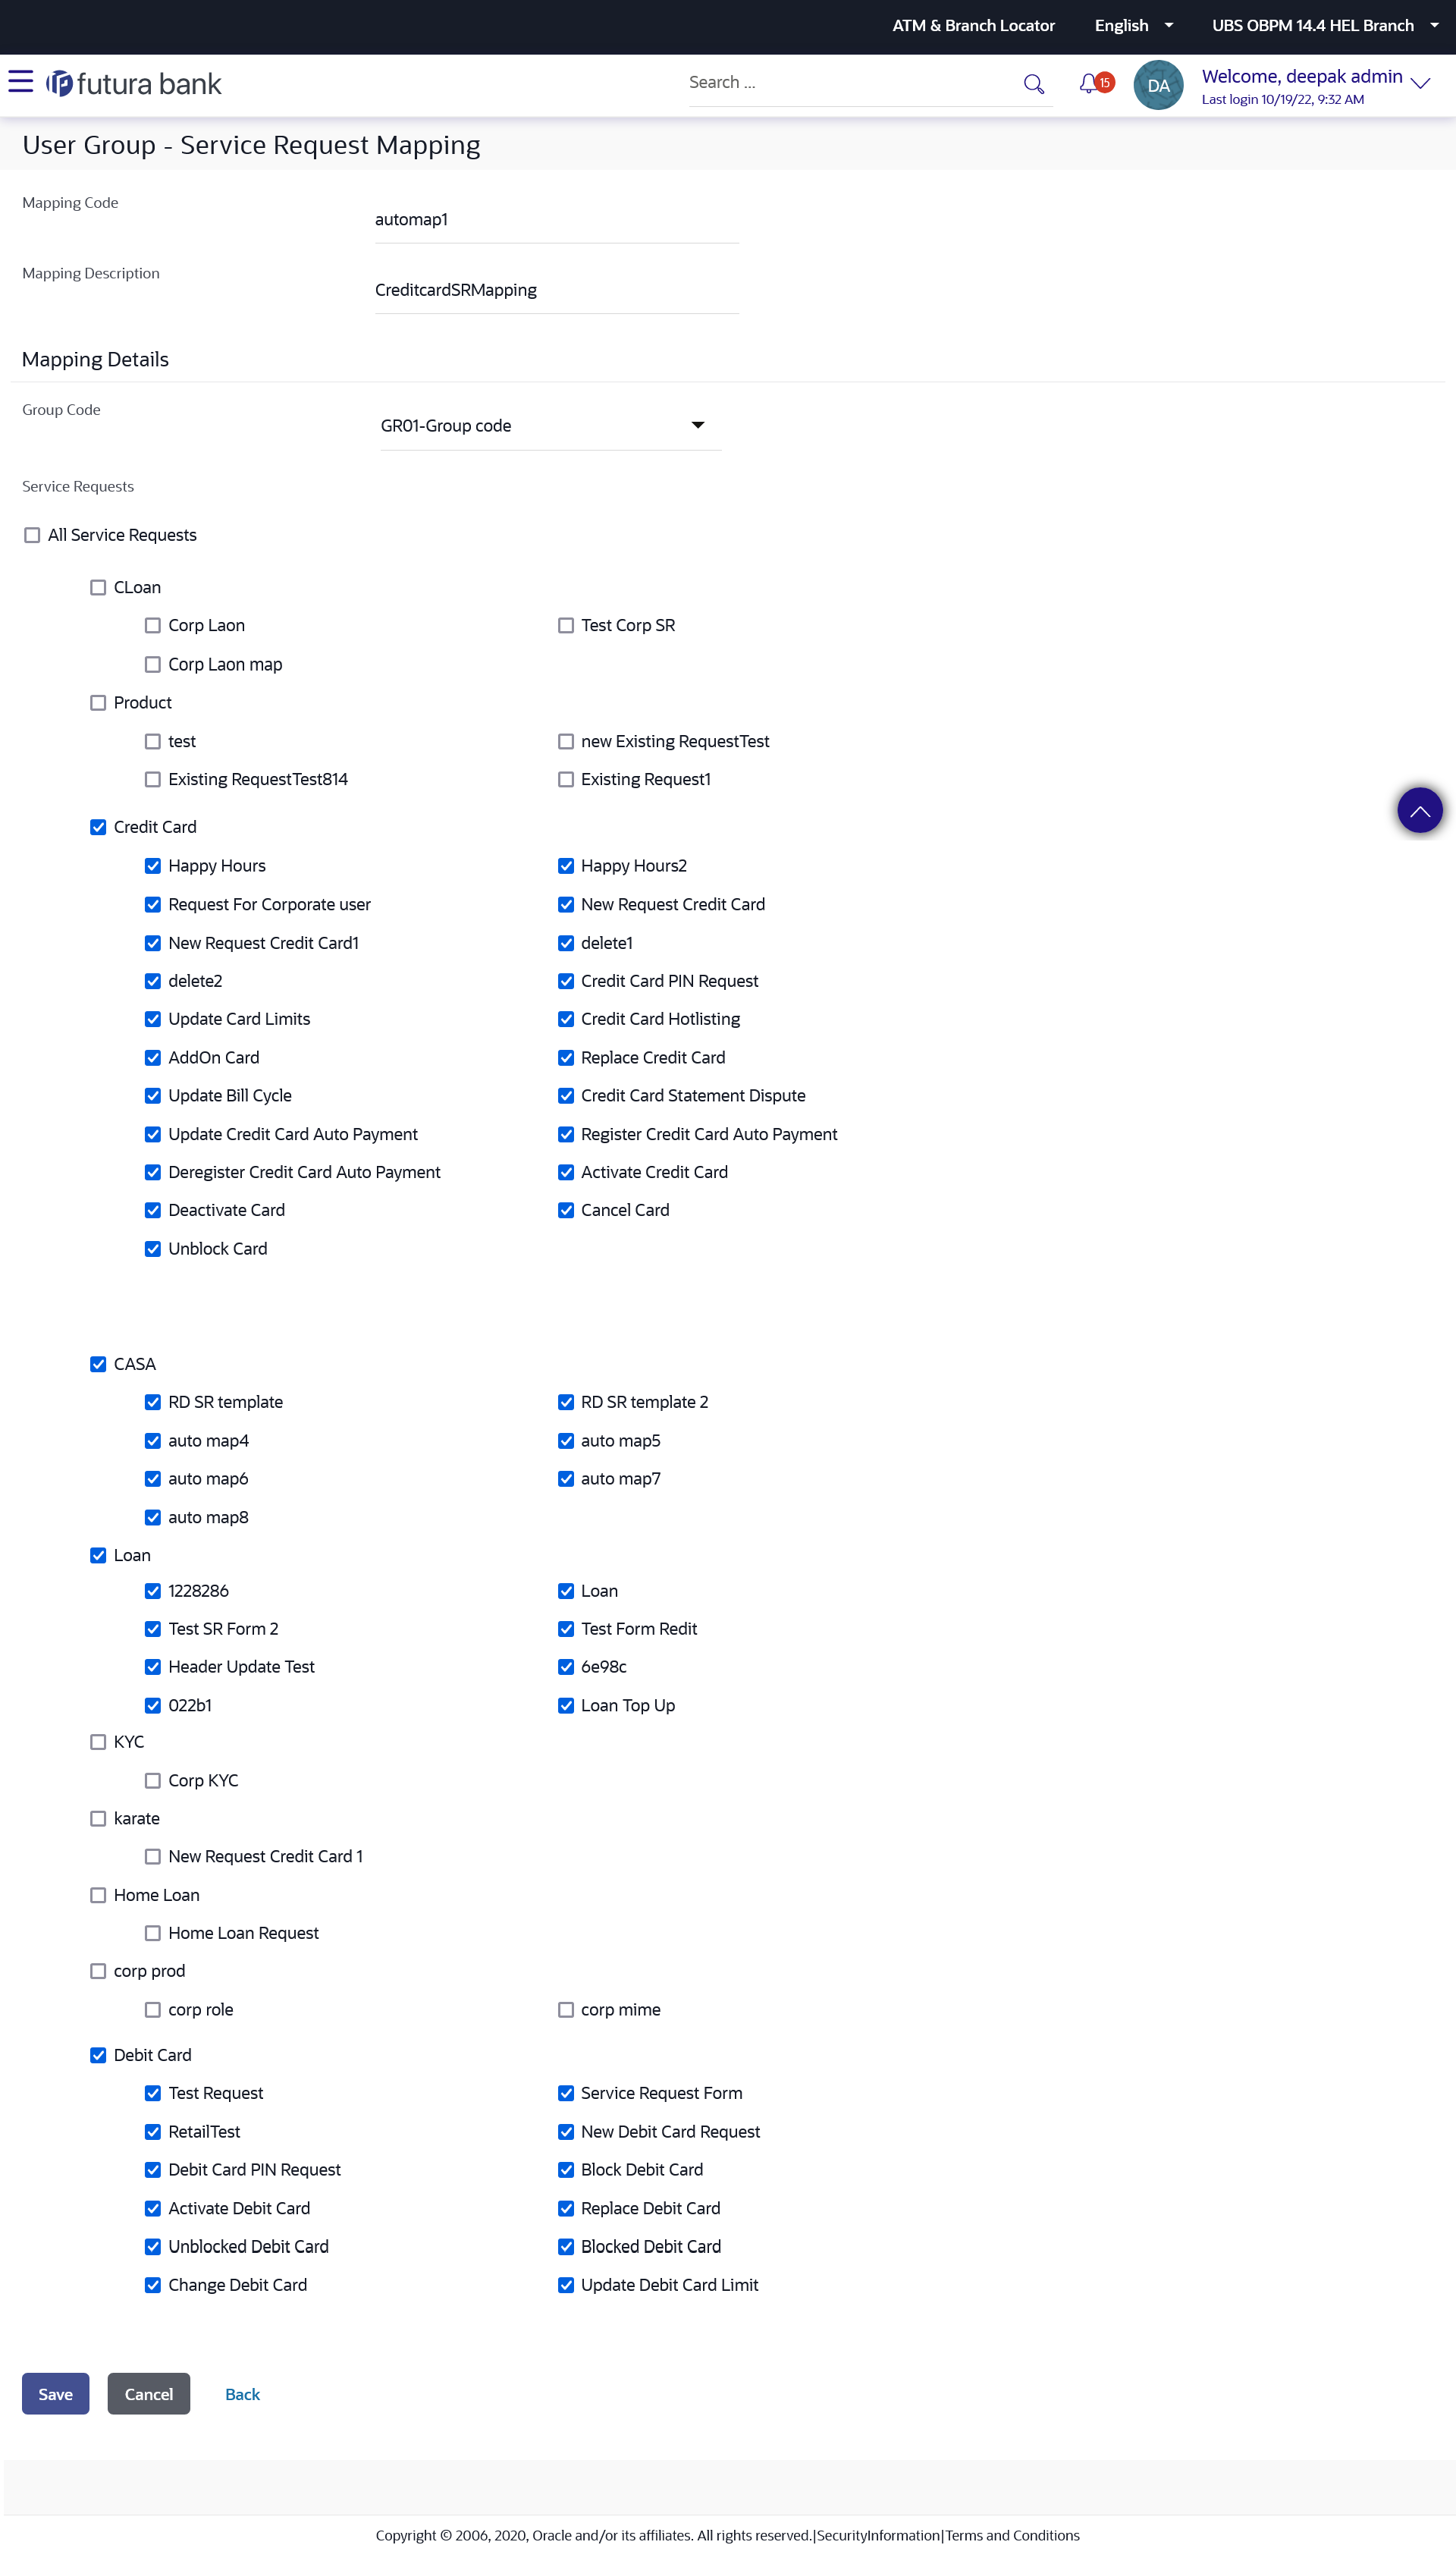
mapping details. The User Group - Service Request Mapping - View screen displays the mapping of service request to the user group.
Figure 40-5 User Group - Service Request Mapping - Edit
Table 40-4 Field Description
Field Name Description Mapping Code The user group - service request mapping code. Description The user group - service requests mapping description. Mapping Details Group Code The group code to create user group service request mapping. Service Requests The list of all service request maintained.
Note:
- All Service Request: if this is checked, then all service requests will be mapped with selected group code within the CASA, TD, Loans, Credit Cards modules.
- List of Individual Service Request: Module wise list of service requests will be available with check box against those. If this is checked, then individual service request is mapped with selected group code within the CASA, TD, Loans, Credit Cards and other modules.
- Select the respective check boxes preceding the service request to be
mapped.OR
Select All Subjects check box, if you want to map all service requests.
- Update the required details.
- Click Save to save the modified details.OR
Click Cancel to cancel the transaction.
OR
Click Back to navigate to the previous screen.
- The Review screen appears.Verify the details, and click Confirm.
OR
Click Cancel to cancel the transaction.
OR
Click Edit to modify the details.
- The success message of update along with the transaction reference number
appears. Click OK to complete the transaction.
Note:
- If the mapping setup requires an approval workflow, the maintenance will be initiated. Once approved by the required number of approvers, the mapping will be effected.
- If the setup does not require an approval workflow or is self / auto approved, then the mapping will be effected immediately.
Parent topic: User Group - Service Request Mapping
