16.5.3 User Groups – Edit

This function enables the Bank Administrator to edit the description of existing user groups mapped under Group Corporate. Bank Administrator can also add new users and remove existing users of the user group as part of this function.

A check is performed on minimum and maximum number of users allowed as a part of user group while adding or removing the users from the user group.

To edit or update a user group:

  1. Navigate to one of the above paths.
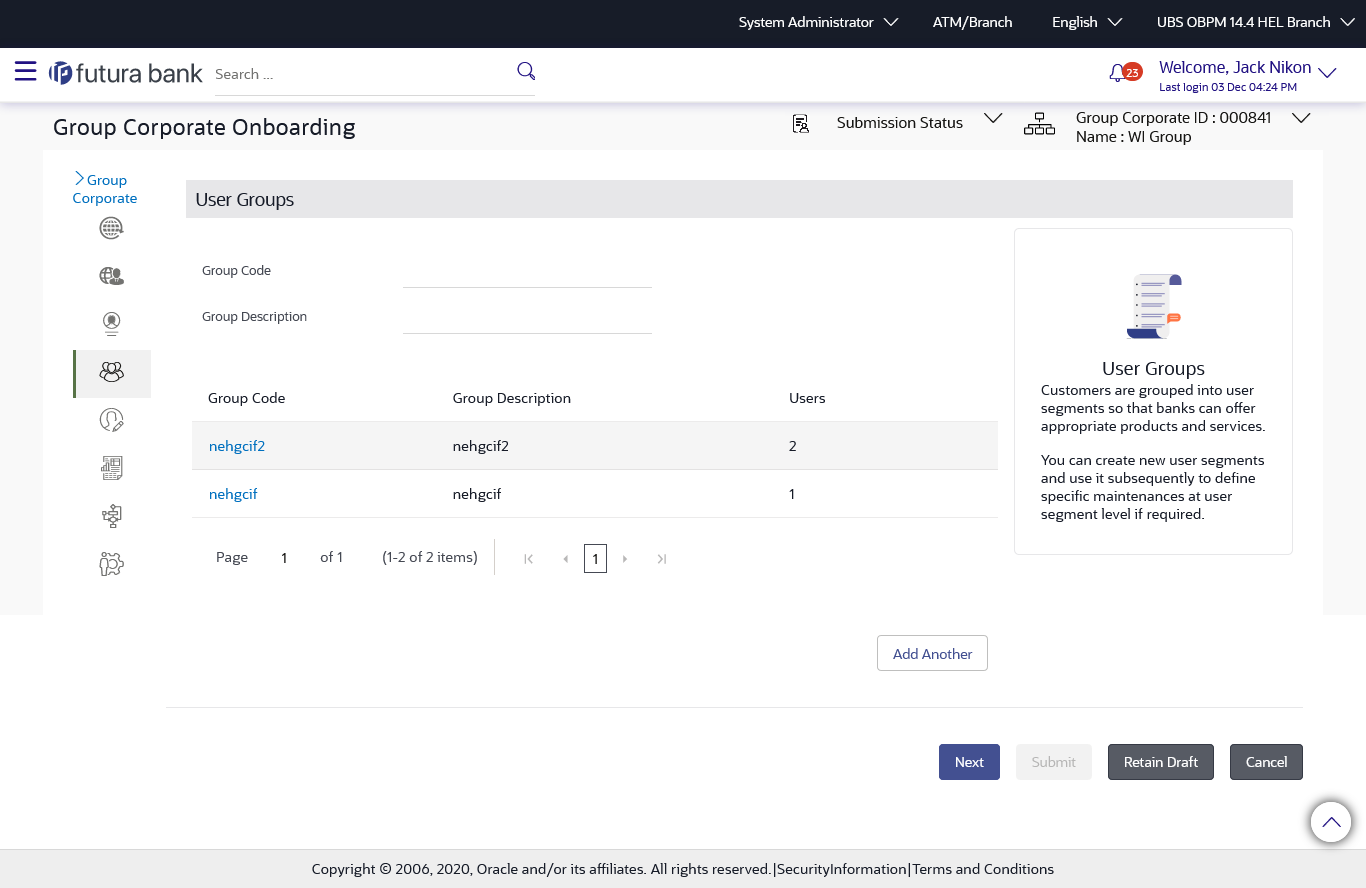
    The User Groups screen appears.
  2. In User Group Management screen, in the Group Code or in Group Description enter the Respective details.
  3. Click Search. User groups maintained if any under the Group Code or Group Description are displayed on the screen.

    Table 16-27 Field Description

    Field Name Description
    Search User Group
    Group Code Enter User group code
    Group Description Enter Description provided to the user group.
    Search Result
    Group Code Display user group code
    Group Description Display description provided to the user group
    User Count Display Number of users available in each user group
  4. Click on Group Code hyperlink to view details of list of users associated with entered user group.
  5. Click Edit to edit the user group.
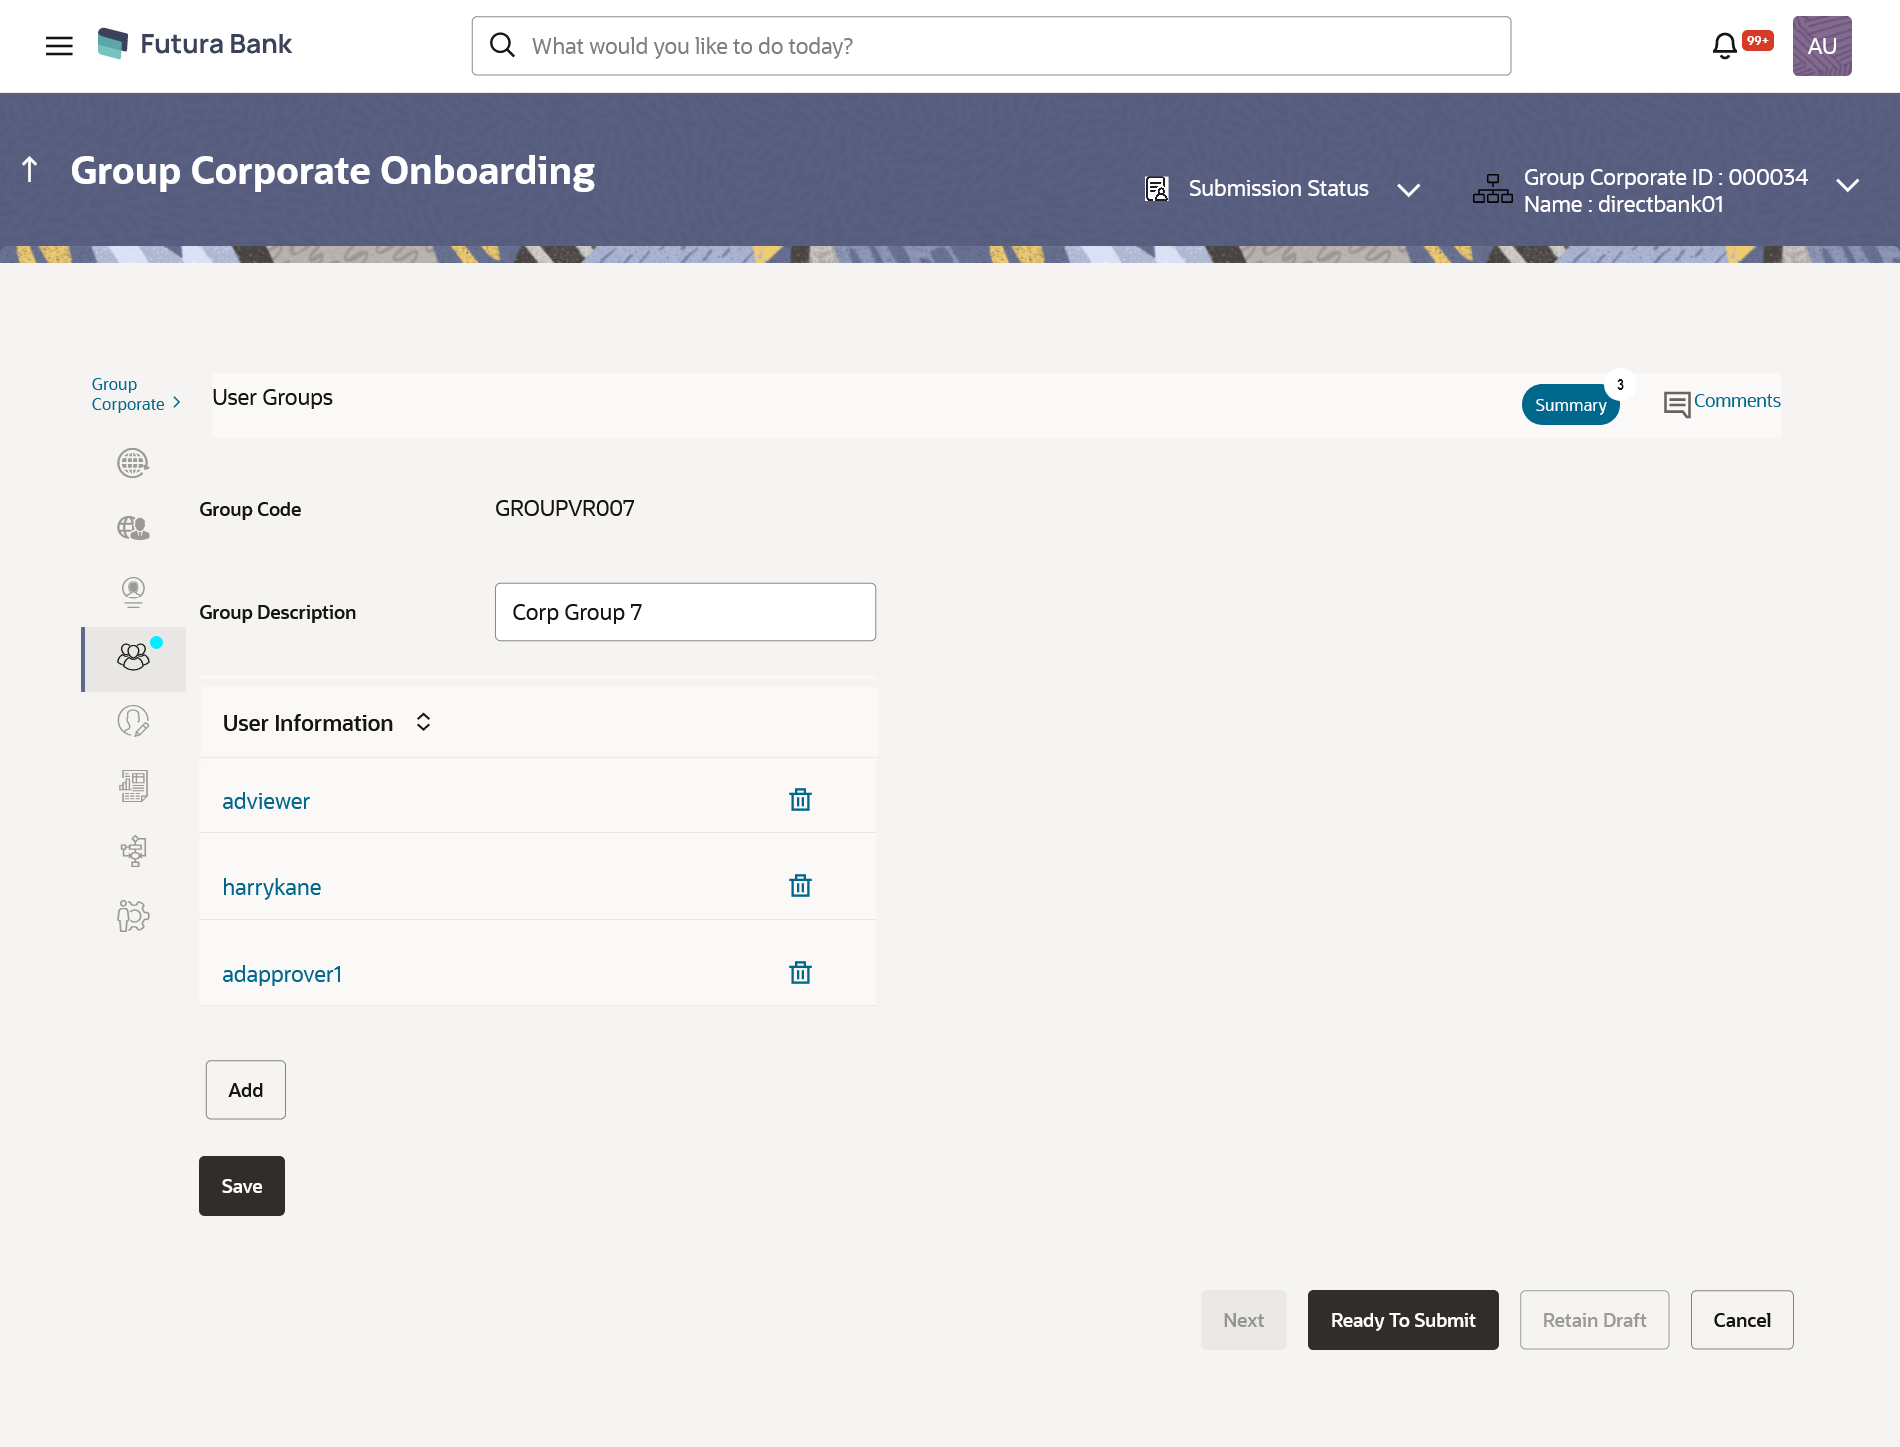
    The User Groups - Edit screen displays the mapping of the user group.

    OR

    Click Cancel to cancel the transaction.

    Figure 16-46 User Group – Edit


    Table 16-28 Field Discription

    Field Name Description
    Edit
    Group Code Display user group code
    Group Description Enter Description provided to the user group.
    User Information
    Username Username of the user who is part of the user group is displayed.

    Click on the link to view the user details.

  6. In the User Group section, Click Add to add the selected user in the User Group. Once added, the user name will be removed from the user drop-down to avoid duplication of users.
    Click delete icon to remove a user from the User Group.
  7. Click Save to save the maintenance, and redirect to the review page.
    OR

    Click Next to proceed to the next logical step.

    OR

    Click Submit to submit the steps performed so far for approval.

    OR

    Click Retain Draft to save the details entered as draft.

    OR

    Click Cancel to cancel the transaction.

  8. The Edit to modify the details entered.
    OR

    Click Add Another to add another maintenance of the same step.

    OR

    Click Cancel to cancel the transaction.

    OR

    Click Back to navigate back to previous screen.

  9. The success message of user group creation appears along with the transaction reference number.