2.1.1 Insta Retail Onboarding - Basic Details

You can add personal details such as name, date of birth, and address of the customer to be onboarded in the Basic Details screen.

Note:

The fields marked as Required are mandatory.

Basic details screen captures the following data segments to capture Party basic details.

Table 2-2 Data Segment - Description

Sl.No Data Segment Name Mandatory / Optional / Conditional Description
1 Basic Info and Citizenship Mandatory Data Segment to capture basic personal information of the party.
2 Current Address Conditional Data Segment to capture current address of the party such as current communication address, current residential address, etc.

Note:

Address type in current address can be configured as mandatory through Address Management Maintenance. For more information, refer to the Oracle Banking Party Configurations User Guide for address management configurations.
3 Previous Address Optional Data Segment to capture previous addresses of the party such as previous communication address, previous residential address, etc.

Multiple previous address for each of the address type can be captured in previous address.

Minimum address history will be required, if configured, as per Address Management Maintenance.

Note:

For more information, refer to the Oracle Banking Party Configurations User Guide for address management configurations.
4 ID Details Mandatory Data Segment to capture identity details of the party such as Passport, Driving License, etc.
5 Contact Details Optional Data Segment to capture contact details of the party such as Mobile, Email, Phone, etc.
6 Tax Declaration Mandatory Data Segment to capture Tax Details of the party such as Form W8-BEN, W9 etc.
7 Educational Qualification Optional Data Segment to capture educational qualification of the party.
8 Visa Details Optional Data Segment to capture visa details of the party.
9 Dates Optional Data Segment to capture key and important dates related to party.
10 Social Profile Optional Data Segment to capture Social Profile of the party such as Linkedin, Facebook, etc.

  1. On Insta Retail Onboarding screen, click and expand the Basic Details segment.
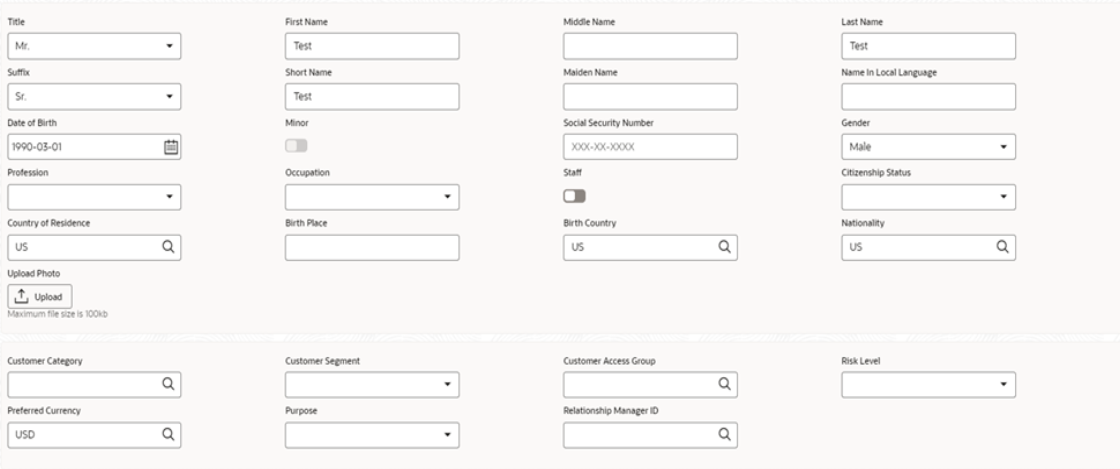
  2. On the Basic Details segment, click on the Edit button on Basic Info and Citizenship widget.
    The Basic Info and Citizenship screen displays.

    Figure 2-3 Basic Info and Citizenship


  3. On the Basic Info and Citizenship screen, specify the details of the basic info and citizenship. For more information on fields, refer to the Table 1-4 table.
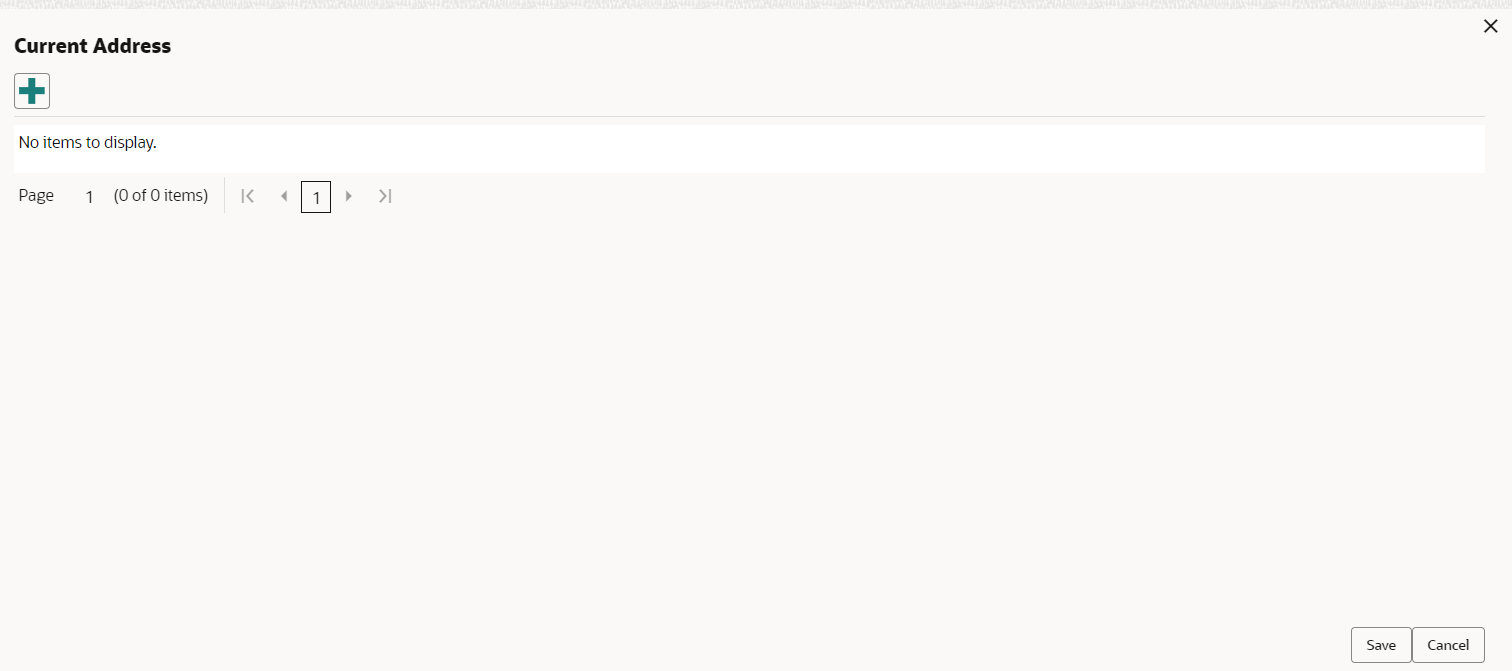
  4. On the Basic Details segment, click on the Edit button on Current Address widget.
    The Current Address screen is displayed.
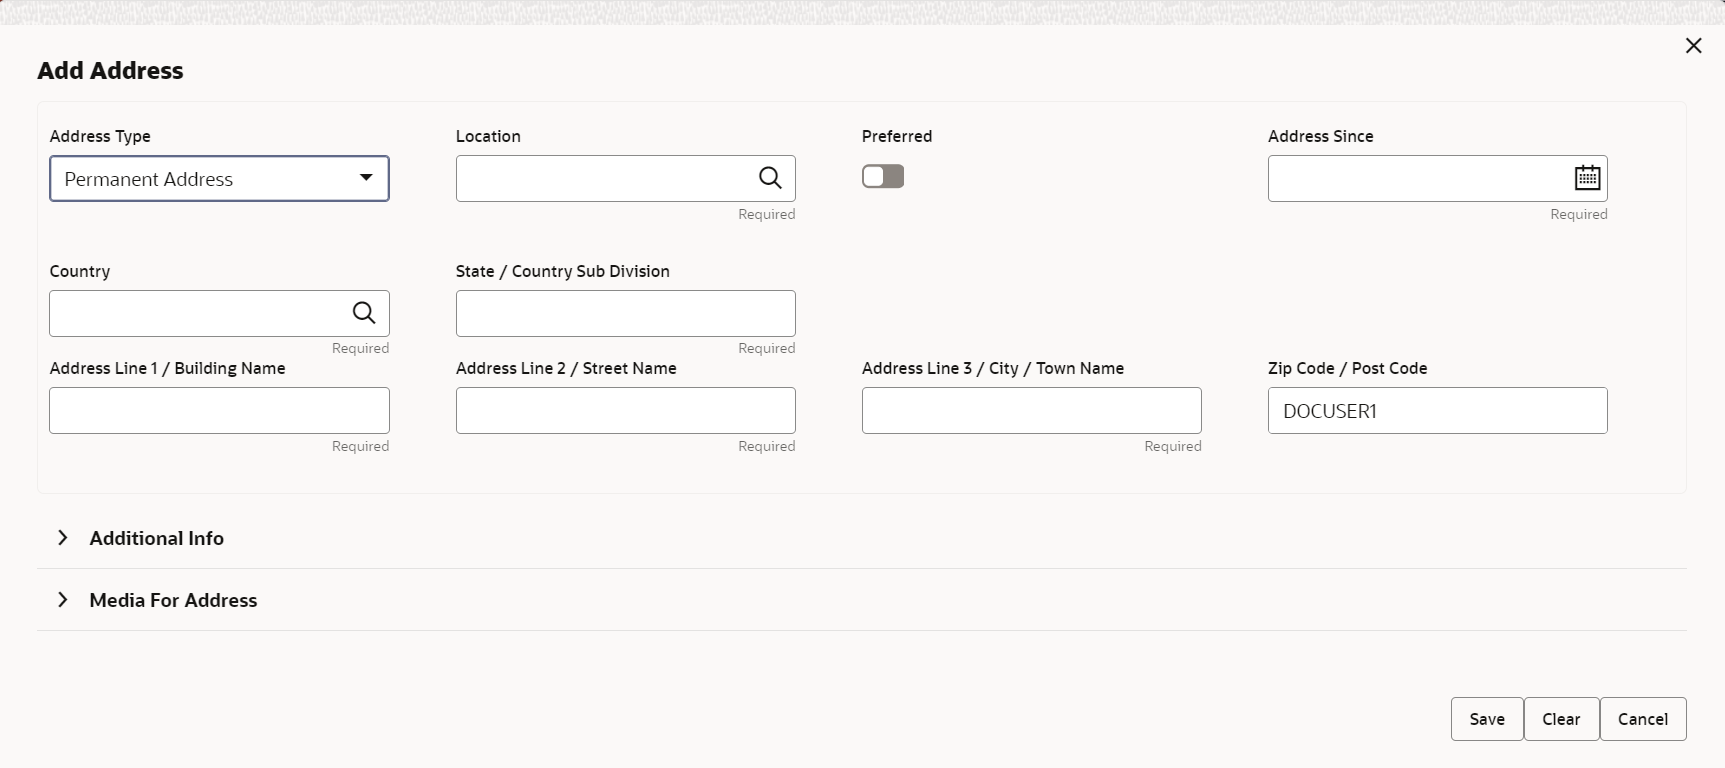
  5. Click on the Add icon icon to add a current address details.
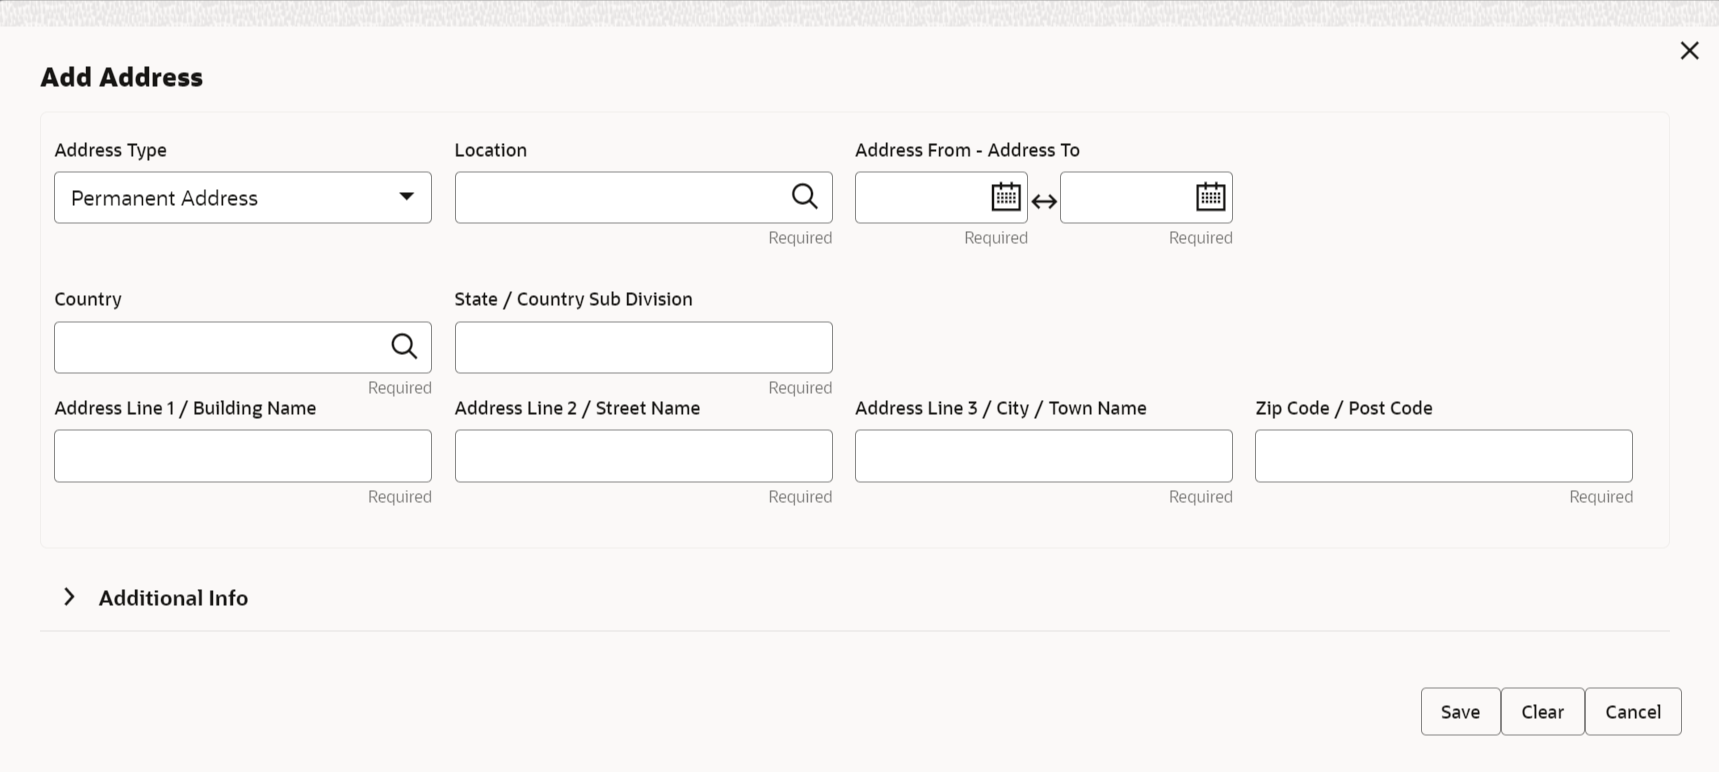
    The Add Address screen is displayed.
  6. On the Add Address screen, specify the details. For more information on fields, refer to the steps from Step 7 to Step 15 in the Onboarding Initiation - Basic Info screen.
  7. Click Submit to save a record.
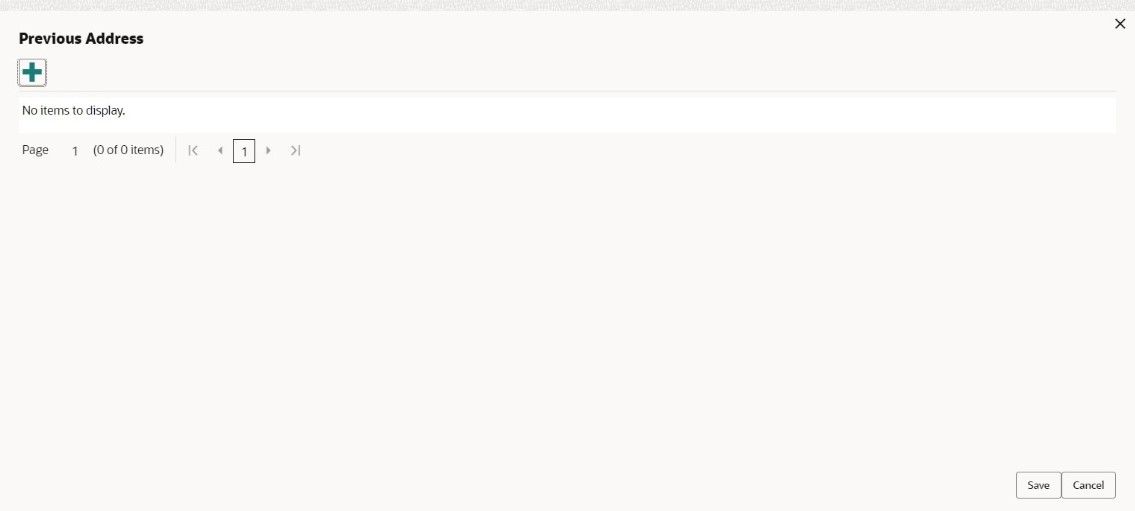
  8. On the Basic Info segment, click on the Edit button on Previous Address widget.
    The Previous Address screen is displayed.
  9. Click on the Add icon icon to add a previous address details.
    The Add Address screen is displayed.
  10. On the Add Address screen, specify the details. For more information on fields, refer to the steps from Step 7 to Step 15 in the Onboarding Initiation - Basic Info screen.
  11. Click Submit to save a record.
  12. On the Basic Info segment, click on the Edit button on ID Details widget.
    The ID Details screen is displayed.
  13. Click on the Add icon icon to add ID details.
    The Add ID Details screen is displayed.
  14. On the Add ID Details screen, specify the details. For more information on fields, refer to the Table 1-12 table.
  15. Click on the Submit to save a record.
  16. On the Basic Info segment, click on the Edit button on Contact Details widget.
    The Contact Details screen is displayed.
  17. Click on the Add icon icon on the Mobile Phone tab to specify the details.
    The Add Mobile Number pop-up screen is displayed.
  18. Specify the details in the Add Mobile Number pop-up screen. For more information on the fields, refer to the Table 1-5 table.
  19. Click on the Add icon icon on the Email tab to specify the details.
    The Add Email pop-up screen is displayed.
  20. Specify the details in the Add Email pop-up screen. For more information on the fields, refer to the Table 1-6 table.
  21. Click Submit to save a record.
  22. On the Basic Info segment, click on the Edit button on Tax Declaration widget.
    The Tax Declaration screen is displayed.
  23. Click on the Add icon icon to specify the details.
    The Add Tax pop-up screen is displayed.
  24. On Add Tax pop-up screen, specify the fields. For more information on fields, refer to the Table 1-13 table.

    Note:

    On the tax declaration screen, the information will be auto-populated based on Citizenship Status of the customer.
  25. Click on the Submit button to save a record.
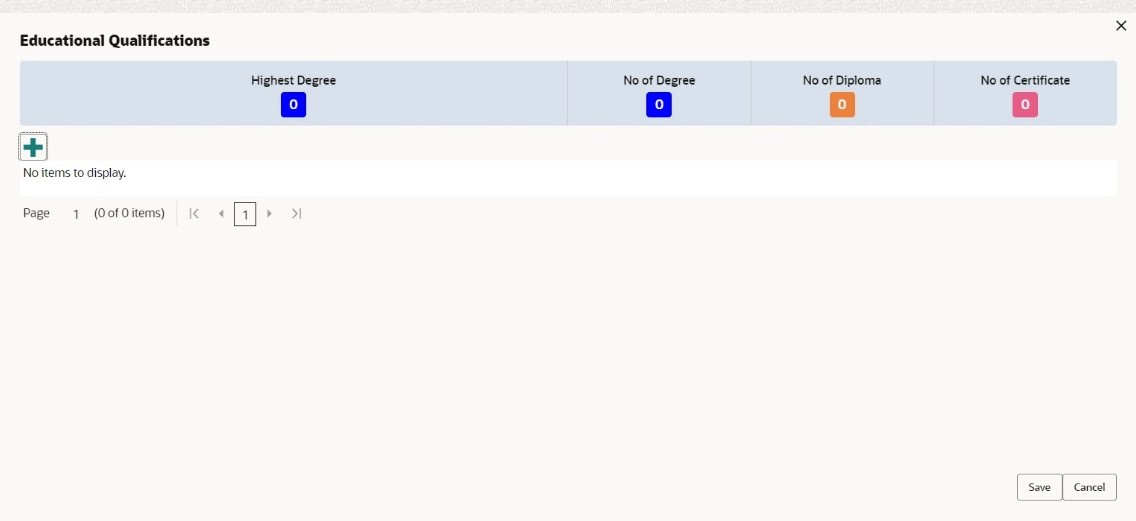
  26. On the Basic Info segment, click on the Edit button on Educational Qualifications widget.
    The Educational Qualifications screen is displayed.

    Figure 2-12 Educational Qualifications


  27. Click on the Add icon icon to add educational details.
    The Add Educational Detail screen is displayed.

    Figure 2-13 Add Educational Detail


  28. On the Add Educational Detail screen, specify the details. For more information on fields, refer to the Table 1-25 table.
  29. Click on the Submit button to save a record.
  30. On the Basic Info segment, click Edit button on Visa Details widget.
    The Visa Details screen is displayed.

    Figure 2-14 Basic Info - Visa Details


  31. On the Visa Details screen, specify the details. For more information on the fields, refer to the Table 1-34 table.
  32. Click Save to save a record.
  33. On the Basic Info segment, click Edit button on Dates widget.
    The Dates screen is displayed.

    Figure 2-15 Basic Info – Dates


  34. On the Dates screen, specify the details. For more information on the fields, refer to the Table 1-35 table.

    Note:

    Click on the Add More button to add additional dates.
  35. On the Basic Info segment, click Edit button on Social Profile widget.
    The Social Profile screen displays.
  36. On the Social Profile screen, specify the details. For more information on fields, refer to the Table 1-14 table.
  37. Click Save to save a record.