4.2.1 Creating a New Form
To design a New Form in the DEFQ - Forms Designer Window:
- Ensure that Create a New Form option is selected and do the following:
- Specify the application name by either entering the New Application Name or selecting Available Applications from the drop-down list.
- Enter the New Form Name .
- Click Next .
The DEFQ - Layout Window is displayed with a range of pre-defined layouts for you to choose from.
Figure 4-6 DEFQ – Layout Window (Step 3 of Designing Form)
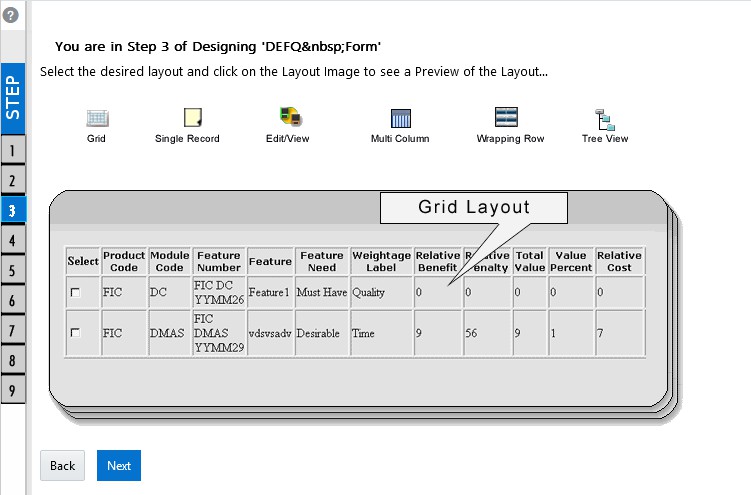
The following table describes the layouts in the DEFQ – Layout Window.
Table 4-1 Layouts in the DEFQ – Layout Window and their Description
Layout Description Grid Layout It is the default layout that displays the records in the Form of a table/grid with multiple rows of data. Single Record Layout It displays a single record at a time. Edit/View Layout It is a combination of the Single Record and Grid layout. By selecting a record in the grid, the record is displayed in a single record format, which is editable. By default, the first record will be displayed in the editable grid.
Note: The column names are editable only during altering the created Form.
Multi-Column Layout It displays a single record with its column in a grid format. You can view a multi-column layout Form without having to scroll or with minimum scrolling to view all the columns. Wrapping Row Layout It displays rows of a single record in a wrapped manner in a grid format. You can view a wrapping row layout Form easily without having to scroll horizontally to view all the data. Tree View Layout It displays the Hierarchical dimensional table with the selected dimension details. You can select the following options:
Dimensional Table Tree Parent-Child Tree
Note: The process to create a Form using the Tree View Layout differs from the procedure explained below. For more information, refer Creating Tree View Form in the References section.
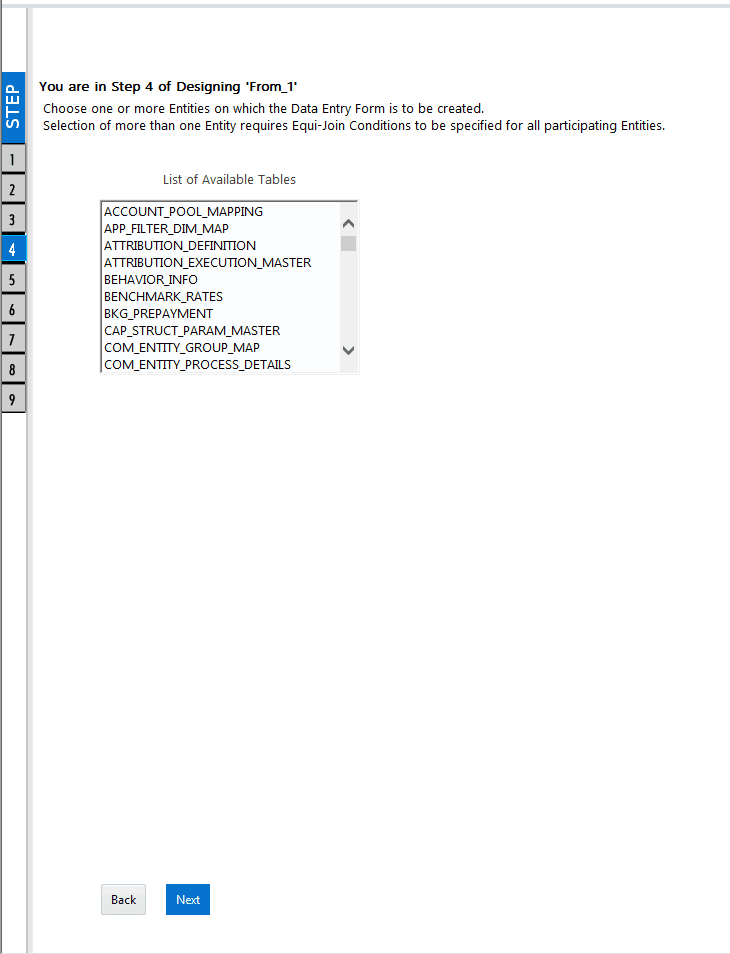
- Select the required layout and click Next . The List of Available Tables is displayed.
- Select the required Table from the list on which the Form is to be created.
Figure 4-7 DEFQ – List of Available Tables Selection Window (Step 4 of Designing Form)
Note:
You should use tables with names not longer than 25 characters. This is a limitation.For multiple selections, you can either press the Ctrl key for nonadjacent selection or the SHIFT key for adjacent selections. Click Next, the Fields Selection Window is displayed.
Note:
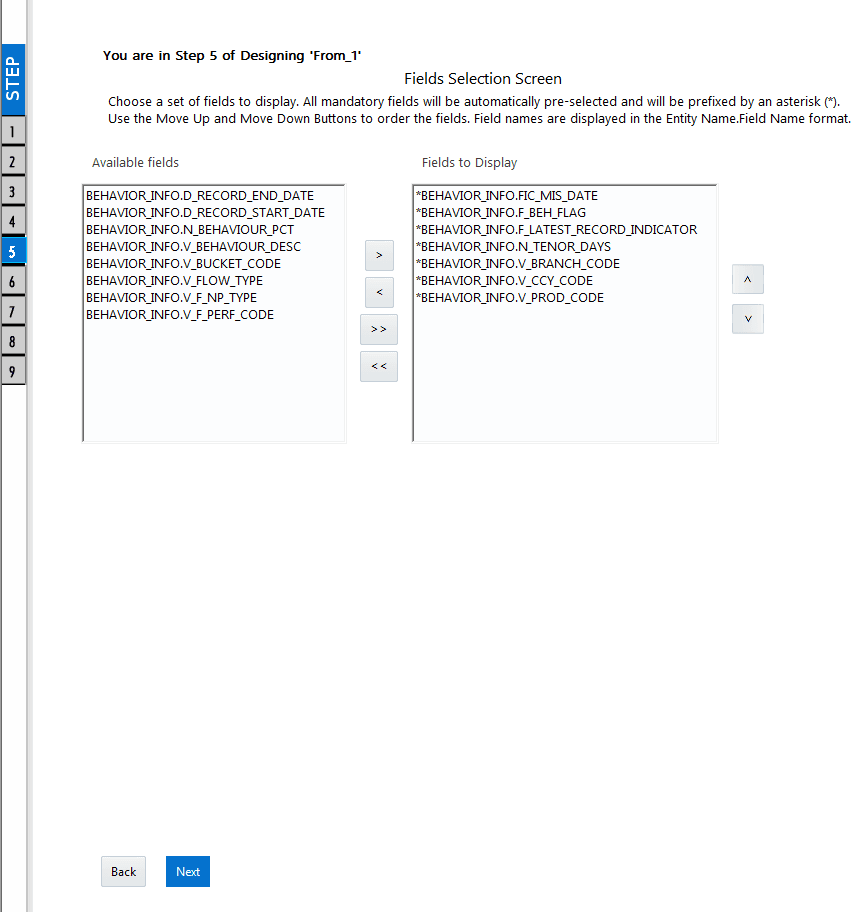
If multiple tables are selected, you need to specify Join Conditions. Select the Table from the drop-down list and select the Available Fields. Specify the Join Condition. Click Next, the join conditions are validated and the Fields Selection Window is displayed. - Select the fields to be joined from the Available Fields list and click the Move icon. You can press the Ctrl key for multiple selections and also click Move All icon to select all the listed fields. All mandatory fields are auto-selected and are indicated on the window with an asterisk ( * ).
Figure 4-8 DEFQ – Fields Selection Window (Step 5 of Designing Form)
Note:
You can clickor buttons to arrange the fields in the required order as intended to display in the Data Entry Form. The fields order need not be similar to the arrangement in the underlying table.Figure 4-9 Icon

Ensure the fields selected are not of CLOB Data Type since it is not supported in DEFQ.
- Click Next .
The Sort Fields Selection Window is displayed.
Figure 4-10 DEFQ – Sort Fields Selection Window (Step 6 of Designing Form)
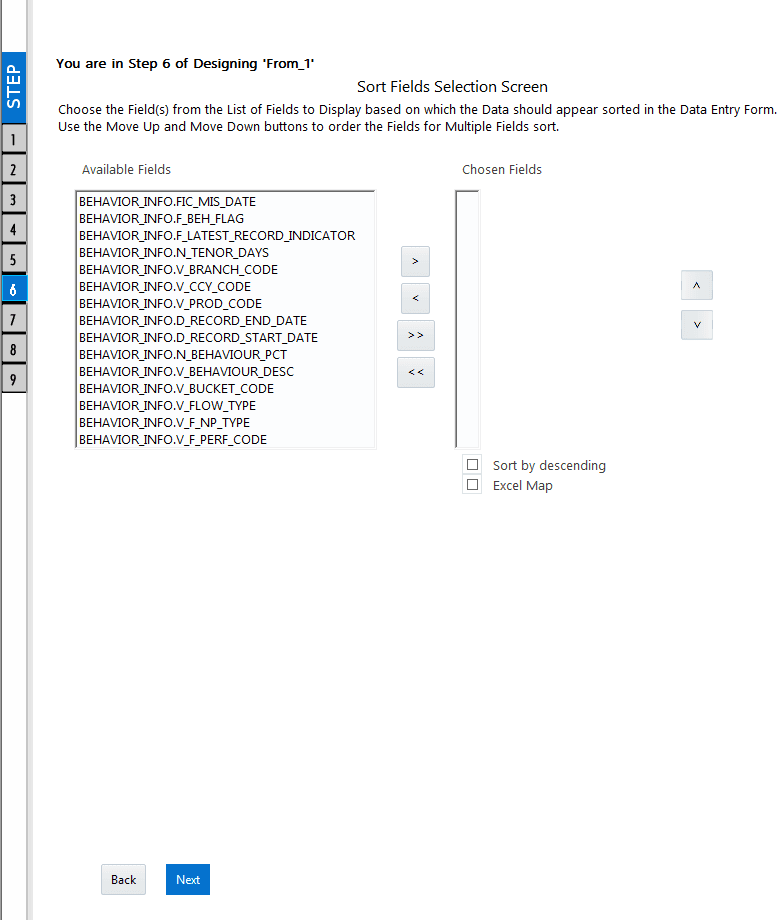
You can sort the fields in the required order as intended to display in the Data Entry Form. Additionally, the mandatory fields which need user inputs are indicated in the '*' symbol and are auto-selected in the Selected Fields Pane.
- Select the field from the Available Fields list and click
. You can press the Ctrl key for multiple selections and also click
Figure 4-11 icon
 to select all the listed fields.
Figure 4-12 Icon

- (Optional) To arrange multiple fields, select the Sort by Descending check box.
- (Optional) Select the Excel Map check box to enable Bulk Authorization.
Note:
In case you have selected the Excel Map check box, you need to select “Excel Name” from the Store Field As a list in the DEFQ Field Properties window. Only on selection, the “SelectExcelSheetName” list is displayed for the authorizer in the DEFQ - Data Entry Window. - Select the field from the Available Fields list and click
- Click Next . The DEFQ Field Properties Window is displayed with the Form details such as Field Name, Display Name, In View, In Edit/Add, Allow Add, Store Field as, Rules, and Format Type.
Figure 21: DEFQ – Field Properties Window (Step 7)
Figure 4-13 Figure 21: DEFQ – Field Properties Window (Step 7)
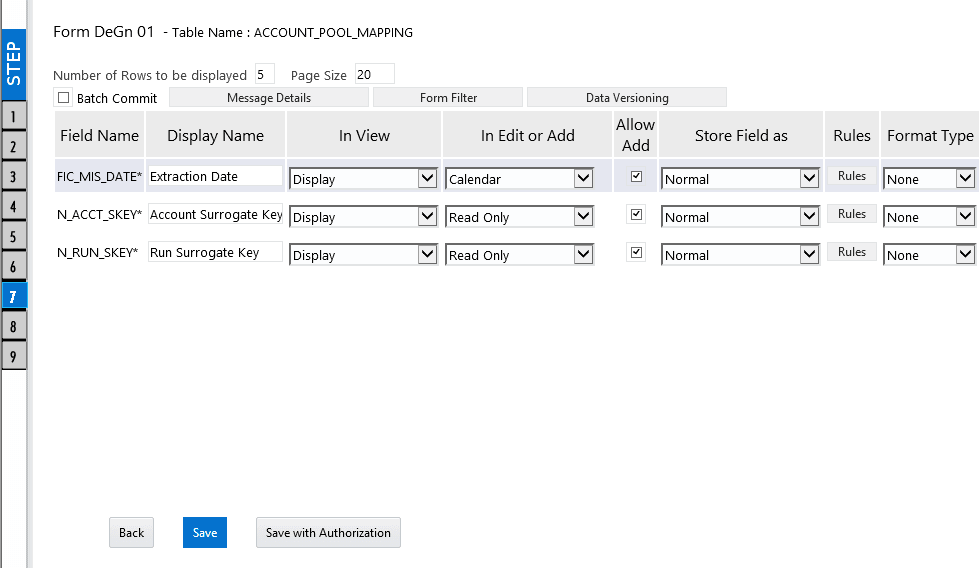
Specify the parameters for each field as tabulated.
The following table describes the fields in the DEFQ – Field Properties Window.
Table 4-2 Fields in the DEFQ – Field Properties Window and their Description
Field Description Display Name Edit the default Display Name if required. In View Select either Display or Do not Display to display the field in the Form.
If the field is a foreign key field or if more than one table is selected, then the following options are available in the drop-down list;
Same Field
Alternate Display Field Do not Display Options
In Edit/Add Specify the edit parameters by selecting from the drop-down list. The available options depend on the type of field selected.
For normal fields, you can select Text Field, Text Area, Select List, Protected Field, Read-Only, and Do Not Show.
For foreign key fields s you can select Read-Only, Select List, and Do Not Show. For primary key fields, you can select Read Only and Do Not Show.
For calendar fields, you can select Calendar and Do Not Show.
Note: If you choose the Select List option, you need to define the values. For more information, see Defining List of Values
Allow Add Select the check box to permit users to add a new record.
Note: An alert message is displayed if you are trying to save a Form with add option disabled for the mandatory fields.
Store field as Select the required option from the drop-down list. You can select the store format as Normal, Sequence Generator, Maker Date, Checker Date, Created Date, Modified Date Auth Flag, Maker id, Maker Date, Checker id, Checker Date, Checker Remarks, Maker Remarks, and Excel Name (If Excel Map is selected in Sort Fields Selection Window). Rules Click Rules and specify Rules and Expressions for the selected field in the
Specifying Rules and Expressions for Data - Validations Window.
For more information, refer Applying Rules section in the References.
Format Type Select the required Format type from the drop-down list depending on the field type selected.
CLOB data type is not supported.
Batch Commit Select the check box to group all the sets of table Forms into a batch.
All the Form tables are executed along with the batch execution and if in case, a Form in the table fails to execute, the entire set of Forms are returned.
Message Details Click Message Details to define the message type for Creator and Authorizer in the Messaging Details for a Form window. For more information, see Defining Messaging Details Form Filter Click Form Filter to define an expression for Form-level filter condition in the
Filter for Form Window.
Data Versioning Click Data Versioning to perform data versioning on an authorized Form. For more information, see Form Data Versioning. - Click either Save to only save the Form details or click Save for Authorization to save the changes with authorization.
For more details, refer Save with Authorization Section.
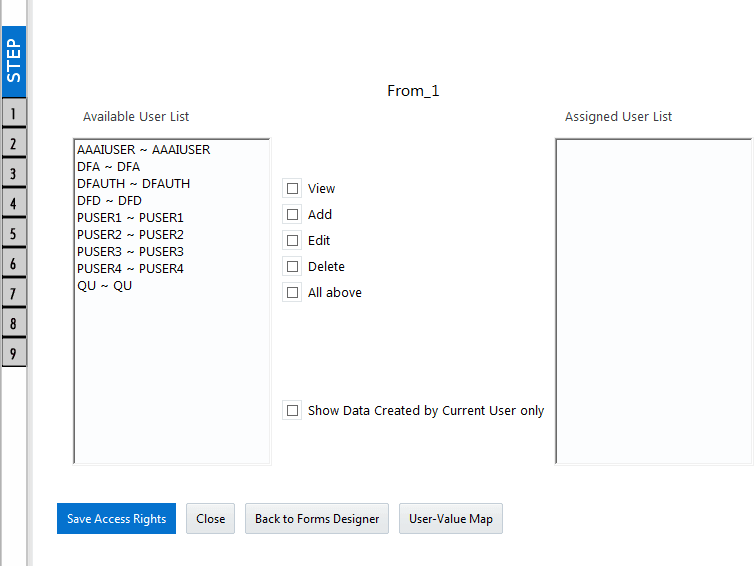
Figure 4-14 DEFQ – Save Window
Note:
Sometimes, on clicking Save, the form does not get saved. This is because the Java heap size setting for the OFSAAI service is set too high and the webserver memory setting is too low. Contact System Administrator to modify it to the appropriate setting by viewing the log file created in the path: $FIC_APP_HOME/common/FICServer/logs/.While saving, the User for Mapping - DEFQ Window is displayed which facilitates you to assign user rights to the Form. For more information, see Assigning Rights.