4.4 Editing the Queue
Perform the following to edit a queue:
Note:
Existing alerts can be re-distributed and counted in the queue if the alerts are satisfied by the new queue status criteria. To re-distributed the queue, navigate to the<FIC_HOME>/TF_Populate_Historical_Alerts/bin or
<FIC_HOME>/CS_Populate_Historical_Alerts/bin directory
and run the TFPopHistAlerts.sh or CSPopHistAlerts.sh, file respectively. This is a
one-time process.
- The Queue type is selected by default in the Select the Queue Type page. Click
Next to Define Criteria for the Queue or click
Cancel to close the page and back to Queue
List.
Once you select the Queue Type and click Next for defining criteria, you cannot return to the same page for selecting queue type again.
- You can edit or select the values for Customer Screening or
Transaction Filtering fields in the Define Criteria page for the Selected
Queue.
The Status fields is mandatory to proceed to the next step. You can add or delete entries in the Status field.
- Customer Screening (CS)
- Alert Type
- Business Domain
- Match Score
- Status
- Assignee
- Jurisdiction
- Priority
- Type of Screening
- Transaction Filtering (TF)
- Assignee
- Currency
- Match Score
- Message Direction
- Priority
- Status
- Amount
- Business Domain
- Jurisdiction
- Message Category
- Message Type
- Risk Score
- Wire Stripping Alert
Note:
Select the Wire Stripping Alert criteria as Yes from drop-down to update the queue to include the WS alertFor more details on fields, see Field Descriptions.
The Queue is created based on the defined criteria filters, and alerts will be pushed into this Queue that is matched with defined criteria. If any alerts do not match the defined criteria, they will be pushed to the OOB queue.
Click Next to select the Alert Statistics or click Cancel to close the page and back to Queue List.
- Customer Screening (CS)
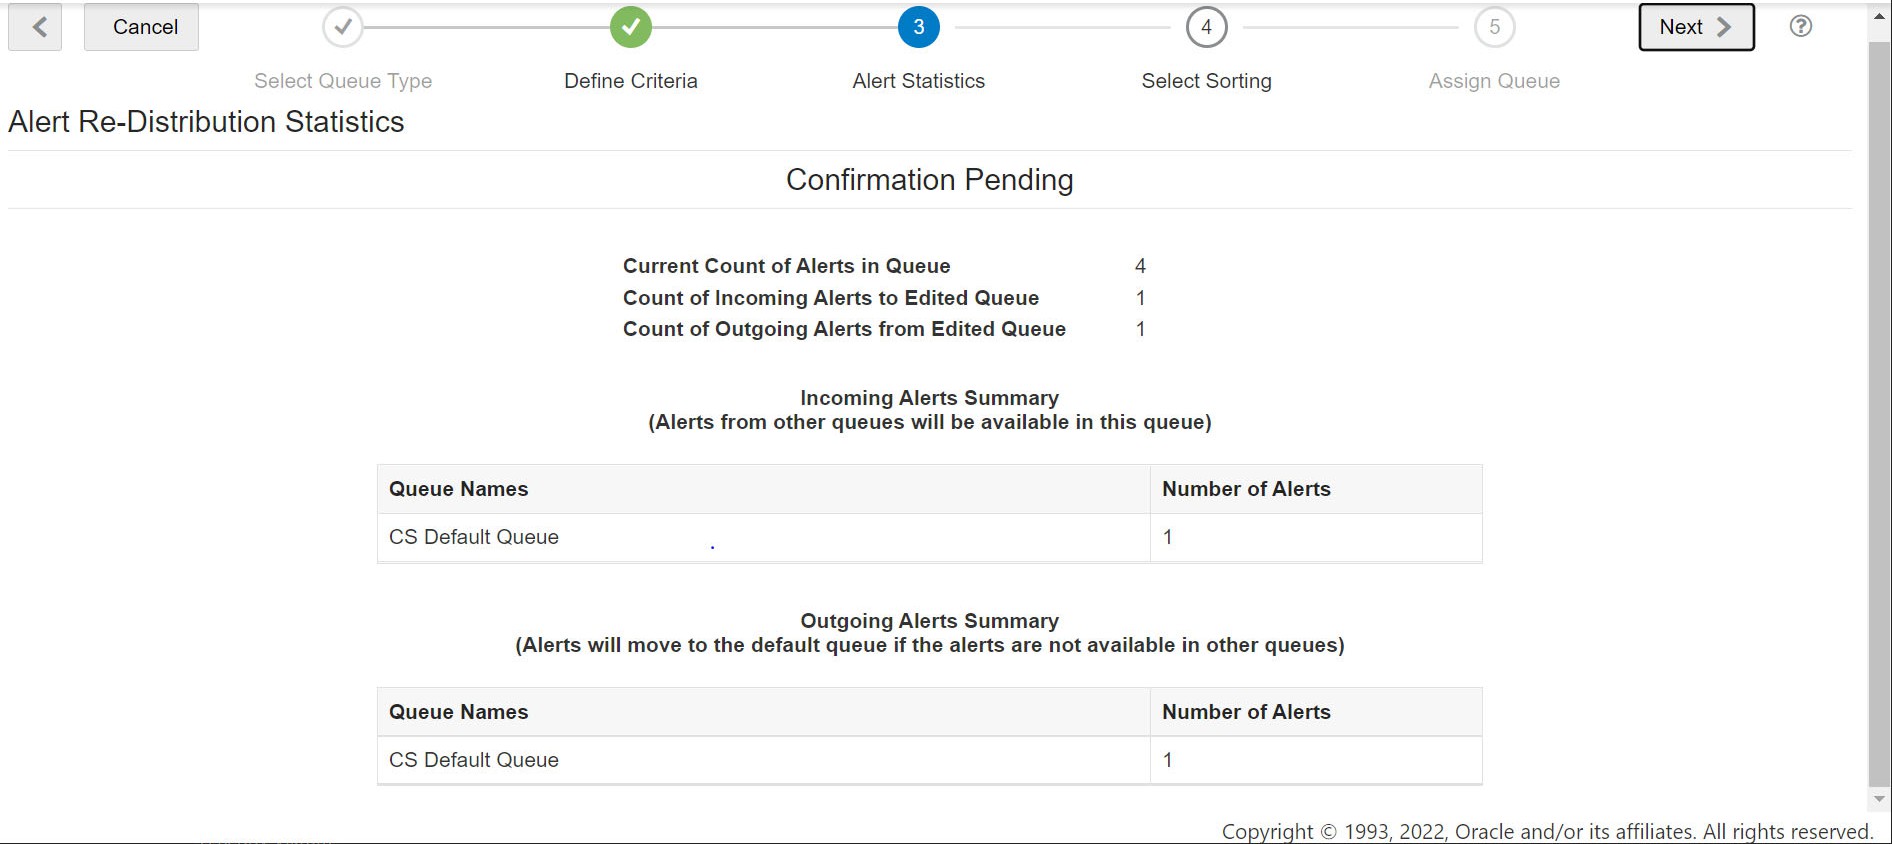
- Alert Statistics provides collected and analyzed alert data, which
satisfies the status criteria for the queue.
Existing alerts inside the queue and the alerts in the other queues are re-distributed to all the queues based on the new matching criteria defined.
You can view the following information in the Alert Statistics Page- Current Count of Alerts in Queue,
- Count of Incoming Alerts to Edited Queue,
- Count of Outgoing Alerts from Edited Queue
- Incoming Alert Summary
- Outgoing Alerts Summary
Incoming Alerts Summery provide data about alerts from other queues that are now available in the current queue.
Outgoing Alerts Summery provide data about alerts that are moved to default queue if the alerts are not available in other queues.
For example, consider the Alert Statistics Queue 1.
Current queue alert count= 50
Total Alerts Moving out of queue= 30
Total Alerts Moving in to queue= 10
The following both tables shows the Alert breakup:Table 4-2 Alert Breakup for Alerts moving Out of the Queue
Number of Alerts moving out of the queue Queue Name 10 Queue2, Queue 3 5 Queue2 10 Queue4 5 Queue3 Table 4-3 Alert Breakup for Alerts Coming to the Queue
Number of Alerts Coming to the queue Queue Name 3 Queue2, Queue 3 4 Queue2 4 Queue3 Click Next and confirm to select the sorting or click Cancel to close the page and back to Queue List.
- You can edit the sorting type and order to display the alerts in order and sort
as specified in the Queue.
- Click
 icon to add sorting and order. The Add Sorting appears.
- Select the values from the drop-down list for Sort By
Column and Sort Order (Ascending/
Descending).
Select the values available in the list; the same value will not be available for the following selection once you select the value.
- Click Save. The sorting and order
will be added to the list. You can select and drag and drop the rows to
change the order as per your requirement.
In addition, you can select the row and right-click, navigate to the sort> Sort Ascending/Sort Descending.
Click
 to delete the sorting.
Click Next button to select the sorting or click the Previous
 icon to define criteria.
Click Cancel button to close the page and back to Queue List.
- Click
- You can assign Queue to one or multiple user group (s) in the list.
You can save the Queue with or without assigning the Queue to the user group.
The following buttons are enabled after assigning Queue to the user group.- Click Finish to save the Queue.
Note:
After adding each Queue via the Queue Admin page, you can run the Clear Cache without restarting the WebLogic to reflect the changes in the UI.
Customer Screening Queue URL:
http://##HOST_NAME##:##POR T##/##SANC_CONTEXT_
                                    NAME##/QueueCacheRe- Load.jsp
For example:
http://whf00beh:5010/zipper/
                                    QueueCacheReLoad.jsp
Transaction Filtering Queue URL:
https:##HOST_NAME##:##PORT##/
                                    ##SANC_CONTEXT_NAME##/Queue- CacheReLoad.jsp
For example:
http://whf00beh:5010/zipper/QueueCacheReLoad. jspSEPA:
http://<HOST>:<PORT>/
                                    SEPATFLT/TFCacheReLoad/ TFCacheReLoad.jsp
FEDWIRE:
http://
                                    <HOST>:<PORT>/FEDTFLT/ TFCacheReLoad/TFCacheRe-
                                    Load.jsp
SWIFT:
http://<HOST>:<PORT>/
                                    TFLT/TFCacheReLoad/ TFCacheReLoad.jsp
