4.2 Grid View
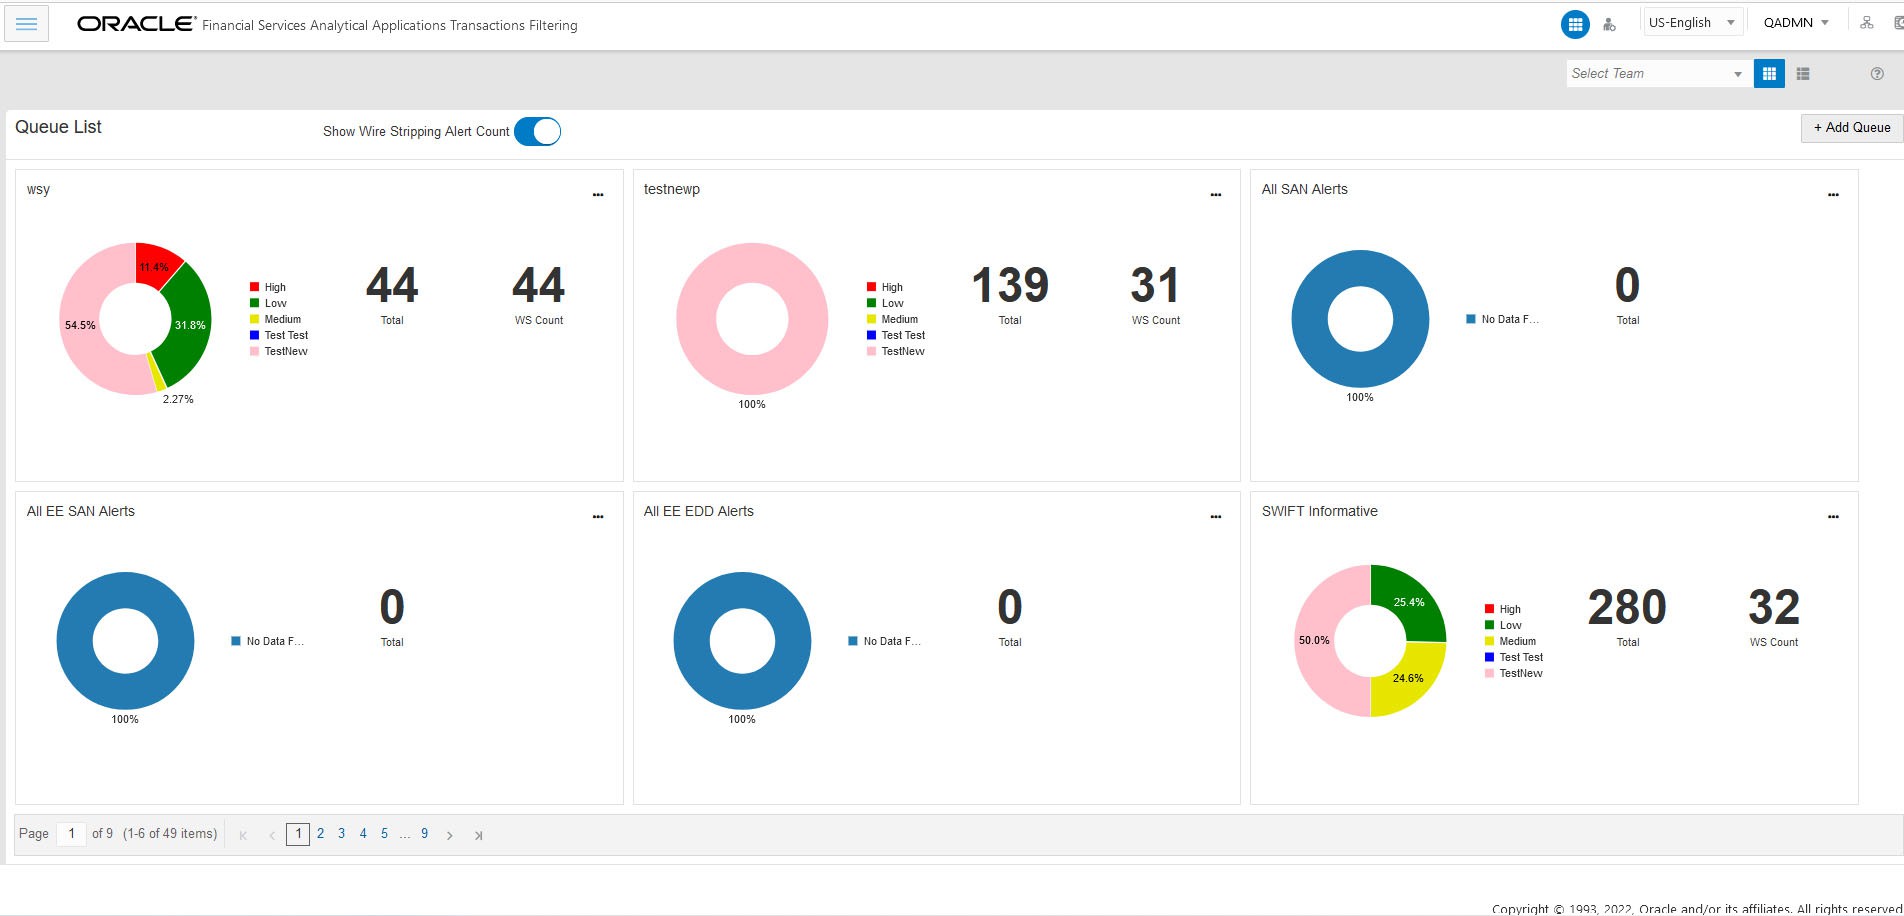
In Financial Services Analytical Applications Transaction Filtering you can click on the Show Wire Stripping Alert Count toggle button to display the Wire Stripping (WS) alert count for each queue which makes the WS alert easily identifiable.
To view the queues related to the specific user group, you can select the user group from the drop-down list. Queue List displays the queues that are related to the selected user group. The selected user group name is displayed as the title for Queue List.
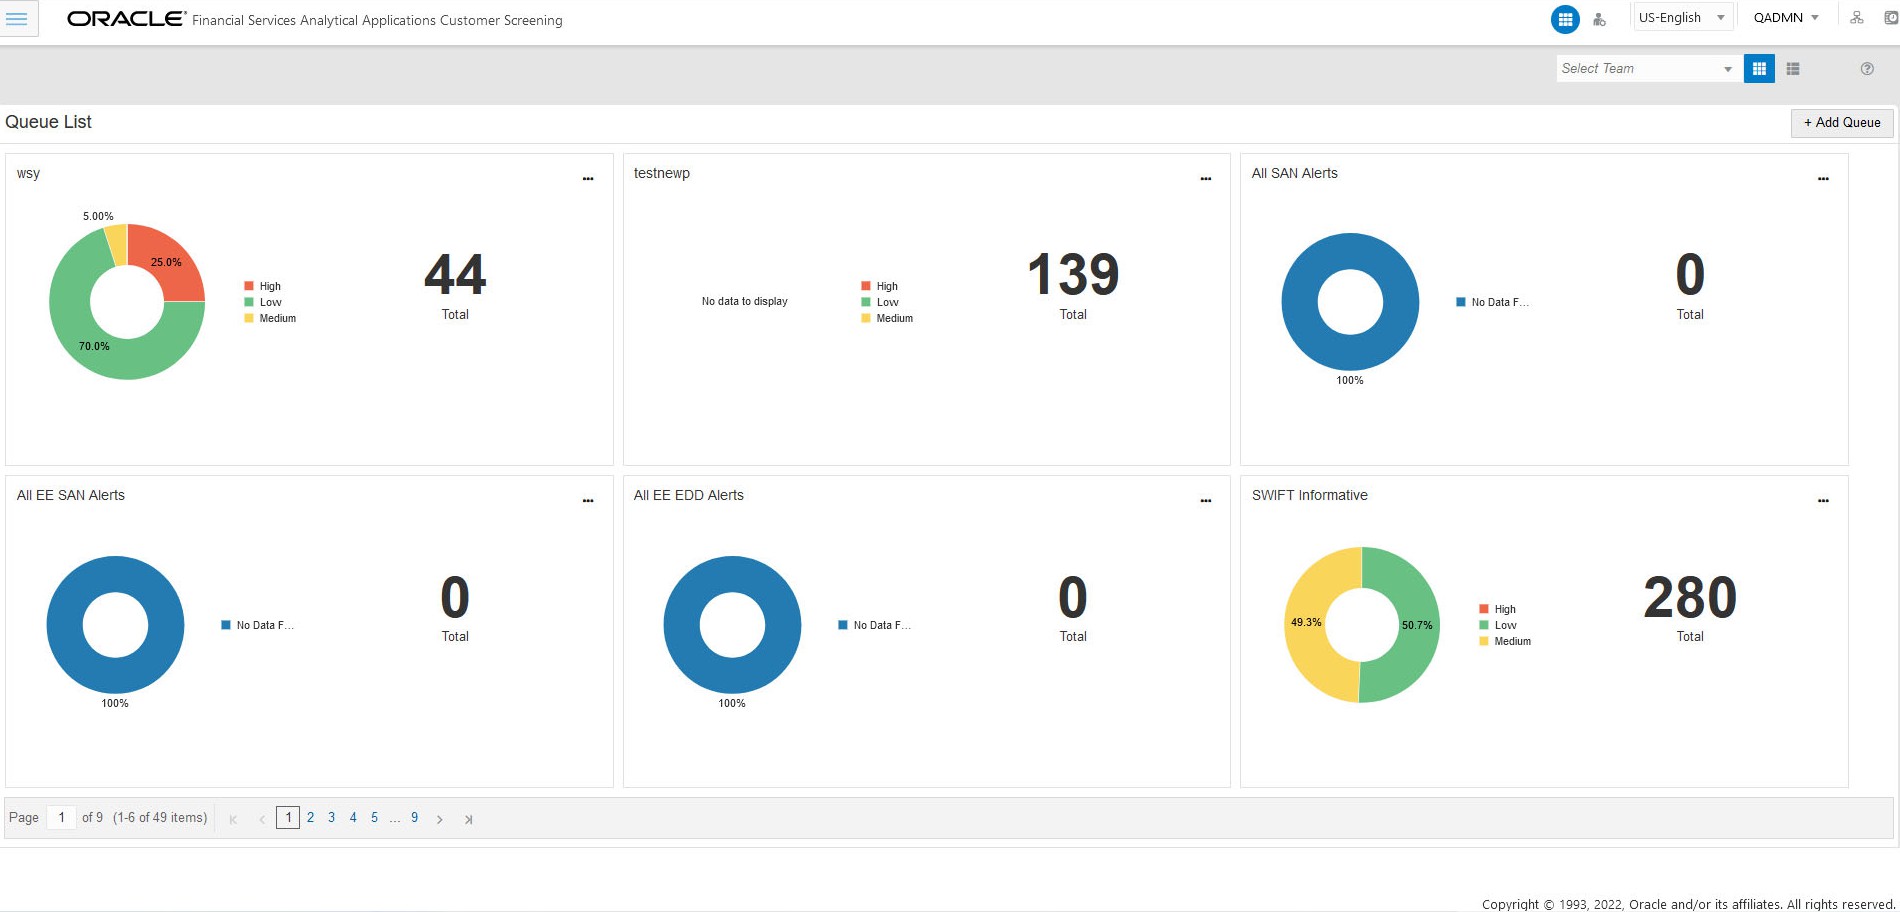
The Queue List appears in a single circle. Hover over the circle to see the details of the Series and the Value of the Queue.
By default, the color-coding displayed for three priorities of the alerts and the Total numeric value indicates the number of alerts in that Queue.
- High
- Medium
- Low
An admin can configure any number of priorities and color code that needs to be displayed on the Queue Management Dashboard against each of the priority based on their requirement in the backend based on the match score, screening type, event type, jurisdiction and business domain.
The Queue Management dashboard displays all the priorities defined by the admin and the number of alerts meeting the priority condition. If there are alerts which doesn't fall under any priority criteria are displayed as No Priority Set.
You can view six queues in Queue List and use the navigation to view the next set of queues.
- Add Queue: Click
 button top-right in the Queue List to add a new queue. For details, see
the Adding a Queue section.
- Edit: Click the Ellipsis menu and then select Edit to modify the queue details except for queue type. For details, see the Editing the Queue section.
- Assign: Click the Ellipsis menu and select Assign to assign the
Queue to User Group(s). The Assign Queue pop-up appears.
- Select the User Group(s) to assign the Queue.
- Click Assign. The successful message is displayed on assigning the groups.
- Delete: Click the Ellipsis menu and then select Delete to delete
the Queue. The Application prompts the message to confirm the deletion.
- Click Yes. The Application displays the successful message on deletion.
Note:
To view the number of alerts details in each Queue, log in as
Reviewer/Analyst/Supervisor/Senior Supervisor, navigate to Queue Management, and
click hamburger ![]() icon. The Queue List appears in doughnut charts with color-coding
displayed for three priorities of the alerts and the Total numeric value. The
following are the only available priorities in the application: High, Medium,
and Low. See the Queue Management section in the OFS Customer
Screening User Guide or OFS Transaction Filtering User Guide for
more information.
icon. The Queue List appears in doughnut charts with color-coding
displayed for three priorities of the alerts and the Total numeric value. The
following are the only available priorities in the application: High, Medium,
and Low. See the Queue Management section in the OFS Customer
Screening User Guide or OFS Transaction Filtering User Guide for
more information.

