- User Guide
- Modeling
- Graphs
- Accessing the Graph Summary Page
- Create a Node
Create a Node
To create a Node:
- In the Graph Model page, click Create Node.ORSelect the graph for which you want to create a Node, click on the Action button, and select the Edit option. In the Graph Model page, click Create Node.The Node Details screen is displayed.
Figure 8-97 Node Details
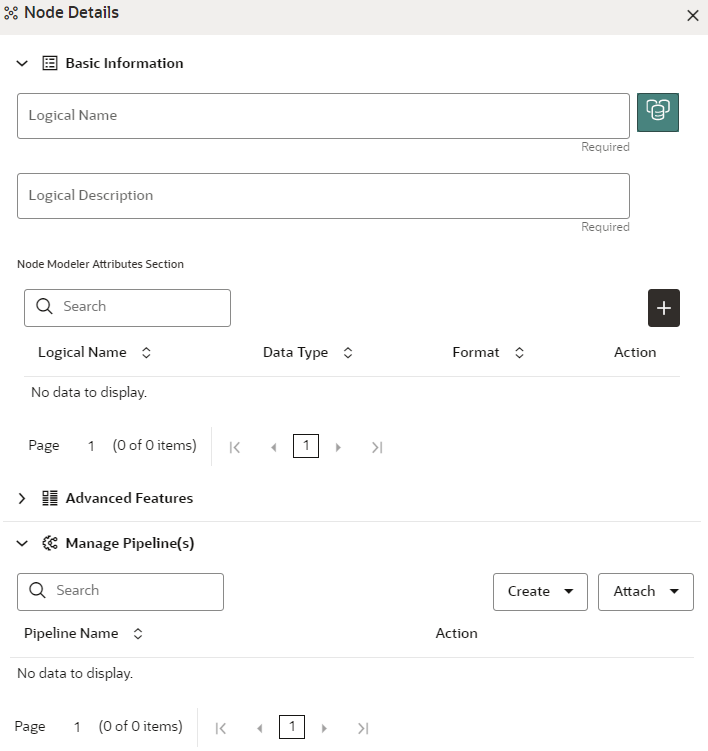
- In the Logical Name field, enter a name for the Node or
click Setting . The Setting pop-up window is displayed.
Figure 8-98 Setting

- Select the required representation from the above Node icon. For example: Person, Institution, Account etc.Hover over the icon to view the definition of the node.
- Based on your selection, the related Nodes are displayed. Select the Node, and you can choose the required color for the Node using the Select Color option.
- The selected Node is displayed on the graph. To add attributes to the Node,
click Add . Modeler attributes are the properties of Node/Edge, and these are mandatory inputs.For Example:Customer Node will have properties like Customer ID, Name, Age, Gender, etc.The Add Node Modeler Attribute(s)screen is displayed.
Figure 8-99 Add Node Modeler Attribute(s) screen
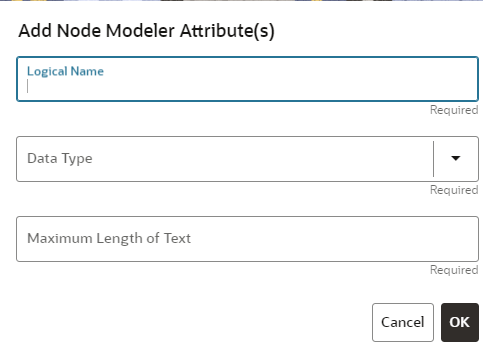
- In the Logical Name field, enter the logical name for
the modeler attribute. This field is mandatory.
- Select the data type based on your requirements in the Data
Type field drop-down. The available data types are Text, Number, and Date. This field is mandatory.Based on the data type selection, the following input field is displayed.For example, the Maximum Length of Text field is displayed if the data type is selected as Text.
Note:
Ensure the Maximum Length attribute is set to at least the field's length from which the data is to be populated. - Enter the data and click OK.The Node attributes are displayed on the Node Details page.
Figure 8-100 Search
 You can add any number of modeler attributes based on your requirements by clicking on the Add icon.
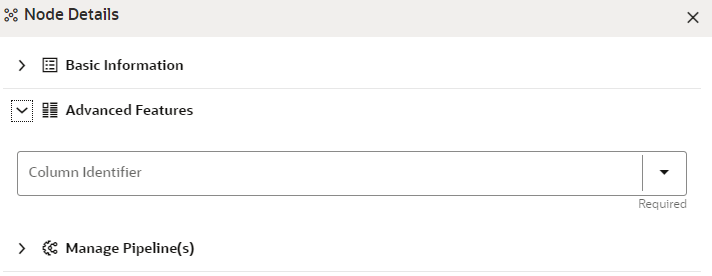
 - Under the Advanced Features group, select the modeler
attribute from the Column Identifier drop-down. All the created modeler
attributes are displayed in this list.
Figure 8-101 Advanced Features
 Under the Manage Pipeline(s) group, you can either create a new data pipeline or attach the existing pipeline.The application uses data pipelines to prepare filtered data which can be used to create and run scenarios. Data pipelines prepare data by selecting and joining data sources to create virtual data tables, adding derived attributes to data, running derivations on the data to determine the risk associated with the entity, and so on.
Note:
The newly created data pipeline is not automatically added to the Node. You must attach the pipeline using the Attach drop-down option.The selected data pipeline is displayed under the Manage Pipeline(s).Figure 8-102 Manage Pipeline(s)

- Click Create drop-down and select Data
Pipeline. The Create Pipeline window is displayed.
Figure 8-103 Create Pipeline

- Select the Create New Data Pipeline option and then
click Ok. The Pipeline Designer page is displayed.
- To create a data pipeline, see the Managing Data Pipeline section.
OR
- To clone from an existing data pipeline, see the Cloning
from an Existing Data Pipeline section.
Note:
The Persist of the Data pipeline of the corresponding node should be defined with the prescript. See the Prescript Condition section for more details.Figure 8-104 Create an Index
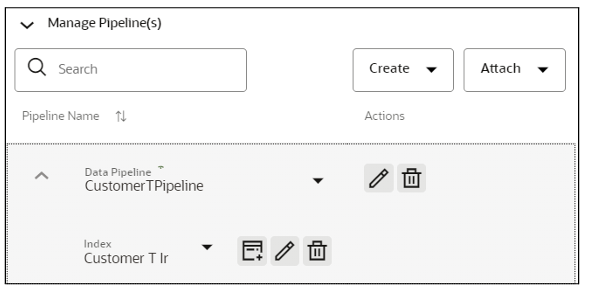
- To define an index for the data pipeline, see the Defining an Index section.
- To create a data pipeline, see the Managing Data Pipeline section.
- By clicking on the Attach drop-down, you can add any number of data pipelines to the Node-based on your requirements.
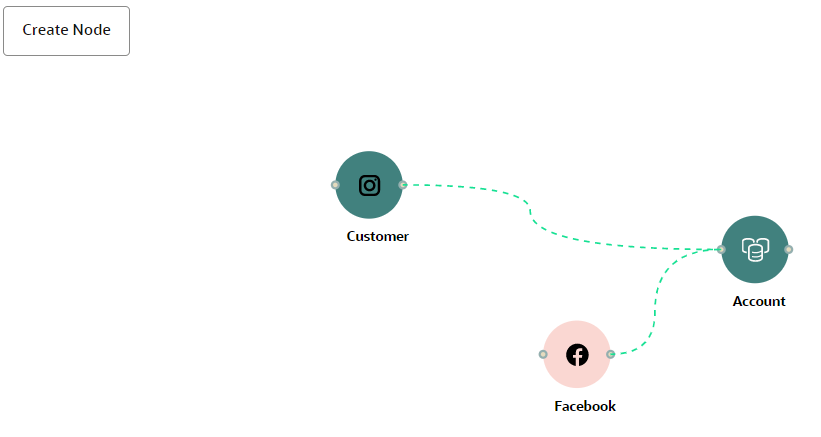
- Click OK.The Node is created with pipeline Facebook and an account attached to it as shown in the below example.
Figure 8-105 Graph with Node and Edge
