Add a multi-selection list field

When you add a field to a topic workflow configuration, it appears by default in the user interface as a single value-entry field and accepts any alphanumeric value that a user enters. Alternatives to single value-entry include Append-Only and Multiple Values. Both of these multi-selection list fields provide a limited set of possible values and both appear in the user interface with a link to a multi-selection list.
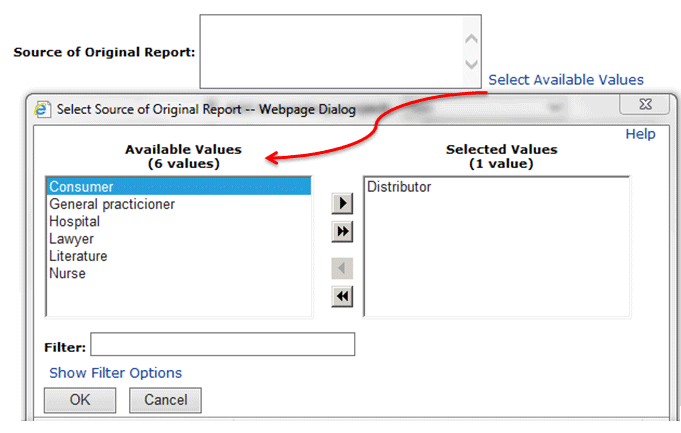
Designate the field Append-only when you add it, and provide a limited set of possible entries.

Like a drop-down list field, a multi-selection list field limits the number of possible entries that users can make and enforces consistency. Append-only fields also ensure that any value selected at one point in time cannot be deleted or replaced. Users cannot later edit this type of field to remove or replace a value. Multiple Values fields do allow users to edit the field and remove or replace values.

Note:

You can further reduce the possibility of user error when entering field values by setting up a multi-selection field, and then specifying the work team or teams that can select each of its valid values. See Constrain field values by work team.
  1. In the left navigation pane, click the Settings icon (Settings icon).
  2. In the Configure System section, click Manage Topic Workflow Configurations.
  3. Click the Row Action menu (Row Action menu icon) for a configuration, and then click Manage Fields.
  4. Click Add Field.
  5. In the Column Name field, enter a column name.
  6. In the Display name field, type a name to display in the user interface.
  7. From the Format drop-down list, select either string or integer as the format.
  8. For a string field, in the Length field, specify a maximum field length.
  9. In the Type section, check Append-only or Multiple Values.
  10. In the Context section, select the field context. The field can be used to collect information for a topic, action, attachment, or work team.
  11. To use the field as a filter, check Display as filter field. See Identify a field as a filter field.
  12. Click Save.
  13. Click the Row Action menu (Row menu) for the field you added, and then click Define Values.
  14. Click Add Value.
  15. On the Add Value page, supply a value for users to select.
  16. Click Save.
  17. Repeat this step to add all possible values for the field. Alternatively, you can store all field values in a .csv (comma-separated value) file and then upload it. See Upload a table of valid values.
  18. Click Back.

    The Manage Fields page appears.

    By default, the new field appears with a Select Available Values link next to it for a topic or action that is in any workflow state, for any type of document-style attachment, or for a work team. The field is editable: that is, users can select values for it or leave it blank.

    You can make this field required (users must select at least one value before saving). See Manage topic field accessibility by state, Manage action field accessibility by state, or Manage attachment field accessibility by type.