Configuring Stationery Templates
Note:
For multi-language stationery it is recommended to prefix or suffix filenames with the language code; for example:e_folio.rtf , fr_folio.rtf, de_folio.rtf Adding a Stationery Template
-
From the OPERA Cloud menu, select Reports, then select Manage Reports.
-
Click New Report and complete the following:
-
Property: Enter or select a property.
-
Report Group: Select a stationery report group from the list. For more information, see Stationery Reports Groups.
-
Report Type: Select Customized Report.
-
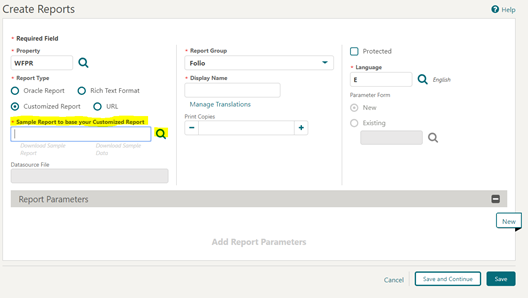
Sample Report to base your Customized Report: Click to search and select a sample RTF template to customize.
Figure 9-13 Sample Report to base your Customized Report
-
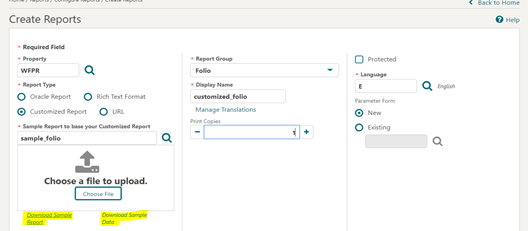
Click Download Sample Report (RTF) and click Download Sample Data (XML) to download the sample template and sample data model.
Figure 9-14 Download Sample Report and Sample Data links
Note:
Once downloaded, the files are located in the default download folder (that is, the Downloads Folder on your local machine).
-
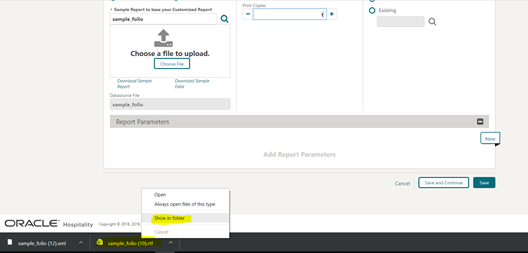
Navigate to the file location and right click the downloaded file and then click the Show in folder option. You can also navigate to the preset download folder to open or view the file.
Figure 9-15 Show in folder option
-
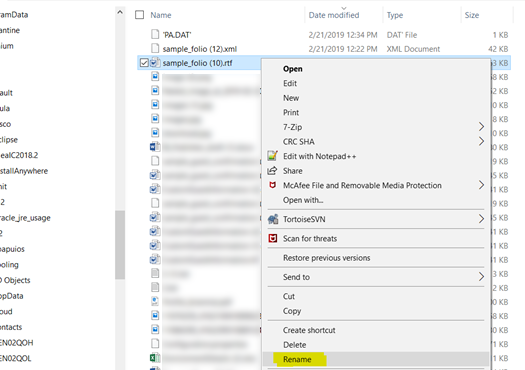
Rename the <sample>.rtf file (for example,
sample_folio.rtf) per your requirement and ensure the updated name does not begin with “SAMPLE.” No name changes are needed for the XML files. Right click the .rtf file and then select the Rename option to change the name.Figure 9-16 Rename File
-
Customize the template as needed . For more information, see Using Stationery Editor.
-
Save the RTF file and close Microsoft Word.
-
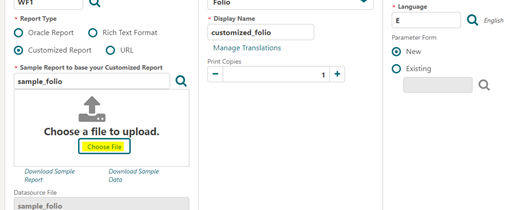
In OPERA Cloud (Create Report), upload the customized RTF file by clicking Choose File and then select the file from the workstation location and click Open.
Note:
Templates must be less than 10MB in size.Figure 9-17 Choose File
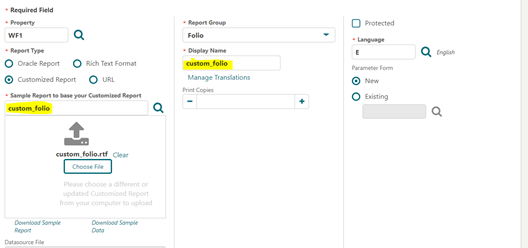
 Once uploaded, the file display name in the Display Name field automatically updates to the uploaded .rtf file’s name.
Figure 9-18 Display Name matches the uploaded .rtf file’s name
-
Print Copies: Enter the number based on your requirements (for example, enter 1 or 2).
-
Language: Select the language of the template. When the multi-language OPERA Control is active you must configure an entry for each profile language so OPERA Cloud knows which template to generate for each language.
-
Parameter Form: This step is not applicable for PMS stationery templates. For Simple Diary and Sales and Event Management stationery such as the Banquet Event Order and Sales Contract a parameter form is required. For more information, see Blocks and Groups Reports.
-
Click Save.
-