Complete Business Verification
From the onboarding steps, click Verify. For details about required privileges, see Predefined Payment Groups and Privileges.
- You have 60 minutes to complete the verification process. If your session ends you can continue where you left off at a later time.
- If you come back later to continue the verification process, you can navigate here in one of two ways:
- If the business is still being onboarded, click Business Management, click the business, and then from the onboarding checklist click Verify next to Verify Business.
- If the business is already onboarded, click Business Management, click the business, click Business Verification, and then click Update Verification.
- Do not reload or refresh the page after you start entering verification details.
- After you complete all the information it can take several hours or even days for the business to be verified.
Enter Business Details
- Review the business information, personal information, and banking information required for the verification process, and then click Continue.
- Enter business details:
-
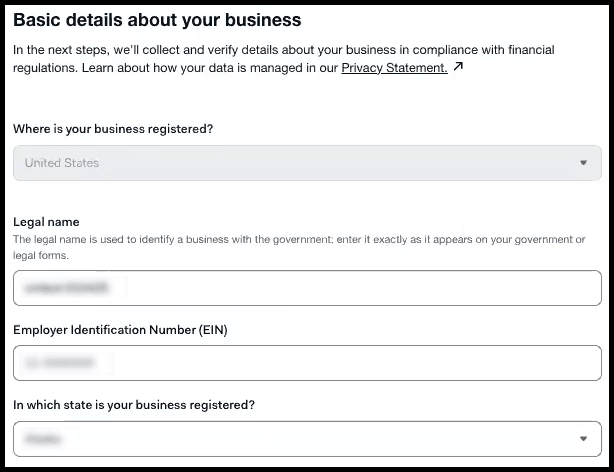
Click Business details, enter the details, and then click Next.
-
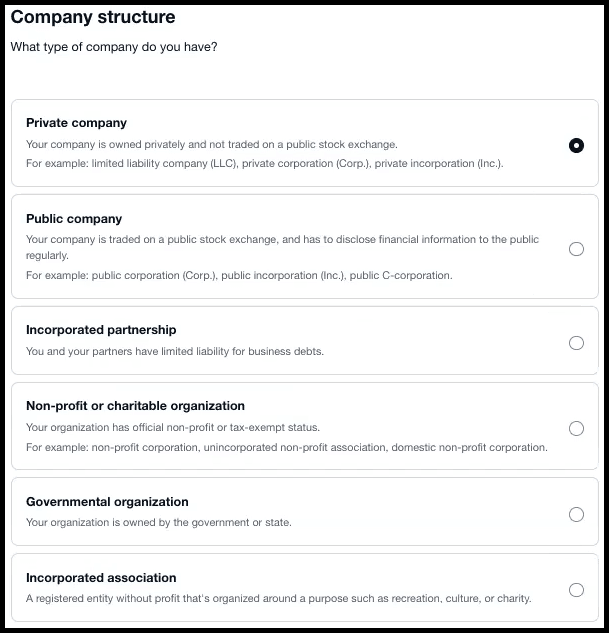
Select the company structure type and then click Next.
-
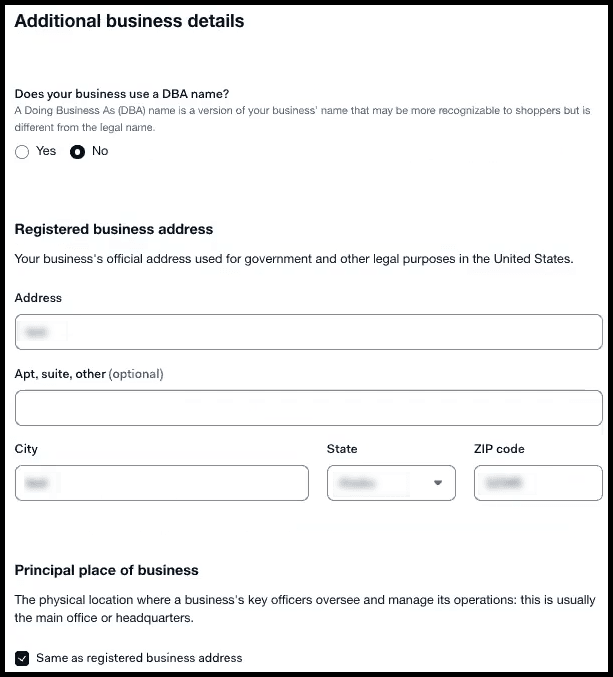
Enter additional business details and then click Next.
-
Review the summary and then click Submit.
-
Tip: If you are asked to provide a registration document, make sure it:
- Is issued by a public authority, government agency, judicial authority, or local commercial register.
- Shows the legal entity name and registration number.
- Is issued within the last 12 months, or is signed and dated by a legal representative within the last 12 months.
- Shows an address and country that match the business information entered during verification.
Do not use self-completed tax forms, such as a W-9, as registration documents.
Add Decision-Maker Details
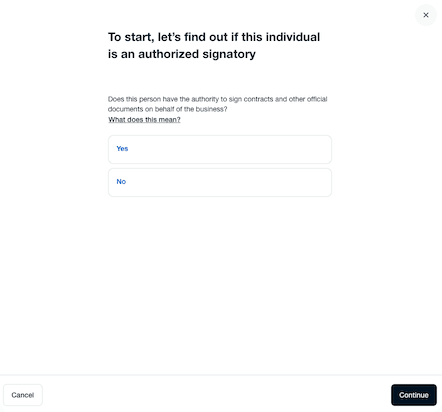
Decision-maker details include information about someone who is authorized to sign contracts, owns 25% or more of the company, or has significant control over the business.
- Click Decision-makers, and then click Add decision-maker.
-
Answer the guided questions. The guided process helps identify the decision-maker’s role and explains what each role means.
-
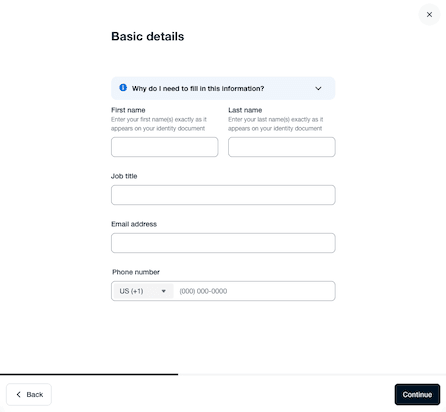
Enter the basic details, and then click Continue.
- Enter the first name and last name exactly as they appear on the identity document.
- Enter the job title, email address, and phone number.
- Enter any additional details requested by the guided process.
-
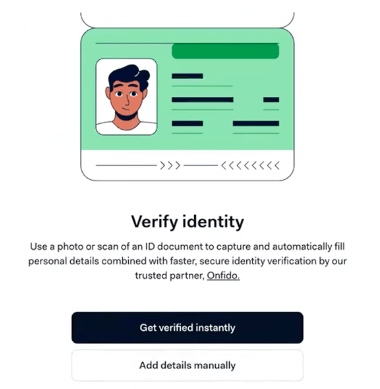
To verify identity, choose one of these options:
- Click Get verified instantly to upload or scan an ID document. This can fill in personal details from the ID document and help complete identity verification faster. Review the details before you submit them.
- Click Add details manually to enter the details yourself.
- Review the additional personal details and then click Continue.
- Review the summary and then click Submit.
- Fit the document within the frame of the photo without excess background.
- Use a color photo.
- Rotate the photo so it opens and reads left to right.
Add Payout Details
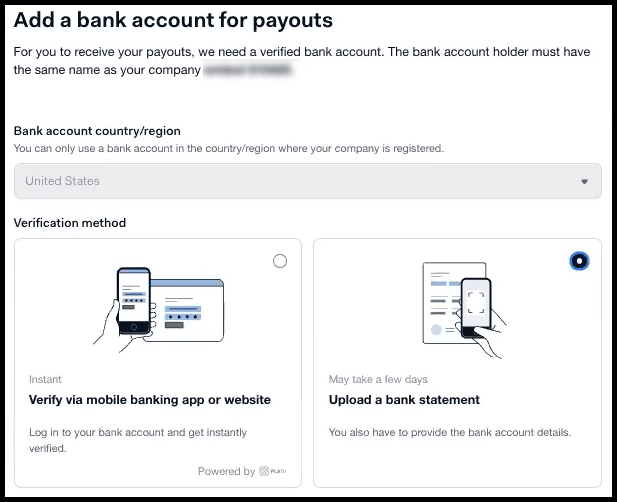
Add payout details. Verify through a banking app or mobile website, or add payout details manually.
-
Click Payout details, select the verification method, and then click Next.
-
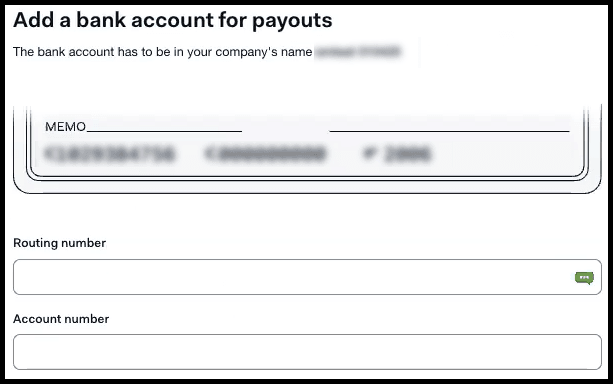
Enter the bank account information and then click Next.
-
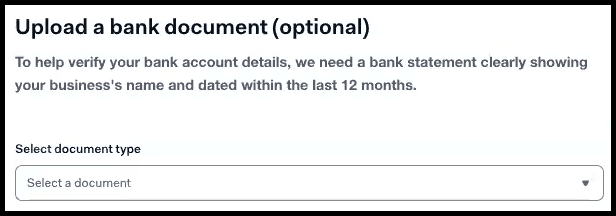
Optionally, upload a bank document and then click Next.
-
Review the summary and then click Submit.
- Use a business bank statement (PDF) from the past 30 days, a screenshot of an online banking page with the business account name, address, and account number visible, or a photo of a voided business check with the business account name, address, account number, and routing number visible. The check should show IBAN and sort code for banks in the UK.
- Use color photos of the front and back of a government issued photo ID or passport.
- Fit the ID within the frame of the photo without excess background in the frame.
- Rotate the photo so that it reads left to right, not vertical or upside down.
Sign the Terms of Service Agreement
- Sign the terms of services agreement:
-
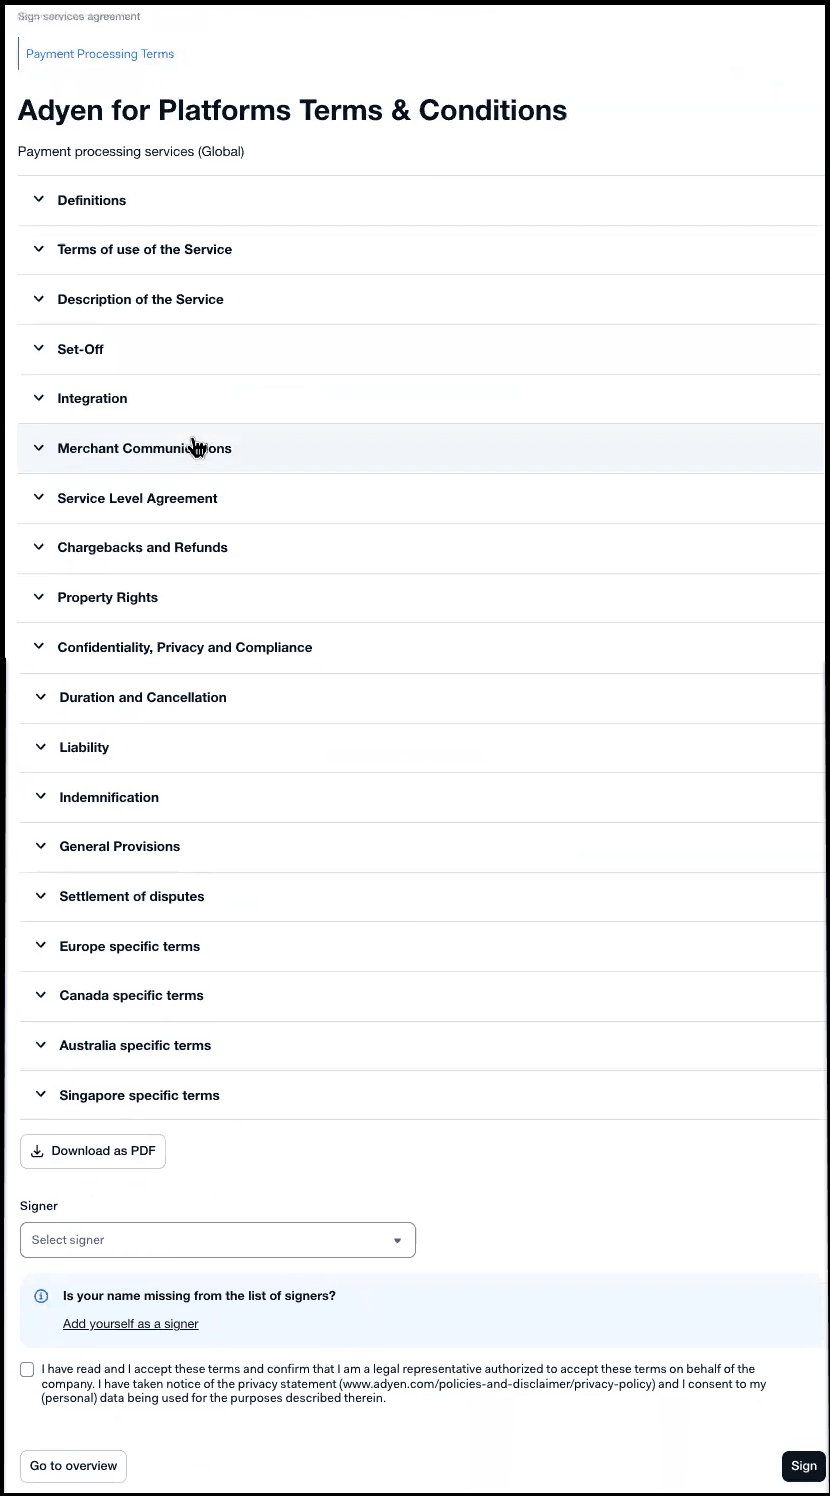
Click Sign services agreement.
-
Review and agree to the terms of service, select the signer, and then click Sign.
-
Return to Onboarding Steps
-
After completing all the steps, Verified is shown next to each step.
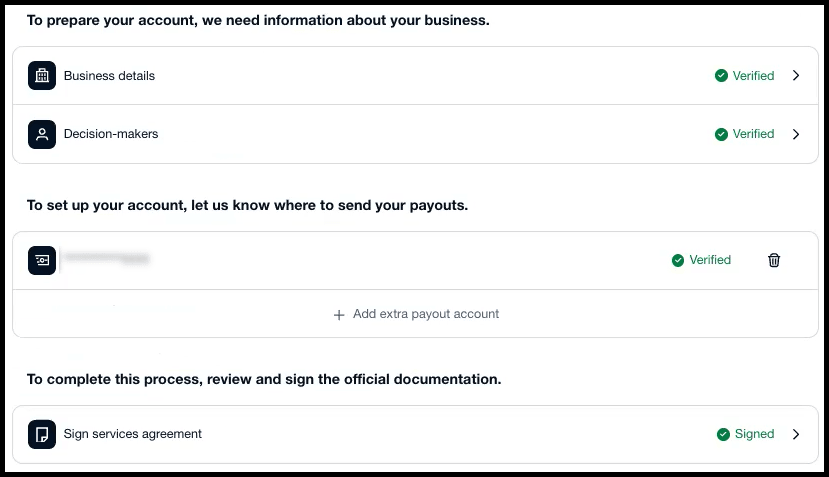
- After you complete the steps, go back to the onboarding checklist by clicking the link on the bottom left side of the screen.
- The next onboarding step is to Set Up Business Units.
Parent topic: Verify a Business - Know Your Customer (KYC)