6 Assortment Period Maintenance
The Assortment Period Maintenance task allows assortment planners to assign weeks and location clusters to specific Assortment Periods, map last assortment weeks, analyze locations by clusters, and view periods by calendar. Planners can define start and end weeks for style colors within an Assortment Period; if left unspecified, the period’s start and end dates automatically default for assorted style colors. This ensures precise alignment of planning timelines with business requirements, streamlining the assortment process.
Create the Assortment Maintenance Segment
To create the Assortment Maintenance segment:
-
Click Assortment Services in the Task menu. Then, click the Planning Administration activity and then the Assortment Period Maintenance task.
-
The dialog to create New Plan opens. Click Create New Plan.
-
Enter the Plan Label in the text field. Click Ok.
-
In Select Product, select one or multiple departments and click Finish.
The Assortment Maintenance segment is built.
Step 1: Assortment Period Maintenance
The first and only step in the Assortment Maintenance process is to assign weeks to a cluster, assign a cluster version to an Assortment Period, and assign the maximum receipt lead time. You can also view assortment periods by calendar and location clusters by calendar. It is advisable that multiple departments planned together should have the same assortment period for accurate planning.
Tab and Views in this Step:
Assortment Period Maintenance Tab
This tab is used to define assortment periods and review the assortment periods by calendar and location.
Define Assort Periods View
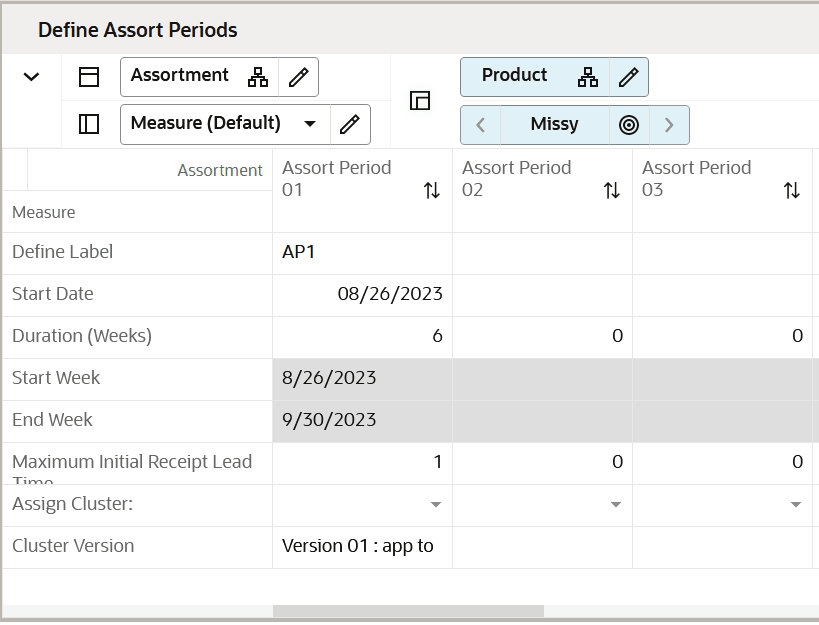
The Define Assort Periods view is used to assign weeks to an Assortment Period and to assign a cluster version to an Assortment Period.
Note that weeks may not overlap between Assortment Periods, and a real-time alert appears if they do. You must resolve the alert before data is committed to the database.
Figure 6-1 Define Assort Periods View

Review Assortment Periods by Calendar View
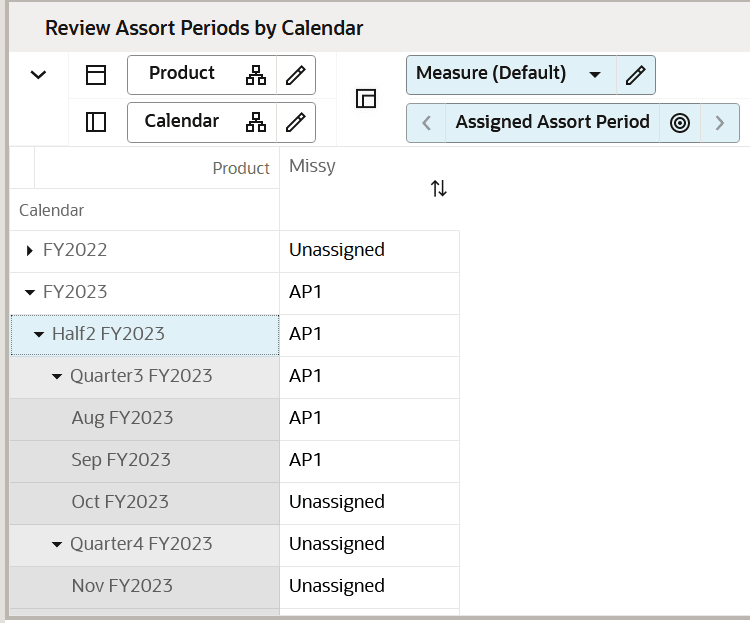
The Review Assortment Periods by Calendar view is used for reference purposes only, to allow you to view the assortment periods by different levels of the calendar hierarchy (week, month, quarter, half, year). It provides visibility to how the Assortment Periods line up to the dates in the calendar.
Figure 6-2 Review Assortment Periods by Calendar View

Review Clusters by Location View
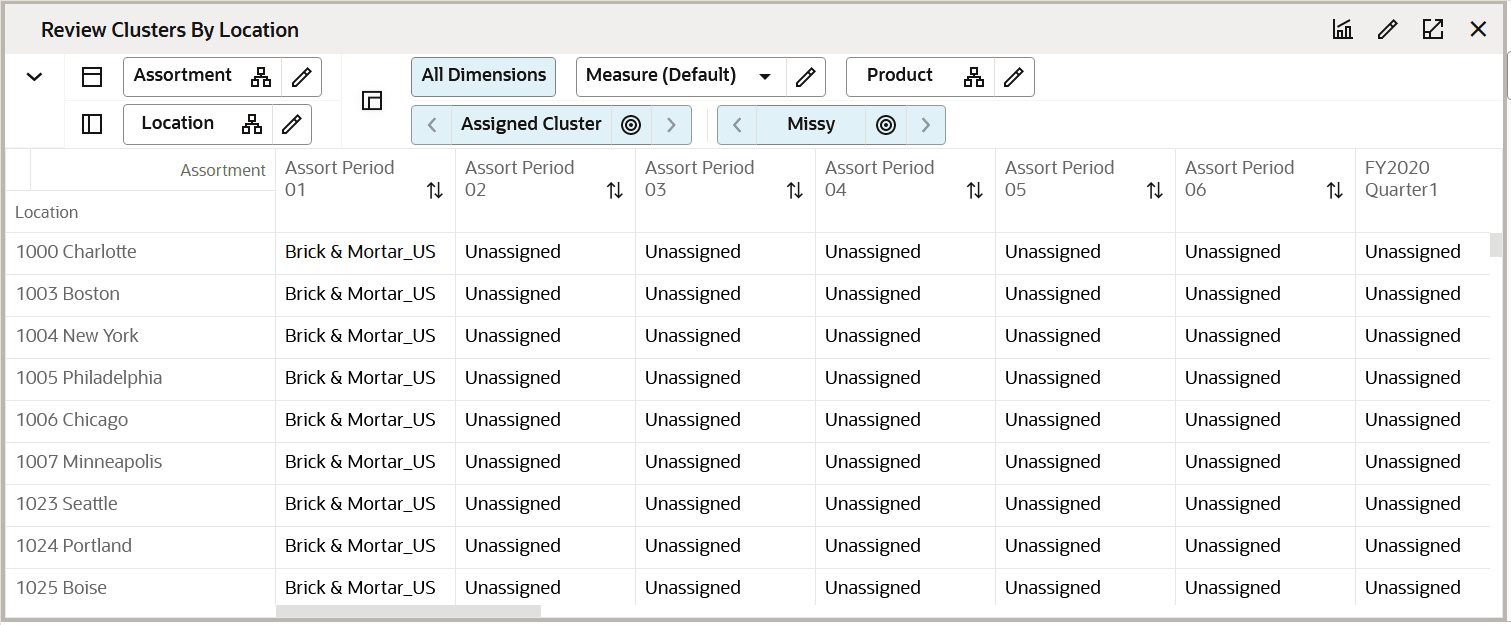
The Review Clusters by Location view serves as a reference tool to display how locations are assigned to different clusters across various Assortment Periods. You can review cluster assignments by department and period using the Assigned Cluster measure or check location-to-period mappings with the Store to Cluster Prerange by Period measure. If a location appears as Unassigned, it indicates that the location does not belong to any cluster and is unavailable for selection in Assortment Planning.
The Assign Cluster Application Action copies the selected cluster version to the assortment period selected, populating the Cluster Version measure with the cluster version name for reference.
The Approve Application Action commits data to the database, first checking that there are no real-time alerts that are unresolved.
Figure 6-3 Review Clusters by Location View

Item Flow Parameters View
The Item Flow Parameters view enables administrators to define global receipt parameters such as lead time, order frequency, and safety stock for departments. These parameters automatically populate in Item Flow for weekly sales and receipt generation, eliminating the need to set the receipt parameters for every subclass. You can override these settings at the subclass level within Item Flow for tailored adjustments.
Bell, Trend, and Slow Item Curves View
The Bell, Trend, and Slow Item Curves view offers standard curves (Bell, Trend, and Slow Introduction) as automatically available in the Item Flow workspace alongside Last Year Sales and MFP Sales curves. The Bell Curve starts low, peaks mid-season, and gradually declines. The Slow Introduction Curve begins slowly, then accelerates. The Trending Item Curve starts strong but tapers off toward the end. You can customize their planning by defining additional curves using the Curve Maintenance Workbook, tailored to specific needs for generating weekly sales and receipt plans.
Figure 6-4 Bell, Trend, and Slow Item Curves View
