Attribute Management
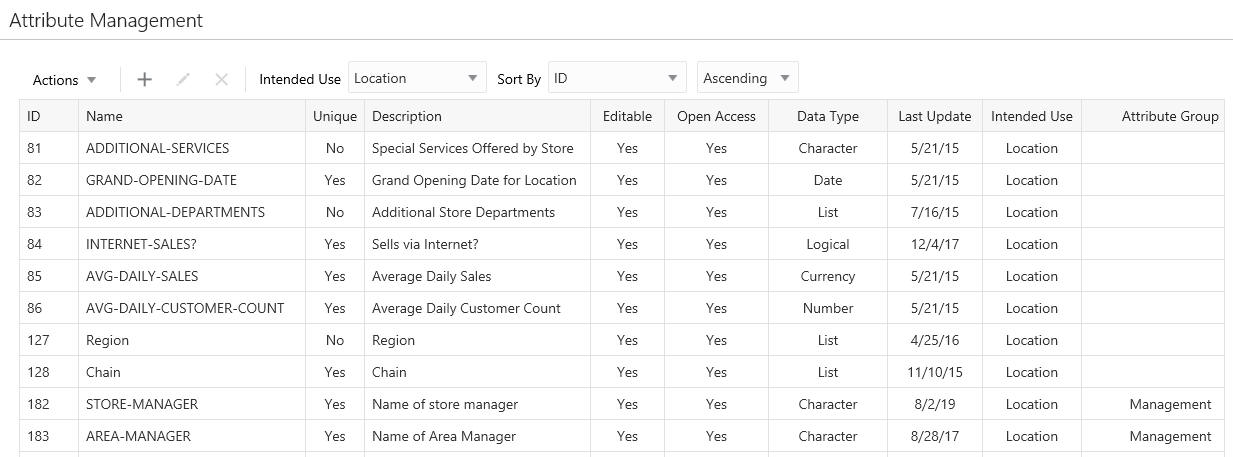
Use the Attribute Management window to create, edit, or delete attributes.
Figure 13-4 Attribute Management

To access the Attribution Management window:
-
Click the Tasks icon.
-
Click the Admin Task.
-
Click the Attribute Management Task.
The following information is displayed for each attribute:
-
ID – The ID for the attribute.
-
Name – The name of the attribute.
-
Unique – Only one value can be added to the attribute when it is identified as unique.
-
Description – Description of the information provided by the attribute.
-
Editable – Identifies whether the associate is allowed to edit the value for the attribute once it is added.
-
Open Access – Indicates whether there is open access to this attribute.
-
Data Type – The type of data contained in the attribute value. Possible values include: Character, Number, Currency, Date, Logical, and List.
-
Last Update – The date last updated in the system.
-
Intended Use – The Customer Engagement element the attribute was created for. Possible uses include: Card, Card Series, Card Type, Customer, Gift Registry, Item Location, Offer, Promo Offer, Promotion, Segment, and Wish List.
-
Attribute Group – The group associated with the attribute.
Filtering and Sorting Attributes
The user can narrow down the list by selecting any of the Intended Use filters. The list can then be sorted by the fields as shown in Figure 13-5.
Figure 13-5 Filtering and Sorting Options
Intended Use filters include:
-
All (Default)
-
Card
-
Card Series
-
Card Type
-
Customer
-
Gift Registry
-
Item Location
-
Offer
-
Promo Offer
-
Promotion
-
Segment
-
Wish List
The following fields can be sorted Ascending or Descending:
-
Attribute Group
-
Data Type
-
Description
-
ID
-
Intended Use
-
Last Update
-
Name
Creating an Attribute
To create an Attribute, do the following:
-
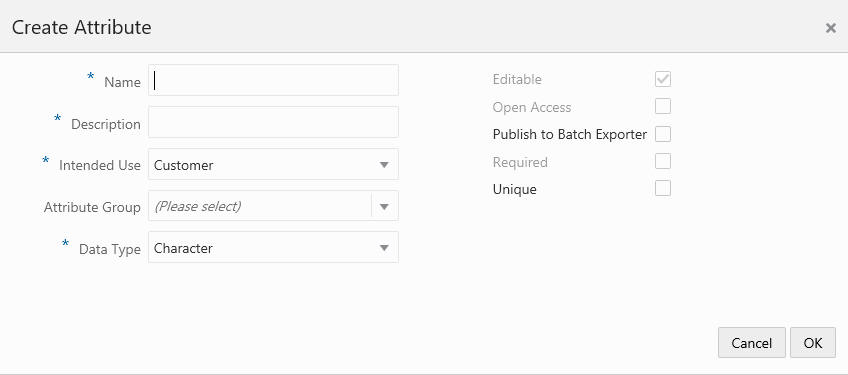
Click the Add (+) icon, or choose Add from the Actions menu. This displays a Create Attribute dialog, where you can enter the following information:
Figure 13-6 Create Attribute

-
Attribute
Name – Name of the attribute (required field).
-
Description – Description of the attribute (required field).
-
Intended Use – The Customer Engagement element the attribute was created for (required field).
-
Attribute Group – The group associated with the attribute. Required for Gift Registry Intended Use, otherwise, optional.
-
Data Type – The type of data contained in the attribute value. Possible values include:
-
Character
-
Number
-
Currency
-
Date
-
Logical
-
List (required field
-
-
-
Depending on your previous selections the following fields are dynamic:
-
Editable – Indicate whether the attribute isis editable.
-
Open Access – Indicate whether the attribute has open access.
-
Publish to Batch Exporter – A flag to indicate export to a marketing system.
-
Required – Adds a flag to make the attribute required
-
Unique – Indicates whether the attribute can be assigned to an element more than once.
-
-
Click OK. This adds the new attribute to the list of attributes. Click Cancel to return to the original window without saving.
Editing an Attribute
To edit an Attribute, do the following:
-
Highlight the row of the desired attribute.
-
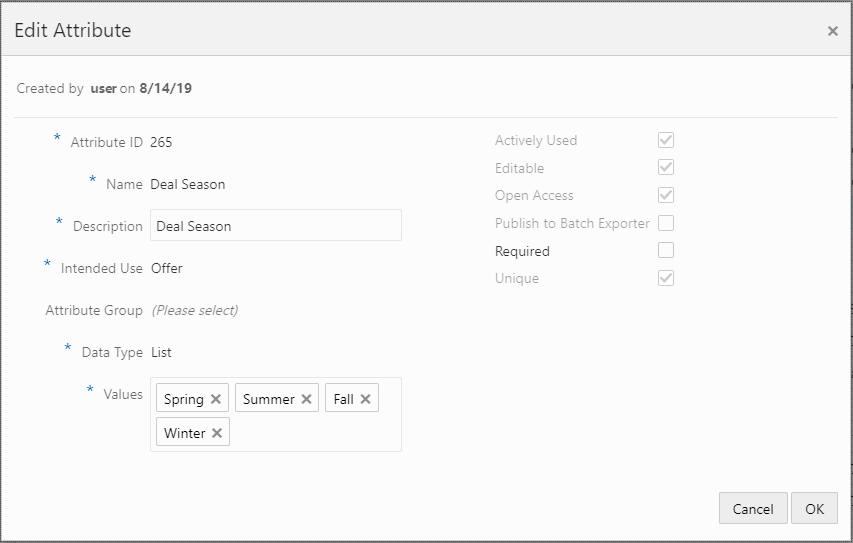
Click the Edit icon, or choose Edit from the Actions menu. This displays an Edit Attribute dialog that displays a window with details of the attribute:
Figure 13-7 Edit Attribute

Note:
Attributes that are actively used (already associated to an element in Customer Engagement) are limited to what fields may be changed, such as Description.
-
Make any necessary changes to the fields.
-
Click OK to accept the changes. The attribute is displayed with the new information. Click Cancel to return to the original window without saving.
Deleting an Attribute
Use the following steps to delete an Attribute:
-
Highlight the row of the Attribute.
Note:
Actively used attributes cannot be deleted, so highlighting such a row will not enable the delete action or the delete icon.
-
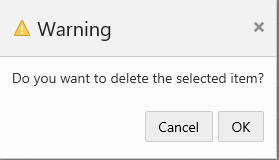
Click Delete from the Actions menu or the Delete icon. This opens the delete confirmation window.
Figure 13-8 Warning

-
Click OK to delete the attribute or Cancel to close the window without deleting the row.
Figure 13-9 Confirmation Notification

Note:
A confirmation notification appears to confirm the attribute has been deleted.