Franchisees
You have the ability to view, add, edit, and delete a franchisee to be used within the system. Additionally, users and locations can be added and deleted on a franchisee as well as viewing a list of customers that are currently assigned to a franchisee. A list of Franchisees can also be imported.
-
Click the Tasks icon.
-
Click Admin.
-
Click Franchisees.
Searching for Franchisees
Enter the following search parameters to search for Franchisees.
-
-
Enter all or part of a Franchisee ID.
-
Enter all or part of a Name.
-
Enter all or part of a Description.
-
Enter all or part of a City.
-
Enter all or part of a State.
-
Click Search.
Note:
The results display in batches of 25 records. When more than 25 records are available, click Show More... to view more results.
You can refresh the Search Results by clicking the Refresh icon or picking the Refresh option from the Actions menu.
Sorting Available Franchisees
The following fields can be sorted Ascending or Descending:
-
City
-
Description
-
Franchisee ID (default)
-
Name
-
State
Viewing a Franchisee
To view a Franchisee, do the following:
-
Highlight the row of the Franchisee you want to view.
-
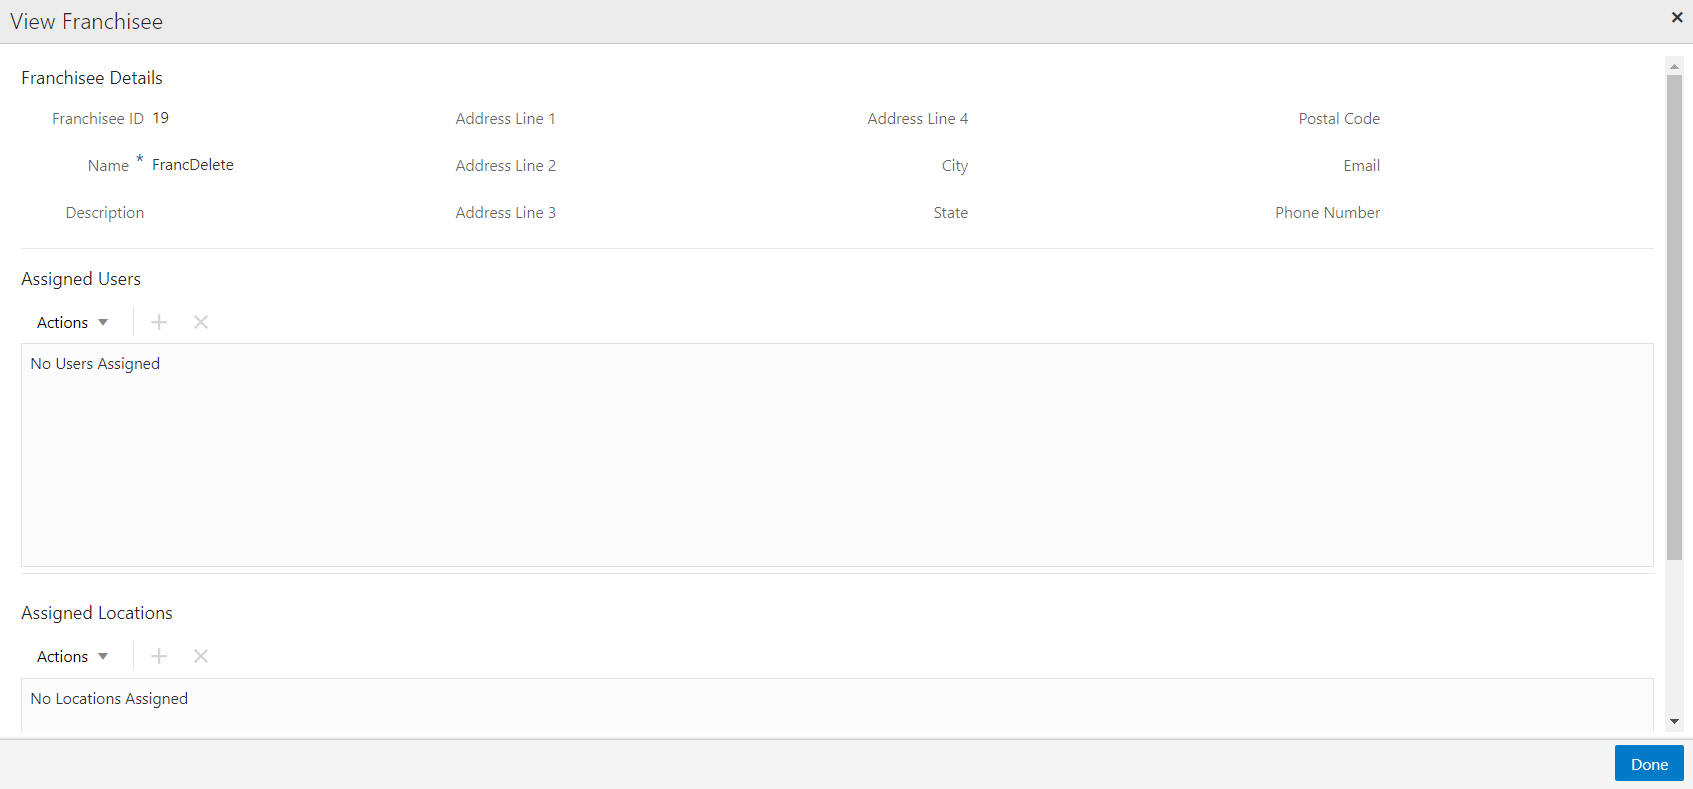
Click the Actions menu or the View icon to open the View Franchisee window.
Figure 13-23 View Franchisee
-
View the details of the Franchisee and click Done to close the window.
Adding Franchisees
Do the following to add a new Franchisee.
-
Click the Actions menu and select Add, or click the Add icon (+).
-
Enter the following information:
-
Franchisee ID (automatically assigned after save)
-
Name
-
Description
-
Address Line 1
-
Address Line 2
-
Address Line 3
-
Address Line 4
-
City
-
State
-
Postal Code
-
Email
-
Phone Number
-
-
Select OK to save or Cancel to exit. You do not at this time have to add users. If you wish to associate users to the new Franchisee at this time, then proceed to the Assign Users section.
Assign Users
-
In the Assign Users section of the Create Franchisee window, click the Actions Menu, and then click Add, or click the Add (+) icon. The Add Users window displays.
Figure 13-24 Add Users

-
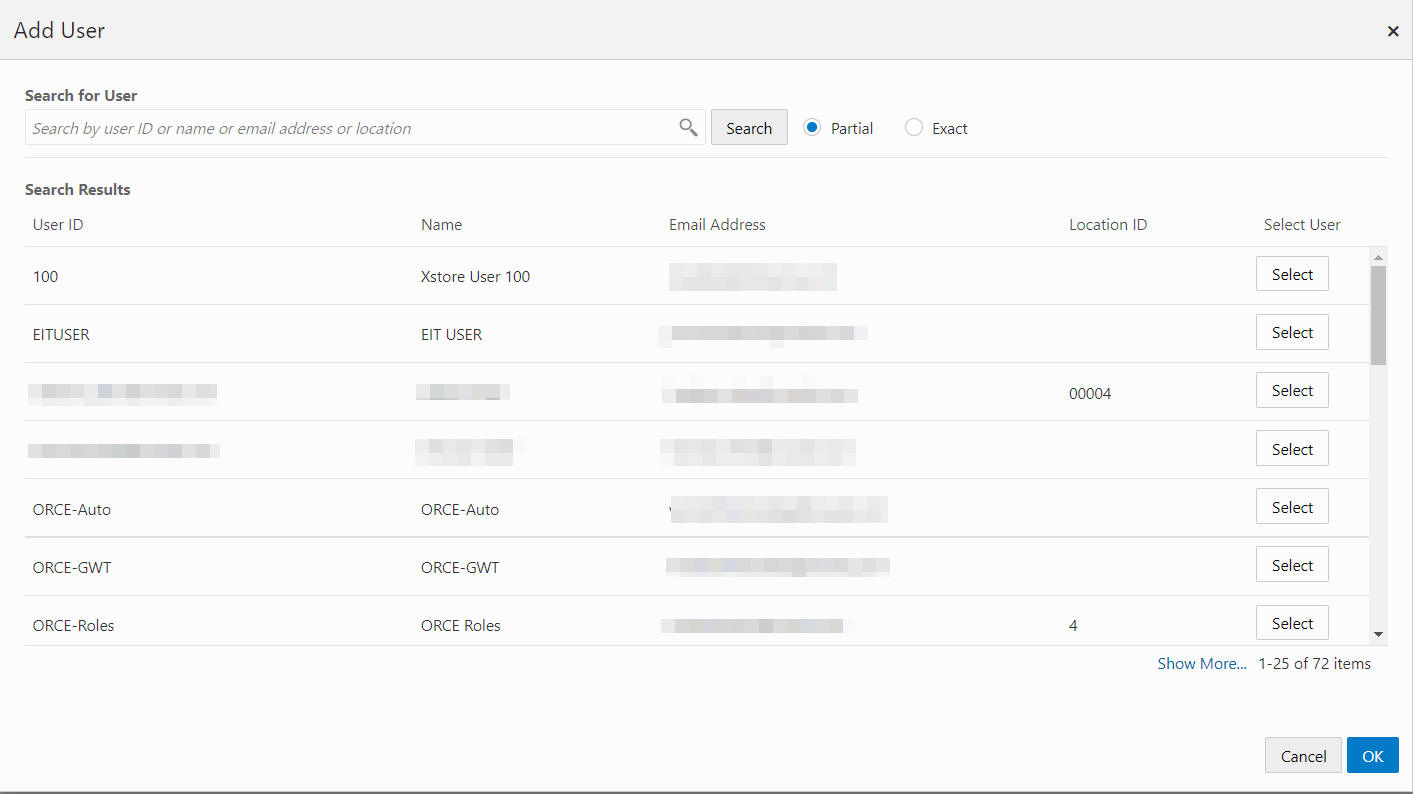
In the Search for User field, enter the User ID, Name, Email Address, or Location of the user you want to search for.
-
Select Partial, if you want to results that match part of what you enter, or select Exact if you only want results that are an exact match.
-
Click Search. A list of users matching the search text is displayed in the Search Results grid.
Figure 13-25 Search Results Grid
-
For each user you wish to assign, click Select.
-
For each user you wish to unassign, click Unselect.
-
Click OK to accept the changes, or Cancel to close the window without saving.
-
Select OK to save or Cancel to exit. You do not at this time have to add locations. If you wish to associate locations to the new franchisee at this time, then proceed to the Assign Locations section.
Assign Locations
-
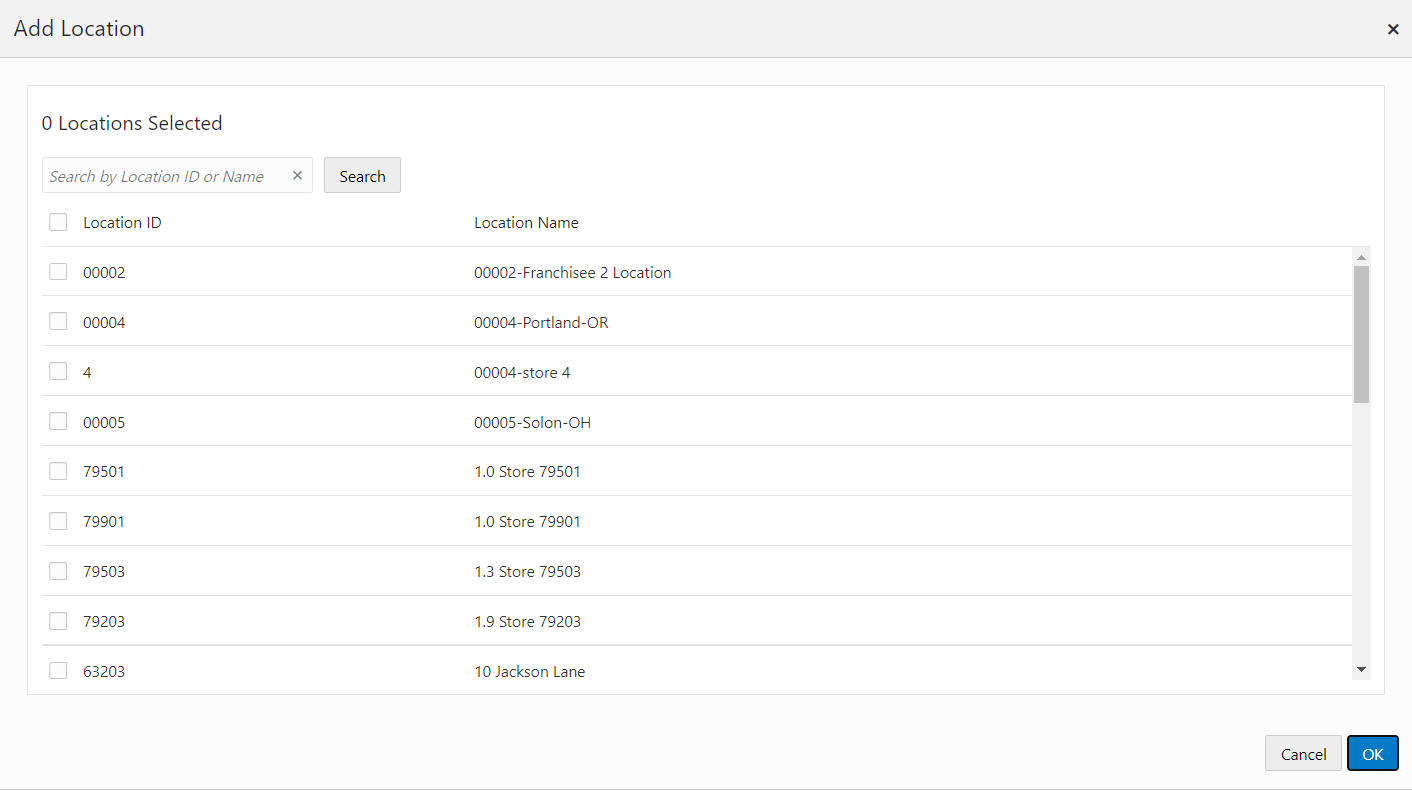
In the Assign Locations section of the Create Franchisee window, click the Actions Menu, and then click Add, or click the Add (+) icon. The Add Location window displays.
Figure 13-26 Add Location
-
Enter all or part of a Location ID or Name.
-
Click Search.
-
Select the top Location ID check box to add all locations, or select each individual Location ID check box for each location to assign to the Franchisee.
-
Click OK to accept the changes, or Cancel to close the window without saving.
-
Click OK to create the new franchisee, or click Cancel to close without saving.
A notification appears to indicate the successful creation of a Franchisee.
Figure 13-27 Notification

Editing Franchisees
To edit a Franchisee do the following:
-
Highlight the row of the Franchisee.
-
Click the Actions menu and select Edit, or click the Edit (Pencil) icon.
-
Edit the Franchisee. See Adding Franchisees for more information.
Deleting a Franchisee
To delete a Franchisee do the following:
-
Highlight the row of the Franchisee.
-
Click the Actions menu and select Delete, or click the Delete (X) icon.
A notification appears confirming the successful deletion of the Franchisee.
Figure 13-28 Notification

Note:
The delete function will not process if the Franchisee is associated with one or more customers. A notification appears to indicate the process did not complete.
Viewing Assigned Customers to a Franchisee
To view the assigned customers to a franchisee do the following:
-
Highlight the row of the Franchisee.
-
Click the Actions menu and select View Customers, or click the View Customers icon.
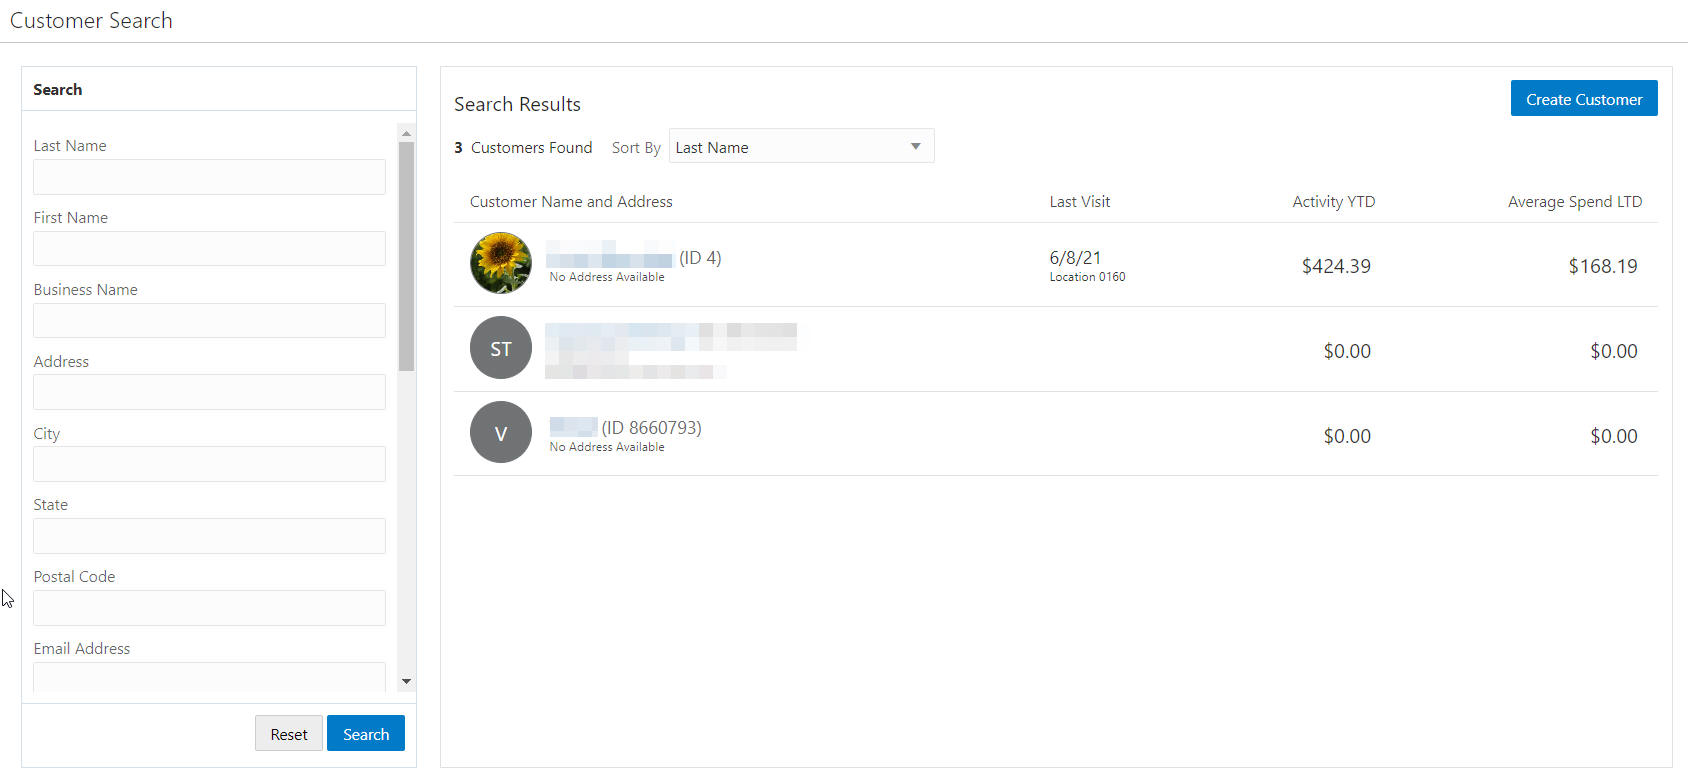
The Customer Search window opens. The Search Results section lists the customers assigned to the franchisee.
Figure 13-29 Customer Search Results
-
Close the Customer Search tab to return to the Franchisees.
Import Franchisees using CSV File
You have the ability to import a csv file containing the franchisees for a client, so that they can be brought into Customer Engagement without creating them all manually.
To import by CSV do the following:
-
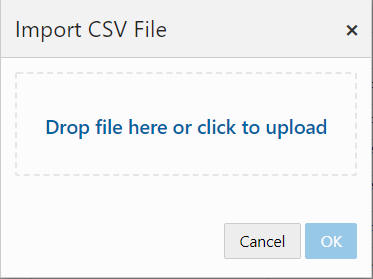
Click the Actions menu and select Import CSV file.
Figure 13-30 Import CSV File
-
To add a file either:
-
Drag and Drop a new file as shown in
-
Click anywhere in the Drop file here or click to upload box.
-
-
After uploading the CSV file, it will scan for viruses and validate the uploaded file's name, size, and extension. After passing the validations, the name of the file will appear on the popup and the OK button is enabled
-
Click OK to import the file or click Cancel the close the window without saving.
Note:
The Franchisees from the CSV file will be read, validated, and saved into the database and the appropriate response message will be displayed. Failure response will also be shown on the click of OK, in case of invalid CSV file. Click Done to close the window and refresh the base Franchisees screen.