Preference Center
The Preference Center page displays the contact preferences for a customer. For more information about how Preference Center channels are initially set up and the configuration is enabled, see the Oracle Retail Customer Engagement Cloud Service Implementation Guide.
Choose the Preference Center option on the Actions menu in the Customer Dashboard for access to the Preference Center page:
Figure 4-69 Preference Center
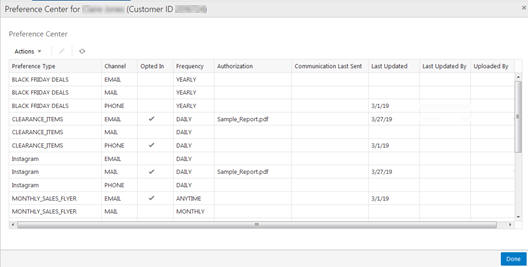
The Preference Center page offers the following information and features:
-
The customer name and ID
-
The Actions menu and corresponding icons let you Edit a preference.
-
Preference Type – Name of the preference center. This is displayed for all the channels in a preference center.
-
Channel –The communication channel
-
Opted In – Indicates whether the customer has opted to be contacted through the channel. If there is a check mark in the field, then the customer is contacted through the channel.
-
Frequency – The frequency at which the customer is contacted through the channel
-
Authorization – Name of the file in which the customer authorized communication
-
Communication Last Sent – Date the communication was last sent to the customer
-
Last Updated – Date and time the channel preferences for this customer were last updated
-
Last Updated By – ID of the user who last updated the channel preferences for this customer.
-
Uploaded By – User who last updated the image/file. This is populated by the logged in user who uploads the latest file on the preference.
Working with Preference Types
You can refresh, sort, view, add, edit and delete preference types, so that you can setup unlimited preference types to use with the Customer Preference Center. To access Preference Types:
-
Click the Tasks icon.
-
Click the Admin Task.
-
Click the Preference Types Task.
Figure 4-70 Preference Types

Sorting Preference Types
You can sort by:
-
Default Frequency
-
Preference Type ID
-
Preference Type Name
Preference types can be sorted ascending or descending from the list.
Adding a Preference Type
Click the Actions menu or the Add icon to open the Create Preference Type window.
Figure 4-71 Create Preference Type
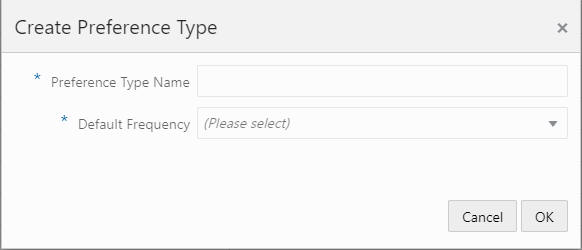
Type a Preference Type Name and choose one of the following default frequencies.
-
Anytime
-
Weekly
-
Monthly
-
Yearly
-
Daily
-
Fortnightly
-
Quarterly
Click OK to add the new Preference Type. Click Cancel to close the window.
Editing a Preference Type
Highlight the row of the Preference Type you want to edit and click the Actions menu or the Edit icon to open the Edit Preference Type window.
Figure 4-72 Edit Preference Type
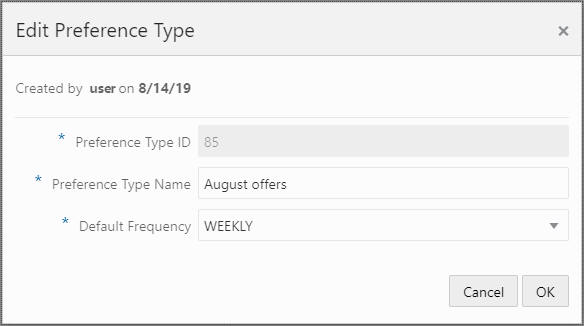
Edit the Preference Type Name or select a different Default Frequency and click OK. Or click Cancel to close the window and discard any changes.
Viewing a Preference Type
Highlight the row of the Preference Type you want to view and click the Actions menu, then click View, or click the View icon to open the View Preference Type window.
Figure 4-73 View Preference Type
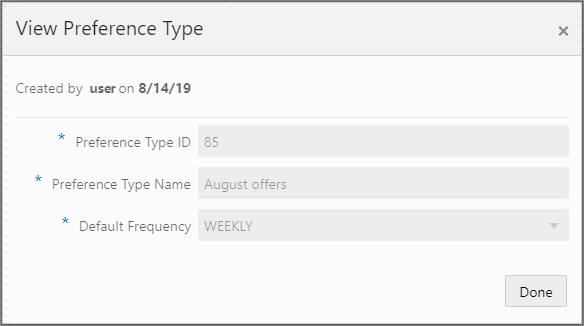
View the details of the Preference Type and click Done to close the window.
Editing a Preference
To edit a Preference:
-
In the Preference Center grid, select the preference that you want to edit.
-
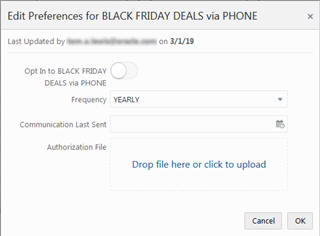
From the Actions menu, choose Edit, or click the Edit icon. This displays the Edit Preference dialog:
Figure 4-74 Edit Preferences
-
Edit the fields that you want to change:
-
Opt In to – Click to the on position to indicate that the customer accepts communication from this channel, or click off, to indicate the customer does not want communication.
-
Frequency – Select the frequency with which the customer receives communication from this channel.
-
Communication Last Sent – Click the date in the calendar on which communication from the channel was last sent.
-
Authorization File – Drag and drop a file authorizing the communication, or click in the field to search for a file to upload.
-
-
Click OK. This returns you to the Preference Center page.